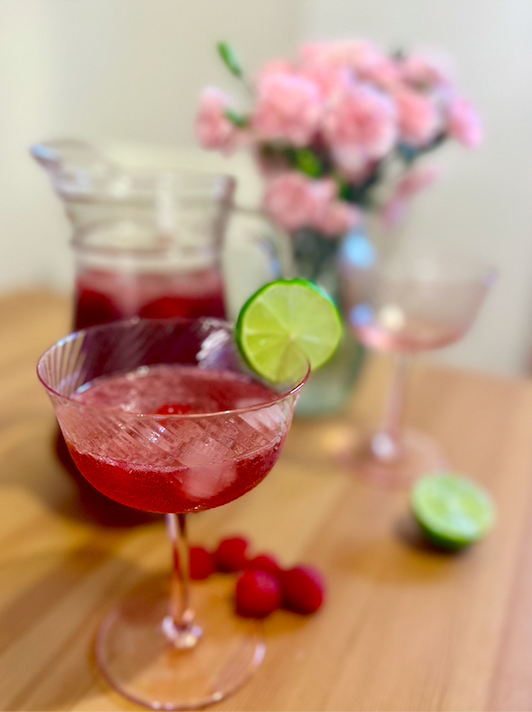
This delicious cocktail is the perfect drink for summer entertaining – it’s fresh, vibrant and a real crowd-pleaser with flavours of raspberry, ginger and lime. Simply replace the raspberry liqueur with cordial to make it a mocktail.
Ingredients (makes 1 jug) 50ml raspberry liqueur (I use Chambord) 50ml fresh lime juice (approx. 3 limes) 1 litre ginger ale Raspberry cordial (approx. 25ml) Fresh raspberries Ice
Method Combine raspberry liqueur, lime juice and ginger ale in a large jug with ice and stir. Add raspberry cordial until the taste and colour is to your liking. Add fresh raspberries and serve. Enjoy!
Pistachio Sponge 250g unsalted butter, at room temperature 200g caster sugar 2 teaspoons vanilla bean paste 50g pistachio paste or cream (I use this brand) 150g marzipan 4 eggs 250g shelled, unsalted pistachios 75g almond meal 50 ml raspberry liqueur (I use Chambord) Green food colouring (optional)
Make the jelly according to packet instructions in a large trifle dish (3L capacity) and add raspberries. Leave in the fridge to set overnight.
Preheat oven to 150°C fan-forced. Grease and line two 20cm cake tins.
To make the cake, blitz pistachios in a food processor until it resembles sand. Place the butter, sugar and vanilla in the bowl of an electric mixer with a paddle attachment and beat on medium speed. When the mixture is pale and fluffy, add the pistachio paste/cream and marzipan and mix to combine. Add the eggs one at a time, beating well between each addition. When incorporated, add the ground pistachios and almond meal. Slowly add in raspberry liqueur and a drop or two of green food colouring. Once incorporated, divide the mixture between the prepared tins. Bake for 45-55 minutes or until a skewer inserted into the centre comes out clean. Allow to cool in the tins for 30 minutes and then place in the fridge to set overnight.
To make the raspberry coulis, combine the frozen raspberries and icing sugar in a medium saucepan over low heat until melted. Blitz with a stick blender until smooth. Strain through a fine sieve, pressing down to extract as much liquid as possible, then discard the seeds.
Approximately 3 hours before serving, whip the thickened cream until soft peaks form. Fold the thickened cream into the vanilla custard.
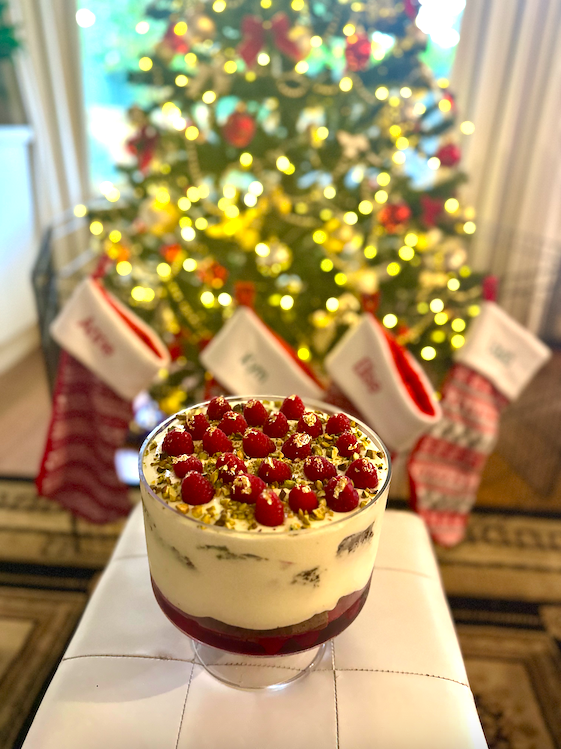
To assemble, place the first sponge into the trifle dish (cutting to size as necessary) on top of the jelly. Follow with a layer of cream, then the raspberry coulis. Cut the other sponge to fit the trifle bowl exactly, place on top and finish with a layer of cream. Allow to set in the fridge for three hours. Decorate with fresh raspberries topped with gold leaf and chopped pistachios. Enjoy!
Recipe adapted from Guillaume Brahimi’s ‘Raspberry and pistachio trifle’ featured in good food.
These adorable trifles are an ideal finish to a big meal (such as Christmas dinner) as they are light and fresh with zesty lemon curd and pops of blackberry. I’ve made 9 individual trifles here, but it also works as one large trifle for a Christmas centrepiece, you may just need to add some chantilly cream on top of the lemon curd layer to get sufficient height.
You’ll want to make the meringues, sponge and curd the day ahead so all you need to do is assemble.
Ingredients (serves 9) Meringues 3 egg whites pinch of salt 3/4 cup caster sugar
1½-2 cups luscious lemon curd (or bought curd if you prefer) 1 vanilla sponge cake (or bought if you prefer) 2 x 300g jars blackberry jam (I use Beerenberg) 900g vanilla custard (I used Paul’s Double Thick Custard in French Vanilla) 2 punnets fresh blackberries Edible flowers (optional)
Method
To make the meringues, preheat oven to 100°C. Line 2 large trays with baking paper. Use a stand mixer with the whisk attachment to beat the egg whites with a pinch of salt until stiff peaks form. Add sugar, a table spoon at a time, beating until the sugar has dissolved between each addition. Keep beating until all of the sugar has been added and the mixture is thick, white and glossy. Transfer to a large piping bag with a large star nozzle (I used Wilton’s 2M). Pipe approximately 50 small rosettes of meringue onto the trays. Bake for 1 hour and 15 minutes, then turn off the oven, prop open the door and leave to cool completely.
Cut the sponge cake in half and spread each half with a layer of blackberry jam. Then carefully cut the sponge cake into small cubes.
To assemble the trifle, put a layer of sponge cake pieces in the bottom of each glass, trying to get a flat and even layer. Spoon approximately 1 teaspoon of extra blackberry jam per glass and spread over the top of the sponge pieces.
Spoon a thick layer of vanilla custard on top of the jam, followed by a generous dollop of lemon curd, then top with crushed meringue pieces and blackberries cut in half (approximately 6 halves per glass).
Repeat the layers – sponge cake, blackberry jam, custard and curd. Then top with a few whole meringues, a couple of blackberries and an edible flower. If not serving immediately, leave off the meringues from the top until just before serving so they stay crisp.
Enjoy!
Meringue recipe adapted from Merle’s Kitchen by Merle Parrish.
Named because of their resemblance to a block of gold, these beautiful, flavoursome morsels are a bit fiddly to make but so worthwhile. I use a Kmart silicone mini loaf pan for mine so they’re slightly bigger than the average financier but when they’re this delicious – the bigger the better!
Pistachio financiers 180g unsalted butter 170g icing sugar 80g pistachio meal (I make my own by blitzing unsalted pistachios in a food processor until you reach a sand-like texture) 70g plain flour 1 teaspoon baking powder Pinch of salt 120g egg whites 1 teaspoon vanilla bean paste
White chocolate & pistachio whipped ganache 400ml thickened cream 150g white chocolate, chopped 50g pistachio praline paste
Day before serving: To make the pistachio praline paste, line a baking tray with baking paper. Combine the sugar, and 50ml water in a saucepan and bring to the boil (do not stir at this stage). Once the syrup is boiling, add the pistachios. Stir until the sugar crystallises around the pistachios then continue cooking until the sugar re-melts and caramelises. Remove from the heat and pour onto prepared baking tray. Once cooled, break into shards and blitz in a good processor until it liquefies and forms a paste (it may take up to 15 minutes).
To make the financier batter, cook the butter in a saucepan over a medium heat until it browns (wait until the foam subsides and you have a medium-dark colour). Set aside to cool. Whisk the icing sugar, pistachio meal, flour, baking powder and salt in a large bowl until combined. Mix in the egg whites and vanilla, then pour in the burnt butter and mix until just combined. Cover and leave in the fridge overnight.
For the white chocolate & pistachio whipped ganache, put all the ingredients in a small microwave safe bowl and melt in 30-second bursts on medium. Stir to combine, then cover and transfer into the fridge to chill overnight.
Day of serving: Preheat the oven to 160ºC (approx. 140ºC fan-forced). Spoon the financier batter into the mini loaf pan moulds, filling each approximately one-third full. Bake for 15-20 minutes or until they are golden brown and crisp at the edges. Allow to cool for 5-10 minutes, then pop them out of the moulds and onto a cooling rack to cool completely.
Using an electric mixer fitted with the whisk attachment, briefly whisk the chilled ganache mixture until just fluffy. Transfer the whipped ganache to a piping bag fitted with a Wilton #104 petal nozzle and pipe the ganache onto the top of the financiers. Decorate with fresh raspberries, pistachios and gold leaf. Enjoy!
Adapted from ‘Pistachio financiers’ in First, Cream the Butter and Sugar by Emelia Jackson.
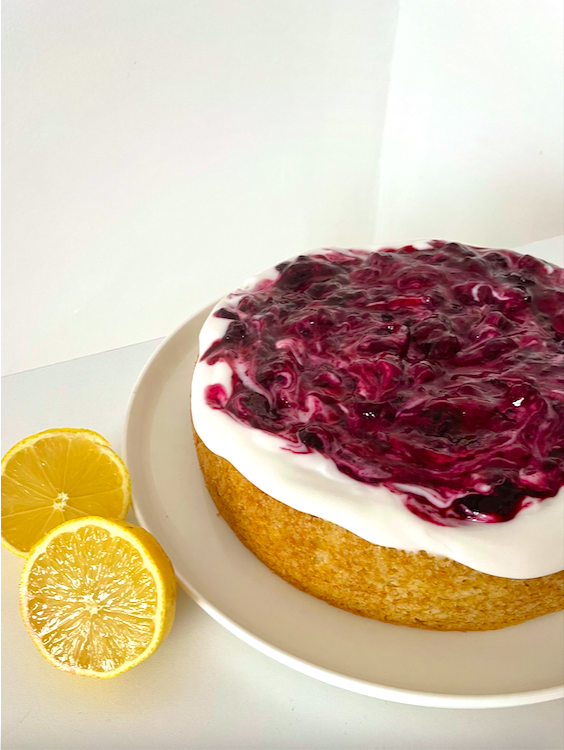
Don’t be put off by the title, you’d never guess that this tender, zesty lemon cake is vegan. Feel free to omit the icing if you’re not a big fan of coconut.
Ingredients (serves 10-12) 1¾ cups flour 1½ teaspoons baking powder ½ teaspoon bicarb soda ¼ teaspoon fine salt ⅔ cup canola oil ¾ cup caster sugar 1 cup full fat coconut milk (including as much of the thicker cream as possible) Zest of 2 lemons, plus 45ml lemon juice 1 teaspoon vanilla extract
Blueberry compote 1 cup fresh blueberries 1 tablespoon lemon juice 1 tablespoon caster sugar 1½ teaspoons cornflour
Preheat the oven to 180°C (160°C fan-forced). Grease the sides and line the base of a 20cm round cake tin with baking paper.
In a large bowl, combine the flour, baking powder, bicarb soda and salt.
In another bowl, whisk together the oil, sugar and coconut milk, then add in the lemon zest, juice and vanilla.
Pour the wet ingredients into the bowl of dry ingredients, whisking to combine, then pour into the prepared tin and bake for 30–35 minutes or until a skewer inserted comes out clean. Leave the cake to cool completely in its tin.
To make the blueberry compote, place the blueberries, lemon juice, sugar and 50ml of cold water into a small saucepan and bring to the boil. Turn down the heat and leave to simmer, stirring occasionally, until the blueberries have softened. Remove from the heat.
Combine the conflour with 1½ teaspoons of cold water in a small cup. Stir the paste into the blueberries, put back on a medium heat and stir for about 30 seconds, or until thickened. Pour into a jug to cool and set.
To make the icing, combine yoghurt, vanilla and icing sugar in a small bowl.
Just before serving, invert the cake onto a serving plate or cake stand and top with icing and compote (I like to swirl the two together). Enjoy!
Adapted from ‘Lemon Tendercake with Blueberry Compote’ in Nigella Lawson’s At My Table.
Preheat oven to 150°C fan-forced. Do NOT grease or line the tin (unlike most other bakes, we want the cake to stick to the sides of the tin).
Scrape out passionfruit pulp into a jug and whisk vigorously. If under 180ml, add some orange juice or water to make up the shortfall.
Weigh the sugar in a medium bowl. Take out 2 tablespoons’ worth to add to the egg whites later. Add the flour, baking powder and salt to the bowl and set aside.
Place the egg whites and cream of tartar into the bowl of a stand mixer. Using the whisk attachment, whip on medium-high speed until the egg whites are stiff and white. Start adding the reserved sugar to the egg whites gradually (about a teaspoon every 30 seconds) and beat until you have a white, smooth, glossy mixture.
Put the oil, egg yolks and passionfruit in a wide bowl and whisk to combine. Sift the dry ingredients over the yolk mix and combine with a silicone spatula to form a loose batter. Gently fold in one-third of the egg white mixture. Then add in the remaining egg white mixture and gently combine until no white streaks remain.
Pour the mixture into the cake tin, wiping away any batter smears around the sides or centre of the tin. Bake for 55-60 minutes or until golden and the cake around the centre tube looks dry. Wearing oven mitts, remove from the oven and immediately invert the centre tube onto a bottle. Let it hang for 2-3 hours or until the tin is completely cool.
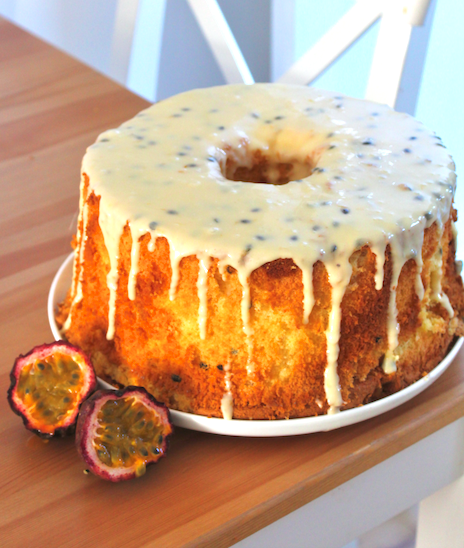
To release the cooled cake, run a thin knife around the edge of the tin, ensuring you get right to the bottom. Turn the chiffon cake out onto a serving plate.
To make the passionfruit sour cream glaze, sift the icing sugar into the bowl of a stand mixer and add the sour cream and passionfruit. Using the paddle attachment, beat on a low speed at first, then increase to medium until combined. Add a little extra icing sugar if too wet, or a small amount of sour cream if too thick.
Spoon the glaze around the outer edge of the cake first, then over the top. Leave to set for 15 minutes before serving. Enjoy!
Recipe adapted from ‘Passionfruit cloud chiffon cake’ in Natalie Paull’s Beatrix Bakes
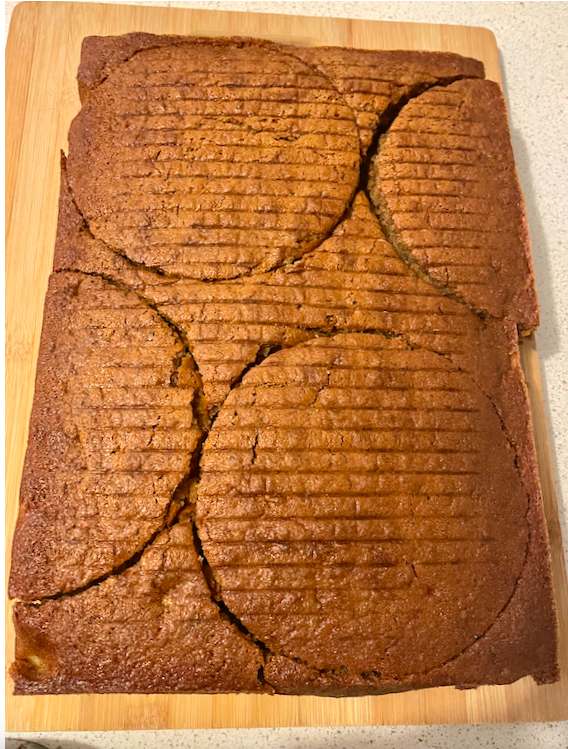
This ultra soft, fluffy cake is heavy on the spices and topped with a delicious brown butter cream cheese frosting. The cake’s texture comes from using cake flour rather than ordinary flour which is lower in protein and gives you a tender, light crumb every time. Please don’t be tempted to use ordinary flour – it’s worth the fuss of buying (or making your own) I promise!
I use the Christina Tosi Milk Bar method for this cake – making a large sheet cake, cutting it into three layers with a six inch cake ring and constructing it using six inch acetate. It cooks faster, doesn’t require multiple cake tins and ensures perfectly even layers every time. If you don’t have this equipment, you can make a four-layered version with two 18cm round cake tins – just increase the baking time by about 10-20mins, carefully slice each cake in half and divide the frosting into quarters rather than thirds.
Ingredients (serves 14) 380g brown sugar 350g cake flour 1 tablespoon ground cinnamon 1 teaspoon mixed spice 1 teaspoon ground ginger ½ teaspoon ground nutmeg ½ teaspoon ground cloves 1½ teaspoons bicarb soda 1 teaspoon fine salt 200g sour cream (full fat) 200ml milk (full cream) 4 eggs 100ml canola oil 1 tablespoon vanilla bean paste 400g tinned apple pieces
Preheat the oven to 180°C (160°C fan-forced) and grease and line a 9 by 13 inch quarter sheet pan with baking paper.
Using a stand mixer fitted with a paddle attachment, mix the brown sugar, flour, spices, baking powder, bicarb soda and salt on low speed until combined.
Pour the sour cream, milk, eggs, oil and vanilla into a jug and whisk to combine. Pour the mixture into the dry ingredients and mix on low speed until just combined, scraping the bowl with a spatula to ensure all ingredients are integrated.
Gently fold the apple pieces through the batter with a spatula.
Pour the mixture into the prepared pan and bake for 30-40 minutes or until a skewer inserted comes out clean. Allow the cake to cool in the pan for 10 minutes before gently turning onto a wire rack to cool completely.
While the cake is baking, make the brown butter for the frosting. Heat the butter in a small saucepan over medium heat, stirring continuously. Once the butter has melted, boiled, the foaming subsides and the butter has sufficiently browned (I like mine quite dark), transfer the butter into a bowl and refrigerate until set and firm.
Once the cake is completely cooled, place it onto a large chopping/bread board. Using the picture below as a guide, use a six inch metal cake cutter to cut out two full rounds of cake and two half pieces.
To make the frosting, beat the set brown butter in a stand mixer with a paddle attachment on a medium speed for 4-5 minutes or until completely smooth. Add the cream cheese and mix for a further 2 minutes, scraping down the sides of the bowl at regular intervals to ensure no lumps. Add the icing sugar, sour cream and vanilla and beat for a further 2-3 minutes or until the icing is fluffy and light.
Clean the cake ring and then place onto a plate or cake stand. Line the inside of the cake ring with a ‘collar’ of acetate. Place the two half pieces of cake at the bottom and press down firmly. If there are any gaps, use extra cake scraps to fill in the holes and press down very firmly to make one even layer. Top with approximately one-third of the frosting, using a cranked spatula to spread right to the edges.
Repeat with the remaining cake and frosting. Place cake in the fridge for at least 3 hours to set.
Gently slide off the cake ring and peel away the acetate strip. Keep refrigerated until approximately half an hour before serving. Cut into pieces (I like to use this method) and serve. Enjoy!
Cake adapted from ‘Spiced apple layer cake with brown butter cream cheese icing’ in Emelia Jackson’s First, Cream the Butter and Sugar.
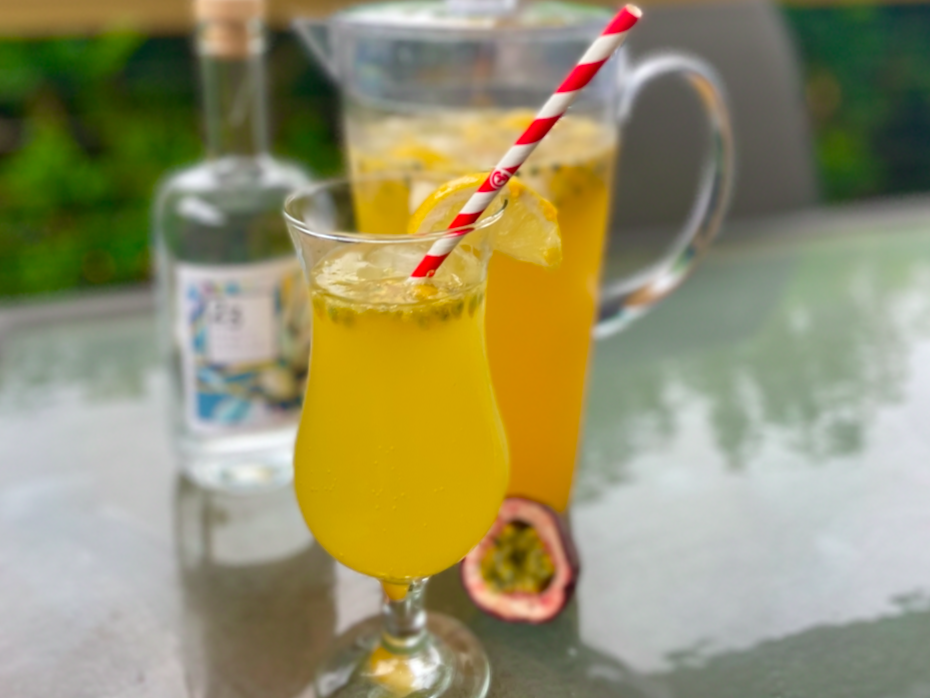
Prepare to meet your new favourite drink. I first tried this on Christmas day and immediately knew this cocktail was special – the perfect blend of sweet and sour, lightly fizzy and oh boy does it go down easily! Turns out I wasn’t the only one feeling this way and I’ve been inundated with requests for the recipe each time I’ve made it.
It’s super easy to make this a mocktail – just omit the alcohol.
Ingredients (makes 1 jug) 2 lemons 4 passionfruit Approx. 300ml Bickford’s Pineapple and Passionfruit Cordial Approx. ½ cup sugar syrup (purchased or make your own by simmering equal parts water and sugar for 10-15 mins) Gin or vodka 1.25l chilled soda water Ice
Method Juice one of the lemons, discarding seeds, and pour into a large jug. Cut the other lemon into thin slices and set aside.
Scoop out the passionfruit flesh and add to lemon juice.
Add approximately 300ml cordial, ¼ cup sugar syrup, a generous splash of gin or vodka and soda water. Adjust ingredients according to taste. Serve with lemon slices and ice. Enjoy!
Adapted from ‘Pineapple and passionfruit gin fizz’ in Woolworths Fresh Magazine, December 2022
This cake is perfect for the strawberry lover in your life and just so happens to be dairy free! I made this after a very successful haul strawberry picking at Beerenberg Farms just out of Adelaide as we were up to our eyeballs in fresh strawberries.
If you don’t need the cake to be dairy free, substitute the dairy-free yoghurt for a Greek-style yoghurt with a drop of vanilla extract and the dairy-free butter for unsalted butter.
Ingredients (serves 8) 250g fresh strawberries, hulled and cut into quarters 225g dairy-free yoghurt (I used Chobani vanilla oat yoghurt) 3 eggs 100ml canola oil 250g caster sugar 180g plain flour 1½ teaspoon baking powder
Strawberry Icing 50g fresh strawberries, hulled and halved 40g dairy-free butter, room temperature 1-1½ cups icing sugar
250g fresh strawberries, hulled and halved, to serve
Method
Preheat the oven to 160ºC fan-forced. Line a 30 x 10cm loaf tin with baking paper.
Whisk the yoghurt, eggs and oil in a large bowl until combined. In a separate bowl, whisk the sugar, flour and baking powder together. Gently fold the dry ingredients into the yoghurt mix until just combined.
Spread half of the cake batter over the base of the lined tin. Fold the strawberries into the remaining batter, then spread on top (this prevents all of the berries sinking to the bottom).
Bake the cake for 55-65 minutes or until a skewer inserted into the centre of the cake comes out clean. Set aside to cool in the tin for 15min before turning out onto a wire rack to cool completely.
To make the icing, blend strawberries with a stick blender until puréed. Add softened butter to a large mixing bowl and use an electric beater to beat until fluffy (about 1 minute). Add strawberry purée and beat until fully incorporated, scraping down the sides of the bowl with a silicone spatula as needed. Add icing sugar ¼ cup at a time and beat after each addition until the icing is thick yet spreadable.
Once the cake is completely cool, spread the icing over the top of the cake with a spatula and top with halved strawberries. Enjoy!
Recipe adapted from ‘Strawberry yoghurt cake with whipped yoghurt’ in First, Cream the Butter and Sugar by Emelia Jackson.
These spiced chocolate sugar cookies are super quick and easy to whip up, leaving plenty of time for more important things, like decorating and eating!
Ingredients (makes approximately 40 cookies) 170g butter, chopped (straight from the fridge) 3/4 cup + 1 tablespoon caster sugar 1 teaspoon vanilla extract 1 egg 2 cups plain flour ½ cup cocoa powder 1 teaspoon mixed spice ½ teaspoon ginger powder ½ teaspoon baking powder Packet of royal icing (I use Queen brand) Red food dye
Method
Preheat oven to 150ºC fan-forced. Line 2 large trays with baking paper.
Add butter, sugar and vanilla to the large bowl of a stand mixer. Beat butter and sugar on low speed, then turn up to medium until butter and sugar is completely combined. Add egg and beat briefly until egg has been dispersed. Add flour, cocoa, spices and baking powder and mix on low speed until it comes together.
Shape into a large disc and roll out with a rolling pin on a clean surface until it’s at your desired thickness (I like mine around 5-6mm). Use cookie cutters to cut out cookies and carefully transfer them to your prepared trays.
Bake for 12-15 minutes. Allow to cool briefly on the tray before transferring to a wire rack to cool completely.
Repeat with the rest of the dough.
For the icing, follow the packet instructions and colour half of the mix red, leaving the remainder white. Transfer into snaplock bags, cut the corner (keep the cut nice and small) and pipe the cookies as desired. Top with mini m&ms, sprinkles or leave plain.
Recipe adapted from The Sweetest Menu’s ‘Chocolate Sugar Cookies’.