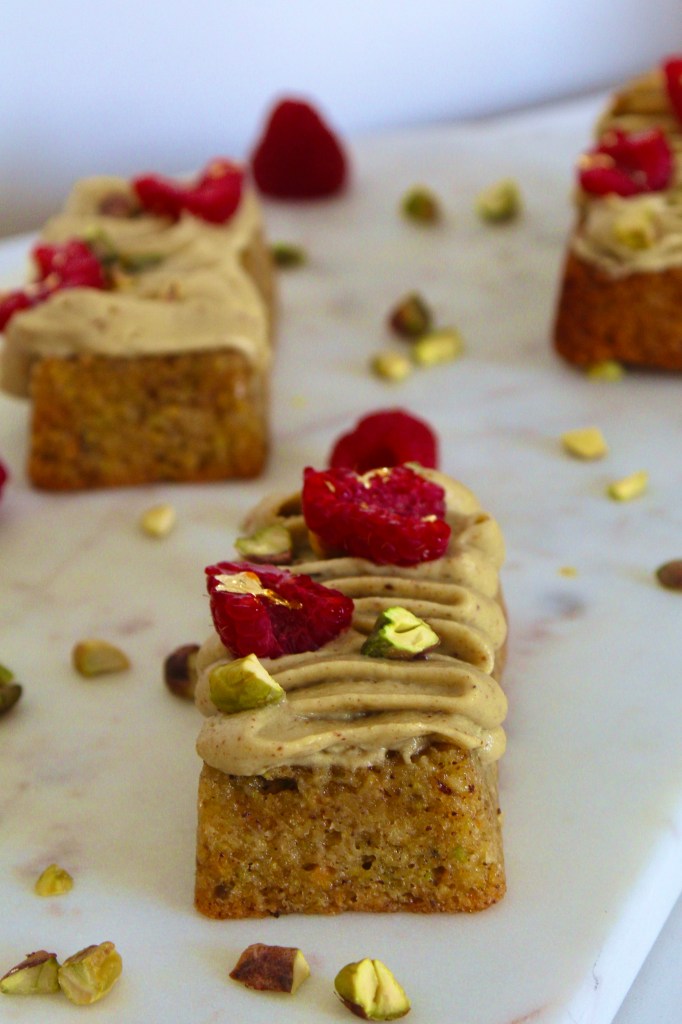
Pistachio & White Chocolate Financiers

Named because of their resemblance to a block of gold, these beautiful, flavoursome morsels are a bit fiddly to make but so worthwhile. I use a Kmart silicone mini loaf pan for mine so they’re slightly bigger than the average financier but when they’re this delicious – the bigger the better!

Begin this recipe the day ahead.

Ingredients (makes 12)
Pistachio praline paste
150g caster sugar
150g shelled unsalted, unroasted pistachios

Pistachio financiers
180g unsalted butter
170g icing sugar
80g pistachio meal (I make my own by blitzing unsalted pistachios in a food processor until you reach a sand-like texture)
70g plain flour
1 teaspoon baking powder
Pinch of salt
120g egg whites
1 teaspoon vanilla bean paste

White chocolate & pistachio whipped ganache
400ml thickened cream
150g white chocolate, chopped
50g pistachio praline paste

To decorate
Fresh raspberries, halved
Pistachios, chopped
Edible gold leaf (optional)

Method

Day before serving:
To make the pistachio praline paste, line a baking tray with baking paper. Combine the sugar, and 50ml water in a saucepan and bring to the boil (do not stir at this stage). Once the syrup is boiling, add the pistachios. Stir until the sugar crystallises around the pistachios then continue cooking until the sugar re-melts and caramelises. Remove from the heat and pour onto prepared baking tray. Once cooled, break into shards and blitz in a good processor until it liquefies and forms a paste (it may take up to 15 minutes).

To make the financier batter, cook the butter in a saucepan over a medium heat until it browns (wait until the foam subsides and you have a medium-dark colour). Set aside to cool. Whisk the icing sugar, pistachio meal, flour, baking powder and salt in a large bowl until combined. Mix in the egg whites and vanilla, then pour in the burnt butter and mix until just combined. Cover and leave in the fridge overnight.

For the white chocolate & pistachio whipped ganache, put all the ingredients in a small microwave safe bowl and melt in 30-second bursts on medium. Stir to combine, then cover and transfer into the fridge to chill overnight.

Day of serving:
Preheat the oven to 160ºC (approx. 140ºC fan-forced). Spoon the financier batter into the mini loaf pan moulds, filling each approximately one-third full. Bake for 15-20 minutes or until they are golden brown and crisp at the edges. Allow to cool for 5-10 minutes, then pop them out of the moulds and onto a cooling rack to cool completely.

Using an electric mixer fitted with the whisk attachment, briefly whisk the chilled ganache mixture until just fluffy. Transfer the whipped ganache to a piping bag fitted with a Wilton #104 petal nozzle and pipe the ganache onto the top of the financiers. Decorate with fresh raspberries, pistachios and gold leaf. Enjoy!

Adapted from ‘Pistachio financiers’ in First, Cream the Butter and Sugar by Emelia Jackson.

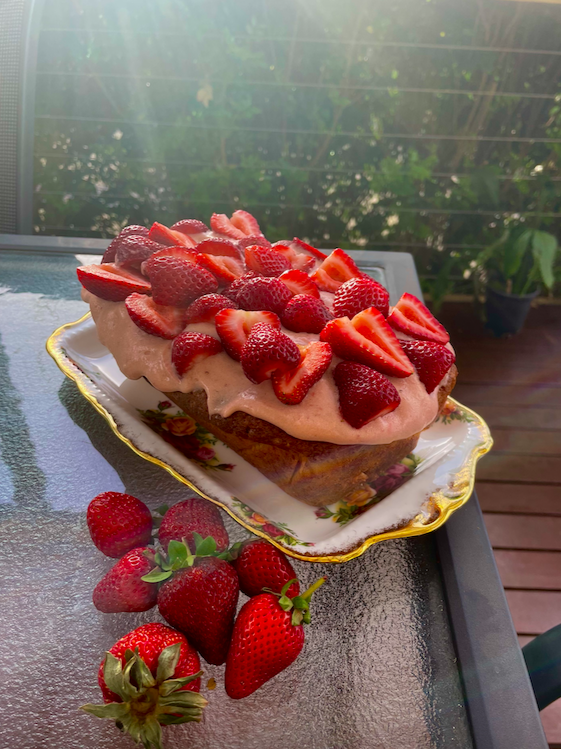
Strawberry Lover’s Cake (Dairy Free)

This cake is perfect for the strawberry lover in your life and just so happens to be dairy free! I made this after a very successful haul strawberry picking at Beerenberg Farms just out of Adelaide as we were up to our eyeballs in fresh strawberries.

If you don’t need the cake to be dairy free, substitute the dairy-free yoghurt for a Greek-style yoghurt with a drop of vanilla extract and the dairy-free butter for unsalted butter.

Ingredients (serves 8)
250g fresh strawberries, hulled and cut into quarters
225g dairy-free yoghurt (I used Chobani vanilla oat yoghurt)
3 eggs
100ml canola oil
250g caster sugar
180g plain flour
1½ teaspoon baking powder

Strawberry Icing
50g fresh strawberries, hulled and halved
40g dairy-free butter, room temperature
1-1½ cups icing sugar

250g fresh strawberries, hulled and halved, to serve

Method

Preheat the oven to 160ºC fan-forced. Line a 30 x 10cm loaf tin with baking paper.

Whisk the yoghurt, eggs and oil in a large bowl until combined. In a separate bowl, whisk the sugar, flour and baking powder together. Gently fold the dry ingredients into the yoghurt mix until just combined.

Spread half of the cake batter over the base of the lined tin. Fold the strawberries into the remaining batter, then spread on top (this prevents all of the berries sinking to the bottom).

Bake the cake for 55-65 minutes or until a skewer inserted into the centre of the cake comes out clean. Set aside to cool in the tin for 15min before turning out onto a wire rack to cool completely.

To make the icing, blend strawberries with a stick blender until puréed. Add softened butter to a large mixing bowl and use an electric beater to beat until fluffy (about 1 minute). Add strawberry purée and beat until fully incorporated, scraping down the sides of the bowl with a silicone spatula as needed. Add icing sugar ¼ cup at a time and beat after each addition until the icing is thick yet spreadable.

Once the cake is completely cool, spread the icing over the top of the cake with a spatula and top with halved strawberries. Enjoy!

Recipe adapted from ‘Strawberry yoghurt cake with whipped yoghurt’ in First, Cream the Butter and Sugar by Emelia Jackson.

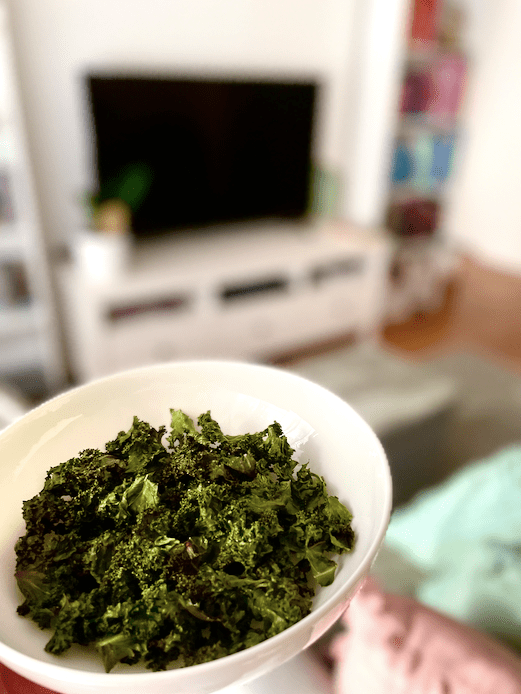
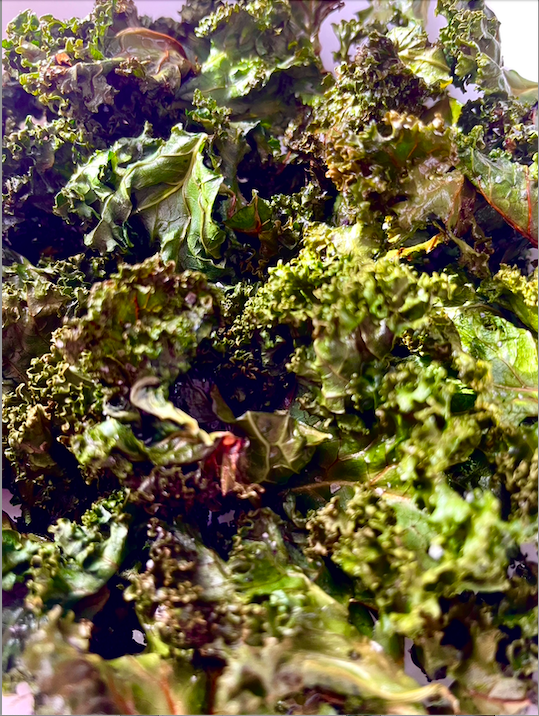
Salt & Vinegar Kale Chips

I am not usually a fan of this divisive brassica, but surprisingly love these crispy kale chips. They work well as a snack on their own (my favourite way to eat my greens!) but can also be added as a garnish to a main course or soup.

Ingredients (serves 4 as a snack)
350g kale, washed and dried
2 tablespoons olive oil
2 teaspoons white vinegar
1 teaspoon salt flakes
Generous grind of pepper

Method
Preheat the oven to 140°C.

Strip the kale leaves from the stalks of the kale and tear into pieces. Place into a bowl with the remaining ingredients and toss to coat.

Spread the kale leaves in a single layer on wire racks over baking trays. Bake for 15-20 minutes or until crunchy.

Remove from the oven and leave to cool and crisp up further before serving. Enjoy!

Recipe adapted from Alice Zaslavsky’s In Praise of Veg

Chocolate & Butterscotch “Crack”

This “crack” (so named due to its highly addictive nature) is a crunchy, salty-sweet treat that has proven so popular in Australia that Salada sales have increased by 15%! Made famous by the Podcast ‘Chat 10 Looks 3’ hosted by Annabel Crabb and Leigh Sales, “crack” is sure to be your newest guilty pleasure. Don’t say I didn’t warn you!

Ingredients (makes 1 large tray worth)
6 Saladas (or Salada-style) crackers
100g salted butter
½ cup brown sugar
1 teaspoon vanilla essence
Pinch of salt
100g dark chocolate, chopped
1/3 cup salted peanuts, chopped

Method

Preheat the oven to 180°C (160 fan-forced).

Line a 33.5 x 24cm tray with foil and then baking paper (take it from me, you do NOT want this to stick!) Lay out six Saladas onto the tray, which should fit snugly.

In a small saucepan, melt the better and sugar together over a moderate heat. Cook for about 5 minutes then stir in vanilla and salt.

Pour the butterscotch over the Saladas and smooth with a spatula to ensure they are evenly coated.

Bake for 8-12 minutes or until the butterscotch is a deep golden colour (keep a close eye on it as it can go from golden to burnt very quickly). Immediately sprinkle with the chopped chocolate and smooth with a spatula until melted and evenly coated. Top with chopped peanuts.

Refrigerate until set. Then break into shards and try not to eat it all at once. Enjoy!

Recipe adapted from Well Hello by Annabel Crabb and Leigh Sales

Chicken Pesto Pot Pies

These chicken and pesto pot pies are absolutely delicious and surprisingly quick, as they use both pre-bought pesto and pastry. Feel free to add/change the veggies as you like.

Ingredients (makes 6)
450-500g chicken thighs, chopped
40g butter
1 leek (white part only), thinly sliced
½ carrot, chopped finely
1 clove of garlic, chopped finely
4 button mushrooms, sliced
2 tablespoons plain flour
¾ cup chicken stock
¾ cup thickened cream
2 tablespoons basil pesto
2 sheets frozen puff pastry, thawed
Milk, to brush

Method
Pan fry your chicken over a medium-high heat until just cooked through. Set aside.

Preheat the oven to 180°C (160 fan-forced).

Melt the butter in a pan over medium-low heat. Add the leek and carrot and cook, stirring, for 5 minutes or until soft. Add the garlic and mushrooms and cook for 1 minute, then add the flour and stir for a further minute. Gradually stir in the chicken stock, then bring the mixture to simmer. Add the cream and cook for 3 minutes, stirring, until thickened. Allow to cool slightly, then stir in pesto and season to taste. Add the cooked chicken and stir to combine.

Using your ramekins as a stencil, cut 6 pie lids from the puff pastry sheets. Fill each ramekin with the pie mixture and then top with a pastry lid. Make a small hole in the centre to allow steam to escape. Decorate as desired using pastry offcuts (I put initials on mine). Brush each pie lid with milk. Bake for 15-20 minutes or until golden. Enjoy!

Recipe adapted from ‘Chicken Pesto Pies’ in delicious. More Please (2010)

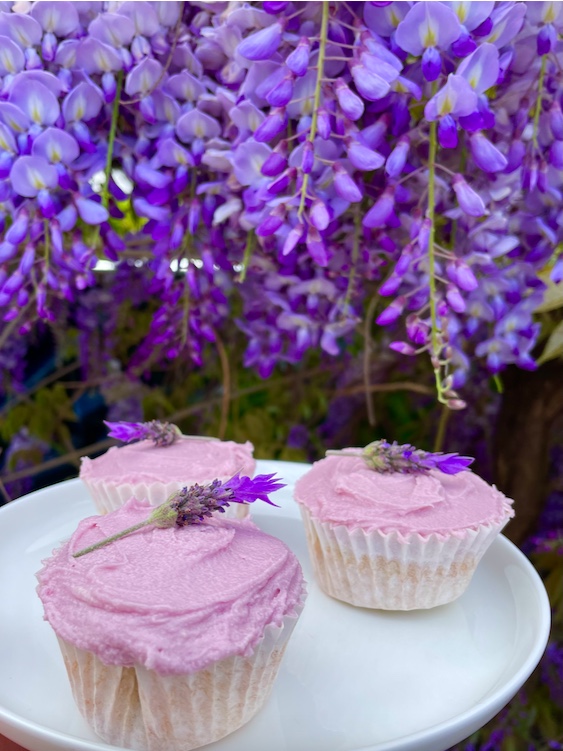
Lavender Cupcakes

I’ve always been intrigued by floral desserts and these cupcakes, inspired by the Hummingbird Bakery, have been on my to-bake list for years. With socially distanced spring picnics all the rage at the moment, I thought now was the perfect time to give them a try. I admit, I was a little worried that they might taste like Grandma’s soap, but I’ve made sure the lavender flavour is subtle, resulting in a delicious vanilla cupcake with a floral back note. If you’re keen to up your picnic game and try something new, give these a go!

I bought my dried lavender flowers from the Essential Ingredient online store, but it’s available at many gourmet and specialty food stores.

Ingredients (makes 24 cupcakes)
1 cup milk
1½ tablespoons dried lavender flowers
2¾ cups plain flour
2 teaspoons baking powder
200g butter, softened
1 ¾ cups caster sugar
4 eggs
1 tablespoon vanilla extract

Icing
¼ cup milk
¼ tablespoon dried lavender flowers
100g butter, softened
¾ tablespoon vanilla extract
4 cups icing sugar
A few drops of purple food colouring
24 small sprigs of fresh lavender (to decorate)

Method
Put the milk and dried lavender in a jug, cover with clingfilm and refrigerate for 2 hours. Repeat with the milk and dried lavender for the icing (in a separate jug/bowl).

Preheat the oven to 170°C (150°C fan forced). Line two 12-hole muffin trays with patty pans. Strain the lavender infused milk (for the cupcakes, discarding the dried lavender) and allow the milk to reach room temperature.

Sift together the flour and baking powder. In a different bowl, cream the butter with an electric mixer for 1-2 minutes. Add the caster sugar about a third at a time, beating for 2 minutes after each addition. After the last of the sugar has been beaten, beat until the mixture is light and fluffy and the sugar has dissolved. Add the eggs one at a time, beating for 1 minute after each addition or until the mixture is light and fluffy. Add the vanilla and beat until just combined.

Add approximately a third of the flour mixture to the creamed mixture and beat on a low speed until combined. Add half of the infused milk and beat until combined. Repeat this process until all of the flour and milk is just combined.

Spoon mixture into the patty pans (filling each about ¾ full) and bake for 18-20 minutes or until the top springs back when touched. Remove the cupcakes from the trays immediately and cool on a wire rack.

To make the icing, strain the remaining lavender infused milk (once again discarding the dried lavender). Cream the butter for 1-2 minutes in a large bowl using an electric mixer. Add the infused milk, vanilla and half of the icing sugar and beat for at least 3 minutes, until the mixture is light and fluffy. Add the remaining icing sugar and beat for a further 3 minutes or until the icing is a spreadable consistency. Add the purple food colouring a tiny bit at a time until the desired colour has been achieved. Add extra milk (plain/not-infused is fine) if too dry or extra icing sugar if too wet.

Once the cupcakes have cooled completely, use a spatula to apply a generous layer of icing to each cake and top with a sprig of fresh lavender. Enjoy!

Recipe adapted from the Crabapple Cupcake Bakery. Flavour inspired by the Hummingbird Bakery Cookbook

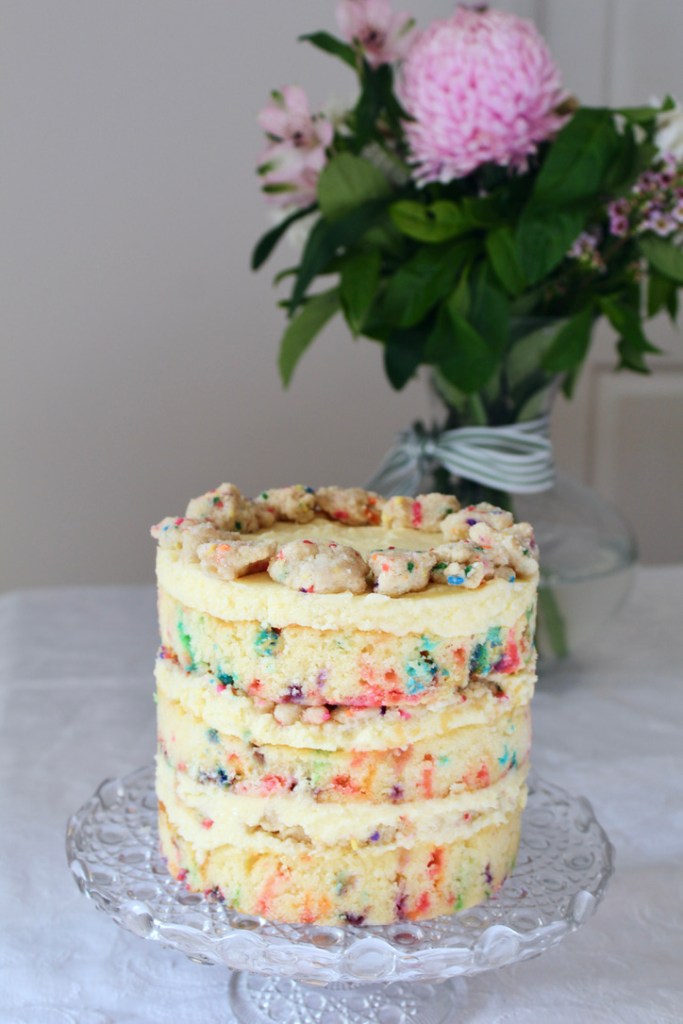
Milk Bar Style Funfetti Layer Cake

I’ve been a huge fan of Christina Tosi for years, ever since I tried her famous Crack and Candy Bar Pies at Ma Peche on my first trip to New York in 2012.

So, naturally, I had to visit one of her Milk Bar stores on my most recent trip to the US in 2019 and it did not disappoint! I tried a slice of her vanilla birthday cake and it was like no cake I’d tried before – somehow both nostalgic and completely innovative. Ever since then, I’ve wanted to bring a taste of Milk Bar to Adelaide, especially as travel is not on the cards for a while. With this recipe, I think I’ve succeeded.

I’ll be honest, this cake is not for the faint-hearted. It’s a labour of love and requires some unusual equipment: a 9 by 13 inch “quarter sheet pan”, a 6 inch cake ring, 6 inch wide acetate to make cake collars and thick high-quality sprinkles/”jimmies”. I managed to source all of these from eBay relatively cheaply, but it is an investment – I guess I’ll just have to make lots more of these cakes to justify the purchases!

Start this cake at least the day ahead of serving. I actually spread it out over 3 days to make it far less intimidating, I made my crumbs on the Thursday evening, the cake on the Friday evening and then the buttercream, milk soak and assembly on Saturday.

Ingredients (serves 14-16)

Crumbs
¼ cup white sugar
1½ tablespoons brown sugar
¾ cup plain flour
½ teaspoon baking powder
½ teaspoon salt
2 tablespoons rainbow sprinkles
¼ cup grapeseed oil
½ tablespoon vanilla extract

Cake
230g butter, softened
200g caster sugar
1 tablespoon vanilla extract
3 eggs, room temperature
2¼ cups plain flour, sifted
3 teaspoons baking powder
1 cup full-cream milk, room temperature
¼ cup full-fat greek yoghurt, room temperature
¼ cup rainbow sprinkles

Buttercream
230g butter, roughly chopped, room temperature
3 teaspoons vanilla extract
4 cups icing sugar
2 tablespoons full-fat greek yoghurt, room temperature
1-2 tablespoons full-cream milk, room temperature
⅛ teaspoon baking powder

Milk Soak
60ml full-cream milk
1 teaspoon vanilla extract

Method

Crumbs
Preheat the oven to 150°C.

Combine sugars, flour, baking powder, salt, and sprinkles in a medium bowl and beat with electric beaters on low speed until well combined. Add the oil and vanilla and beat again to distribute. The wet ingredients will help the dry ingredients form small clusters; continue beating until that happens. Ideally, you want a mixture of large-medium and small crumb clusters.

Bake for 15 minutes. Cool completely and store in an airtight container (they will keep fresh for a week at room temperature or a month in the freezer).

Cake
Preheat the oven to 160°C fan-forced. Spray the base and sides of a quarter sheet pan with cooking oil and line the base with baking paper.

In a large bowl, add butter, sugar and vanilla and beat with an electric mixer on medium speed until pale and creamy. Add eggs, one at a time, and beat after each addition.

In a separate bowl, combine flour and baking powder. Add half of the flour mix and all the milk to the butter/sugar mix and beat on a low speed until combined.

Add remaining flour mix and greek yoghurt and continue to mix on a low speed until just combined. Gently stir in sprinkles with a silicone spatula.

Pour cake into prepared pan and smooth the top. Bake for 25-30 minutes or until golden and a skewer inserted in the middle comes out clean. Set on a wire rack to cool completely.

Buttercream
Beat butter in a large mixing bowl with an electric mixer on medium speed for 1-2 minutes until butter is pale and creamy.

Add vanilla and 1 cup of icing sugar. Beat on a low speed to combine, then turn up to medium and mix for 30 seconds. Add an extra 2 cups of icing sugar, along with the greek yoghurt. Beat on medium speed until combined. Add the final cup of icing sugar, milk and baking powder. Beat on medium speed until the buttercream is light and fluffy.

Milk Soak
Add milk and vanilla to a small bowl and whisk to combine.

Assembling the Cake
Ensure all of your components are in easy reach. Set aside 12-14 large, roughly even-sized crumbs to use to decorate the top of the cake.

Place your cake on a large chopping/bread board. Using the picture below as a guide, use a 6 inch metal cake cutter to cut out two rounds of cake and then two half pieces.

Place the 6 inch cake ring onto a plate or cake stand. Line the inside of the cake ring with a ‘collar’ of acetate.

Place the two half pieces of cake at the bottom and press down firmly. If there are any gaps, use extra cake scraps to fill in the holes and press down very firmly to make one even layer. Carefully remove the cake ring (but leave the acetate). Enjoy snacking on any residual cake offcuts while you work, or make into cake pops later.

Spoon 2 tablespoons of the milk soak over the cake layer. Add a few tablespoons of buttercream and spread into an even layer. Scatter over a handful of crumbs. Add a couple of extra tablespoons of buttercream on top (you don’t need to completely cover the crumbs) and smoothe with a spatula to ensure the layer is (roughly) even.

Repeat this process for the second layer: cake, milk soak, buttercream, crumbs, buttercream. If you need to, attach another layer of acetate on top of your current cake collar to ensure it is tall enough so that all cake will be supported.

Add the final layer of cake, spoon with 2 tablespoons of the milk soak and add the remaining buttercream to the top. Top the cake with the large crumbs you set aside earlier.

Place cake in the fridge for at least 1 hour to set. Gently peel away the acetate strip/s. Refrigerate until approximately half an hour before serving. Because the cake is so rich, cut into very small pieces (I use this method) to serve. Enjoy!

Cake inspired by Christina Tosi’s ‘Vanilla Birthday Cake’. Crumb recipe from Milk Bar Store. Cake, buttercream and soak recipe adapted from The Sweetest Menu ‘Milk Bar Birthday Cake’.

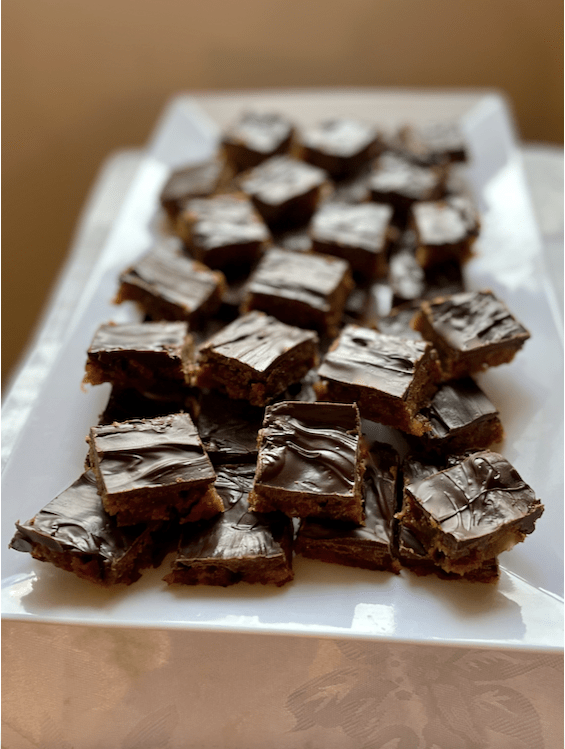
Chocolate, Date & Ginger Slice

This slice always reminds me of my wonderful grandparents. Whenever I stayed with Grandma and Grandpa as a kid, in between playing shop in their walk-in pantry, dress-ups, cuddles and “helping” in the garden or kitchen, this slice made an appearance and never lasted long! I’m very lucky to still catch up with them regularly and can confirm that a piece (or two) of this slice is as delicious as I remember.

Ingredients (makes 48 pieces)
1 cup dates, chopped
½ cup uncrystallised ginger, chopped finely
½ cup white sugar
115g butter, cubed
6 Weetbix, crushed (approx. 2 cups)
225g dark chocolate

Method
Line a 28cm x 18cm slice tin with baking paper.

Cook dates, ginger, sugar and butter in a small saucepan over a medium heat until the butter is melted and the dates are soft. Stir in Weetbix and ensure the mixture is well combined.

Press firmly into lined slice tin and refrigerate 30mins or until set.

Melt the chocolate. Spread a thin layer of chocolate over the top and leave to set at room temperature.

Cut into approximately 48 pieces. Enjoy!

Recipe from Roma Hammond via Grandma

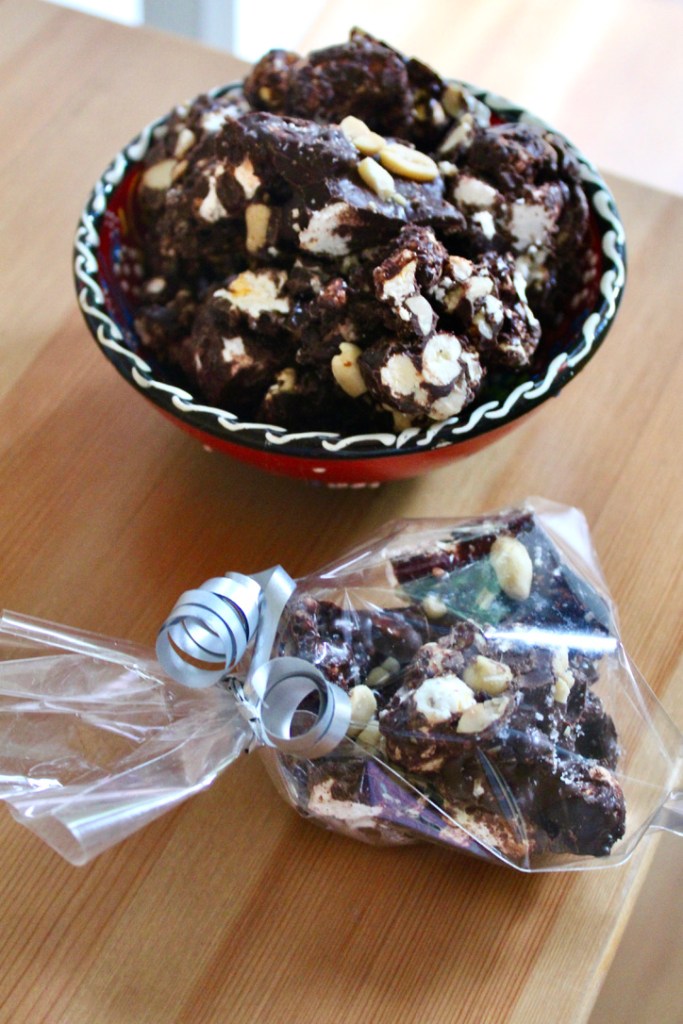
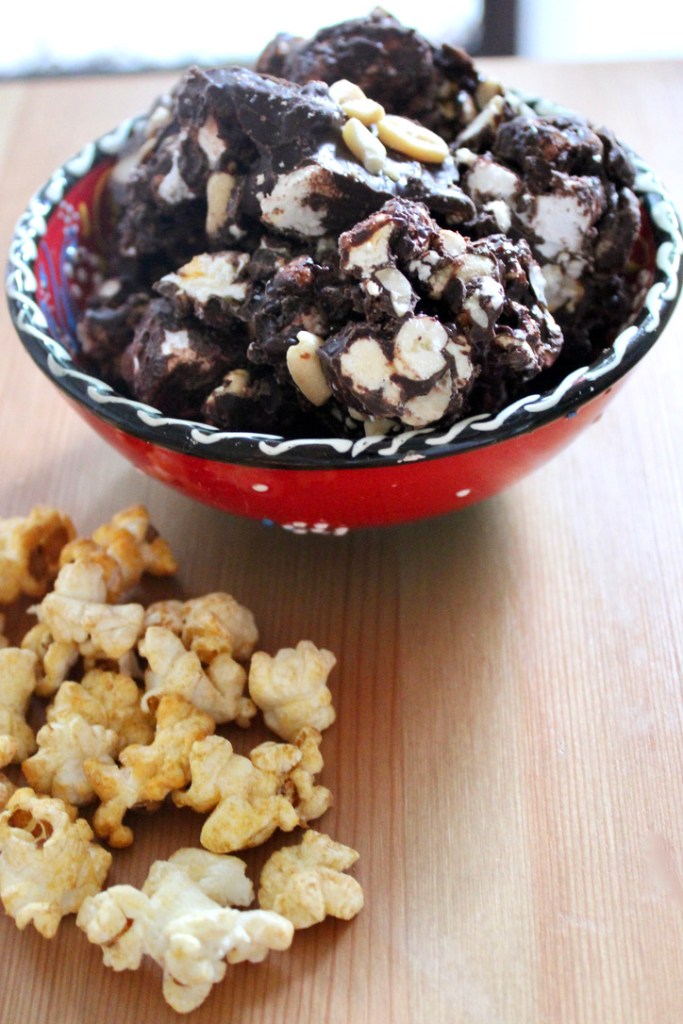
Salted Caramel Popcorn Rocky Road

Salty, sweet, crunchy, chewy – this rocky road has it all! It only takes 5 minutes to put together and is perfect for an after dinner treat, cake stall or work morning tea.

Ingredients
300g dark chocolate melts
¾ tablespoon vegetable oil
1½ cups caramel popcorn
1 cup white marshmallows, halved
½ cup salted peanuts + ¼ cup extra, chopped
Sea salt flakes

Method
Line a 20x20cm square pan with baking paper.

Melt chocolate in the microwave in a large bowl and add oil. Set aside a quarter of a cup of the chocolate mixture.

Add popcorn, marshmallows and peanuts to the large bowl and stir until evenly coated in chocolate.

Spoon into prepared pan. Smooth the top with a spatula and then pour over additional chocolate. Sprinkle with chopped peanuts and a good pinch of sea salt.

Refrigerate for 30 minutes or until set. Cut carefully into serving sized pieces (approx. 24 squares). Enjoy!

Recipe adapted from donna hay magazine Christmas 2017

Passionfruit Pie

The combination of buttery pastry, tangy passionfruit and creamy white chocolate in this pie is absolutely delicious! This is a fairly time-consuming recipe so definitely one I reserve for special occasions. I would recommend using a mixture of fresh and frozen passionfruit pulp to keep it economical unless you have an abundance of fresh passionfruit (in which case, feel free to send some my way!)

Ingredients (serves 12)
White chocolate ganache
125g white chocolate, chopped
½ cup thickened cream

Pastry
1¾ cups plain flour
¼ cup icing sugar mixture
125g cold unsalted butter, cubed
1 egg, lightly beaten

Passionfruit syrup
Pulp of 4 passionfruit
¼ cup caster sugar

Passionfruit crème pâtissière
Pulp of 8 passionfruit
400ml thickened cream
1 teaspoon vanilla paste
1 wide strip lemon zest
4 egg yolks
125g caster sugar
⅓ cup cornflour
50g butter, cubed

Method

To make the ganache, microwave the white chocolate in short bursts until melted. Add the cream and refrigerate for 2 hours until thickened.

For the pastry, place the flour and icing sugar into a food processor and add the butter. Process in short bursts until the mixture has a fine crumb consistency. Add the egg and process until the mixture just starts to come together. Turn out onto a clean bench and gather the dough together. Press into a thick disc, wrap in clingfilm and refrigerate for 15 minutes.

When the dough has chilled, roll it out on a sheet of non-stick baking paper to fit a 26cm loose-based non-stick flan tin. Carefully line the tin with the pastry, easing it into the corners. Trim any overhanging pastry, prick small holes with a fork and refrigerate for 30 minutes. Meanwhile, preheat the oven to 180°C (160°C fan-forced).

Cover the pastry with a sheet of non-stick baking paper and fill it with pastry weights. Blind bake the pastry for 15 minutes, remove the weights and paper, and bake for a further 10-15 minutes or until light golden brown. Remove from the oven and cool completely.

To make the passionfruit syrup, place the passionfruit pulp and sugar in a small saucepan with half a cup of water. Stir over low heat to dissolve the sugar, then bring to the boil, skimming the froth off the top as you go. Boil for about 2 minutes, until thick and syrupy, then remove from the heat.

For the crème pâtissière, place the passionfruit pulp into a strainer over a bowl and leave it to strain. Heat the cream in a saucepan with the vanill and lemon zest until it is just about to boil. Whisk the egg yolks and sugar in a bowl until light and creamy. Strain the cream and pour over the egg yolk mixture, whisking constantly. Add the cornflour and stir over very low heat for approx. 5 minutes. As the mixture starts to thicken, whisk more quickly until it is very thick and smooth. Cover with clingfilm and refrigerate for 20-30 minutes or until the mixture is just warmer than room temperature. Beat in the butter and the strained passionfruit juice.  

Fill the pastry with the passionfruit crème pâtissière mixture, refrigerate for 5-10 minutes and then spread the white chocolate ganache over the top. Drizzle with the passionfruit syrup and refrigerate for about 4 hours.

Enjoy!

Recipe adapted from Julie Goodwin’s ‘Passionfruit puddle pie’ in My Family Table.