Lavender Cupcakes

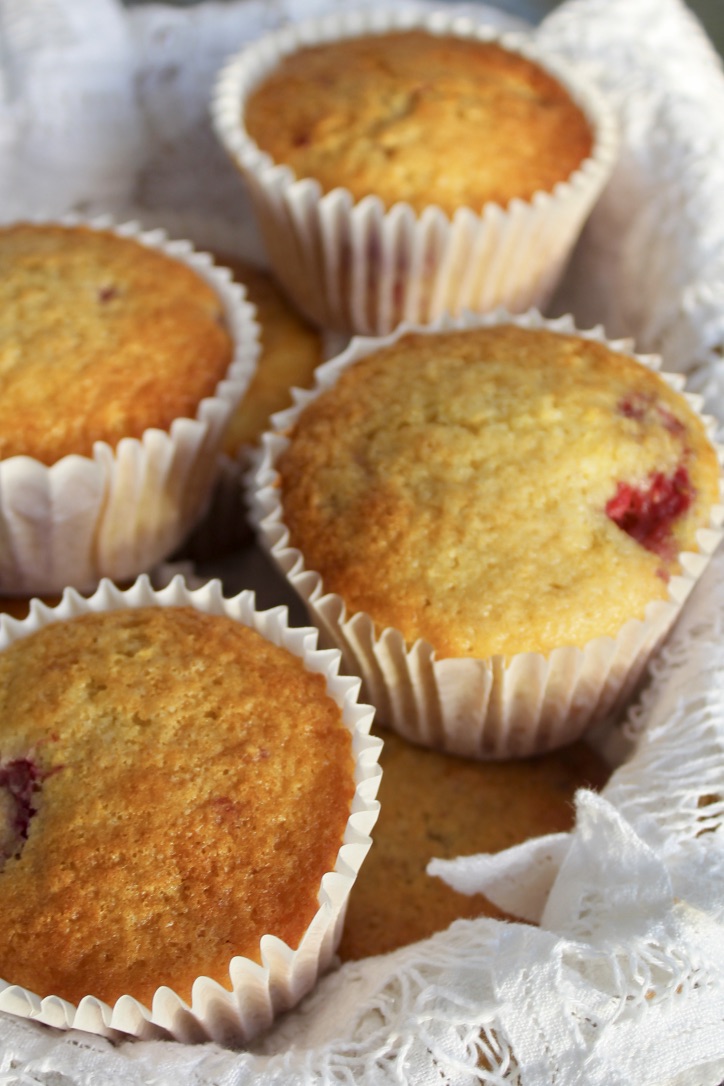
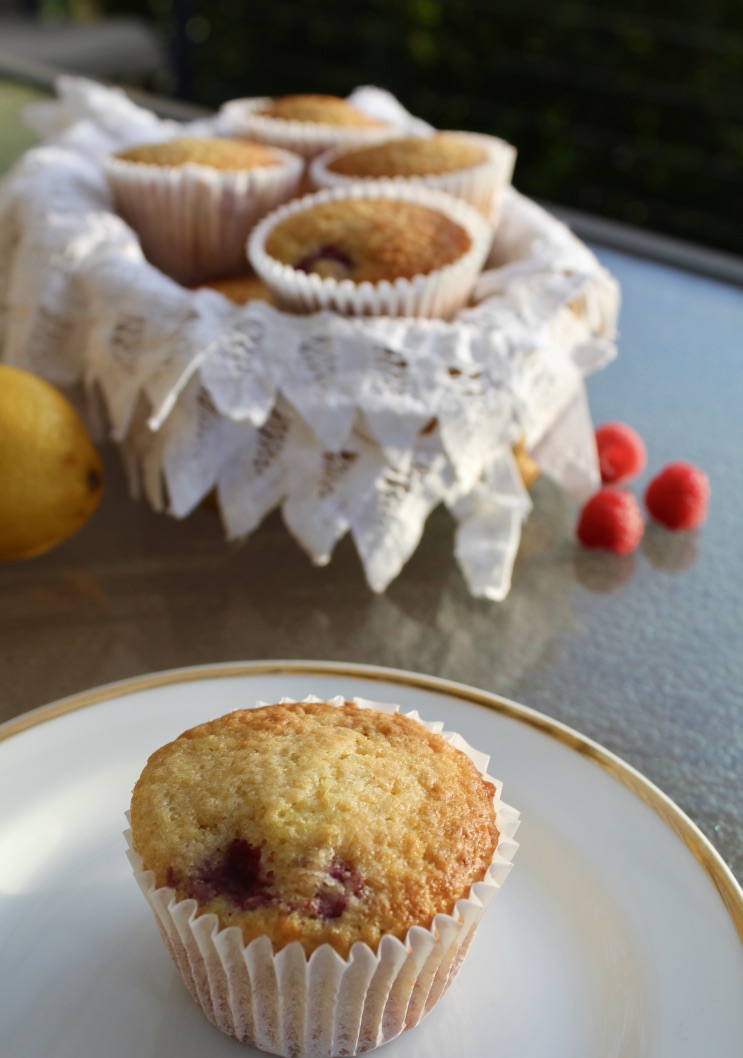
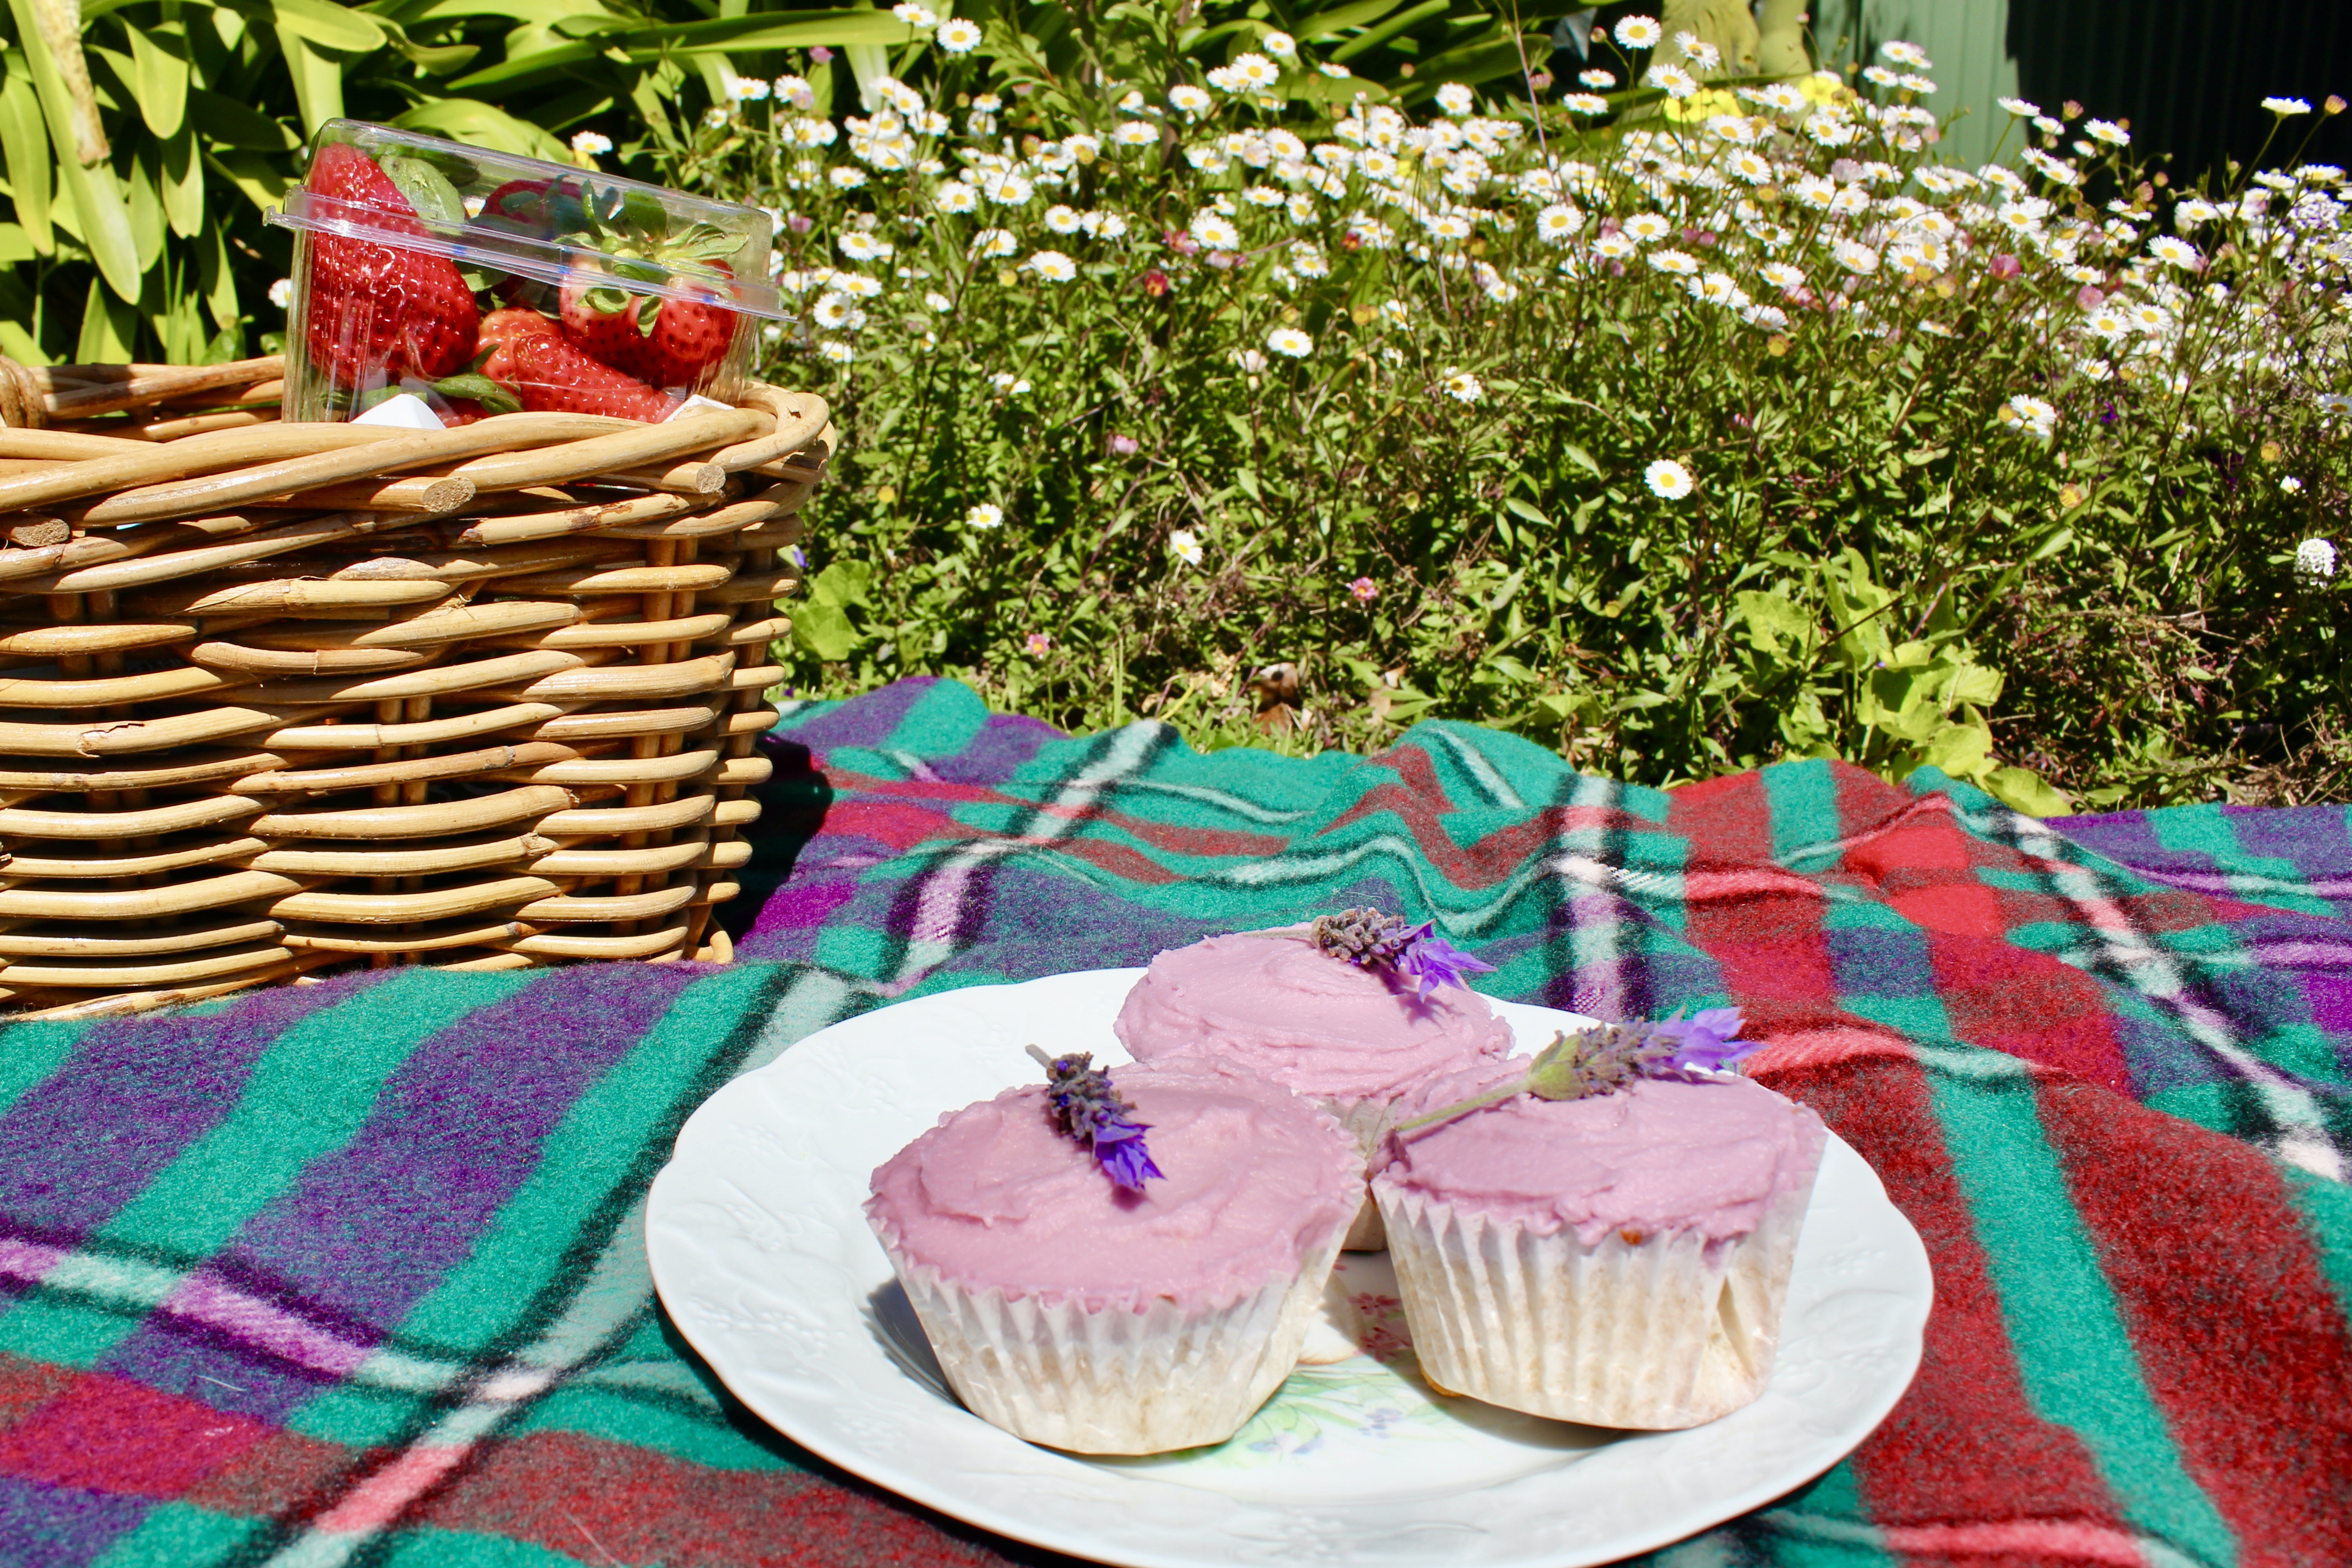
I’ve always been intrigued by floral desserts and these cupcakes, inspired by the Hummingbird Bakery, have been on my to-bake list for years. With socially distanced spring picnics all the rage at the moment, I thought now was the perfect time to give them a try. I admit, I was a little worried that they might taste like Grandma’s soap, but I’ve made sure the lavender flavour is subtle, resulting in a delicious vanilla cupcake with a floral back note. If you’re keen to up your picnic game and try something new, give these a go!

I bought my dried lavender flowers from the Essential Ingredient online store, but it’s available at many gourmet and specialty food stores.

Ingredients (makes 24 cupcakes)
1 cup milk
1½ tablespoons dried lavender flowers
2¾ cups plain flour
2 teaspoons baking powder
200g butter, softened
1 ¾ cups caster sugar
4 eggs
1 tablespoon vanilla extract

Icing
¼ cup milk
¼ tablespoon dried lavender flowers
100g butter, softened
¾ tablespoon vanilla extract
4 cups icing sugar
A few drops of purple food colouring
24 small sprigs of fresh lavender (to decorate)

Method
Put the milk and dried lavender in a jug, cover with clingfilm and refrigerate for 2 hours. Repeat with the milk and dried lavender for the icing (in a separate jug/bowl).

Preheat the oven to 170°C (150°C fan forced). Line two 12-hole muffin trays with patty pans. Strain the lavender infused milk (for the cupcakes, discarding the dried lavender) and allow the milk to reach room temperature.

Sift together the flour and baking powder. In a different bowl, cream the butter with an electric mixer for 1-2 minutes. Add the caster sugar about a third at a time, beating for 2 minutes after each addition. After the last of the sugar has been beaten, beat until the mixture is light and fluffy and the sugar has dissolved. Add the eggs one at a time, beating for 1 minute after each addition or until the mixture is light and fluffy. Add the vanilla and beat until just combined.

Add approximately a third of the flour mixture to the creamed mixture and beat on a low speed until combined. Add half of the infused milk and beat until combined. Repeat this process until all of the flour and milk is just combined.

Spoon mixture into the patty pans (filling each about ¾ full) and bake for 18-20 minutes or until the top springs back when touched. Remove the cupcakes from the trays immediately and cool on a wire rack.

To make the icing, strain the remaining lavender infused milk (once again discarding the dried lavender). Cream the butter for 1-2 minutes in a large bowl using an electric mixer. Add the infused milk, vanilla and half of the icing sugar and beat for at least 3 minutes, until the mixture is light and fluffy. Add the remaining icing sugar and beat for a further 3 minutes or until the icing is a spreadable consistency. Add the purple food colouring a tiny bit at a time until the desired colour has been achieved. Add extra milk (plain/not-infused is fine) if too dry or extra icing sugar if too wet.

Once the cupcakes have cooled completely, use a spatula to apply a generous layer of icing to each cake and top with a sprig of fresh lavender. Enjoy!

Recipe adapted from the Crabapple Cupcake Bakery. Flavour inspired by the Hummingbird Bakery Cookbook

Advertisement

Chocolate, Date & Ginger Slice

This slice always reminds me of my wonderful grandparents. Whenever I stayed with Grandma and Grandpa as a kid, in between playing shop in their walk-in pantry, dress-ups, cuddles and “helping” in the garden or kitchen, this slice made an appearance and never lasted long! I’m very lucky to still catch up with them regularly and can confirm that a piece (or two) of this slice is as delicious as I remember.

Ingredients (makes 48 pieces)
1 cup dates, chopped
½ cup uncrystallised ginger, chopped finely
½ cup white sugar
115g butter, cubed
6 Weetbix, crushed (approx. 2 cups)
225g dark chocolate

Method
Line a 28cm x 18cm slice tin with baking paper.

Cook dates, ginger, sugar and butter in a small saucepan over a medium heat until the butter is melted and the dates are soft. Stir in Weetbix and ensure the mixture is well combined.

Press firmly into lined slice tin and refrigerate 30mins or until set.

Melt the chocolate. Spread a thin layer of chocolate over the top and leave to set at room temperature.

Cut into approximately 48 pieces. Enjoy!

Recipe from Roma Hammond via Grandma

Cream Tart Number Cake

I love the look of these number cakes (also known as cream tarts or alphabet cakes) that are all over Instagram and was thrilled when my sister asked me to make her one for her 21st Birthday.

While they’re a bit fiddly to make and decorate, I was surprised by how quick they are to make; largely as they take so little time to bake in the oven. I also love how customisable they are – you can use any letters or numbers you choose, pick your decoration colour scheme, and change the flavour of the filling to taste. I went with a traditional almond biscuit with a vanilla custard filling and decorated with strawberries and pink and white flowers, meringues and macarons.

kYtnHJ%2Rkqf0Zwc3K6auA_thumb_542

Ingredients (makes two A3-sized number cakes, serves approx. 20)
Pâte Sablée (biscuit layers)
– 225g butter, room temperature
– ½ cup icing sugar
– 1 egg
– 2¼ cups flour
– 1 cup almond meal
– 1 teaspoon almond essence
– 1 teaspoon vanilla essence

Vanilla Custard Filling
– 6 cups thickened cream
– 3 100g packets Cottee’s Instant Vanilla Pudding mixes
– 1 cup icing sugar
– 3 teaspoons vanilla essence

Other
– Cut out A3 sized numbers (I used a 1 and a 2 stretched to fill an A3 page each in bolded Arial Black font)
– Extra large square silver cake board
– Fresh, pesticide-free flowers
Macarons
– Meringues
– Sugar flowers
– Strawberries (halved)

3+poHP4ETemEapj2g2DpUQ_thumb_513

  1. To make the biscuit layers, place all pâte sablée ingredients into a food processor and blitz until combined.
  2. Remove the dough from the processor and knead gently for 30 seconds until smooth. Halve the dough, press each into a disc shape, cover in clingfilm and refrigerate for at least 30 minutes.
  3. Pre-heat oven to 180ºC.
  4. Roll one of the pieces of dough between two pieces of baking paper until it’s big enough for your number template (approx. 5-6 mm thick). Carefully cut out the first number from the dough, keeping the excess pieces. Place onto a baking tray lined with baking paper.
  5. Repeat with the same number and the excess dough (remember that you need two of each number).
  6. Bake the two biscuits for 12-15 minutes or until golden brown. Allow to cool completely before VERY gently transferring one of the biscuits onto to the silver cake board and setting the other aside.
  7. Take out the second half of the dough from the refrigerator and repeat steps 4-6 for the second number.
  8. To make the vanilla filling, whip the cream in a large bowl with an electric mixer until peaks form. Alternately add the pudding mix and the icing sugar while beating, until the filling is combined and very thick.
  9. Spoon the filling into a piping bag with a medium-sized round nozzle and pipe even dollops in rows on each number (as below) IMG_9951
  10. Gently sandwich the biscuit pairs on top of the filling and repeat step 9.
  11. Decorate with flowers, macarons and meringues.
  12. Enjoy!

YJt3B8KhQSKFB4j9yIbfeA_thumb_522

Notes:

  • The biscuits can be made the day ahead and kept in an airtight container, but don’t pipe the filling or assemble the cake until the day of serving.
  • If any of your biscuits break, don’t panic, simply ‘glue’ the biscuit back together with some of the vanilla filling prior to piping the filling on top and decorating – no-one will ever know!
  • Can be kept in the refrigerator for up to 3 days but the biscuit layers will go soft.

Biscuit recipe adapted from ‘Cream Tart’ recipe on Home Cooking Adventure.com

Vanilla filling recipe adapted from ‘The Best Whipped Cream Frosting’ on Two Sisters Crafting.com

IMG_9984


Lemon & Raspberry Muffins

I love Nigella recipes because they’re consistently quick, easy and delicious. These muffins are no exception, taking under 40 minutes from start to finish. The recipe is also incredibly flexible – you can use fresh or frozen raspberries (or any other fruit for that matter) or try switching the lemon for another citrus fruit of your choice. Happy baking!

foH3RgnFTnyCm4Cdk2cbTw_thumb_13

Ingredients (makes 12)
60g butter
200g plain flour
2 teaspoon baking powder
½ teaspoon bicarb soda
150g caster sugar
Juice and z est of 1 lemon
Milk (approx. 120ml)
1 large egg
150g raspberries

%etvstgDQp6kJpBNRrG4xQ_thumb_1e

Method

Preheat the oven to 200ºC. Line a muffin tin with 12 patty pans.

Melt the butter in a medium bowl and set aside to cool.

In a large bowl, combine the flour, baking powder, bicarb, sugar and lemon zest.

Pour the lemon juice into a large measuring jug and add milk until it comes to 200ml (don’t worry about it curdling). Add the milk mixture to the melted butter and then beat in the egg.

Combine the wet ingredients with the dry ingredients until just combined (don’t overmix it as your muffins will be tough). Gently stir through the raspberries.

Spoon the batter into the patty pans and bake for 25 minutes or until the muffins spring back when touched. Enjoy!

DlKUx8pYSWioOJWcjgI8ag_thumb_10

Recipe adapted from Nigella’s ‘Lemon-Raspberry Muffins’ in How to Be a Domestic Goddess.

Spiced Pumpkin Whoopie Pies

Autumn is here (at long last) and the trees are looking stunning! Even though I live in the Southern Hemisphere and pumpkin flavouring isn’t as prevalent as in the US, when I found myself free on a grey Autumn afternoon I felt the need to make something using pumpkin, cream cheese frosting and my favourite spices.

My Mum, sister and I visited the Hummingbird Bakery while we were in Notting Hill in London and tried one of their whoopie pies. While everything we tried from the bakery was delicious, the whoopie pie was our favourite and so I felt the need to replicate it at home. Luckily for me, the recipe was easily available online (and also in their cookbook Cake Days) and with a bit of tweaking to add in extra spices, it really hit the spot.

hbE6H2iHQq+38Y06nt+g7w_thumb_3

Ingredients (makes 15 whoopie pies)
120ml vegetable oil
180g brown sugar
1 teaspoon vanilla extract
1 egg
100ml pumpkin purée
250g plain flour
½ teaspoon baking powder
½ teaspoon bicarbonate of soda
2 teaspoons ground cinnamon
1 teaspoon mixed spice
½ teaspoon ground ginger

85g butter, softened
150g icing sugar
80g cream cheese
1 teaspoon vanilla extract
2 teaspoons cinnamon
1 teaspoon mixed spice
A splash of milk (as required)

h0tVzICfRome4PjCCxkv4Q_thumb_e

Method
Preheat the oven to 170ºC (approx. 150ºC fan-forced) and line two large trays with baking paper.

Using an electric mixer, combine the oil, sugar and vanilla until combined and light in colour. Add the egg and pumpkin purée and mix until all ingredients are incorporated. Sift together the remaining ingredients and add to the liquid mixture in two batches, beating until just combined.

Spoon 30 teaspoons full of the batter on to the prepared trays, leaving a 3cm gap between each. Bake for 10-15 minutes or until they are golden and bounce back when touched. Allow to cool completely before filling.

To make the cream cheese filling, use an electric beater to mix together the butter and the icing sugar on a low speed until smooth. Add the cream cheese, vanilla and spices and continue mixing on a low speed until just combined. Add milk or extra icing sugar as required.

To assemble the whoopie pies, take a sponge, spread approximately 1 tablespoon of filling onto its flat side and then sandwich with another sponge flat-side-down. Enjoy!

zqdAnK2vQTGowZ0wpxdipQ_thumb_4

Recipe adapted from Cake Days by the Hummingbird Bakery

Grandma’s Scones

Does anything beat scones with jam and cream and tea in the sunshine? (Answer: no).

Scones are very simple to make but tend to be saved for ‘fancy’ occasions like high-tea in my house. Well, no more. I vow to make more of these versatile beauties because, regardless of occasion, there’s something supremely satisfying about a eating a fluffy scone smothered in jam (ideally homemade) and a dollop of whipped cream.

Oh and obviously it’s pronounced scone, rhyming with “John” not “Joan”.

fullsizeoutput_17b3.jpeg

Ingredients (makes 18)
2 cups self-raising flour (+ extra for dusting)
2 tablespoons butter, melted
1½ tablespoons caster sugar
1 cup milk
1 tablespoon lemon juice
2 eggs

Method
Preheat oven to 230-240°C (210-220°C fan-forced).

Beat eggs together in a small bowl.  Add lemon juice to milk in order to sour it (don’t worry if it gets a bit lumpy).

Sift flour into a large bowl, add sugar and then gently mix in eggs, soured milk and butter until just combined.

Turn dough out onto a lightly floured surface and knead gently until it just comes together. Gently form into a disc 3-4cm thick. Use a 5cm-diameter round cutter dipped in flour to cut out scones (re-flouring between each scone). Arrange scones on a large oven tray lighted dusted with flour.

Bake scones for 10-12 minutes or until golden brown. Turn scones out onto a clean tea towel and cover with another tea towel.

Serve scones warm or at room temperature with jam and sweetened whipped cream.

NB: best eaten fresh on the day they’re made as they dry out quickly.

fullsizeoutput_17b6.jpeg

Recipe adapted from Grandma, Margaret Payne, via Mum ♥

Luscious Lemon Curd 2.0

This lemon curd could not be easier to make. Honestly. It takes 5 minutes and uses a microwave (the horror!!)

I have tried many recipes for lemon curd in my time, and can honestly say that this is far and away the tastiest, easiest and most luscious. You will want to slather this stuff on EVERYTHING – pikelets, bread or between sponge cake layers, tartlets (like these mini lemon meringue pies), ice cream or on a spoon right out of the jar (not that I would ever do anything as undignified as that). It is liquid gold.

IMG_4418

Ingredients (makes approx. 2½ cups)
1 cup white sugar
3 eggs
1 cup fresh lemon juice (approx. 4-5 lemons)
Zest of 2 lemons
½ cup (115g) butter, melted

Method
Whisk together the sugar and eggs in a large microwave safe bowl until thoroughly combined. Whisk in lemon juice, zest and melted butter.

Cook in the microwave on full power for 50 second intervals, whisking after each interval. You will know your lemon curd is ready when it coats the back of a metal spoon (approximately 3-5 50 second intervals).

Pour into a sterile jar or container and allow to cool to room temperature before covering it with a lid and storing it in the refrigerator.

Keeps for ~2 weeks.

0A9F68F9-83F6-4EB8-833A-0E432081B237_1_105_c

Adapted from My Baking Addiction microwave lemon curd.

Mini Lemon Meringue Pies

These adorable mini lemon meringue pies make entertaining simple. I use bought miniature pastry cases, filled them with the simplest ever homemade lemon curd and topped them with a dollop of meringue – delicious! The best part is, the recipe makes more lemon curd than is required for the pies so you will have plenty to use in cakes, on scones, to give as a gift, or to eat with a spoon (no shame!)

Note: for best results, make the lemon curd the day ahead

fullsizeoutput_178f.jpeg

Ingredients (makes 32 mini pies)
For the lemon curd
1 cup white sugar
3 eggs
1 cup fresh lemon juice (approx. 4-5 lemons)
zest of 2 lemons
½ cup butter, melted

30 x 5cm tart shells (I use the Baylies Epicurean Delights brand)
2 egg whites
½ cup caster sugar

fullsizeoutput_1791.jpeg

To make the curd,whisk together the sugar and eggs in a large microwave safe bowl until thoroughly combined. Whisk in lemon juice, zest and melted butter.

Cook in the microwave on full power for 50 second intervals, whisking after each interval. You will know your lemon curd is ready when it coats the back of a metal spoon (approximately 3-5 50 second intervals).

Pour into a sterile jar or container and allow to cool to room temperature before covering it with a lid and storing it in the refrigerator.

To assemble the pies, preheat oven 200°C (180°C fan-forced).

Place egg whites in a large bowl and beat with an electric mixer until soft peaks form. Gradually add the sugar, beating until it dissolved between additions. Spoon meringue into a piping bag with a large star tip nozzle.

Place pastry cases onto a baking tray and carefully fill each with lemon curd. Pipe stars of meringue onto each pie.

Bake in the oven for 8-10 minutes or until the meringue is lightly browned.

fullsizeoutput_1786

Lemon curd recipe adapted from My Baking Addiction and meringue recipe from 9 Honey Kitchen.


Melting Moments

Happy Birthday to me! Bakerholics Anonymous is 5 years old today 🙂 In celebration of the anniversary I am posting one of my favourite biscuit recipes: melting moments. This version has a tangy passionfruit buttercream which helps cut through the deliciously buttery biscuit – yum!

FAoqfeQtRU+VbIGjjJqzRQ_thumb_288f

Ingredients (makes 25)
250g butter, softened
1 teaspoon vanilla extract
½ cup icing sugar
1½ cups plain flour
½ cup cornflour
Passionfruit Buttercream
90g butter, softened
¾ cup icing sugar
½ teaspoon vanilla extract
Pulp of 3 passionfruit

2tqVk0jtRRS0c0tJG5R5Gw_thumb_2894

Method
Line oven trays with baking paper.

Beat butter, extract and sifted icing sugar in a large bowl with an electric mixer until light and fluffy. Gently stir in sifted flour in two batches.

Preheat the oven to 160ºC.

Roll teaspoons of mixture into balls and place ~2.5cm apart on the trays. Flatten slightly with a fork.

Bake biscuits for 15 minutes or until lightly golden on the bottom. Stand 5 minutes before transferring to a wire rack to cool.

Make butter cream by beating butter, icing sugar and vanilla with an electric mixer until pale and fluffy. Stir through passionfruit pulp. If the icing is too runny, add more icing sugar.

Sandwich biscuits with butter cream. Dust with extra icing sugar and enjoy.

Note: if you do not have passionfruit, add more vanilla extract to make a vanilla buttercream or add 1 teaspoon each of lemon juice and finely grated lemon rind to make lemon buttercream.

2RSvqNl6Q86HPmh3srKpGA_thumb_2891

Recipe from Grandma, adapted from the Australian Women’s Weekly

Butterfly Cakes with Strawberries & Cream

4r4f+HrwRyiAVM+exY9USg_thumb_d49

Considering it’s winter, we have been incredibly lucky to have an abundance of delicious, flavoursome strawberries and these cakes take full advantage of them.

zUuD1C6uQ+O34%Yrysxlkw_thumb_d45

These cupcakes are probably the quickest and easiest to make in the history of the world;  you simply blitz the ingredients in a food processor, divide into patty pans and bake!

The cakes are very light with a soft, sponge-like texture, which makes them perfect for butterfly cakes. If butterfly cakes aren’t for you, they’re also delicious with a frosting of your choice (try my vanilla buttercream or marshmallow frosting).

reHoi07+TbijnoL2o8%4NQ_thumb_d17

Ingredients (makes 12)
1 cup (125g) self-raising flour
⅔ cup (125g) caster sugar
125g butter, softened
2 large eggs
1 teaspoon vanilla extract
2 tablespoons milk
Sweetened thickened cream (or whipped cream)
Good quality strawberry jam
Fresh strawberries, halved (optional)
Icing sugar

BKVg8WuiQsWvmNzfzVXnNQ_thumb_d19

Method
Preheat oven to 200ºC and line a 12-hole muffin tin with patty pans.

Put all of the ingredients except for the milk into a food processor and blitz until smooth. Pulse while adding the milk until just combined.

Divide batter evenly among the patty pans (I know it doesn’t look like much batter, but they will rise a lot).

Bake for 15-20 minutes or until a skewer inserted comes out clean. Transfer immediately onto a wire rack to cool completely.

If you will be serving the cakes immediately, make your thickened cream and cut up your strawberries while the cakes cool.

Using a sharp knife at a 45 degree angle, cut out a circle from the top of each cake and cut it in half to make the butterfly wings. Fill the holes with a teaspoon or so of strawberry jam and then top with cream, butterfly wings and another line of jam. If you like, you can serve them like this in the traditional butterfly cake style (below).

cK1kGHjXTt+7BZ+IryKDzg_thumb_d0b

For me though, I love fresh strawberries so I top each cake with a strawberry half and then sprinkle with icing sugar. Enjoy!

NRowYsLGTmuyv9A1XZrSEg_thumb_d16

NB: filled cakes are best eaten with 6 hours
Recipe adapted from Nigella Lawson’s ‘Cupcakes’ in How to Be a Domestic Goddess. 

SaveSaveSaveSaveSaveSave