Chocolate, Date & Ginger Slice

This slice always reminds me of my wonderful grandparents. Whenever I stayed with Grandma and Grandpa as a kid, in between playing shop in their walk-in pantry, dress-ups, cuddles and “helping” in the garden or kitchen, this slice made an appearance and never lasted long! I’m very lucky to still catch up with them regularly and can confirm that a piece (or two) of this slice is as delicious as I remember.

Ingredients (makes 48 pieces)
1 cup dates, chopped
½ cup uncrystallised ginger, chopped finely
½ cup white sugar
115g butter, cubed
6 Weetbix, crushed (approx. 2 cups)
225g dark chocolate

Method
Line a 28cm x 18cm slice tin with baking paper.

Cook dates, ginger, sugar and butter in a small saucepan over a medium heat until the butter is melted and the dates are soft. Stir in Weetbix and ensure the mixture is well combined.

Press firmly into lined slice tin and refrigerate 30mins or until set.

Melt the chocolate. Spread a thin layer of chocolate over the top and leave to set at room temperature.

Cut into approximately 48 pieces. Enjoy!

Recipe from Roma Hammond via Grandma

Advertisement

Passionfruit Slice

Passionfruit is one of my favourite fruits – I love its intense tangy flavour which, to me, tastes like summer. It should come as no surprise then, that I love this slice which pairs passionfruit with lemon in a creamy cheesecake-like layer on top of a chewy coconut-ty base – delicious! I also love it because it’s so quick and easy to make, perfect for whipping up quickly the night before a morning tea at work.

thumb_IMG_0256_1024

thumb_IMG_0280_1024
It smells so good that Bailey wouldn’t leave it alone! 

Ingredients (makes 24 pieces)
1 cup self-raising flour
1 cup desiccated coconut
½ cup caster sugar
100g butter, melted
395g can condensed milk
½ cup fresh lemon juice
4 tablespoons passionfruit pulp

thumb_IMG_0257_1024

Method
Preheat oven to 180°C. Line a 16 x 26cm pan with non-stick baking paper, allowing it to hang over the sides.

Combine the flour, coconut, sugar and butter in a large bowl. Use your hands to bring it together into a dough. Using a metal spoon, press dough into the base of the prepared pan.

Bake for 12 minutes or until lightly golden. Set aside to cool.

Reduce oven temperature to 150°C. Whisk together condensed milk, lemon juice and passionfruit pulp in a large bowl until well-combined. Pour onto the cooled base and spread evenly.

Bake for 15 minutes or until just firm. Set aside to cool completely before cutting into squares. Enjoy!

thumb_IMG_0282_1024
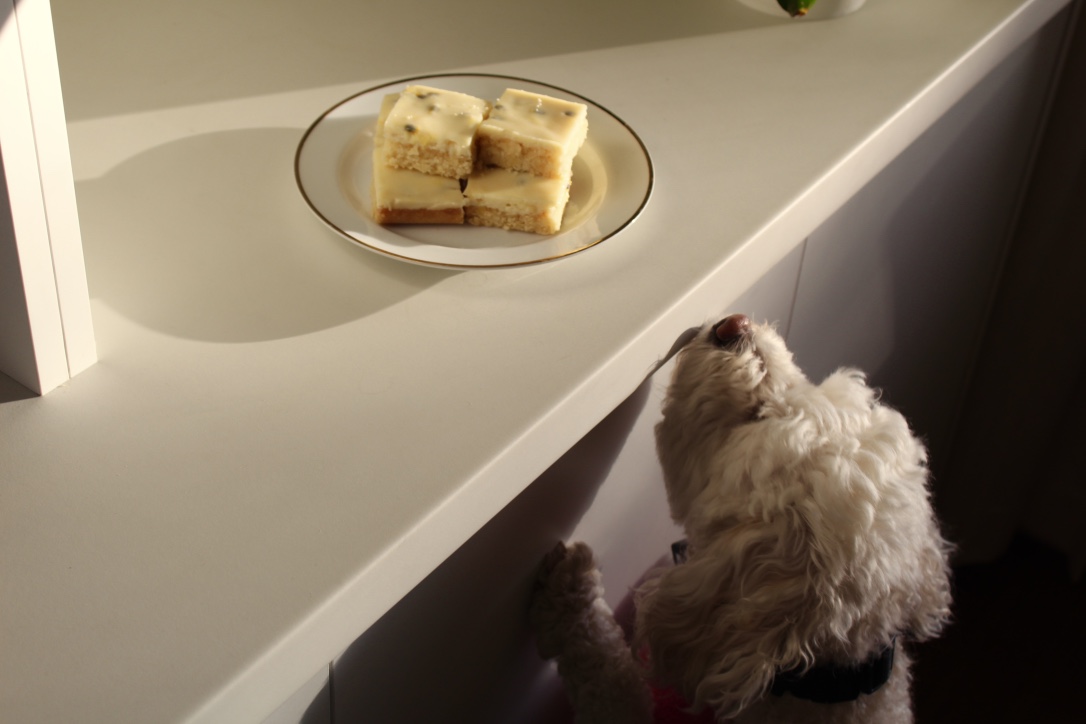
Adapted from Passionfruit Slice on Taste.com.au


Salted Caramel Blondies

These delicious blondies taste like a cross between choc chip cookies and cake. Be careful not to over cook them as they’re definitely best when fudgy.

GlGdzQI2RmuJf%EzUYw+DQ_thumb_1b88

Z7qs2o8yQdeQ+yZpNoD%Yw_thumb_1b8b

Ingredients (Makes about 25 blondies)
180g unsalted butter, melted
1 ½ cups lightly packed brown sugar
2 eggs
2 teaspoons vanilla extract
1 ½ cups plain flour
Sea salt flakes
½  cup white chocolate melts
½ cup white chocolate chips
½ cup milk chocolate chips (optional)

Method
Preheat the oven to 190°C (or 170 fan-forced). Line a 20cm square baking tin with baking paper.

Mix the melted butter and brown sugar together in a large bowl. Beat in the eggs, one at a time, and then the vanilla extract.

Gently stir in the flour and a pinch of sea salt. Carefully fold in the chocolate, making sure it is evenly dispersed.

Spoon the mixture into the prepared baking tin and smooth the top with a spatula. Sprinkle a couple of pinches of salt over the top and then bake for 20-30 minutes, or until the outside is cooked and the middle has a slight wobble.

Remove from the oven, sprinkle once more with a pinch or two of salt, and allow to cool for 30 minutes in the tin. Gently remove the blondie from the tin by the baking paper and leave to cool for a further 5-10 minutes on a cooling rack.

Once cool, cut into squares. Enjoy!

wojLkPEET7SYVKkYi%3Krw_thumb_1b8c

Adapted from Callum Hann’s ‘Salted Dirty Blondies’ in I’d Eat That, 2014.


Chocolate Mint Fudge

image2-3

St. Patrick’s Day is almost upon us and so I am all about the green in my baking at the moment! This fudge is super quick and easy – taking only a few minutes cooking time from start to finish. I love this fudge as it isn’t too sweet (the major issue I have with most fudge), and I’m a sucker for the mint/choc combination.

Feel free to omit the chocolate drizzle on top if you wish, and if you prefer a marbled finish you can make the 2 fudge layers at the same time, and swirl them together in the tray instead of layering them.

Ingredients
1 ½ cups dark chocolate melts
400ml can sweetened condensed milk
1 ½ cups white chocolate melts
Green food colouring
Peppermint essence
Approx. ½ cup dark chocolate melts (melted) to drizzle on top

Method
Line a rectangular baking tray with baking paper (a small tray will give you fewer pieces of thick fudge, larger will give you more pieces of thinner fudge – it’s up to you!).
In a small saucepan over a low heat, melt the dark chocolate melts with half of the condensed milk, stirring occasionally.

Spread evenly into the pan and chill in the fridge.

While the chocolate layer is chilling, melt the white chocolate and remaining condensed milk on the stovetop on a low heat.

Add peppermint extract to taste (I used 1 teaspoon) and a drop or two of green food colouring.

Spread evenly over chilled chocolate layer.

Put in the fridge to set.

After approximately 10 minutes in the fridge, melt the remaining dark chocolate melts and drizzle over the fudge.

Leave in the fridge until set and then cut into small squares. Enjoy!

image2

Note: can be stored in an airtight container in the fridge for up to a fortnight.

image1-4

Adapted from ‘Choc Mint Fudge’ on Grab Your Spork.com.

Caramel Slice

I love caramel slice but am constantly disappointed by the thick-bottomed, chalky and bland mass-produced stuff you buy at many cafes around the place. Instead, when I can be bothered, I make my own… and it’s amazing (if I do say so myself). The recipe originally came from my Mum’s high school cookbook and I am eternally grateful to the Annesley College Mothers’ Club for sharing it. It is very simple to make, using very few ingredients, and is perfect for occasions when you’re asked to ‘bring a plate’. The hardest part is not eating it all in one sitting (which is why I often make a double batch).

NP53UiU1TMeOxO8TwgJ6wQ_thumb_1bba

Ingredients
Base:
185g plain flour
125g butter, softened
60g sugar

Caramel layer:
125g butter, chopped
125g sugar
2 tablespoons golden syrup
½ tin condensed milk

Topping:
150g dark cooking chocolate

PZ00IqsIQYumKjleUTOAJw_thumb_1bb3

Method
To make the base, grease and line a swiss roll tin (or lamington tin – whatever you have, it will just alter the thickness of each layer) and preheat the oven to 180°C (or 160°C fan-forced). Rub butter into flour, add sugar and press evenly into the prepared tin. Bake for 20mins or until golden brown.

To make the caramel, put the butter, sugar, golden syrup and condensed milk into a heavy-based saucepan and boil for 5 minutes, stirring all the time (pay particular attention and scrape the bottom of the pan, otherwise it will burn).

Pour over the base. Leave to cool for about an hour.

Finally, to make the topping, melt the chocolate in the microwave or on the stovetop. Pour over the caramel.

Once set, cut into even squares using a knife dipped in hot water between each slice (so it cuts easily and leaves the layers intact).

Enjoy!

Vr1S1ybCQoGa7tYGZOjc6A_thumb_1bb7

Adapted from ‘Caramel Slice’ in the Annesley College Mothers’ Club Cookbook

Caramel & Pear Upside-down Cake

First off, I would like to apologise profusely for my extended hiatus! No, I didn’t hibernate through winter (quite), instead I was on holidays in the Greek Islands and then my time was filled with Birthdays, work & uni assessment.

photo

However, today I have an absolutely delicious recipe for you; one so good that only moments ago I finished gobbling up a piece and felt I had to share it right away!

EAD3A10D-9E61-4442-8317-8BFCF2DD97B5_1_105_c

Ingredients (serves 8)
175g butter
2/3 cup brown sugar
2 large pears, peeled & sliced thinly
½ cup white sugar
3 eggs
1 teaspoon ground cinnamon
1 teaspoon ground nutmeg
1 teaspoon vanilla essence
¾ cup almond meal
1 cup self-raising flour
1/3 cups milk

725BCEDA-DBB2-456E-A96A-E776E0F993B1_1_105_c

Method
Preheat the oven to 180°C (160°C fan-forced) and grease and line a round 23cm springform cake tin.

Melt 55g of the butter in a small saucepan and then stir in brown sugar over a low heat until combined into a caramel.

Pour the caramel mixture into the base of your prepared tin. Arrange your pears on the caramel. I tried to make neat circles, but this was a challenge as my pear was quite soft!

Using electric beaters, cream the butter and sugar. Once combined, add eggs, almond meal , vanilla and spices and beat until combined. Finally, add flour and milk and beat until just combined.

Gently spread the batter over your pears and bake in the oven for between 50-60 minutes (until a skewer inserted in the centre comes out clean).

Allow the cake to sit in the tin for around 15 minutes before turning out.

Serve with cream or ice-cream and a dusting of icing sugar if desired.

5A971CA0-7ED4-4C61-A00D-947FCC5B879E_1_105_c

Recipe adapted from ‘Caramel pear cake’ on BestRecipes.com.au


Cinnamon Rolls

Inspired by the movie The Proposal which features some divine looking homemade cinnamon rolls, I decided to give making them from scratch a go. I did lots of research & eventually found a recipe on Pinterest which promised me a quick and easy bake using everyday ingredients. I was a little skeptical that they could possibly be considered ‘easy’, but they worked perfectly. The rolls are light, fluffy and packed full of sweet cinnamon flavour. They also fill your home with the most heavenly aroma and are especially amazing eaten fresh from the oven while still warm.

EYz0Pih7QumWBx1%tKn+TQ_thumb_cca

Ingredients (Makes 12)
1 cup milk
55g butter, chopped
3 ¼ – 3 ½ cups flour
1x 7g packet instant yeast
¼ cup white sugar
1 egg

Filling
1 cup brown sugar
1 ½ tablespoons ground cinnamon
115g butter, very soft

Cream Cheese Frosting
¾ cup icing sugar
13 tablespoon cream cheese
1 teaspoon vanilla
1 tablespoon of milk

CEb8sd2SQqGHRCOsygyK2g_thumb_cd1

Method
Heat milk & butter in the microwave (about 1 and a half minutes) or until the butter is at least partially melted. Stir using a small whisk, and set aside.

In the large bowl of your stand mixer (using the paddle attachment), mix together 2 cups of the flour, the yeast and the white sugar. When the milk mixture is warm but not hot, add it to the flour mixture along with the egg and beat for about 1 minute, or until well combined. Switch to the dough hook attachment and add remaining flour, half a cup at a time, until the dough just leaves the sides of the bowl (it should be very soft and slightly sticky). Continue with the dough kneading for another 5 minutes. Turn dough onto a floured surface and let rest while you make the filling.

To make the filling, ensure butter is soft and mix in the brown sugar and cinnamon until you have a paste.

To assemble, roll the dough into a large rectangle (around 30cm x 35cm) and spread brown sugar mixture evenly over the surface. Roll up from the longer side of the rectangle and pinch the edges to close. Score the roll into 12 equal pieces and then cut into rolls (dental floss can work well here!!).

Place into a 23cm by 33cm (or similar) pan that has been sprayed with cooking oil, cover with a clean tea towel and let the dough rise in a warm place for half an hour. Set oven to 180°C.

When the rolls have finished rising, bake for 15-20minutes or until light golden brown.

Make the icing by beating all ingredients together until smooth. Drizzle rolls with icing while still warm. Enjoy!

B3JNvDQuTX6HEnYoX0YlkQ_thumb_cc7

Adapted from the ‘Everyday Cinnamon Rolls’ recipe on ourbestbites.com

6Jyq0TgmWSlyatAMspQ_thumb_ccc

Notes:
– These rolls can be frozen at almost any point (before rising, after rising or when finished) and keep well in the freezer when covered in cling wrap and foil – then you have a delicious treat in a heart beat!
– If you don’t have a free standing mixer, use handheld beaters to combine the dough initially and then knead the dough by hand for around 7 minutes.

Simple Sugar Cookies

Happy 1st birthday Bakerholics Anonymous! To celebrate this milestone I thought I would share a recipe that I have only recently discovered but used frequently. These sugar cookies are so versatile – you can cut them into any shape you like, flavour the dough with cocoa or cinnamon, and decorate however you desire.

Image

Ingredients (makes approx. 50 small heart cookies)
250g butter
1 cup sugar
2 teaspoons vanilla
1 egg
3 cups plain flour
1 ½ teaspoons baking powder

Icing
2 cups icing sugar
1 tablespoon or so of melted butter
1 teaspoon vanilla
Food colouring of your choice (I used Wilton Red food gel)

Method
Cream butter, sugar & vanilla using electric beaters until well combined.

Add the egg and beat until light and fluffy.

Using a wooden spoon or silicone spatula, mix sifted dry ingredients into wet ingredients until a dough forms. Divide into 2 roughly equal pieces, cover with glad wrap (or plastic wrap) and refrigerate for an hour.

Preheat oven to 180°C (160 fan-forced). Roll out dough onto a lightly floured surface using a rolling pin until you reach your desired thickness (I like mine around 6-7mm) and cut out shapes using cookie cutters.

Place onto a baking tray (they don’t have to be spread out much as they don’t really expand) and bake for 5-8 minutes, or until lightly golden.

While the cookies cool, make the icing by combining all ingredients into a bowl. Add more butter if the icing is too thick or more icing sugar if it is too thin.

Once cool, spread the icing on the cookies with a spatula and decorate as desired.

ImageAdapted from ‘Alice & Lois.com’ – ‘The Best Valentine Sugar Cookies’