The simple addition of red M&Ms, candy eyeballs and pretzel halves turn this family favourite dessert into a Christmas classic. Start this dessert at least 8 hours ahead of serving (I make the caramel the night before).
Ingredients (serves 10-12) 1 x 395g can sweetened condensed milk 2 teaspoons vanilla extract Big pinch sea salt flakes 1½ cups plain flour 3 tspns icing sugar 140g cold butter, chopped 1 egg yolk 2 tblspns water 150g dark chocolate melts ½ cup thickened cream 12 red M&Ms 24 candy eyes 12 pretzels, cut in half to look like antlers
Method
To make the caramel filling, put the unopened can of condensed milk into a large saucepan and fill with enough water to just cover the to of the tin. Bring the water to the boil, then turn down the heat until the water is simmering. Keep simmering for 3½ hours, ensuring you top up the water regular so the can is still fully submerged. Allow to cool for 30 mins in the water before carefully removing. Carefully open the can and scrape the caramel into a small bowl. Add vanilla and sea salt flakes to taste.
To make the pastry, put flour, icing sugar, butter, yolk and water into a food processor and process until just come together. Press dough into a ball, knead gently on a floured surface until smooth; cover, refrigerate 30 mins.
Preheat oven to 180°C fan-forced. Lightly grease a 24cm flan tin. After resting, roll dough on floured surface until large enough to line the tin. Lift pastry into tin, ease into sides and trim the edge.
Place tin on an oven tray, line pastry with baking paper and fill with pie weights or uncooked rice. Bake for 15 mins then remove baking paper and weights and bake, uncovered for a further 15-20 mins or until pastry case is golden browned and crisp. Leave to cool.
Once the pastry is completely cool, spoon in the caramel and smooth the top with a silicone spatula. Refrigerate for 30 mins.
To make the chocolate ganache, place the dark chocolate melts and cream in a medium saucepan over a medium heat. Stir continuously until the chocolate has melted and the ganache is glossy and smooth. Set aside for a couple of minutes to cool slightly.
Pour the chocolate ganache onto the caramel layer and refrigerate for a further 30 mins to set .
Once set, cut the tart into 10-12 slices. Decorate each slice with a red M&M nose, 2 candy eyes and 2 pretzel antlers. Serve and enjoy!
Tart recipe adapted from Beatrix Bake’s salty dulce de leche, the Australian Women’s Weekly pastry & Donna Hay’s chocolate ganache. Reindeer inspiration from Instagram.
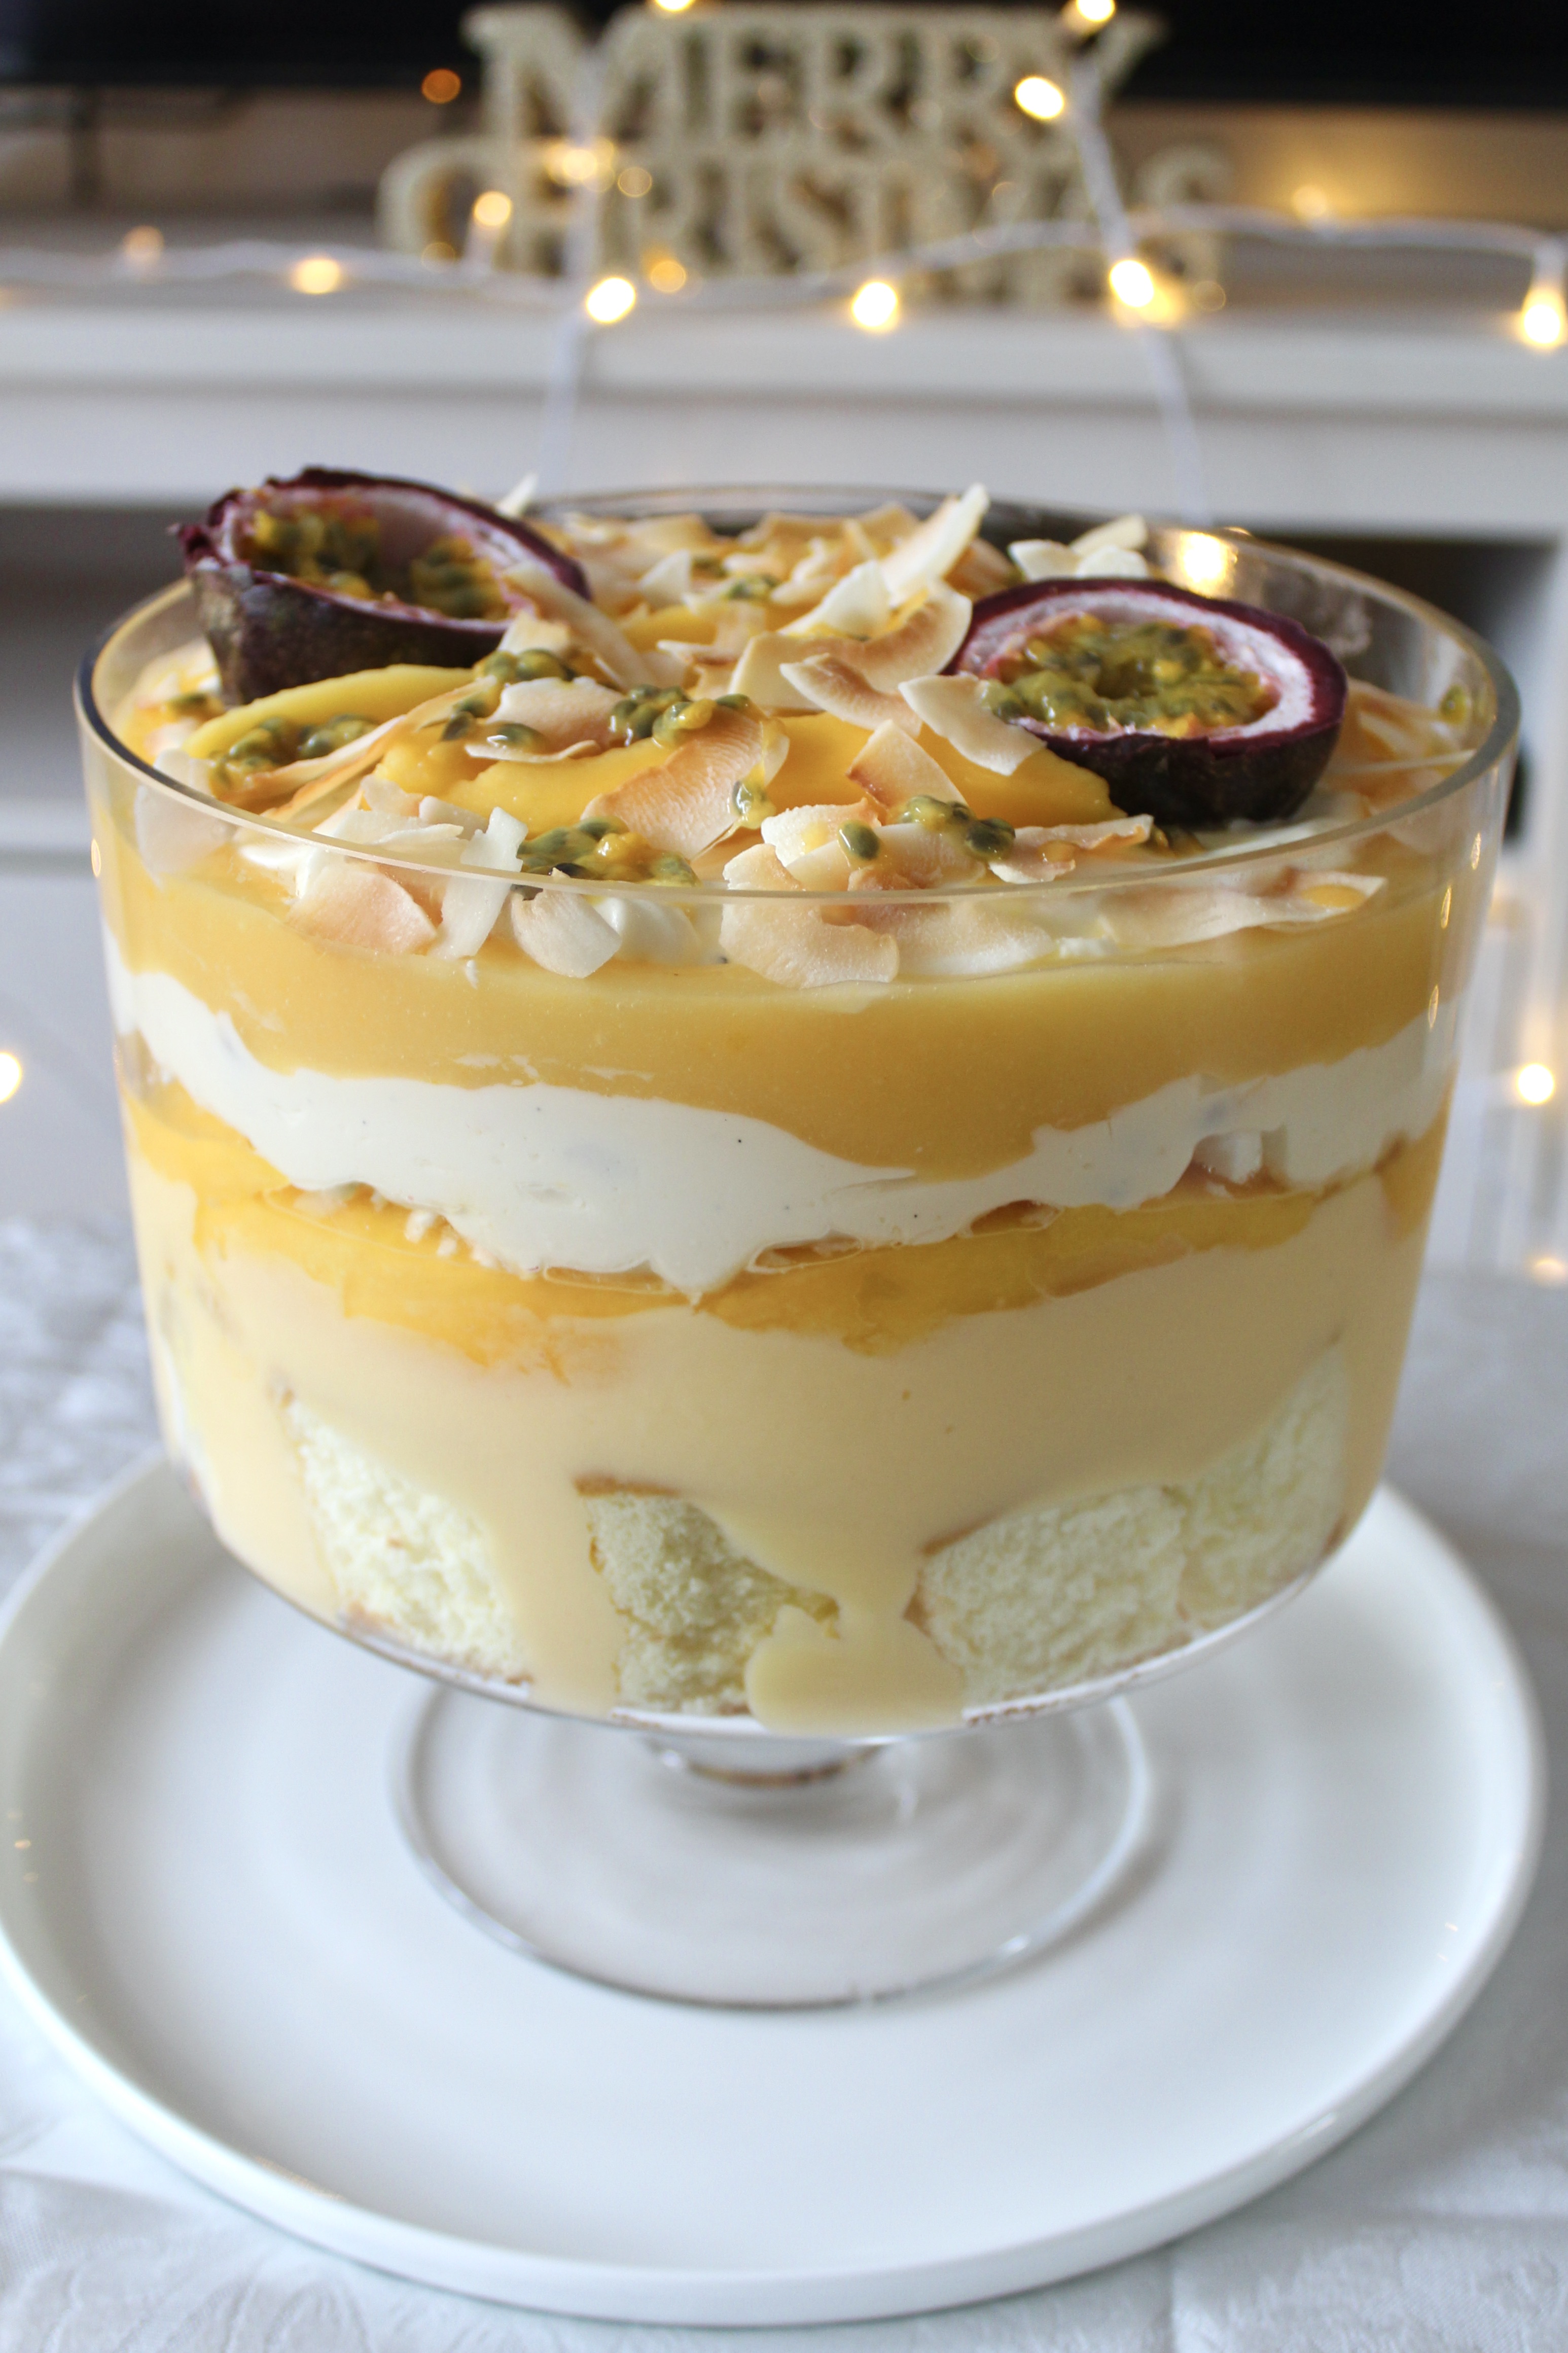
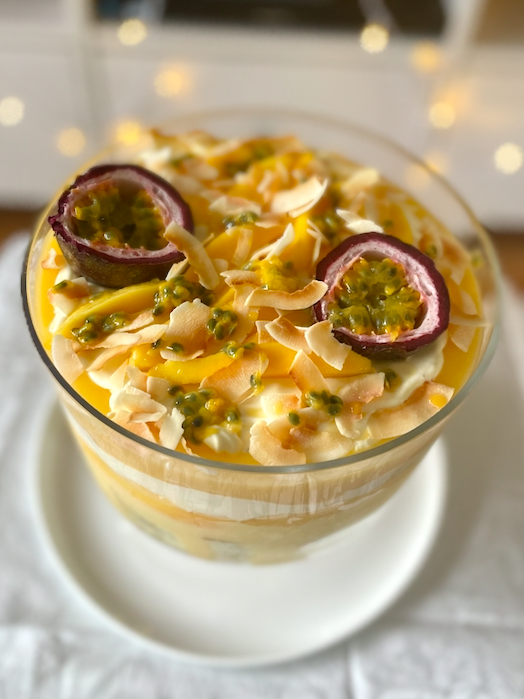
This trifle is a cinch to put together and can be made ahead of time but looks amazing – making it the perfect Christmas dessert! Everyone will love the classic summery flavours and textural surprises and there’s no booze, so the whole family can enjoy.
Ingredients (serves 10-12) 2 cups luscious lemon curd (or bought curd if you prefer) 8 passionfruit 600ml thickened cream 1 tablespoon icing sugar 2 tspns vanilla extract 1 vanilla sponge cake, cut into squares (I bought mine, but you could use this recipe to make your own) 900g vanilla custard (I used Paul’s Double Thick Custard in French Vanilla) 2 mangoes (I used Kensington Pride) 1 packet meringue kisses ½ cup coconut flakes
Method
Make the lemon curd and refrigerate until cool.
To make the passionfruit cream, combine cream, vanilla and icing sugar in a large bowl and beat on high speed until very thick. Gently stir through the pulp of 5 passionfruit.
Toast your coconut flakes in a frypan over a medium-high heat until golden brown and fragrant.
Cut up the mangoes into long slices, discarding the skin and pit.
To assemble the trifle, place an even layer of sponge cake squares in the bottom of the dish.
Top with vanilla custard and approximately two-thirds of the mango slices.
Crush approximately 10-12 mini meringue kisses and sprinkle over the top of the mango.
Top with approximately two-thirds of the passionfruit cream mixture and the pulp of an extra passionfruit.
Gently spoon on the lemon curd, taking care not to mix it with the cream.
Allow to set in the fridge.
Just prior to serving, spoon the remaining passionfruit cream onto the curd and then top with remaining mango slices, passionfruit pulp (I left a whole passionfruit) and toasted coconut flakes.
Recipe inspired by delicious. magazine’s ‘Mango Dacquiri Trifle’, December 2022/January 2023 issue.
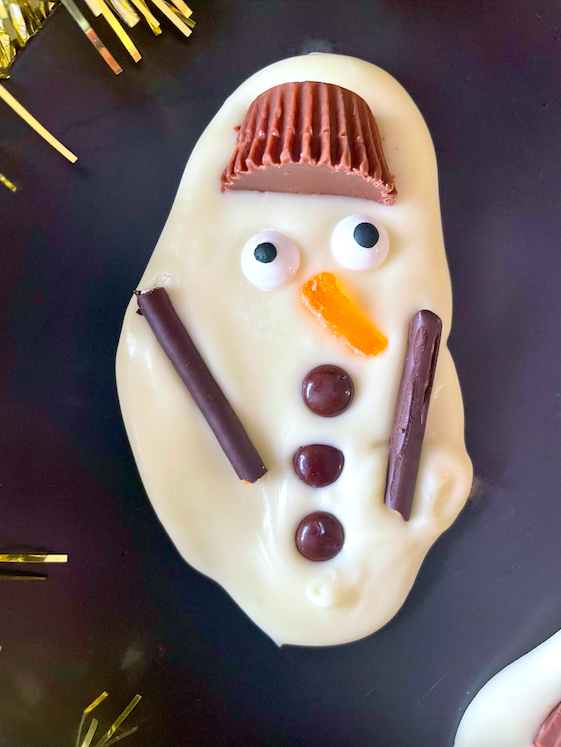
These adorable chocolate snowman puddles are such a fun and simple no-bake Christmas treat. Perfect for making with little ones – you really can’t go wrong!
Ingredients (makes 8) 290g packet white chocolate melts 1 packet mini Reese’s Peanut Butter cups 16 candy eyeballs 1 packet of jubes 1 packet mini M&Ms 1 packet chocolate Pocky sticks
Method
For the snowman’s hat, gently unwrap the mini Reese’s Peanut Butter cups and cut in half
For the snowman’s nose, thinly slice orange jube/s into 8 narrow triangles.
For the snowman’s arms, cut 16 4cm pieces of Pocky sticks, using only the chocolate section.
For the snowman’s buttons, separate out the red, green and brown mini M&Ms and ensure you have enough for 3 buttons per snowman.
Melt the white chocolate in a microwave-safe bowl on medium in 30 second bursts, stirring with a silicone spatula after each burst, until melted and smooth. Set aside to cool for 2 minutes.
Meanwhile, line 2 large baking trays with baking paper.
Divide your melted white chocolate into 8 roughly even puddles – 4 per tray.
Working quickly and using the picture as a guide, arrange the peanut butter cup ‘hat’, 2 eyeballs, jube nose, 3 M&M buttons and pocky stick arms on each puddle.
Leave to set at room temperature (or in the fridge if it’s warm). Serve and enjoy!
Recipe adapted from Woolworths fresh ideas magazine, December 2022.
I am not usually a fan of this divisive brassica, but surprisingly love these crispy kale chips. They work well as a snack on their own (my favourite way to eat my greens!) but can also be added as a garnish to a main course or soup.
Ingredients (serves 4 as a snack) 350g kale, washed and dried 2 tablespoons olive oil 2 teaspoons white vinegar 1 teaspoon salt flakes Generous grind of pepper
Method Preheat the oven to 140°C.
Strip the kale leaves from the stalks of the kale and tear into pieces. Place into a bowl with the remaining ingredients and toss to coat.
Spread the kale leaves in a single layer on wire racks over baking trays. Bake for 15-20 minutes or until crunchy.
Remove from the oven and leave to cool and crisp up further before serving. Enjoy!
Recipe adapted from Alice Zaslavsky’s In Praise of Veg
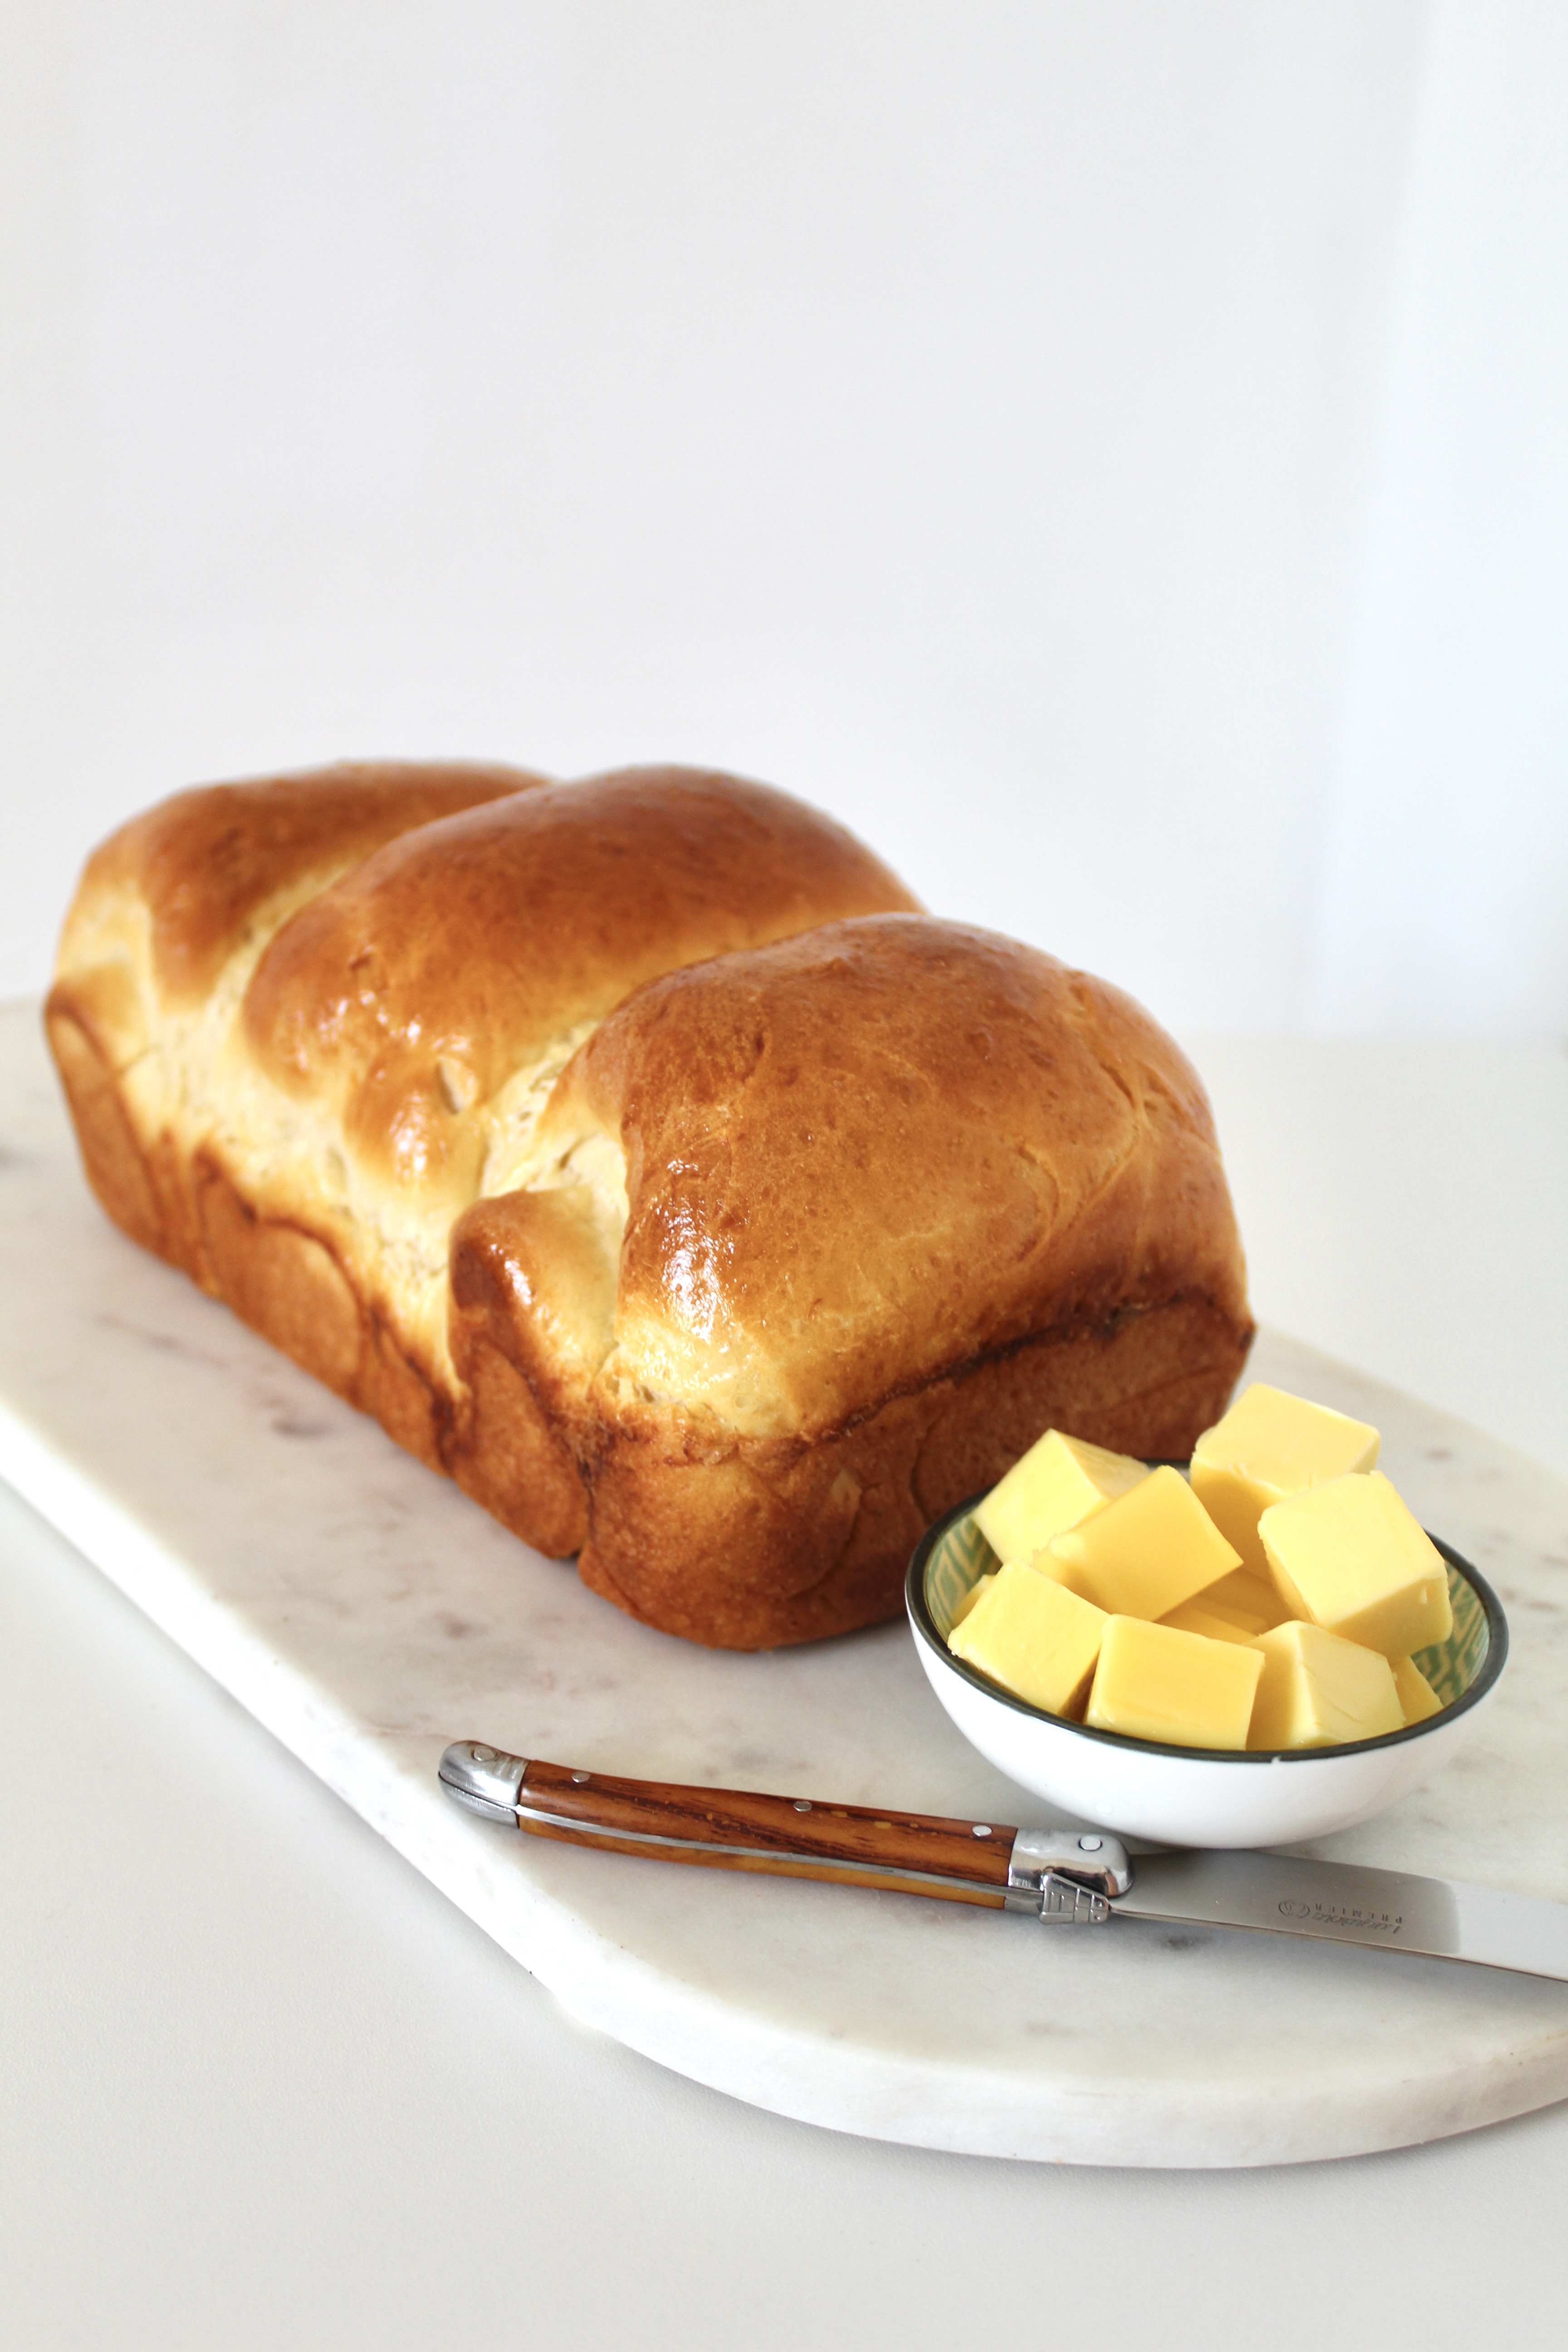
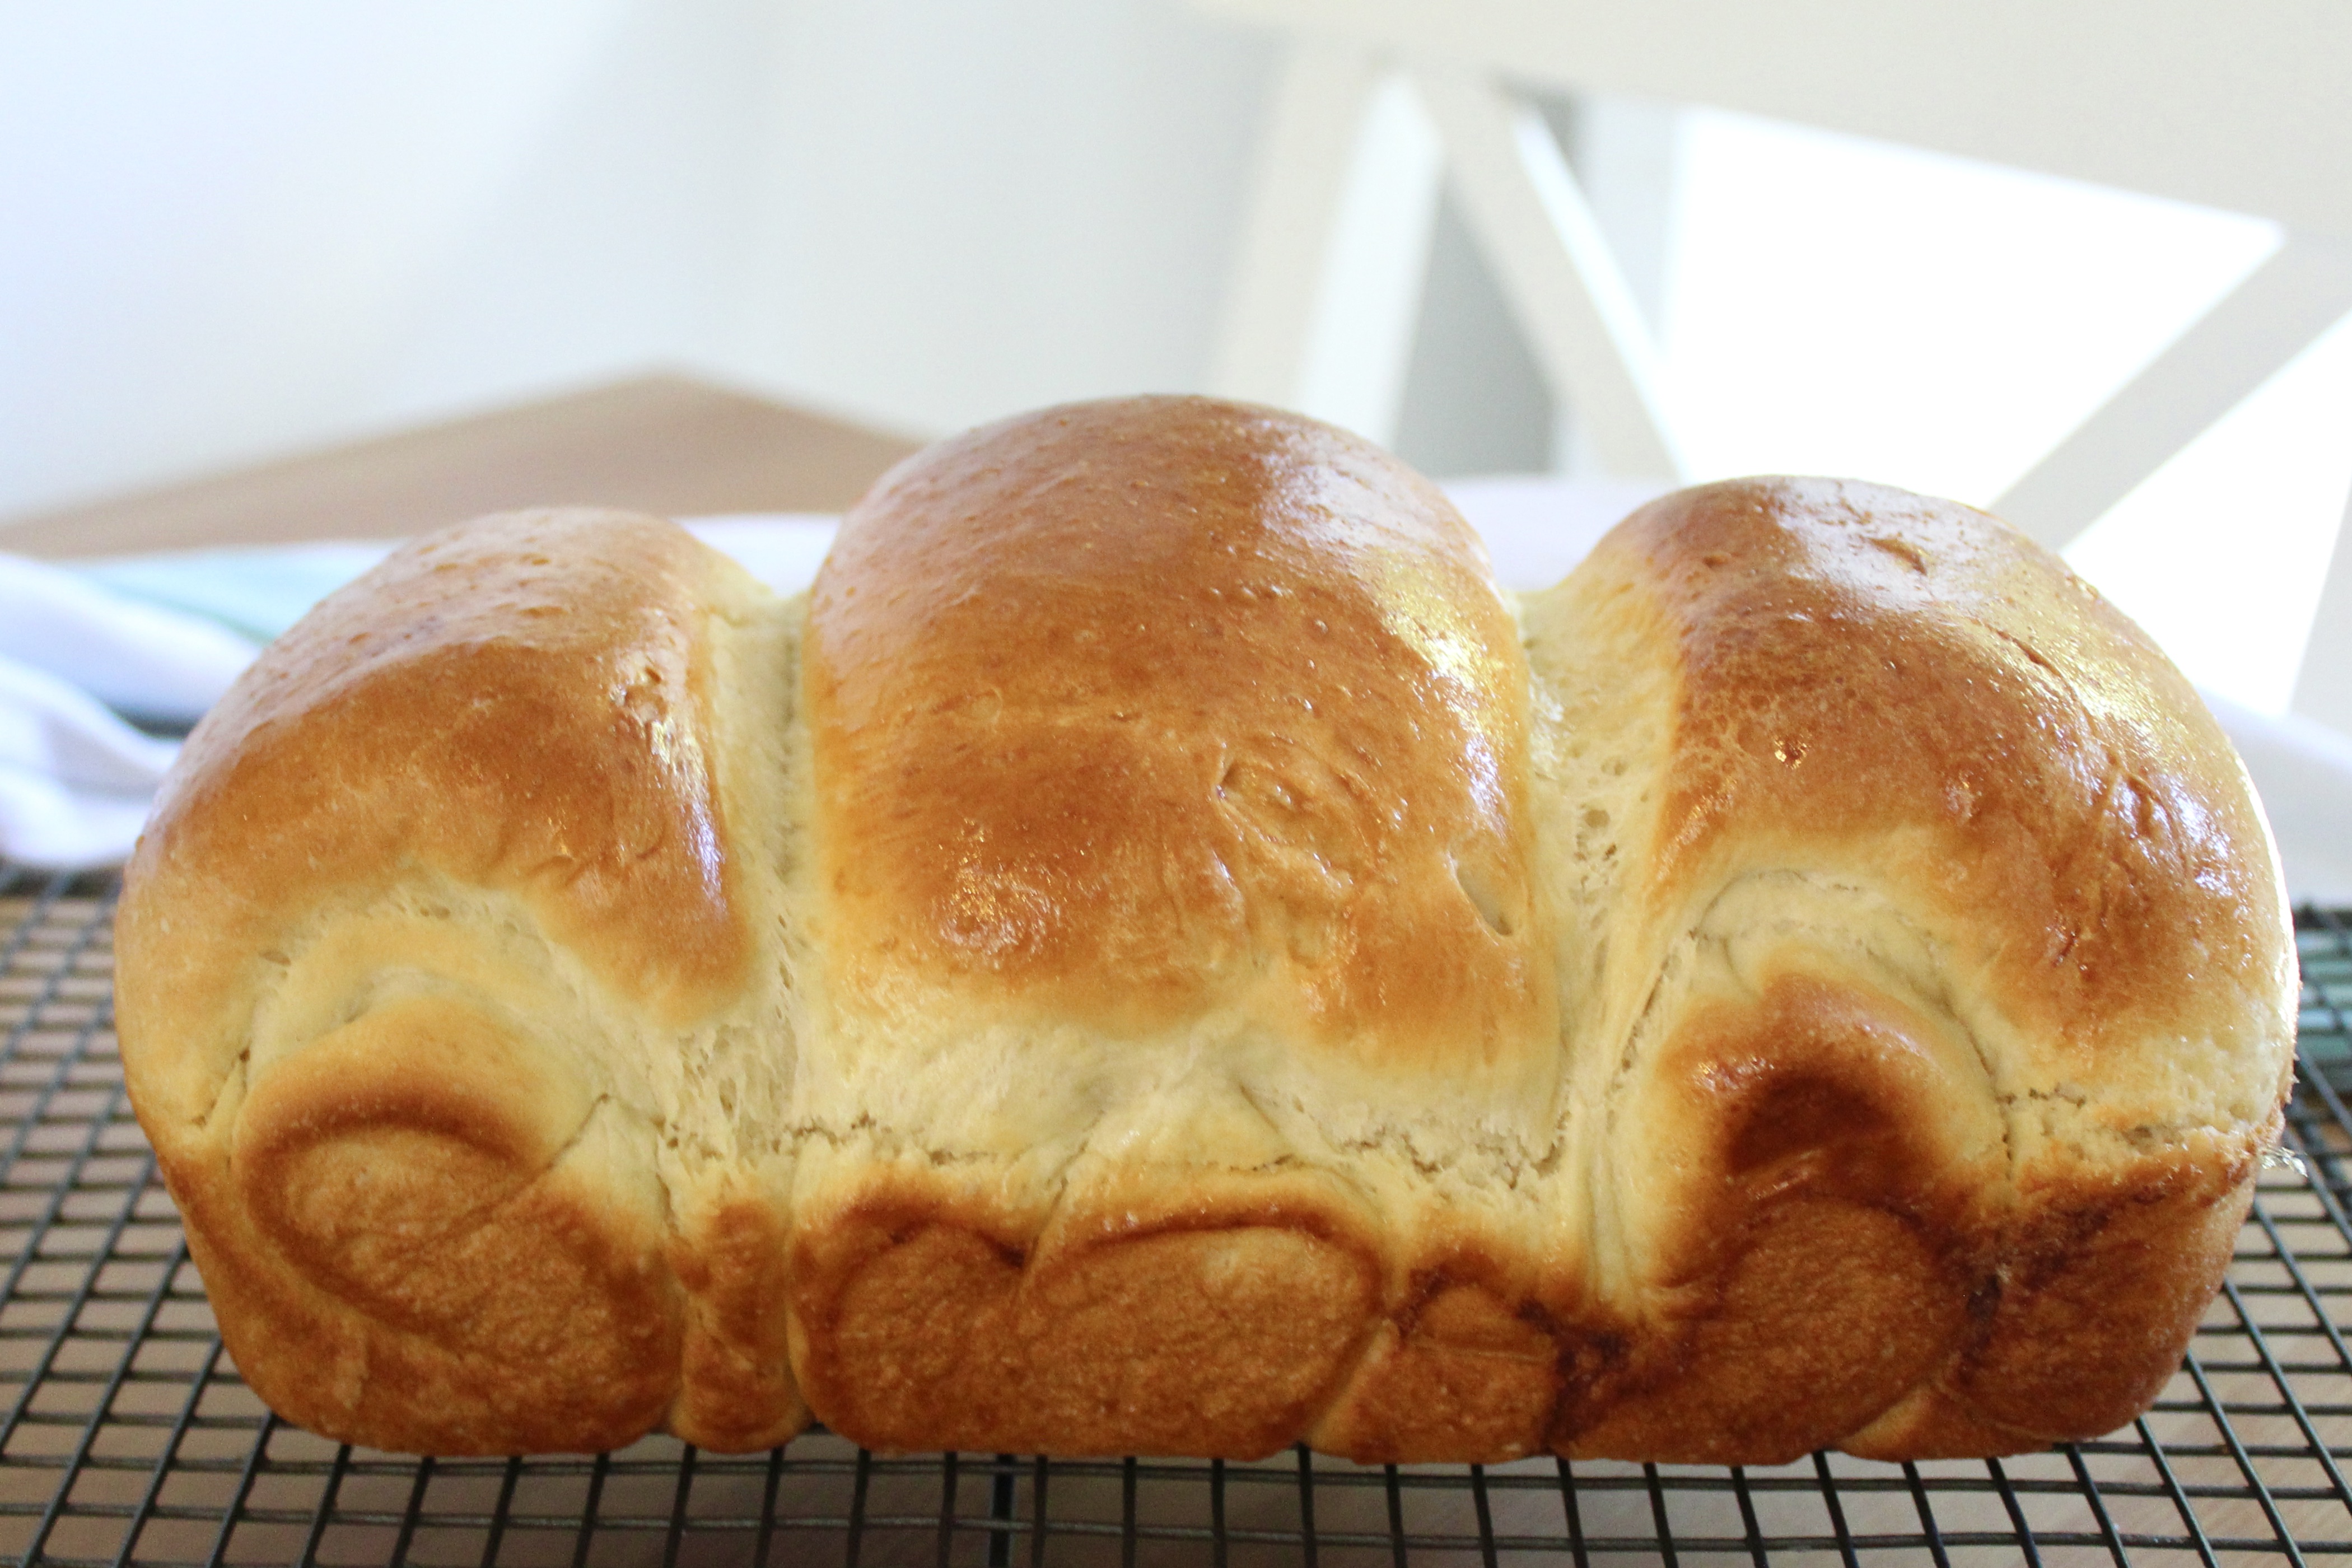
This bread is without a doubt the lightest, fluffiest loaf you’ll come across and with its shiny golden exterior and featherlight white centre, it’s as much a joy to look at as it is to eat. It’s also really simple to make so is perfect for bread making beginners.
This version uses a tangzhong method of making a roux out of flour and water to ensure soft, fluffy bread every time.
Ingredients (makes 1 large loaf) Tangzhong 25g bread flour 90ml water
Loaf 300g bread flour 7g sachet of fast acting yeast 120ml milk (lukewarm, not hot) 30g butter 40g caster sugar 1 egg
Glaze 1 egg
Method
Add water and flour to a small saucepan, whisk until free from lumps. Place over a low-medium heat and stir constantly until it thickens. Set aside to cool.
Once cooled, add the egg to the tangzhong and stir until combined. Add the bread flour, yeast, milk, butter, sugar and eggy tangzhong mixture to the large bowl of a standmixer. Use the dough hook of the standmixer on a medium spped to combine and knead the dough until it is no longer sticky (approximately 10-15 minutes). Add a small amount of extra flour if required.
Transfer dough to a lightly oiled bowl. Cover with a clean tea towel and leave to rise in a warm place until doubled in size (approximately an hour).
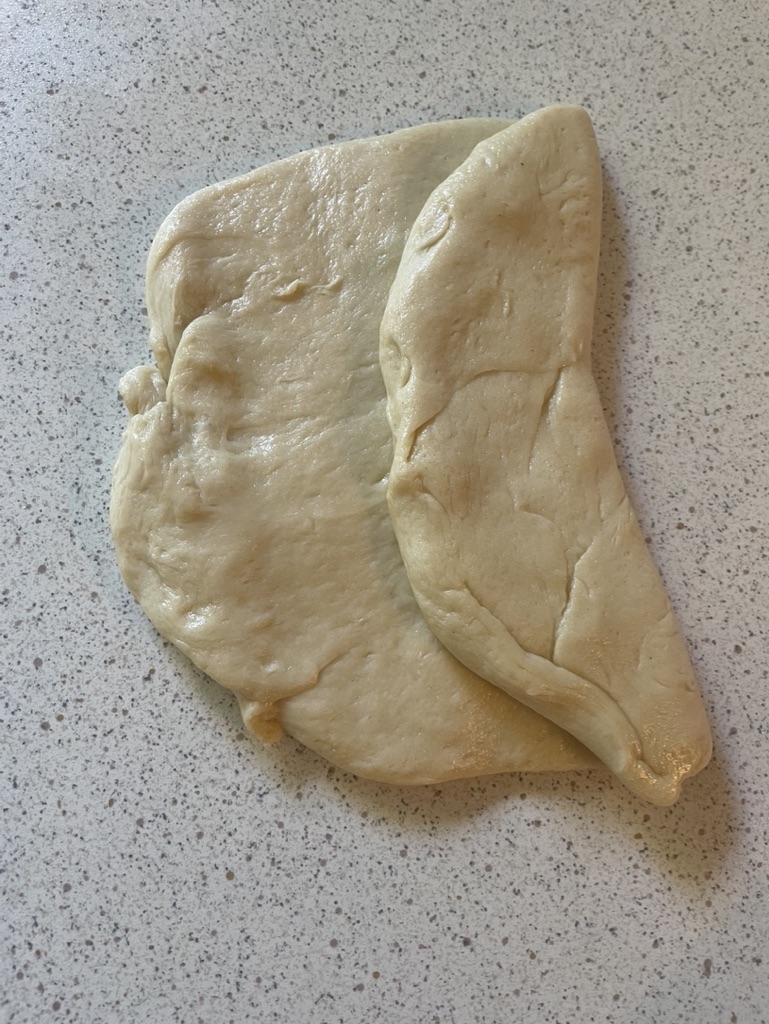
Once it has risen, punch down the dough and divide into three equal pieces. Set the other pieces to one side and use a rolling pin to shape a piece into an oval shape.
Fold one side of dough over to halfway across the remaining dough then fold the other side on top(see photos below). Roll up the piece of dough from the short side (bottom to the top of the middle picture below) as you would a cinnamon roll.
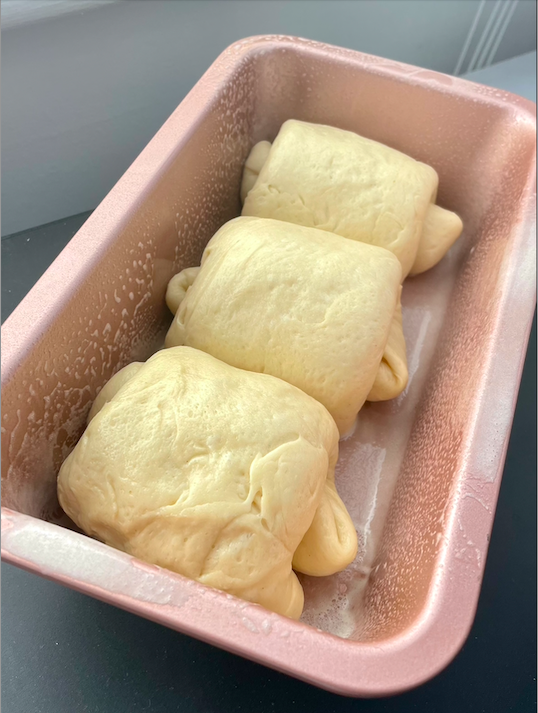
Repeat with the other pieces of dough then put all three rolls of dough in an oiled loaf pan.
Cover and leave to rise again until the loaf is just reaching the top of the pan.
Once nearly risen, preheat oven to 175°C (160°C fan-forced). Lightly beat the egg and brush the top of the loaf with egg wash.
Bake the loaf for approximately 30 minutes until golden brown. If it browns too fast, loosely cover with foil for the last part of cooking. Turn onto a cooling rack to cool before slicing.
Recipe adapted from Caroline’s Cooking ‘Japanese milk bread’.
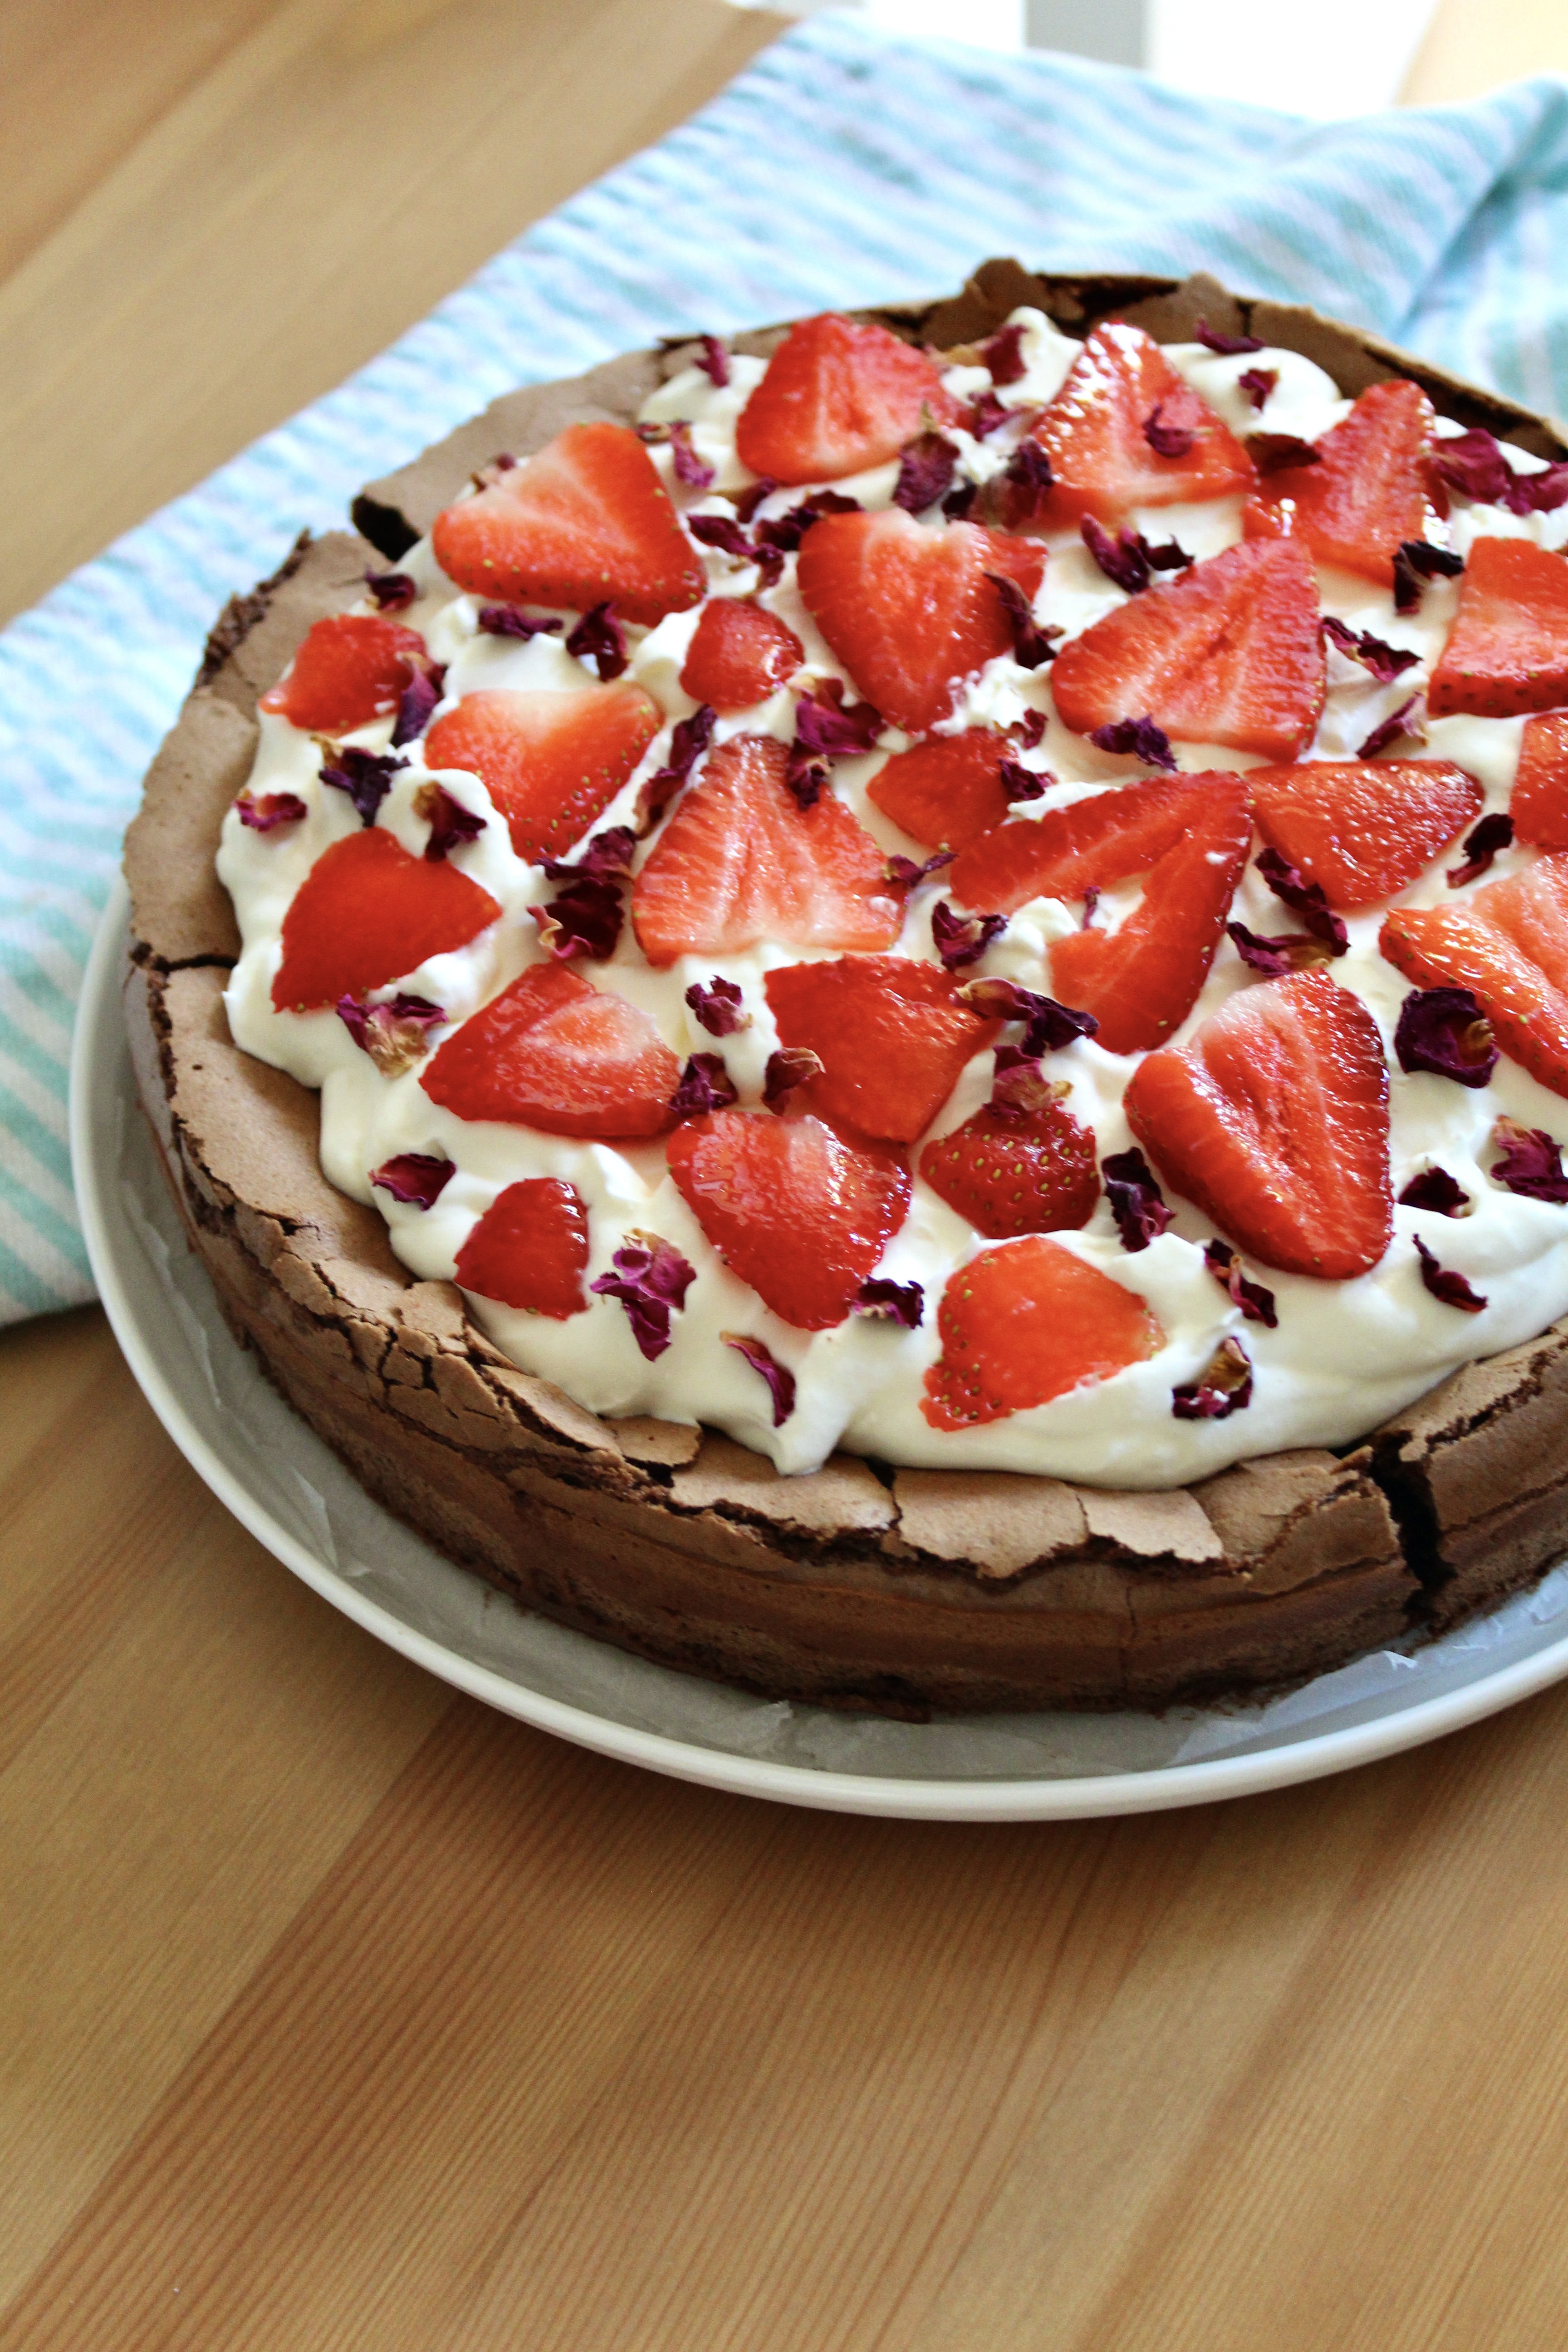
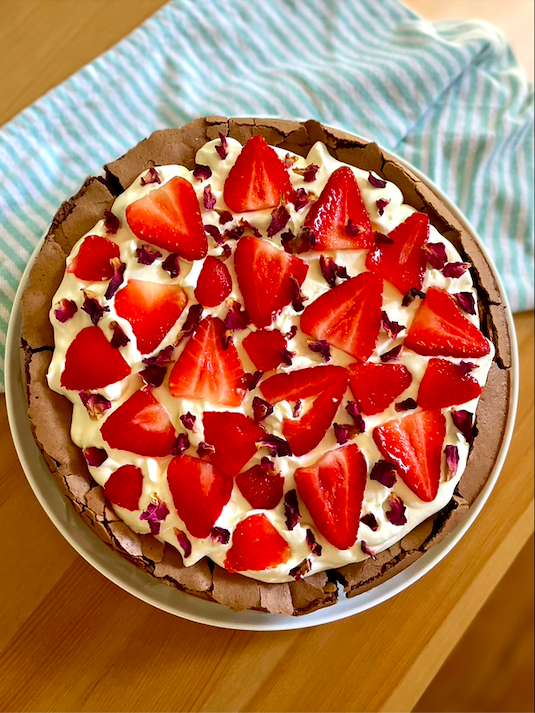
There’s something very freeing about a cake that’s supposed to crack, and that’s exactly what this one does – right before your eyes. But it’s the incredibly light, cloud-like texture of this cake that makes it so special (and gives it its name) due to its airy, flourless batter and whipped cream topping.
Ingredients (serves 8-10) 250g good quality dark chocolate, chopped 125g butter 6 eggs 175g caster sugar 300ml thickened cream 2 teaspoons icing sugar Fresh berries Edible rose petals (optional)
Method Preheat oven to 180°C (160 fan-forced). Grease and line the base of a 23cm springform tin.
Melt the butter in a small saucepan. Once melted, remove from the heat and stir in the chocolate until smooth and glossy.
Separate 4 of the eggs and set the whites aside. Using electric beaters or a stand-mixer, beat the yolks and remaining 2 whole eggs with 75g of the caster sugar on high speed for 3-4 minutes or until really creamy. Gently fold in the melted chocolate mixture.
In another bowl, whisk the eggwhites until they’re just frothy, then slowly add the remaining caster sugar while whisking until the mixture holds soft peaks.
Add a table spoon of the whisked eggwhites to the chocolate mixture to loosen it, then gently fold in the rest, maintaining as much of the air in the mixture as you can.
Pour into the prepared tin and bake for approximately 35 minutes or until it is no longer wobbly around the edges (but still soft in the centre).
Leave the cake in the tin to cool.
Once cooled, whip the cream and icing sugar until very thick and velvety.
Run a knife around the edge of the cake to loosen it from the tin and carefully transfer to a serving plate.
Top with the whipped cream, berries and rose petals. Enjoy!
Recipe adapted from the ‘Chocolate pomegranate cloud cake’ in Special Delivery by Annabel Crabb and Wendy Sharpe
This “crack” (so named due to its highly addictive nature) is a crunchy, salty-sweet treat that has proven so popular in Australia that Salada sales have increased by 15%! Made famous by the Podcast ‘Chat 10 Looks 3’ hosted by Annabel Crabb and Leigh Sales, “crack” is sure to be your newest guilty pleasure. Don’t say I didn’t warn you!
Ingredients (makes 1 large tray worth) 6 Saladas (or Salada-style) crackers 100g salted butter ½ cup brown sugar 1 teaspoon vanilla essence Pinch of salt 100g dark chocolate, chopped 1/3 cup salted peanuts, chopped
Method
Preheat the oven to 180°C (160 fan-forced).
Line a 33.5 x 24cm tray with foil and then baking paper (take it from me, you do NOT want this to stick!) Lay out six Saladas onto the tray, which should fit snugly.
In a small saucepan, melt the better and sugar together over a moderate heat. Cook for about 5 minutes then stir in vanilla and salt.
Pour the butterscotch over the Saladas and smooth with a spatula to ensure they are evenly coated.
Bake for 8-12 minutes or until the butterscotch is a deep golden colour (keep a close eye on it as it can go from golden to burnt very quickly). Immediately sprinkle with the chopped chocolate and smooth with a spatula until melted and evenly coated. Top with chopped peanuts.
Refrigerate until set. Then break into shards and try not to eat it all at once. Enjoy!
Recipe adapted from Well Hello by Annabel Crabb and Leigh Sales
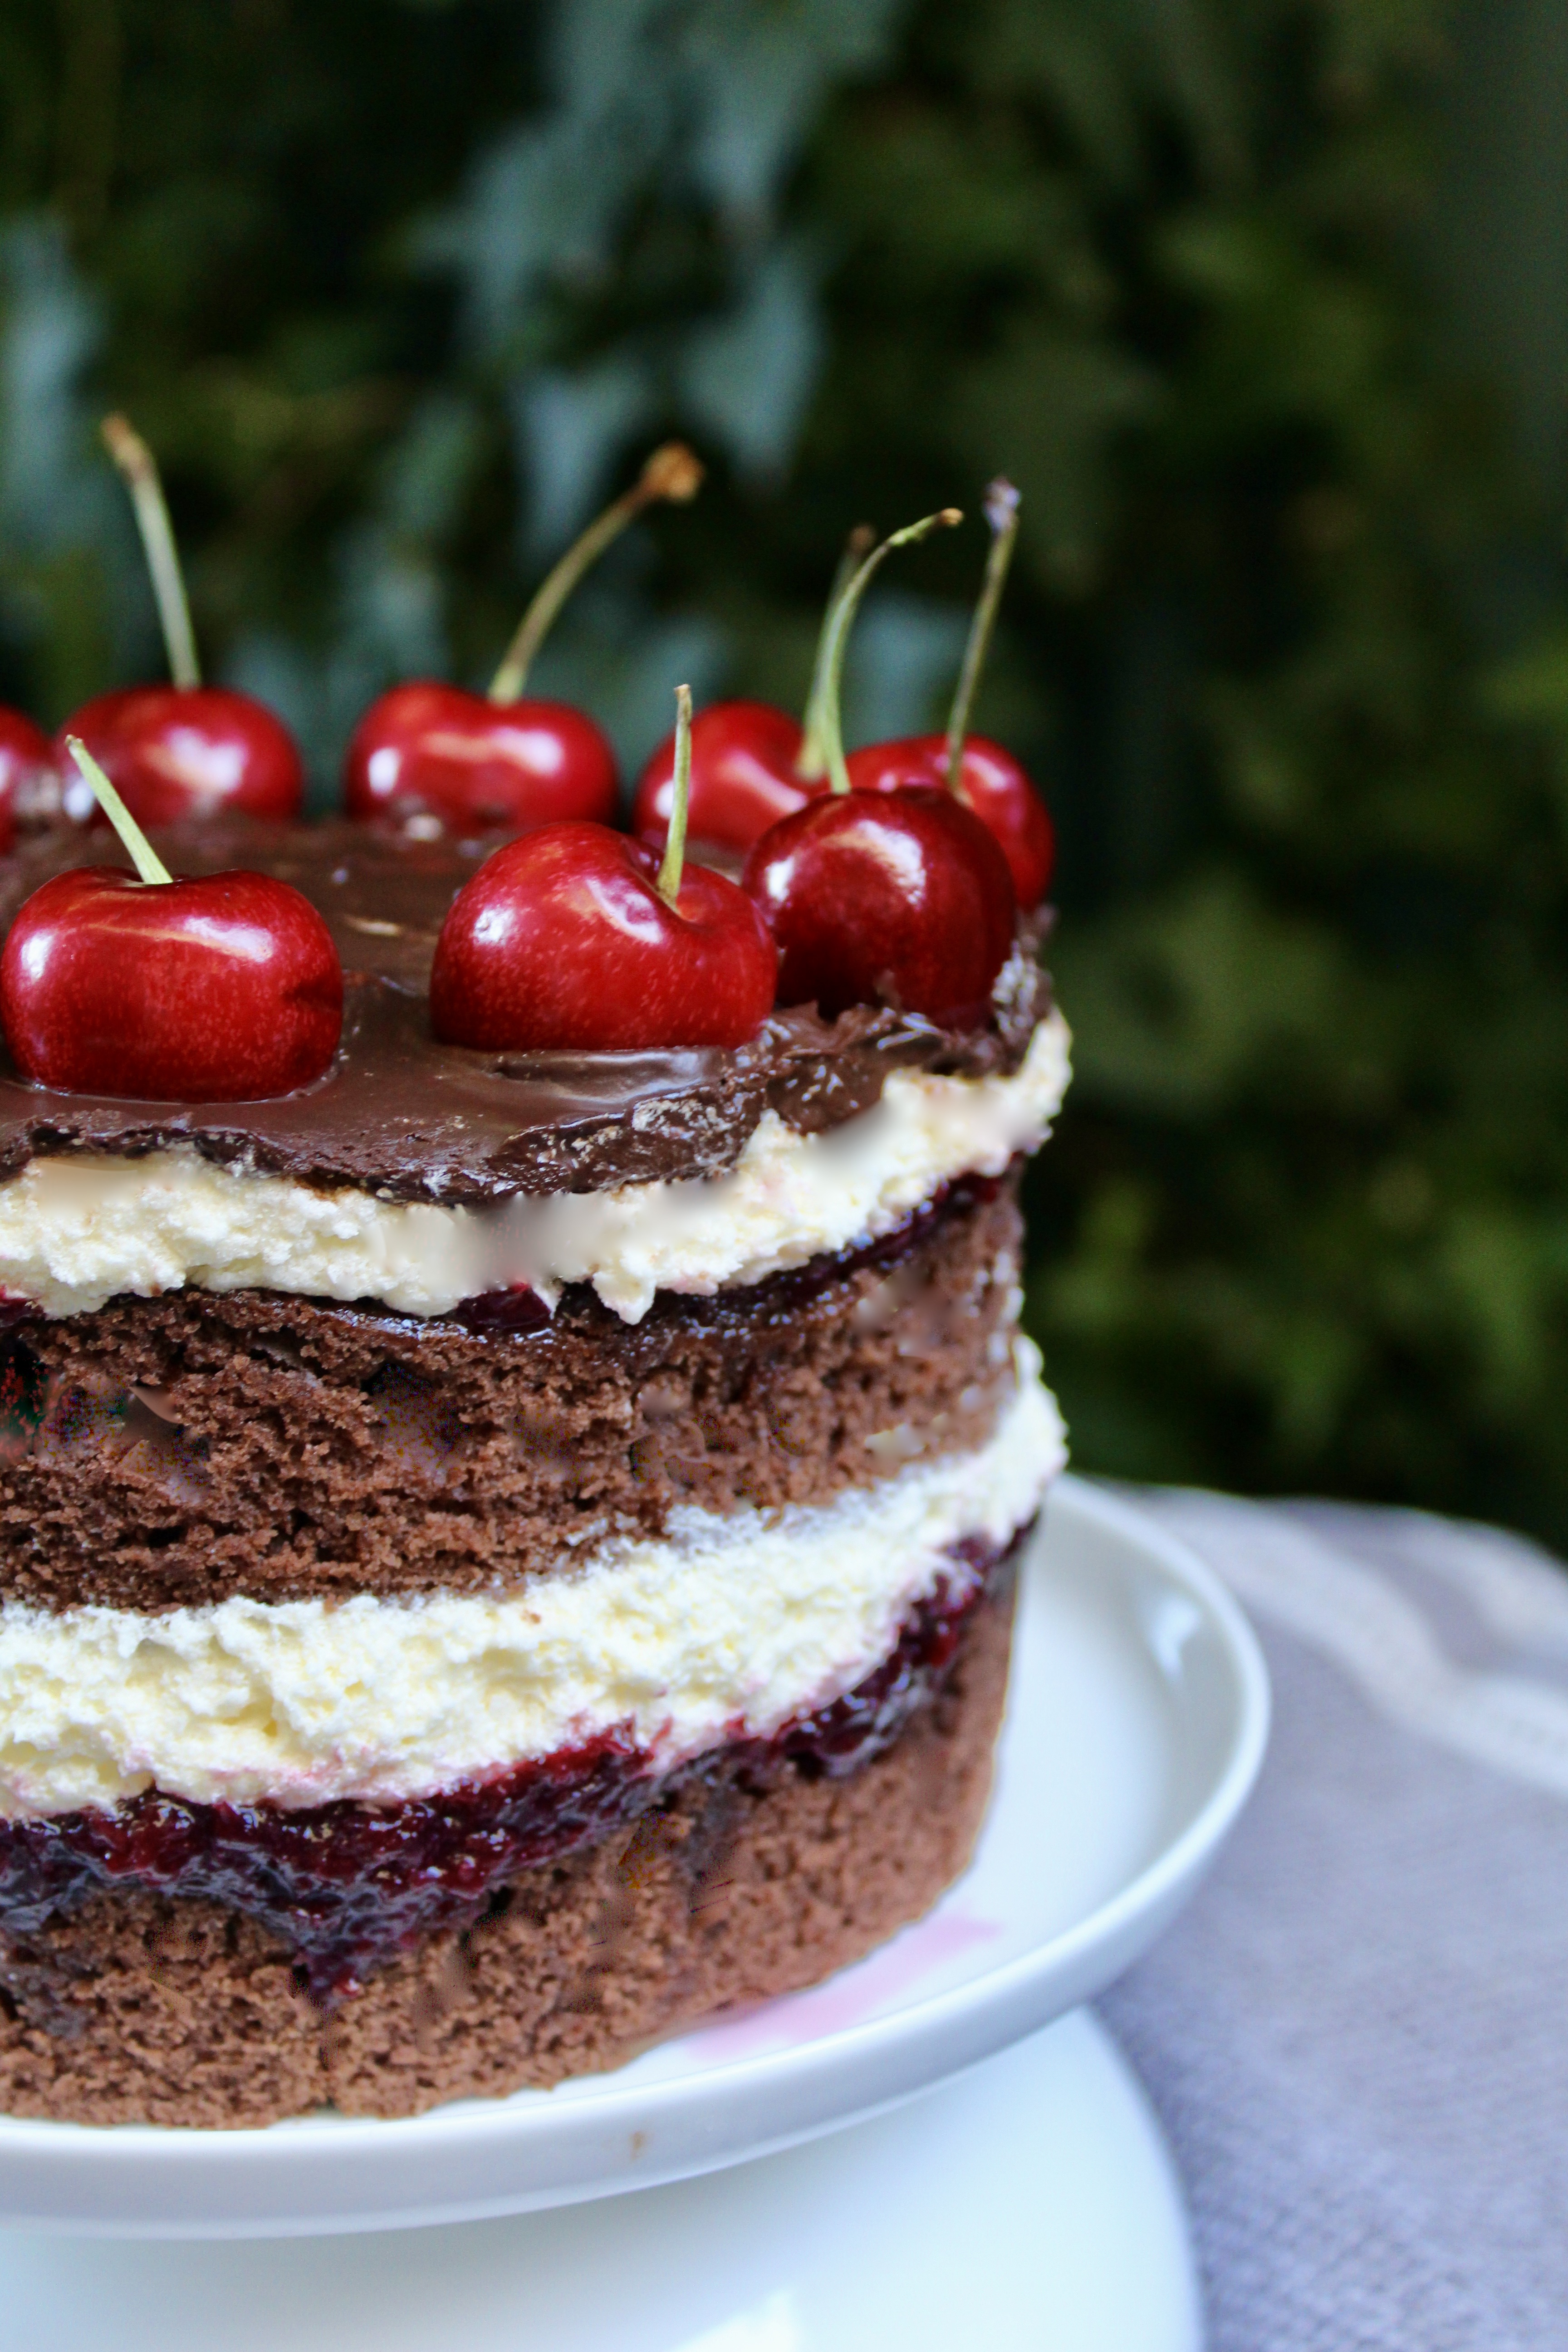
Black forest cakes are a tried and true favourite for a reason – especially when cherries are in season and at their most flavoursome. This is another cake using the Milk Bar method of cutting out rounds from a large rectangular sponge cake, ensuring you get perfectly even layers every time.
While I made this into a 2-layer cake this time as it was a gift for a couple in quarantine who didn’t need a giant cake, the recipe actually makes a 3-layer cake.
Ingredients (serves 12-14) Equipment 9 x 13 inch “quarter sheet pan”* A 6 inch cake ring* 6 inch wide acetate roll Sticky tape
Chocolate Ganache 120g dark chocolate melts 90ml cream
Cherry Jam 225g fresh or frozen cherries (pitted and chopped finely) 25g caster sugar 1 tablespoon cornflour
Buttercream 115g butter, roughly chopped, room temperature 2 teaspoons vanilla extract 2 cups icing sugar 1 tablespoons full-fat greek yoghurt, room temperature ½-1 tablespoon full-cream milk, room temperature
Cherry MilkSoak 40ml full-cream milk 25ml kirsch (cherry liqueur) or cherry juice
10-12 large fresh cherries, to decorate
Method
Chocolate Ganache Add the dark chocolate and cream to a small saucepan and stir over a low heat until the chocolate is nearly melted. Remove from the heat and continue stirring until the chocolate is fully melted and smooth. Set aside (at room temperature).
Cake Preheat oven to 180°C (160°C fan-forced). Spray the base and sides of a quarter sheet pan with cooking oil and line the base with baking paper.
Cream the butter and sugar together in a stand mixer, or a large bowl if using a hand mixer, on a medium speed until light and fluffy. Add the eggs and beat on high until combined.
Add the buttermilk, oil, 2 tablespoons of your pre-prepared chocolate ganache, vanilla and coffee into a small bowl and stir until the coffee has dissolved. Add this chocolate mixture into the the butter mix and beat on high for a few minutes, scraping down the bowl as required.
Sift the flour, cornflour, cocoa powder and baking powder into the batter. Beat on low until the mixture has just combined, and then pour the batter into the lined cake tin. Smooth out flat and tap the tray gently against the bench a few times to get out any air bubbles.
Bake for 25-35 minutes, or until a skewer inserted into the middle comes out clean. Leave to cool in the tin for about 15 minutes and then remove from the tin and place on a wire rack to cool completely.
Cherry Jam Place the cherries, caster sugar and cornflour into a saucepan over a medium heat. Stirring constantly, bring the mixture to the boil. Reduce the heat slightly and continue to stir until thickened.
Buttercream Beat butter in a large mixing bowl with an electric mixer on medium speed for 1-2 minutes until butter is pale and creamy.
Add vanilla and 1 cup of icing sugar. Beat on a low speed to combine, then turn up to medium and mix for 30 seconds. Add the remaining icing sugar along with the greek yoghurt. Beat on medium speed until light and fluffy. If too stiff, add milk. If too wet, add extra icing sugar. It should be fluffy and spreadable.
Cherry Milk Soak Add milk and kirsch to a small bowl and whisk to combine.
Assembling the Cake Place your cake on a large chopping/bread board. Using the picture below as a guide, use a 6 inch metal cake cutter to cut out 2 rounds of cake and then two half pieces.
Image courtesy of ‘What Charlotte Baked’
Place the 6 inch cake ring onto a plate or cake stand. Line the inside of the cake ring with a ‘collar’ of acetate, taping the edges together to join.
Place the two half pieces of cake at the bottom and press down firmly. If there are any gaps, use extra cake scraps to fill in the holes and press down very firmly to make one even layer. Carefully remove the cake ring (but leave the acetate).
Spoon 2 tablespoons of the milk soak over the cake layer. Allow to soak for about a minute. Spoon approximately one third of the chocolate ganache onto the cake layer, and spread evenly, ensuring the ganache gets right to the edges of the cake. Spoon half of the cherry filling on top of the ganache and spread out evenly to the edges of the cake. Add a few tablespoons of buttercream on top and smooth with a spatula to ensure the layer is (roughly) even.
Repeat this process for the second layer: cake, cherry milk soak, chocolate ganache, the remaining cherry jam and a thick layer of buttercream. If you need to, attach another round of acetate on top of your current cake collar (using tape to join the two collars) to ensure it is tall enough that all cake is supported.
Add the final layer of cake, spoon with the remaining milk soak and then top with the remaining chocolate ganache. Decorate with a ring of cherries and place in the fridge to set for a few hours. While the cake sets, add any remaining buttercream to the cake offcuts and enjoy as a snack!
Remove the cake from the fridge and gently peel away the acetate strip/s just before serving. Enjoy!
Recipe adapted from What Charlotte Baked ‘Black Forest Naked Cake’. Buttercream recipe adapted from The Sweetest Menu ‘Milk Bar Birthday Cake’.
*If you don’t have a quarter sheet pan and/or round cutter, you can use two 8 inch/three 6 inch round cake pans
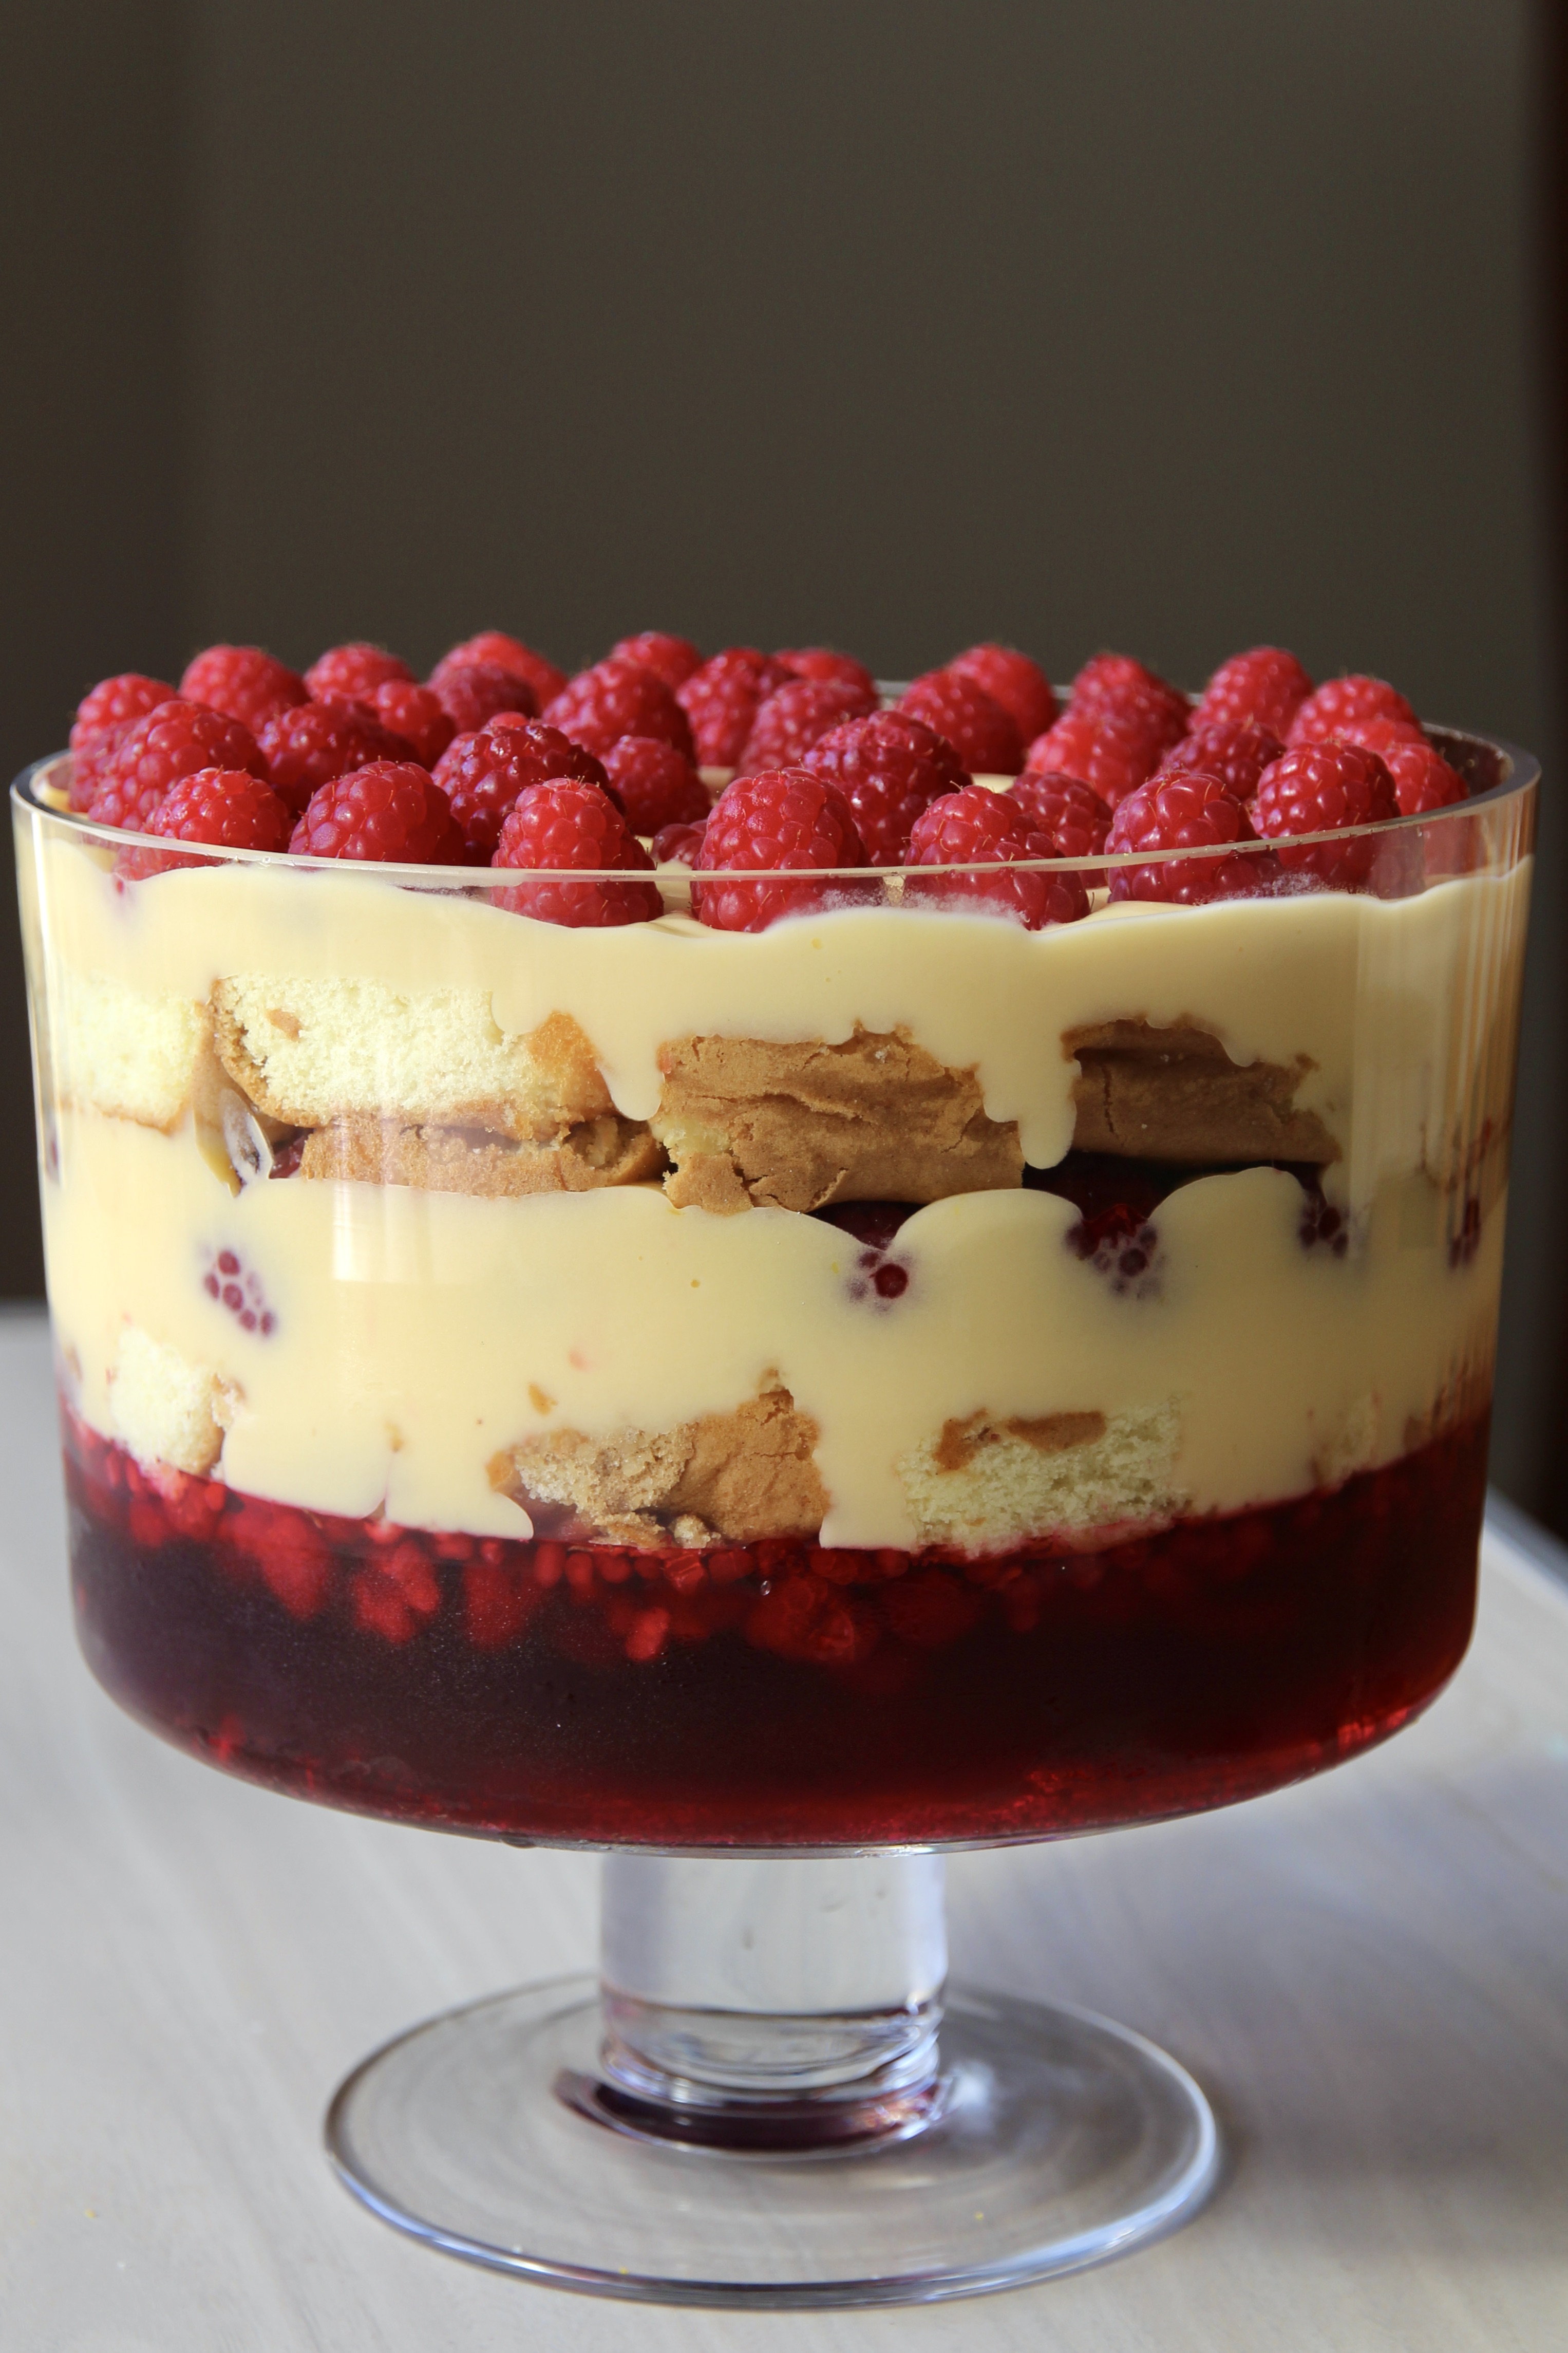
We’ve never really been a trifle family, and the few trifles I’d tried before this one were often disappointing – mushy and bland. We decided we wanted to serve a trifle as a dessert option on Christmas day and so, after a bit of experimenting, I developed this vanilla and raspberry trifle with torched meringue topping. I hope you enjoy as much as I do! For the time poor, I have put in some cheats to make it an easier job.
Make the jelly according to packet instructions and pour into a 3L capacity trifle dish. Add frozen raspberries. Put in the fridge to set for at least 6 hours.
To make the sponge cakes, preheat oven to 160°C fan-forced. Grease two 20cm round, shallow tins and line the bases with baking paper.
Use electric beaters to beat the egg yolks, sugar, water, and vanilla for approximately 10 minutes, until very pale and thick. Wash the beaters and then, in a separate bowl, beat the egg whites and baking powder until stiff peaks form. Fold the sifted flours into the yolk mixture and then gently mix in the egg whites.
Divide evenly between the tins and bake for 20 minutes or until springy in the centre and the cake has come away from the sides of the tins. Gently turn cakes onto wire cooling racks and leave to cool entirely. Store in an airtight container until required.
To make the custard, add vanilla bean paste and milk to a large saucepan on a medium-low heat and bring to the boil. Immediately remove it from the heat and leave to cool slightly.
Meanwhile, in a very large mixing bowl, whisk the egg yolks with the sugar and cornflour until pale.
Gradually add the warm milk, a tablespoon full at a time, whisking well between each addition. Pour the mixture back into the pan and cook gently on a low heat, whisking continuously, for about 20 minutes or until very thick. Leave to cool at room temperature then refrigerate until required.
To assemble the trifle, cut the sponge cake into squares approximately 6cm x 6cm. Add a layer of sponge cake pieces over the set jelly like so:
Top with half of the custard mixture. Place half of the raspberries, evenly spaced, on top of the custard.
Repeat – add a further layer of sponge cake, the remaining custard and top with raspberries. Refrigerate until required.
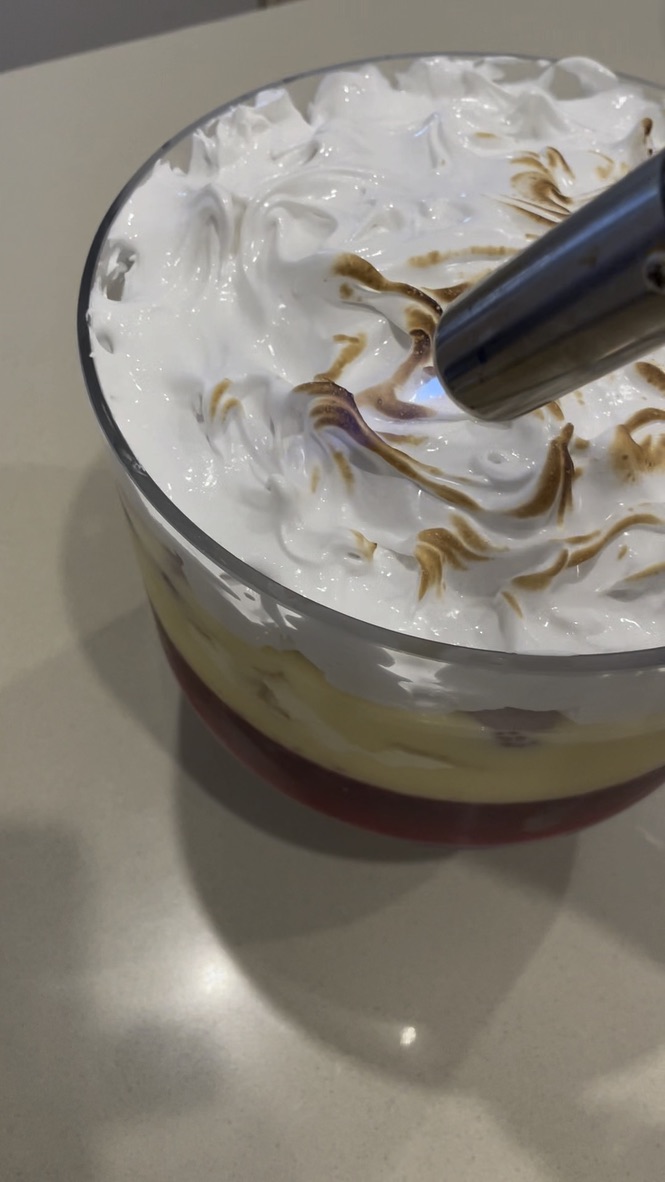
Just before serving (or up to 3 hours ahead), make the meringue. Whip the eggwhites with electric beaters until they’re light and fluffy. Add the vanilla and a tablespoon of the sugar and beat until combined. Add the remaining sugar, a spoonful at a time, beating between each addition until the sugar has dissolved. Once all of the sugar has been added you should have glossy white, stiff peaks.
Spoon the meringue mixture onto the top. Use a kitchen blowtorch to lightly toast the meringue. Serve and enjoy!
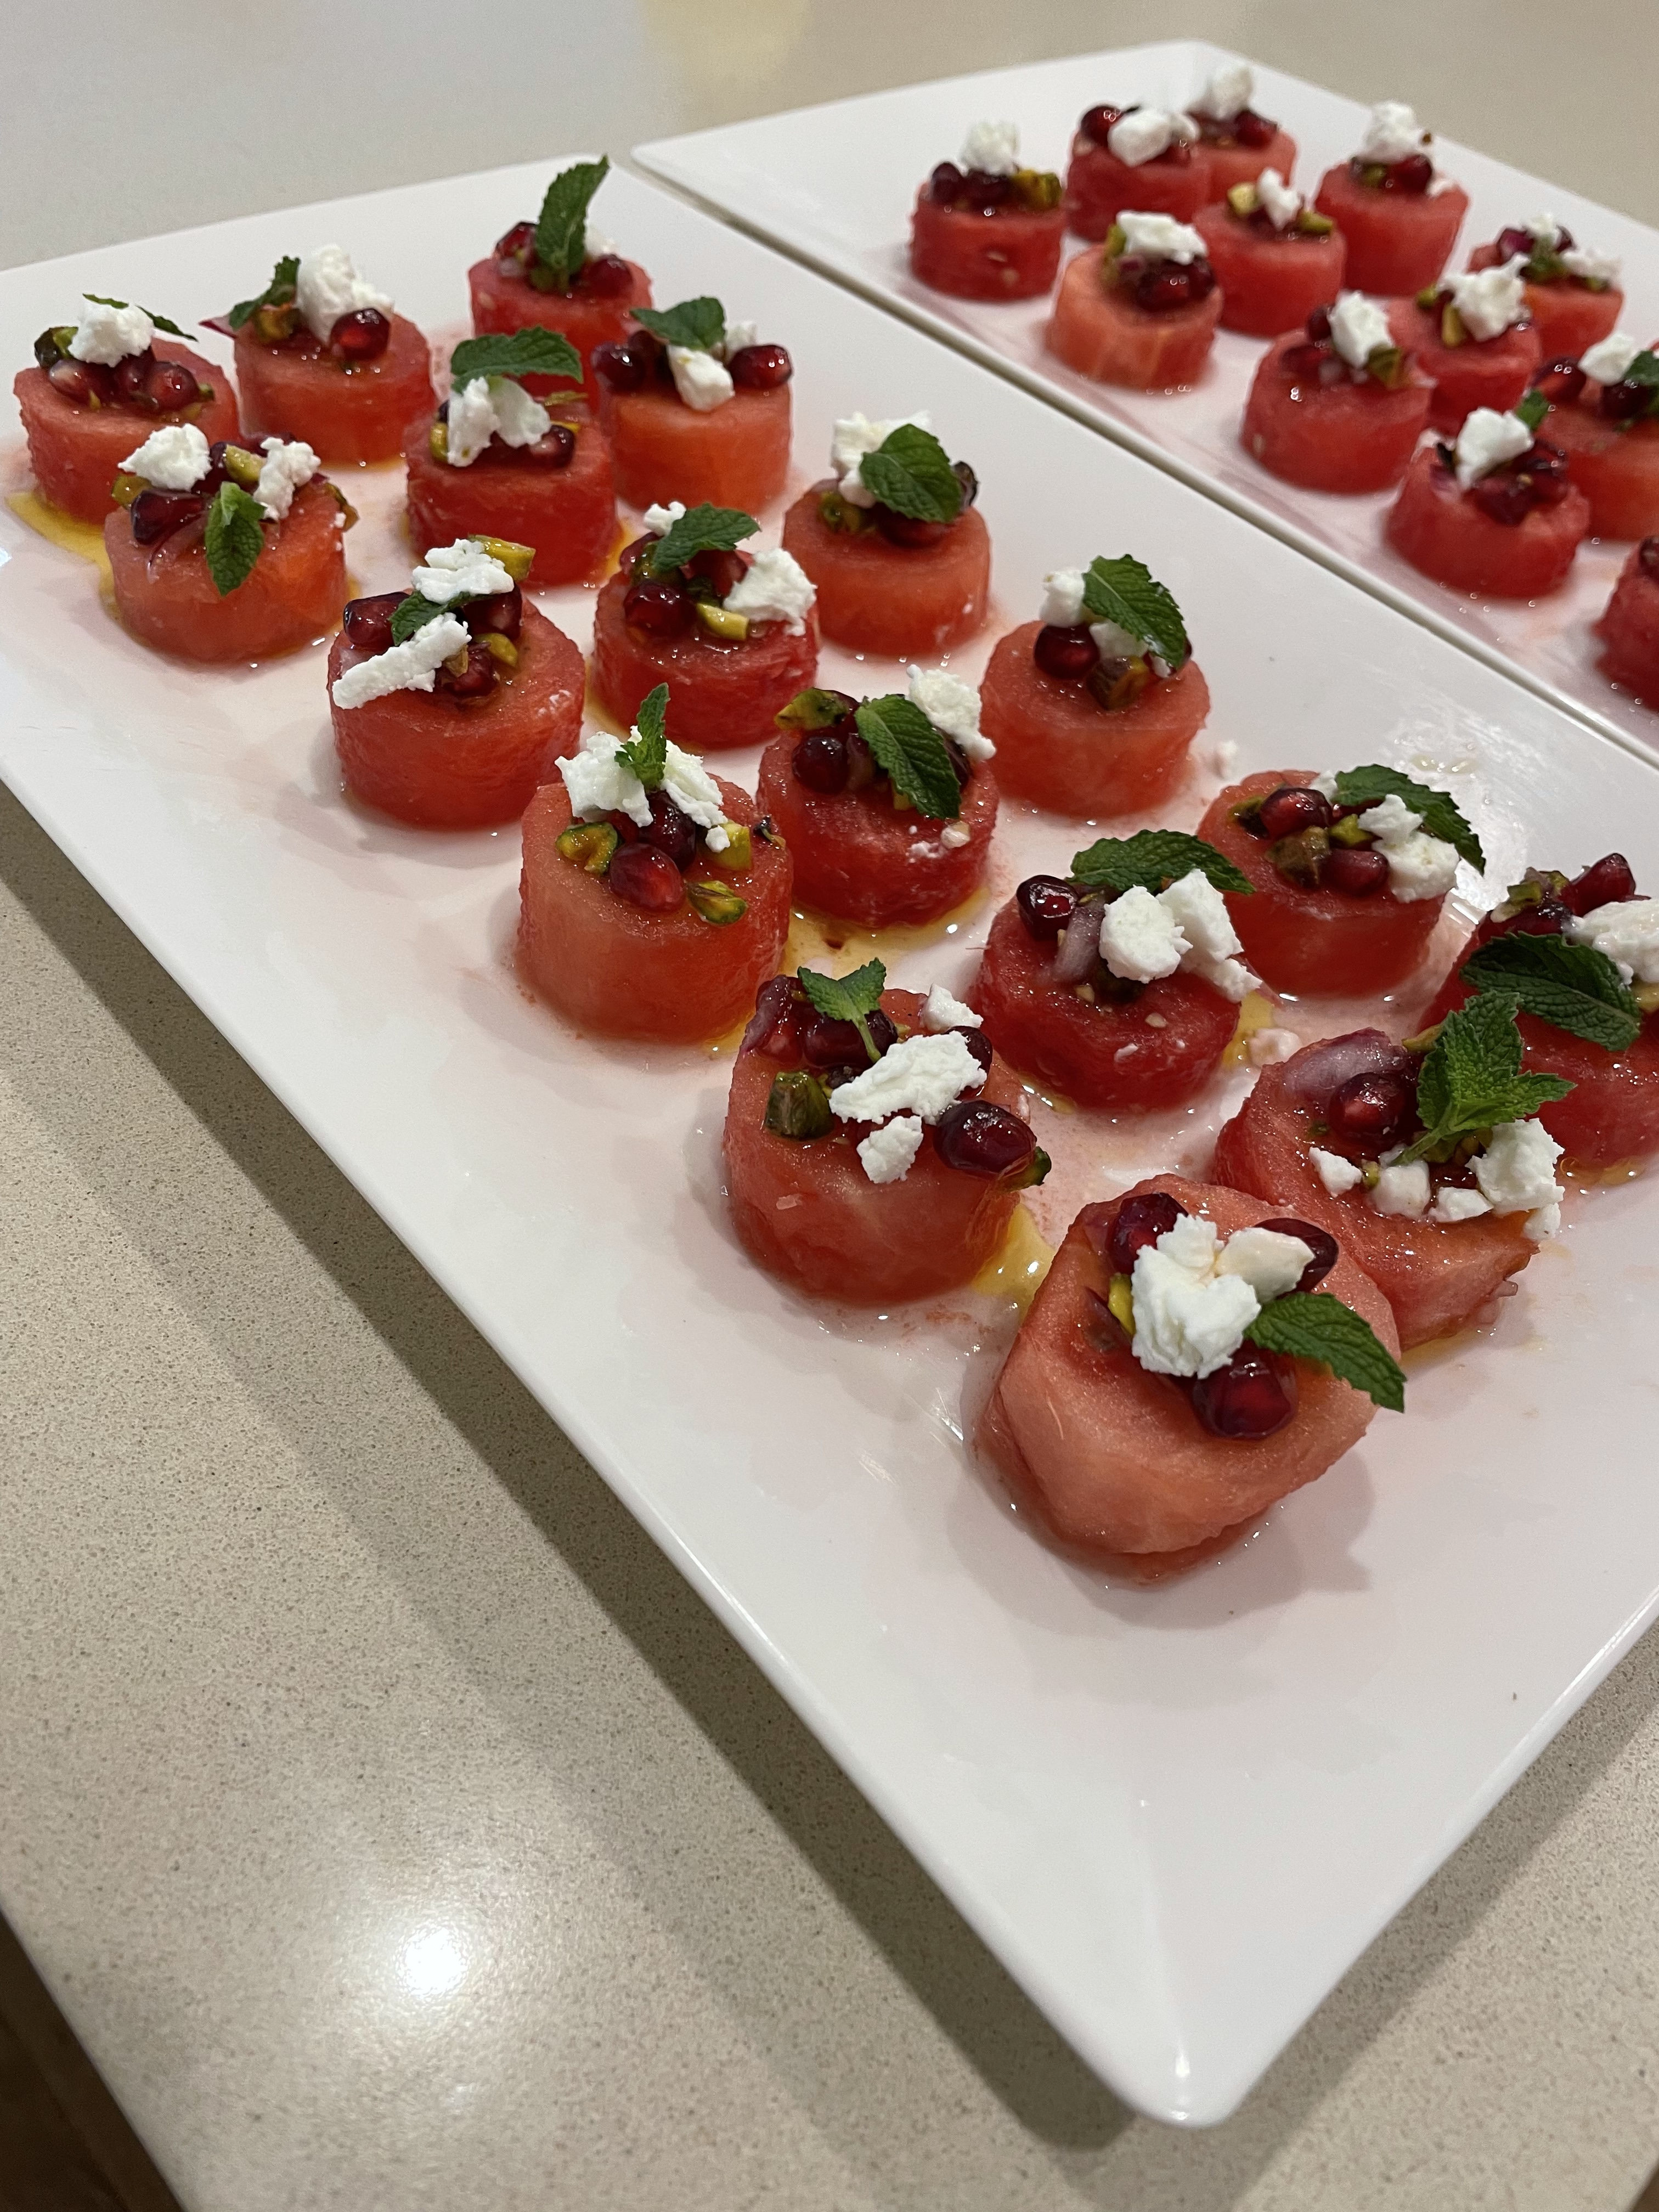
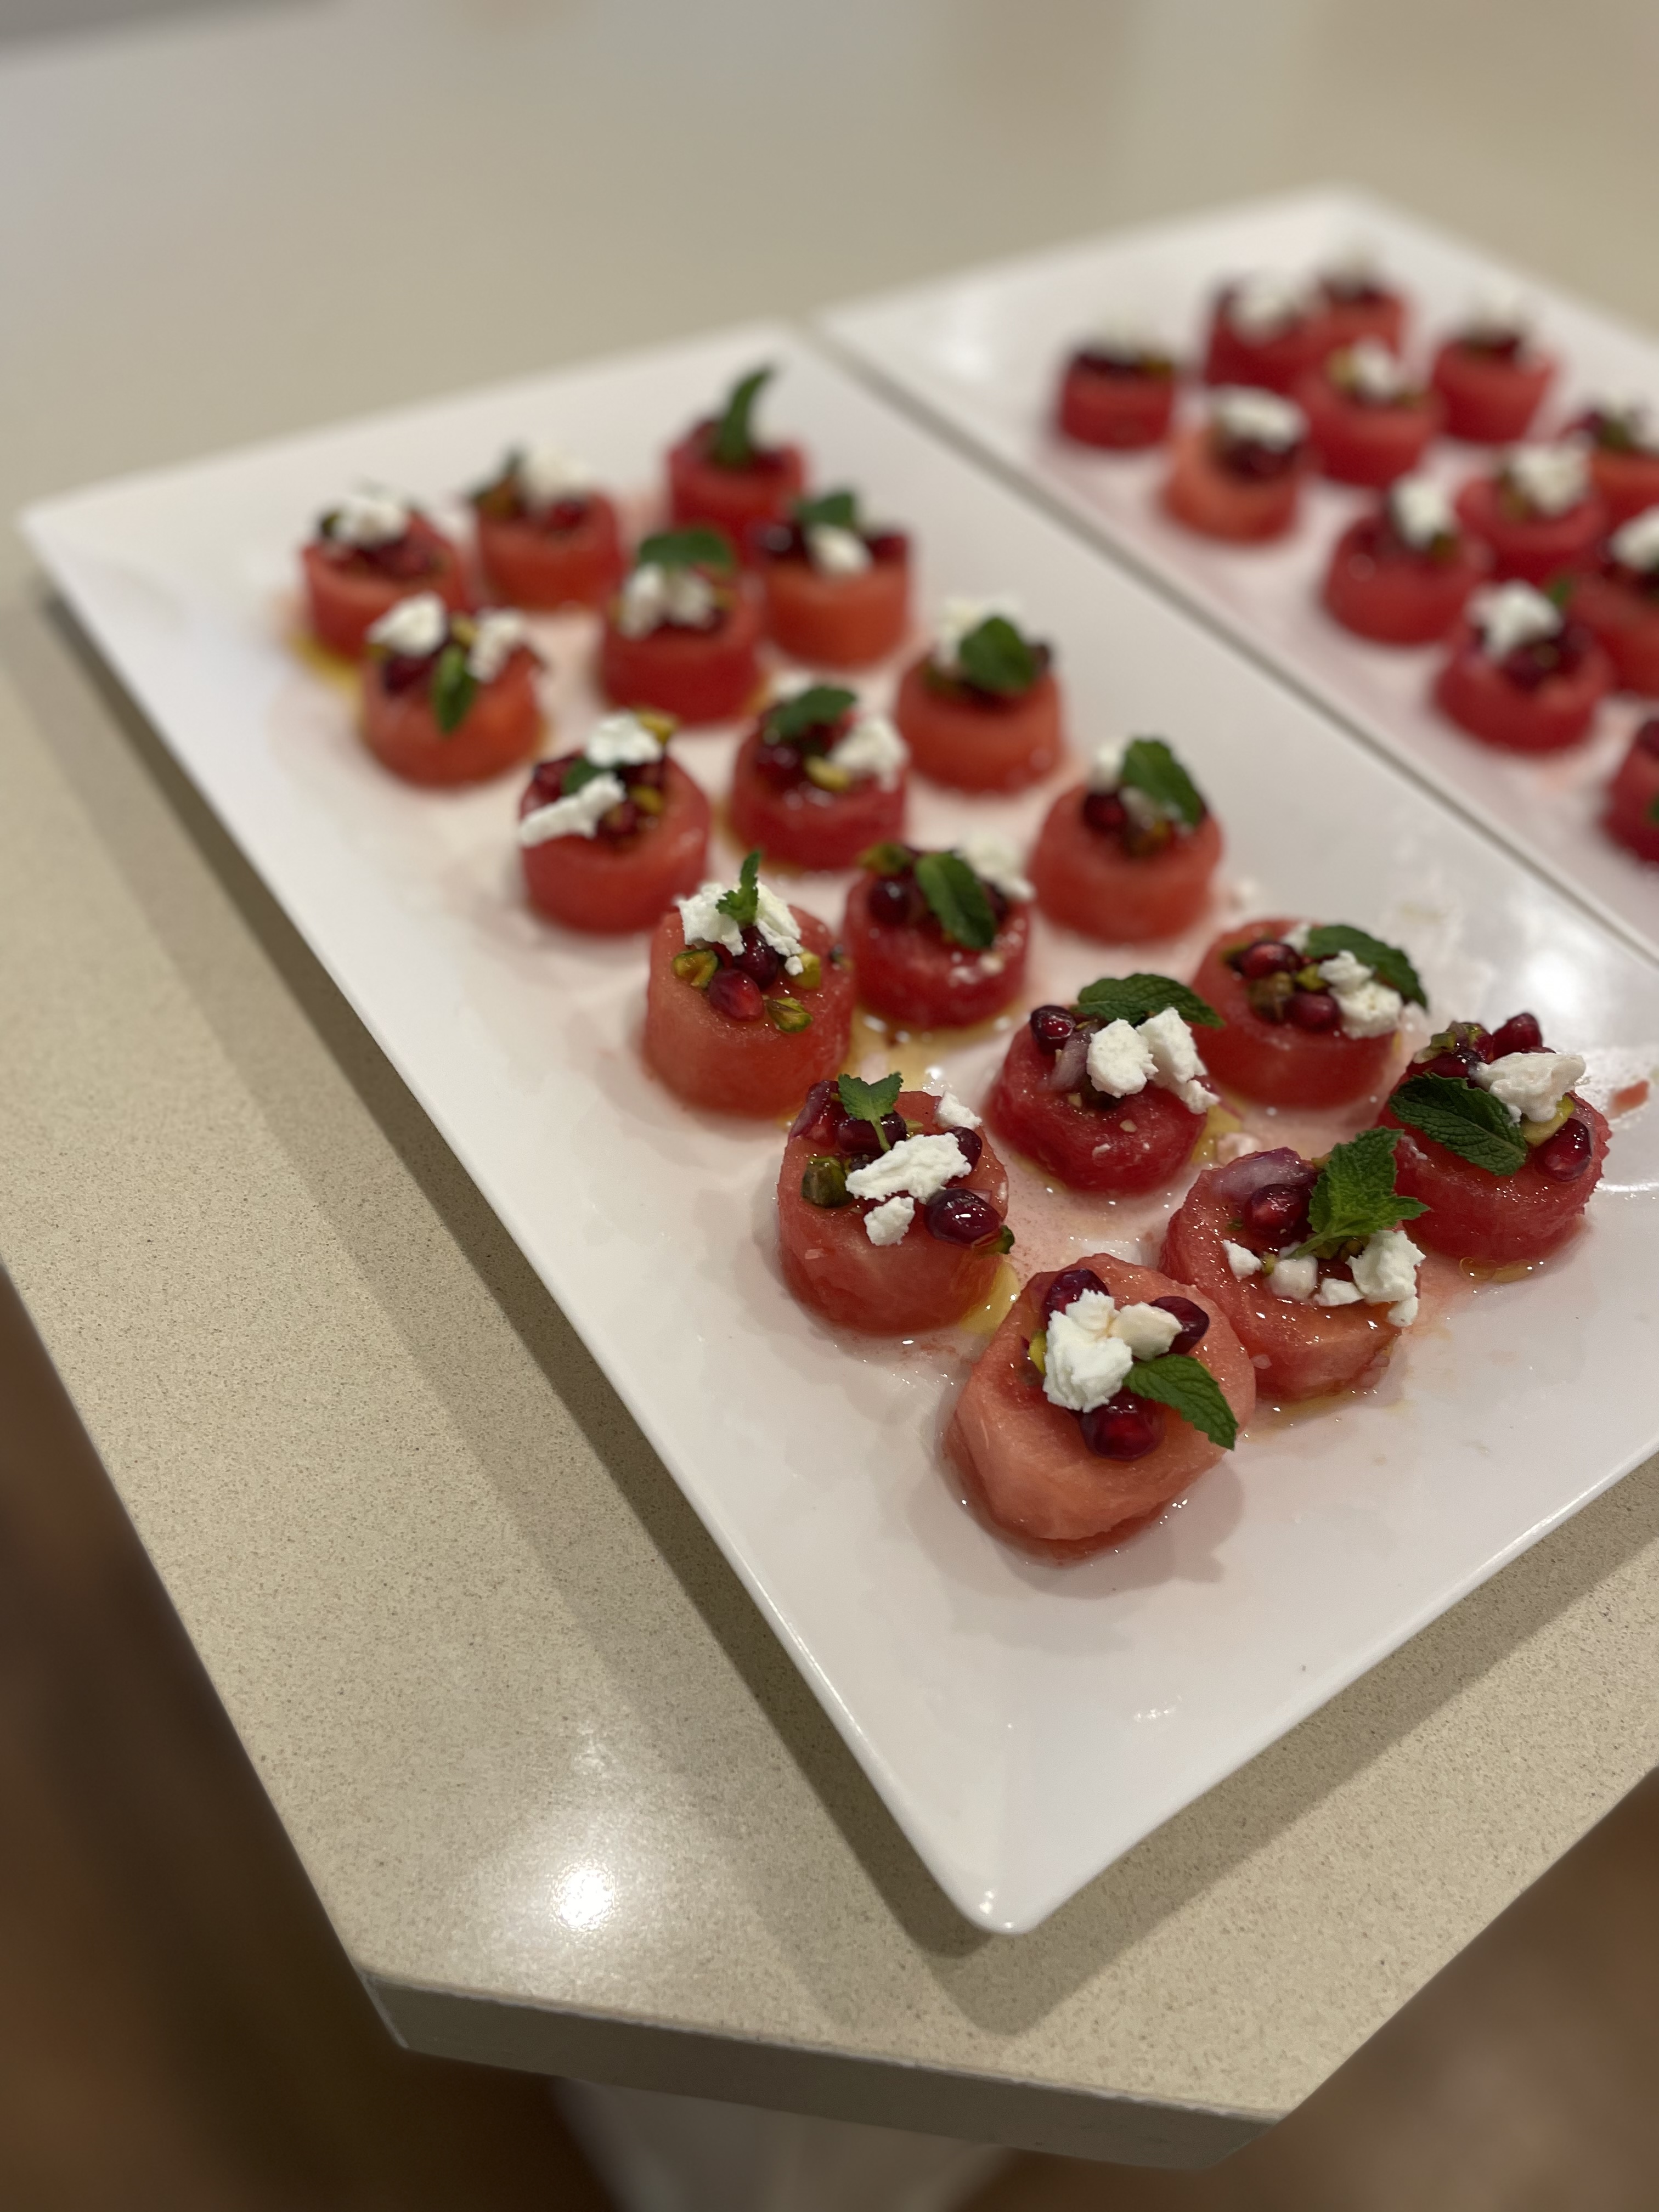
These unique, tasty morsels are a perfect starter – especially for Christmas in Australia with the jewel-like pomegranate seeds contrasting beautifully with the pistachios.
Ingredients (serves 10-12) 1.6kg wedge seedless watermelon ¼ red onion, finely chopped 2 tablespoons olive oil (ideally extra virgin) 1 tablespoon red wine vinegar ¼ cup roasted pistachios, roughly chopped ½ cup pomegranate seeds 50g goat’s cheese, crumbled ¼ small fresh mint leaves
Method
Remove watermelon rind and discard. Cut the watermelon into 2cm thick slices. Using a 4cm round cutter, cut out rounds from sliced watermelon (you should have approximately 36).
Combine red onion, olive oil and vinegar in a bowl and season to taste. Whisk to combine. Add pistachio and pomegranate seeds and stir to combine. Spoon a little pistachio mixture onto each piece of watermelon. Top with goat’s cheese and mint. Enjoy!
Recipe adapted from Super Food Ideas, December 2019.