Featherlight Japanese Milk Bread

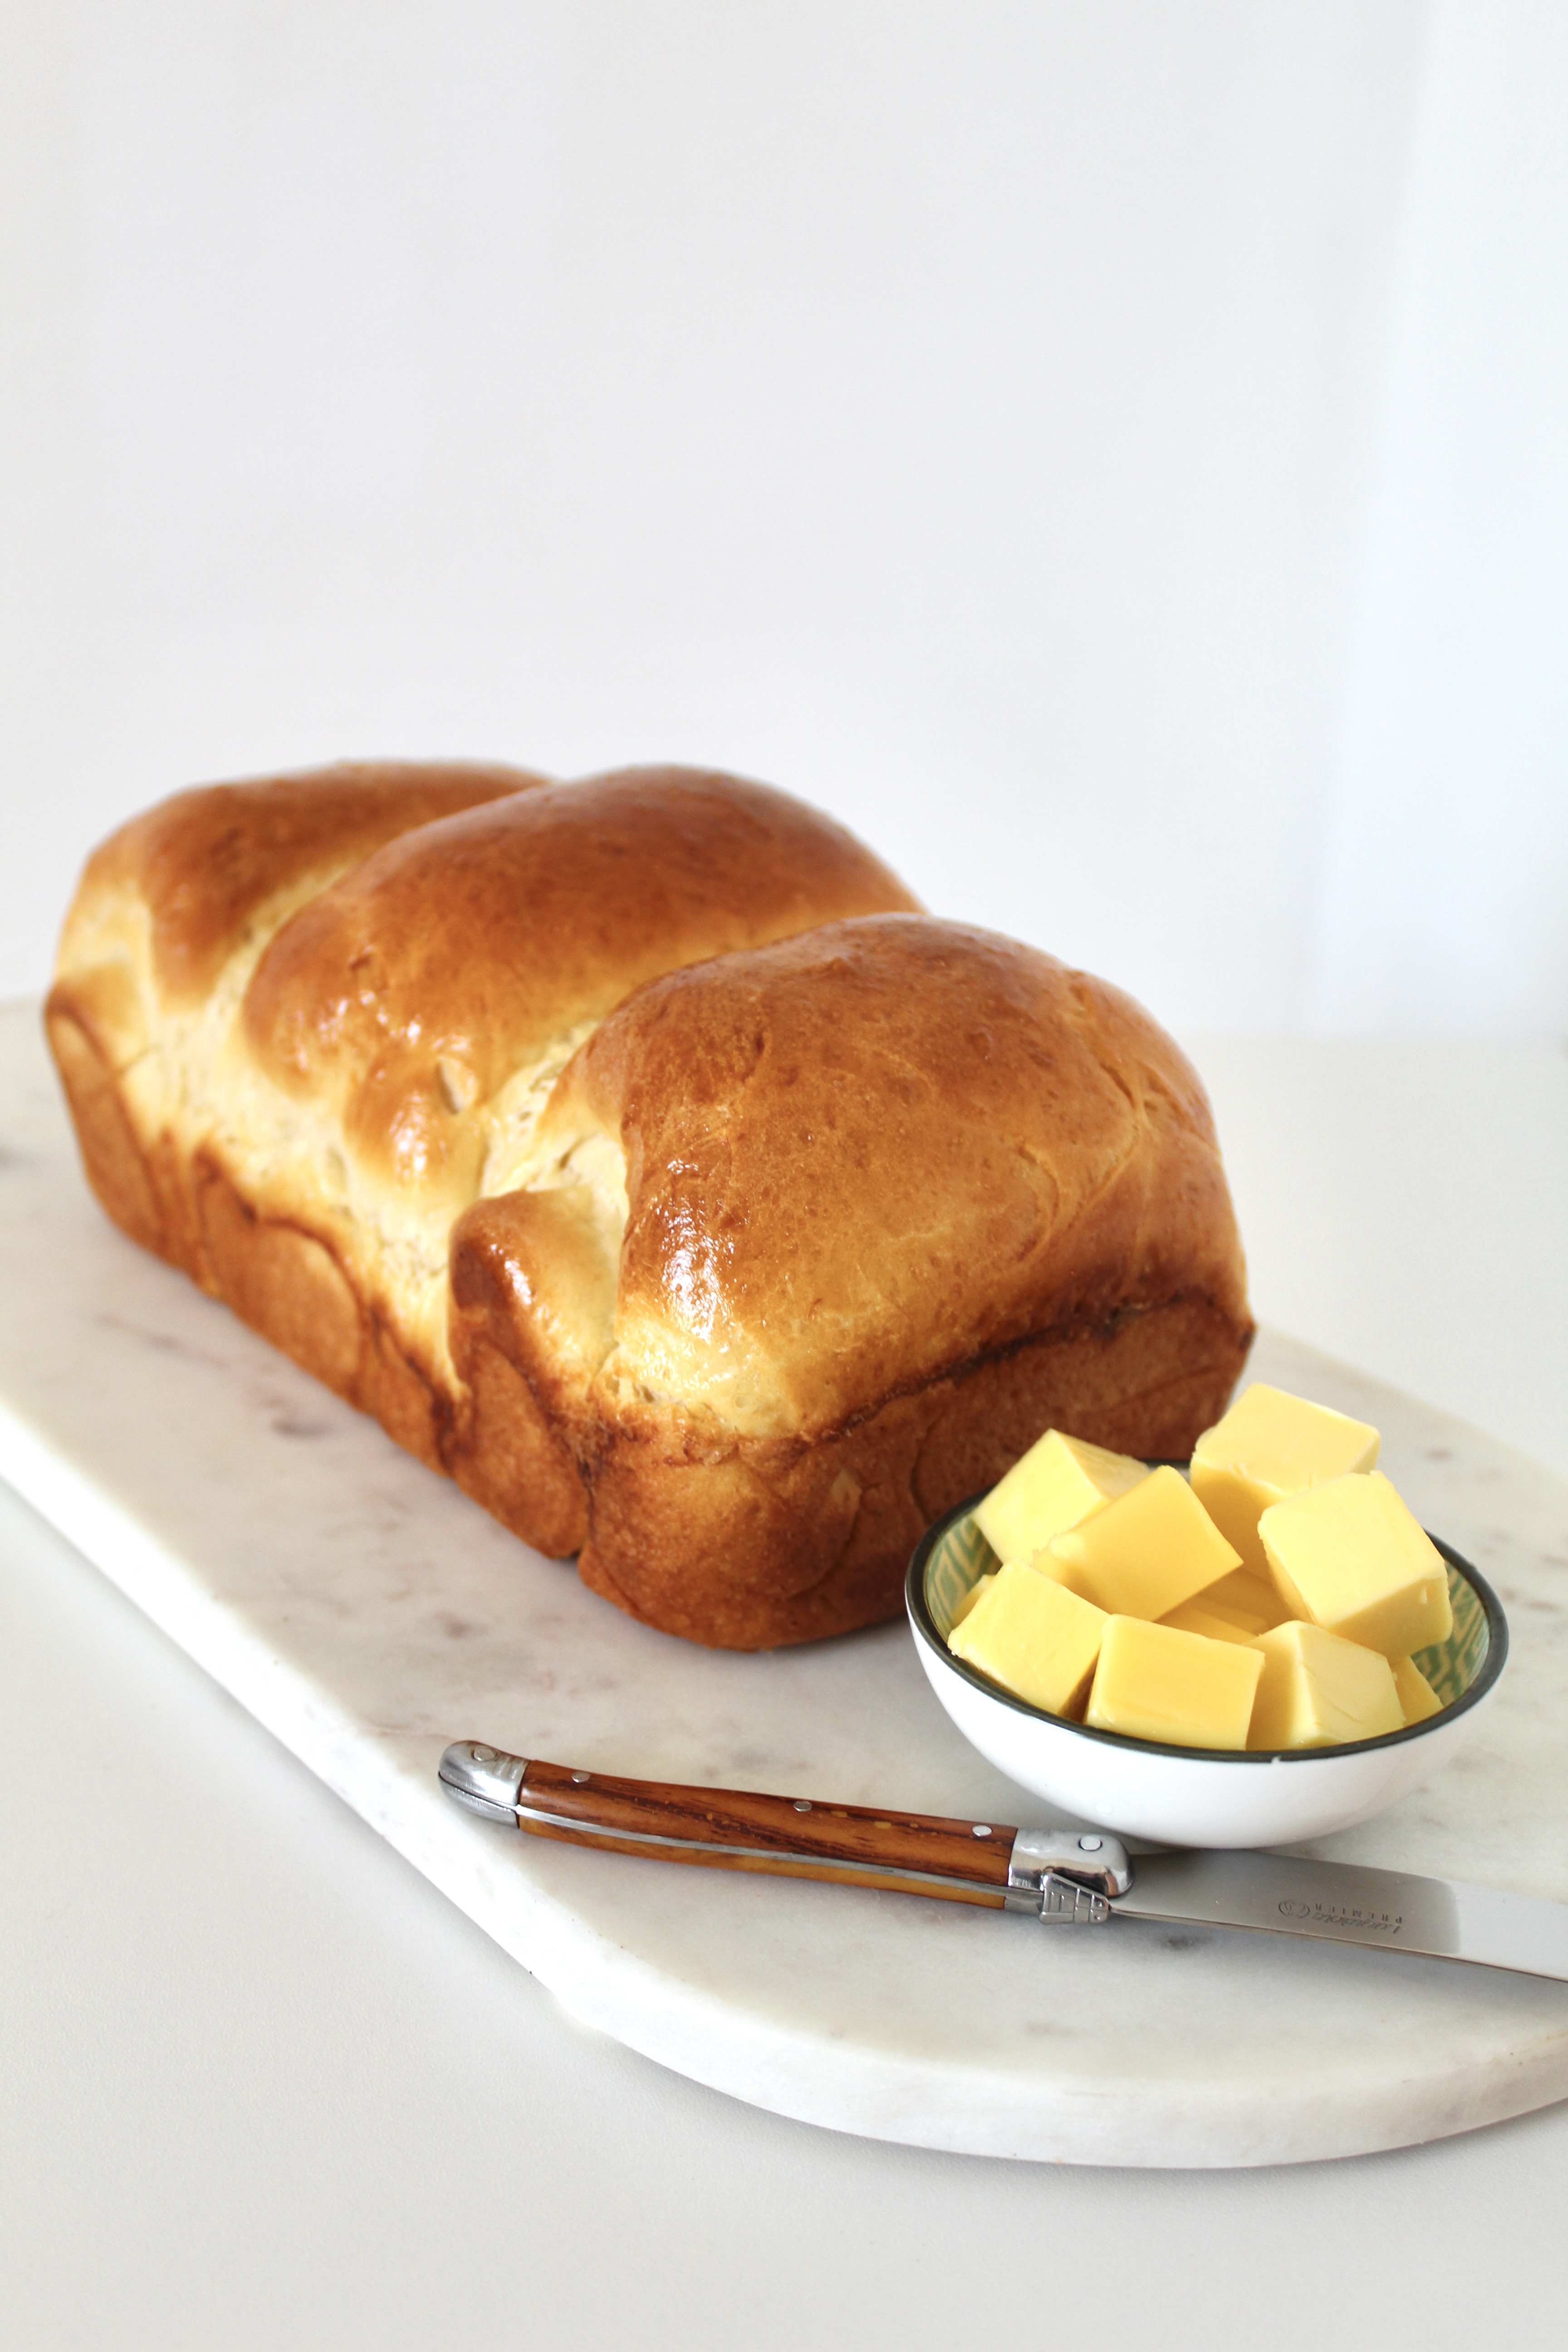
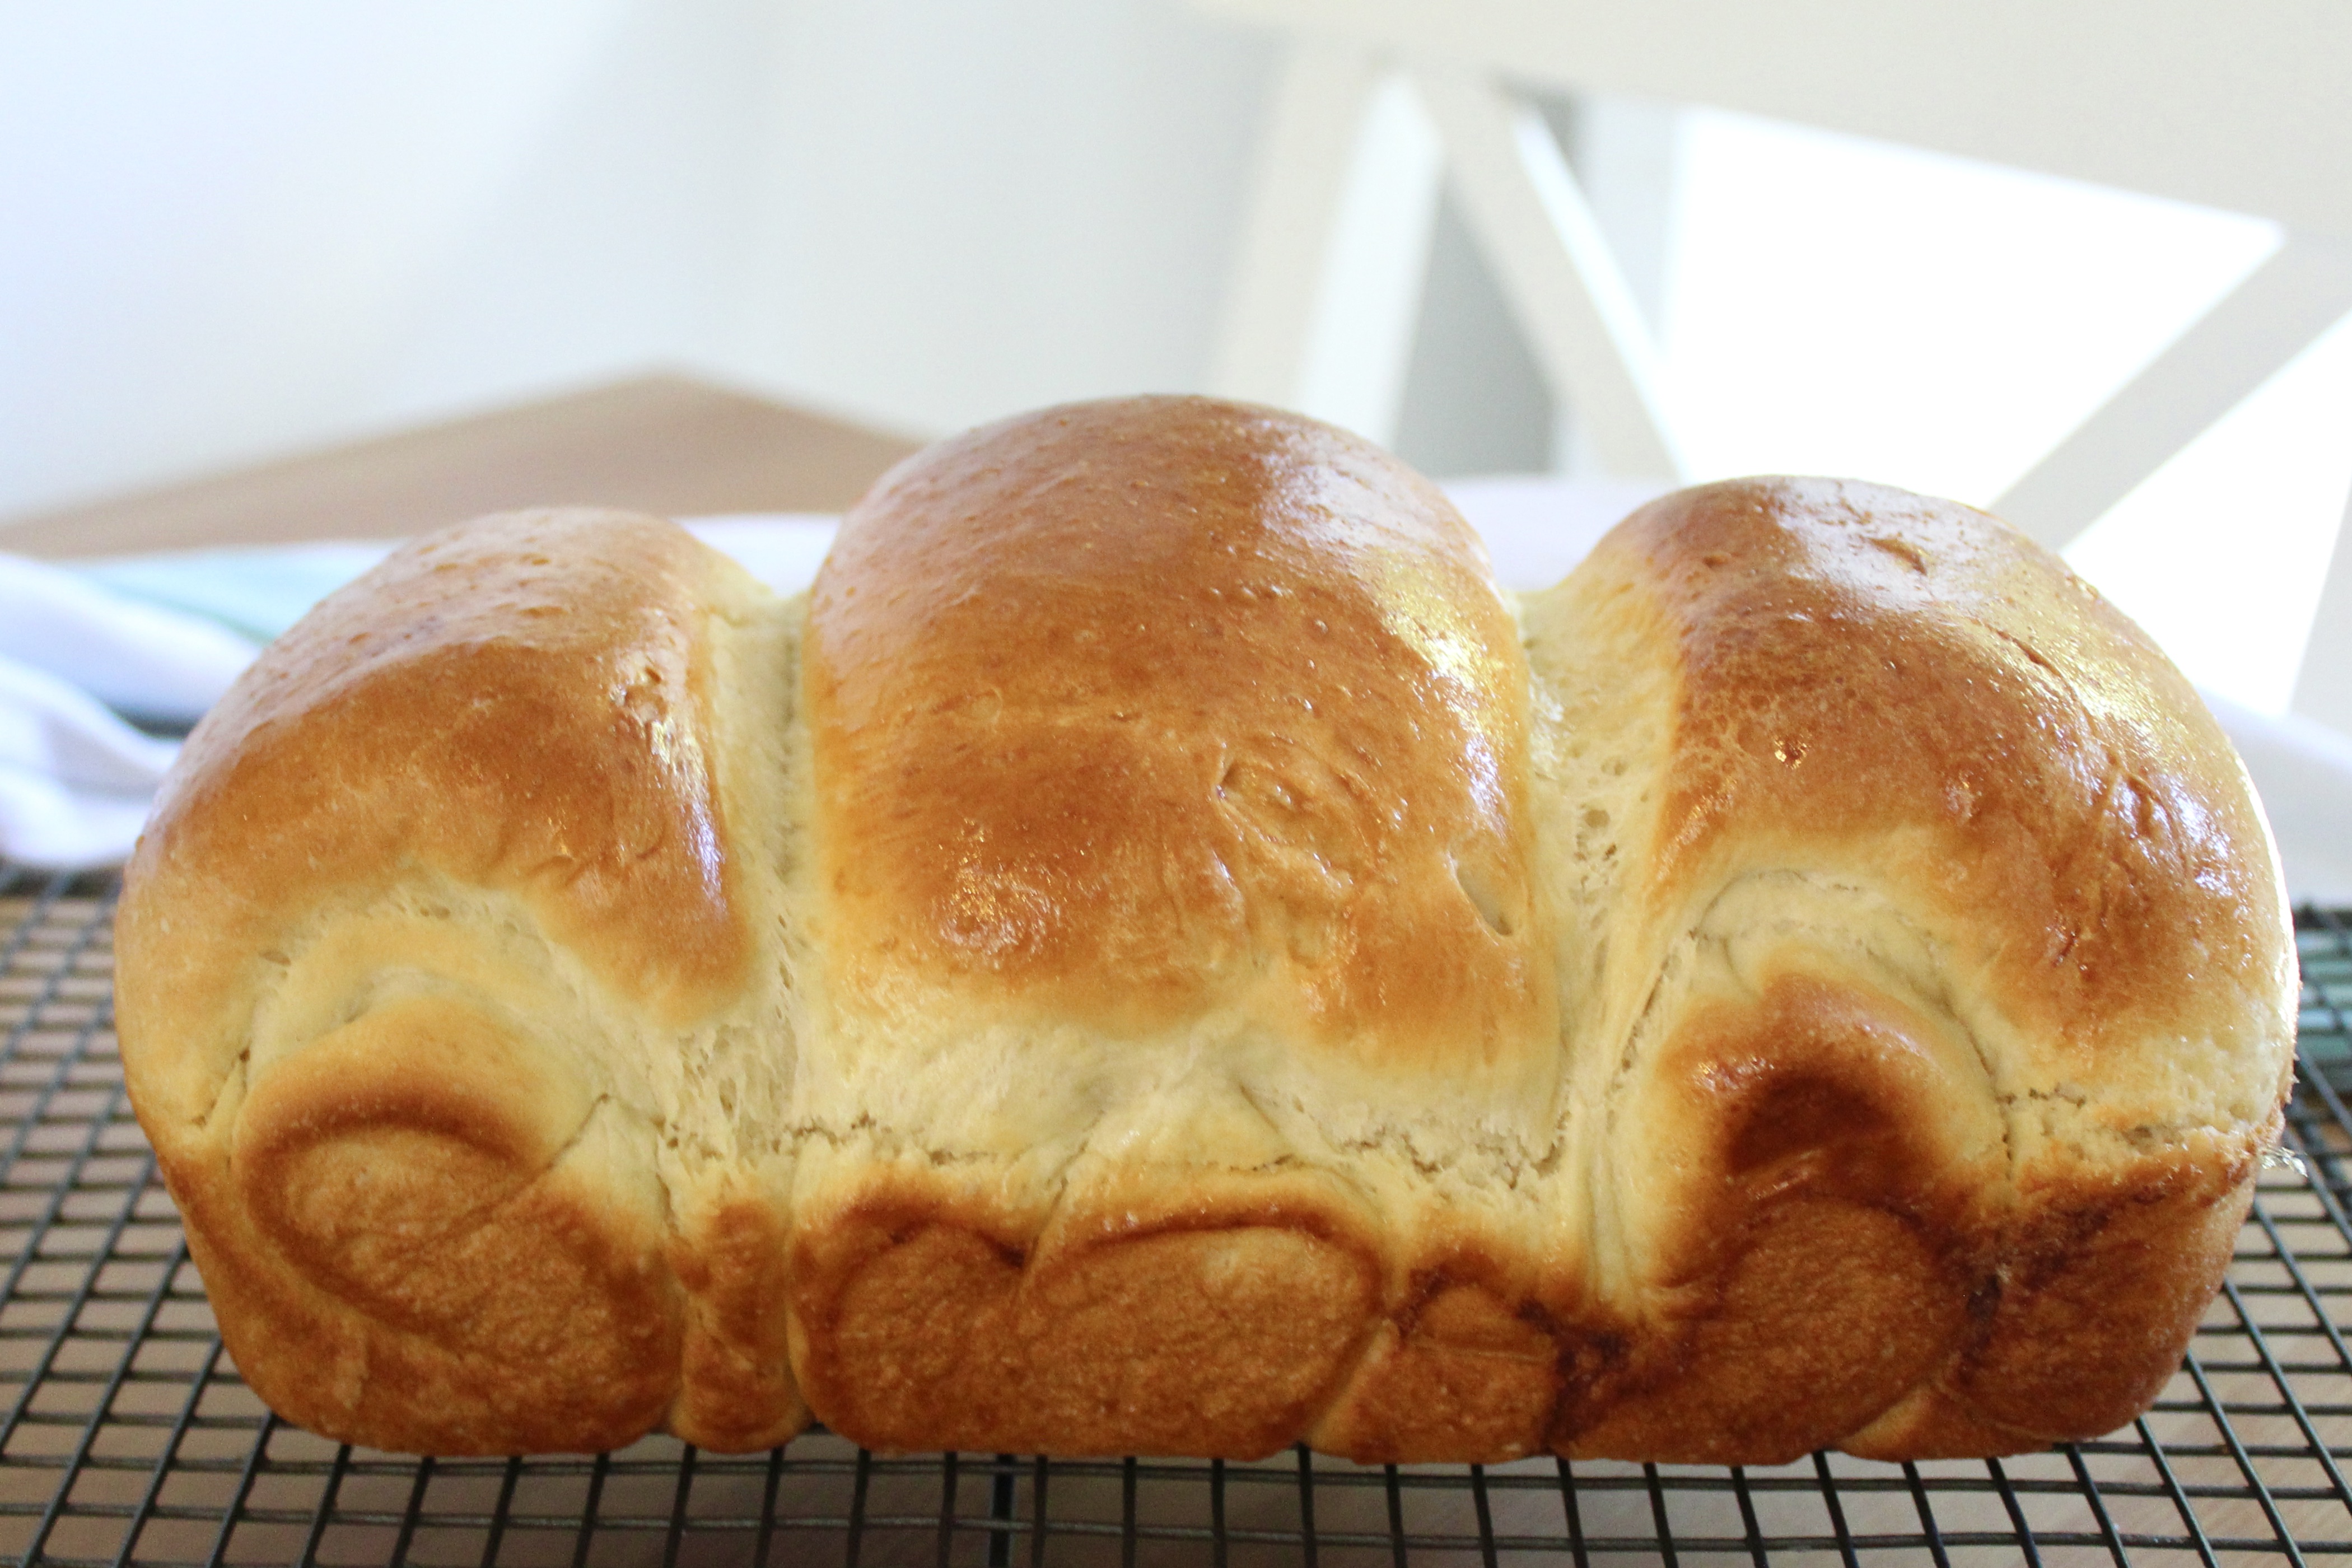
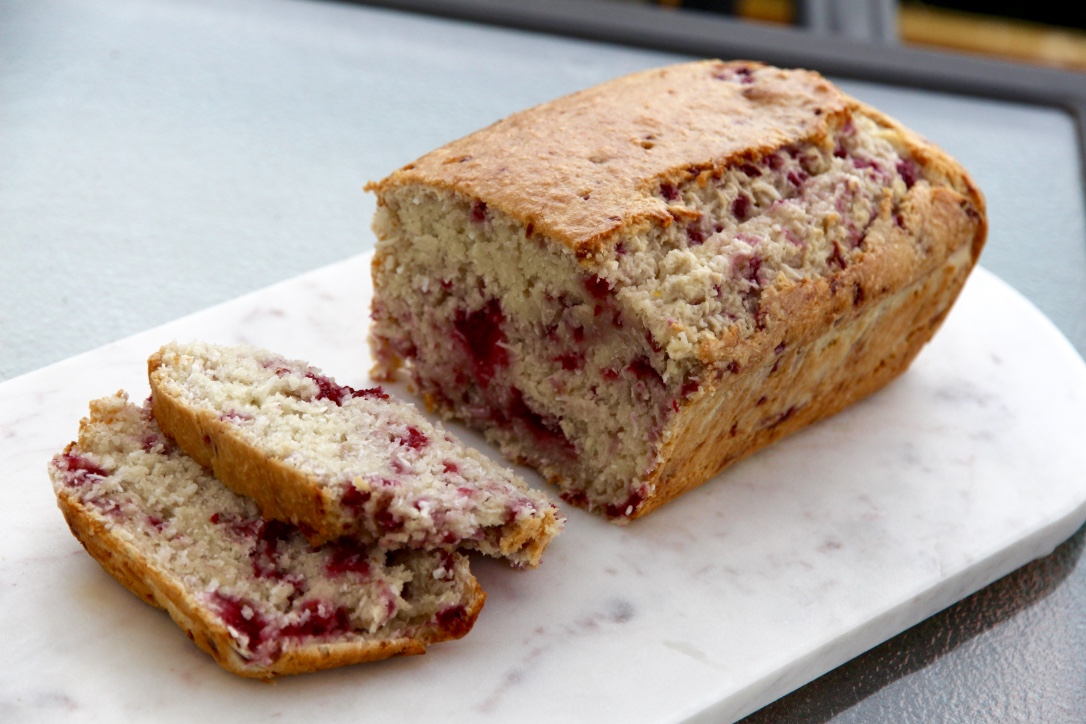
This bread is without a doubt the lightest, fluffiest loaf you’ll come across and with its shiny golden exterior and featherlight white centre, it’s as much a joy to look at as it is to eat. It’s also really simple to make so is perfect for bread making beginners.

This version uses a tangzhong method of making a roux out of flour and water to ensure soft, fluffy bread every time.

Ingredients (makes 1 large loaf)
Tangzhong
25g bread flour
90ml water

Loaf
300g bread flour
7g sachet of fast acting yeast
120ml milk (lukewarm, not hot)
30g butter
40g caster sugar
1 egg

Glaze
1 egg

Method

Add water and flour to a small saucepan, whisk until free from lumps. Place over a low-medium heat and stir constantly until it thickens. Set aside to cool.

Once cooled, add the egg to the tangzhong and stir until combined. Add the bread flour, yeast, milk, butter, sugar and eggy tangzhong mixture to the large bowl of a standmixer. Use the dough hook of the standmixer on a medium spped to combine and knead the dough until it is no longer sticky (approximately 10-15 minutes). Add a small amount of extra flour if required.

Transfer dough to a lightly oiled bowl. Cover with a clean tea towel and leave to rise in a warm place until doubled in size (approximately an hour).

Once it has risen, punch down the dough and divide into three equal pieces. Set the other pieces to one side and use a rolling pin to shape a piece into an oval shape.

Fold one side of dough over to halfway across the remaining dough then fold the other side on top(see photos below). Roll up the piece of dough from the short side (bottom to the top of the middle picture below) as you would a cinnamon roll.

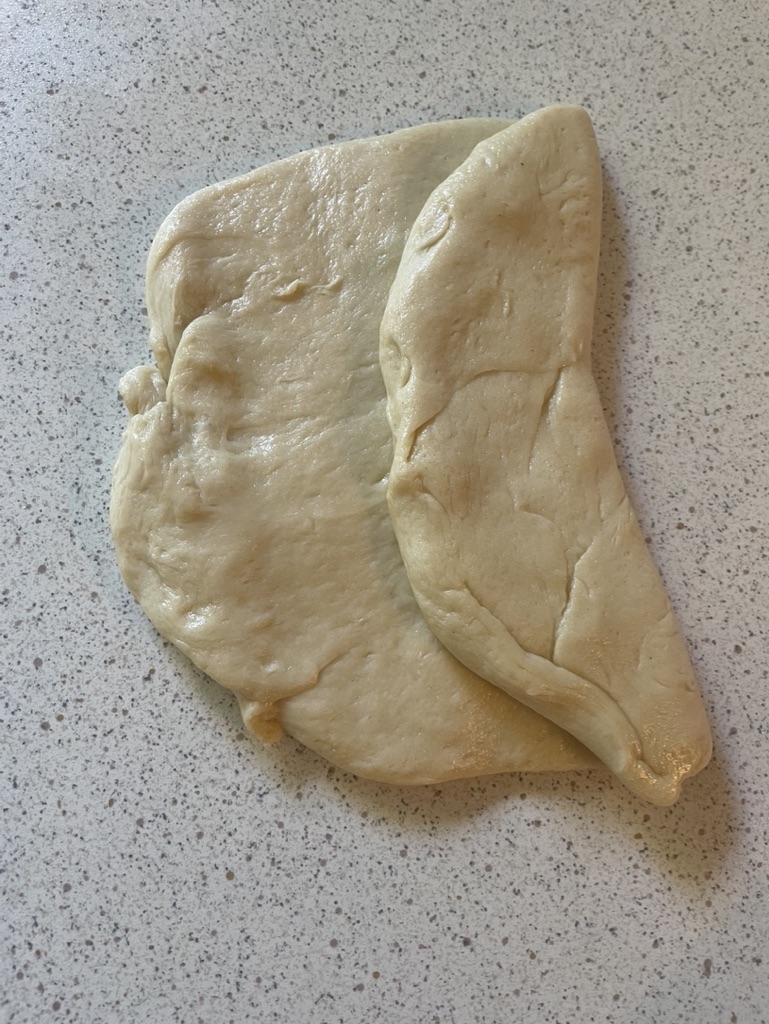
Repeat with the other pieces of dough then put all three rolls of dough in an oiled loaf pan.

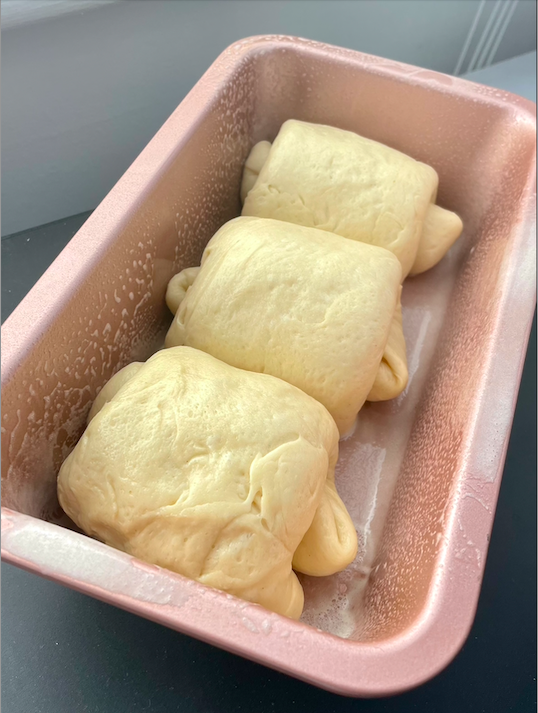
Cover and leave to rise again until the loaf is just reaching the top of the pan.

Once nearly risen, preheat oven to 175°C (160°C fan-forced). Lightly beat the egg and brush the top of the loaf with egg wash.

Bake the loaf for approximately 30 minutes until golden brown. If it browns too fast, loosely cover with foil for the last part of cooking. Turn onto a cooling rack to cool before slicing.

Recipe adapted from Caroline’s Cooking ‘Japanese milk bread’.

Advertisement

Bacon, Caramelised Onion & Thyme Piroshki

thumb_IMG_3749_1024

Piroshki (also known as pirozhki or pyrizhky), literally translating to ‘small pie’, are individual-sized buns with either a sweet or savoury filling. There are many variants of piroshki across Eastern Europe, but this recipe most closely resembles the Russian version. These piroshki are baked rather than fried and stuffed with the dreamy combination of bacon, caramelised onion and thyme. We usually serve these as hors d’oeuvres but they are great for lunches and picnics as they are easily transportable and don’t make a mess.

While they do take time and effort to make, they more than make up for it in terms of flavour and I find the baking process is very rewarding. There’s something so satisfying about making things from scratch and I’m always left feeling very self-righteous (plus who doesn’t love kneading dough? So fun and therapeutic). Next time you have a free afternoon, try making a batch – your tastebuds will definitely thank you for it!

thumb_IMG_3740_1024

Ingredients (makes 35-40)
60g fresh yeast
2 tablespoons sugar
315ml lukewarm milk
375g plain flour
Salt & pepper
125g melted butter
3 large brown onions, chopped
55g butter, extra
250g bacon
2 tablespoons fresh thyme leaves
1 egg, beaten

Method
Combine the yeast and sugar; stir in the milk.

In a large bowl, mix flour and 2 teaspoons salt and make a well in the centre. Pour the yeast mixture and the melted butter into the centre. Beat well for 3 minutes until a smooth batter is formed. Cover with Gladwrap and leave in a warm place for 1 hour or until doubled in size.

Gently cook onions in extra butter until golden. Chop bacon finely and add to the onions along with a teaspoon of pepper and the thyme leaves.

Knead the risen dough lightly and then divide into 35 to 40 portions. Wrap a teaspoon of the bacon filling into each portion of the dough. Allow the buns to prove in a warm place on greased trays for 15 minutes.

Preheat oven to 230°C.

Brush each bun with egg and bake in the prepared oven for 10-15 minutes or until golden brown. Enjoy!

thumb_IMG_3745_1024

thumb_IMG_3752_1024

Recipe adapted from Hors D’Oeuvres (1988) by June Budgen.

The Port Elliot Bakery – the Best in South Australia

It is a truth universally acknowledged that the Port Elliot Bakery is the best in South Australia*. Yes, it’s a bold statement considering SA’s dozens of award-winning bakeries, but the Port Elliot Bakery’s consistent 5 star reviews, 4000-strong “Port Elliot Bakery appreciation society” Facebook group, and regular 50m+ queues set it apart from the rest and are a testament to its excellence. The bakery is located on the main street of Port Elliot, a small town on the Fleurieu Peninsular about an hour’s drive south of Adelaide, and is a must-visit when you’re in the area.

screen-shot-2017-02-12-at-3-34-11-pm
Just some of the delicious offerings from the Port Elliot Bakery. (Image: Michael Mangahas)

photo_731_1415318658
The unassuming shopfront of the Port Elliot Bakery – although you will never see it this empty! (Image: travelguide.net.au)

The Port Elliot Bakery was established in 1989 by the Gormon-Horrocks family, who still own and operate it today. However the site has hosted a bakery since the 1860s, and its tradition of using fresh produce and baking  daily on the premises is maintained, along with the original wood fired oven.

screen-shot-2017-02-12-at-2-58-03-pm
The original Port Elliot bakers, the Bebee family (Image: portelliotbakery.com)  

I am fortunate enough to have visited the Port Elliot Bakery regularly for over 20 years, as it is located about 10mins drive away from my family’s holiday house. I can honestly say that I have never left disappointed as the food is always delicious and the service is quick and friendly (no matter how long the line-up is).

The pies, pasties and sausage rolls come in a wide range of delicious flavours and always have perfect crisp, flaky pastry, and the enormous array of beautiful and tempting sweets is sure to impress the harshest of critics.

338630_134786679959935_1365775407_o
A selection of their savoury goods. (Image: The Port Elliot Bakery Facebook page)

While everything I’ve tried has been excellent, my go-to is their steak and bacon pie** (so mouthwateringly tender and flavoursome) with a chocolate doughnut and a Farmer’s Union ice-coffee – perfection!

img_5256
Look at that perfect pastry…

img_5260
Melt in your mouth steak paired with bacon and a rich flavour-packed gravy… what more could you ask for?!

fullsizerender-4
With a deep golden exterior, soft fluffy interior and a dark chocolate icing, these are the doughnuts of my dreams

img_5269
Bailey is always more than happy to assist in eating Port Elliot Bakery goods!  

One of the reasons I love the bakery so much, is that it’s constantly innovating and updating its menu. The bakery offers a new “pie of the month” each month, and its recent Nutella and Oreo doughnut additions already have cult followings!

14590525_923272104444718_1839979544938360214_n
The bakery’s new Oreo cookies & cream doughnuts (Image: The Port Elliot Bakery Facebook Page)

The bakery has also developed a range of vegan options including ‘Fruchoc’, ‘Bounty’ and ‘Snickers’ slices, bliss balls, and salads.

14479703_918723174899611_4919212302071358403_n
“Fruchoc slice” a vegan option. (Image: the Port Elliot Bakery Facebook page)

Next time you’re down in the Fleurieu area, make sure you give the Port Elliot Bakery a visit. My advice is to get in early to avoid disappointment as the bakery is so popular that many items sell-out before 1pm. There is seating outside the bakery, but we like to drive to the Freeman Lookout and eat our bakery goodies with a magnificent ocean view where, between May and October, you might even be lucky enough to see whales.

horshoe-bay-lookout
Freeman Lookout

Port Elliot Bakery

Open: 7am-5:30pm every day but Christmas Day, Proclamation Day, New Year’s Day and Good Friday.
Location: 
31 North Terrace, Port Elliot, South Australia
Phone: (08) 8554 2475
Price: from $2.50
Rating: 5/5 cupcakes
5-star

screen-shot-2017-02-12-at-4-27-40-pm
* I’m sure if Jane Austen had tried their baked goods she would agree!

**tragically, as of January 2023, they are no longer offering the steak and bacon pie so I have had to adapt and opt for the steak, cheese and bacon pie #notquitethesame #bringbacksteakandbacon

Banana Bread with Chocolate Chips

This banana bread is super simple to make and is a perfect way to use up ‘dead’ bananas. It travels well so is great in kids’ lunch boxes, and will last for ~2 months in the freezer.

thumb_img_2899_1024

Ingredients (serves 8-10)
125g butter, softened
¾  cup caster sugar
2 eggs
2 teaspoons vanilla essence
3 overripe bananas
1 ¾ cups plain flour
1 teaspoon bicarb soda
½ cup milk chocolate chips (optional)

thumb_img_2893_1024

Method
Preheat your oven to 180°C (160°C fan-forced). Grease and line a 1-litre loaf pan.

Cream the butter and sugar with a handheld mixer until pale and thick. Beat in the eggs, vanilla and banana, followed by the flour and bicarb soda, beating until just combined. If desired, stir through the chocolate chips until evenly dispersed.

Pour the mixture into your prepared pan, smooth over the top and then bake for 55-60 minutes or until a skewer inserted in the thickest part of the bread comes out clean.

Allow to cool in the tin for 5 minutes before transferring to a wire rack to cool completely.

Enjoy! I love mine fresh for the first few days and then toasted with a bit of margarine.

thumb_img_2897_1024

Adapted from Matt Preston’s “Rock Star Banana Bread” from his Cook Book.

Coconut & Raspberry Bread

This is a ‘bread’ like banana bread, in that it’s really more like a bread-shaped cake. Name aside, it’s super simple to make and perfect for brunch, afternoon tea or dessert. I like it because it’s deliciously moist and not too sweet, but feel free to dust it with icing sugar to make it extra decadent. thumb_img_2444_1024

Ingredients (serves 8-10)
1 ¾ cups desiccated coconut
1 ½ cups coconut milk (I use Vitasoy unsweetened coconut milk found in the longlife milk section at most supermarkets)
¾ cup caster sugar
1 egg
1 teaspoon vanilla essence
1 ⅔ cups self-raising flour
1 cup frozen raspberries

thumb_img_2420_1024

Method
Add the coconut and coconut milk to a large bowl and stir to combine. Cover with Gladwrap and let it stand for 30 minutes.

Preheat the oven to 170°C. Spray a loaf pan with cooking oil and line with baking paper, ensuring you have overhang at both sides to help get it out.

Stir sugar, egg and vanilla essence in to the coconut mixture. Gently stir in the flour and then fold through the frozen raspberries.

Spoon into prepared pan and bake for 1 hour and 10 minutes, or until a skewer inserted come out clean. Cool in pan for 5 minutes, then lift onto a wire rack to cool completely.

Dust with icing sugar to serve if desired. Enjoy!

thumb_img_2449_1024
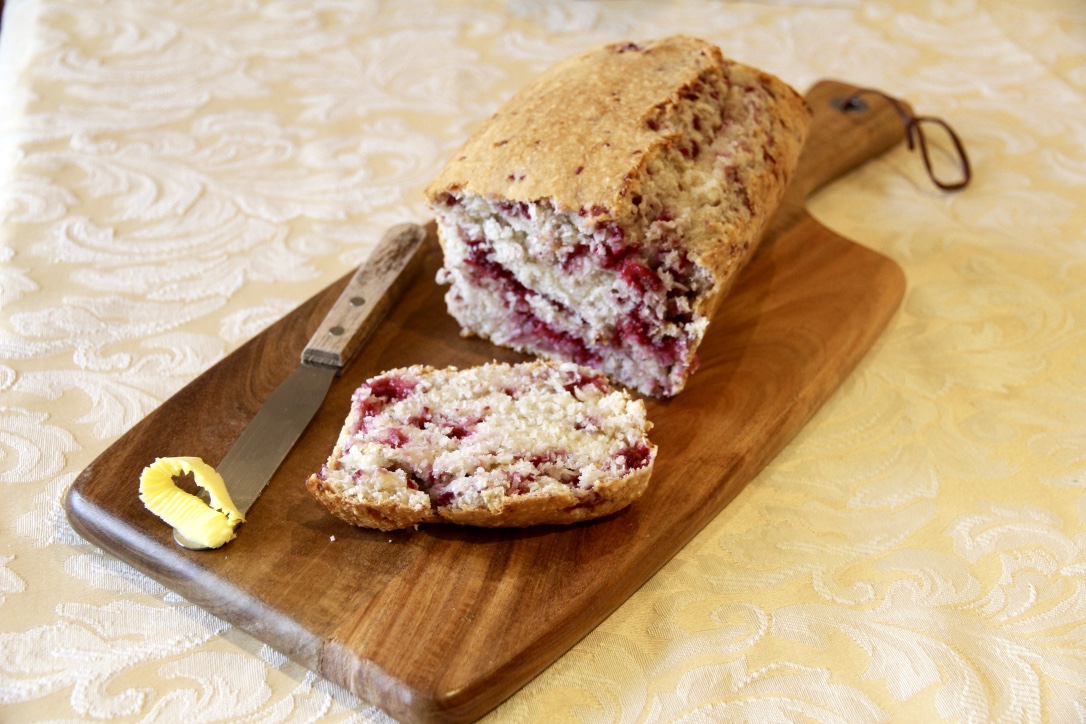
It’s also delicious toasted with margarine or butter!

Recipe adapted from a 2006 issue of Super Food Ideas.

Quick & Easy Indian Flatbread (Roti)

This recipe really gets a workout in our household because 1. we love Indian food, 2. we especially love having it with bread to soak up all the curry sauce deliciousness, & 3. this recipe is incredibly quick, easy & non-scary as it doesn’t involve yeast. We make rotis particularly when having butter chicken, but it’s great with all kind of curries. Thankfully, it only takes about 15-20 minutes from start to finish so is perfect for while your curry is simmering away.

It also travels really well as I discovered last week when we took butter chicken & rotis over to my grandparents’ house for dinner (see pic below), and will keep in cling wrap at room temperature for a couple of days (perfect for any leftover curry!)

image2-4

Ingredients (makes 12 rotis)
1 ½ tablespoons vegetable oil
2 cups plain flour
½ teaspoon salt
200ml water

Method
In a medium bowl, stir together flour, salt, water and oil until the mixture pulls away from the sides of the bowl. Turn the dough out onto a flat, floured surface and knead until smooth and pliable (around 10 minutes).

Preheat frying pan on medium-high heat.

Divide the dough into 12 equal parts, form into rounds and then roll each out to 15-20cm rounds with a rolling pin.

Cook the roti for about a minute on each side, or until it has some dark brown spots on each side. Serve warm.

Untitled

Recipe adapted from ‘allrecipes.com.au’.

Cinnamon Rolls

Inspired by the movie The Proposal which features some divine looking homemade cinnamon rolls, I decided to give making them from scratch a go. I did lots of research & eventually found a recipe on Pinterest which promised me a quick and easy bake using everyday ingredients. I was a little skeptical that they could possibly be considered ‘easy’, but they worked perfectly. The rolls are light, fluffy and packed full of sweet cinnamon flavour. They also fill your home with the most heavenly aroma and are especially amazing eaten fresh from the oven while still warm.

EYz0Pih7QumWBx1%tKn+TQ_thumb_cca

Ingredients (Makes 12)
1 cup milk
55g butter, chopped
3 ¼ – 3 ½ cups flour
1x 7g packet instant yeast
¼ cup white sugar
1 egg

Filling
1 cup brown sugar
1 ½ tablespoons ground cinnamon
115g butter, very soft

Cream Cheese Frosting
¾ cup icing sugar
13 tablespoon cream cheese
1 teaspoon vanilla
1 tablespoon of milk

CEb8sd2SQqGHRCOsygyK2g_thumb_cd1

Method
Heat milk & butter in the microwave (about 1 and a half minutes) or until the butter is at least partially melted. Stir using a small whisk, and set aside.

In the large bowl of your stand mixer (using the paddle attachment), mix together 2 cups of the flour, the yeast and the white sugar. When the milk mixture is warm but not hot, add it to the flour mixture along with the egg and beat for about 1 minute, or until well combined. Switch to the dough hook attachment and add remaining flour, half a cup at a time, until the dough just leaves the sides of the bowl (it should be very soft and slightly sticky). Continue with the dough kneading for another 5 minutes. Turn dough onto a floured surface and let rest while you make the filling.

To make the filling, ensure butter is soft and mix in the brown sugar and cinnamon until you have a paste.

To assemble, roll the dough into a large rectangle (around 30cm x 35cm) and spread brown sugar mixture evenly over the surface. Roll up from the longer side of the rectangle and pinch the edges to close. Score the roll into 12 equal pieces and then cut into rolls (dental floss can work well here!!).

Place into a 23cm by 33cm (or similar) pan that has been sprayed with cooking oil, cover with a clean tea towel and let the dough rise in a warm place for half an hour. Set oven to 180°C.

When the rolls have finished rising, bake for 15-20minutes or until light golden brown.

Make the icing by beating all ingredients together until smooth. Drizzle rolls with icing while still warm. Enjoy!

B3JNvDQuTX6HEnYoX0YlkQ_thumb_cc7

Adapted from the ‘Everyday Cinnamon Rolls’ recipe on ourbestbites.com

6Jyq0TgmWSlyatAMspQ_thumb_ccc

Notes:
– These rolls can be frozen at almost any point (before rising, after rising or when finished) and keep well in the freezer when covered in cling wrap and foil – then you have a delicious treat in a heart beat!
– If you don’t have a free standing mixer, use handheld beaters to combine the dough initially and then knead the dough by hand for around 7 minutes.