Black Forest Layer Cake

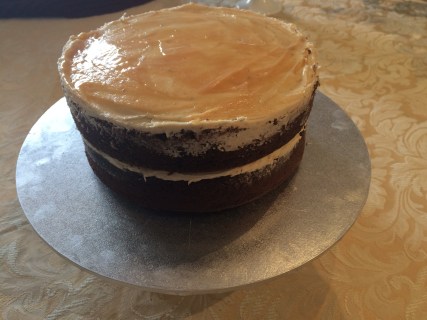
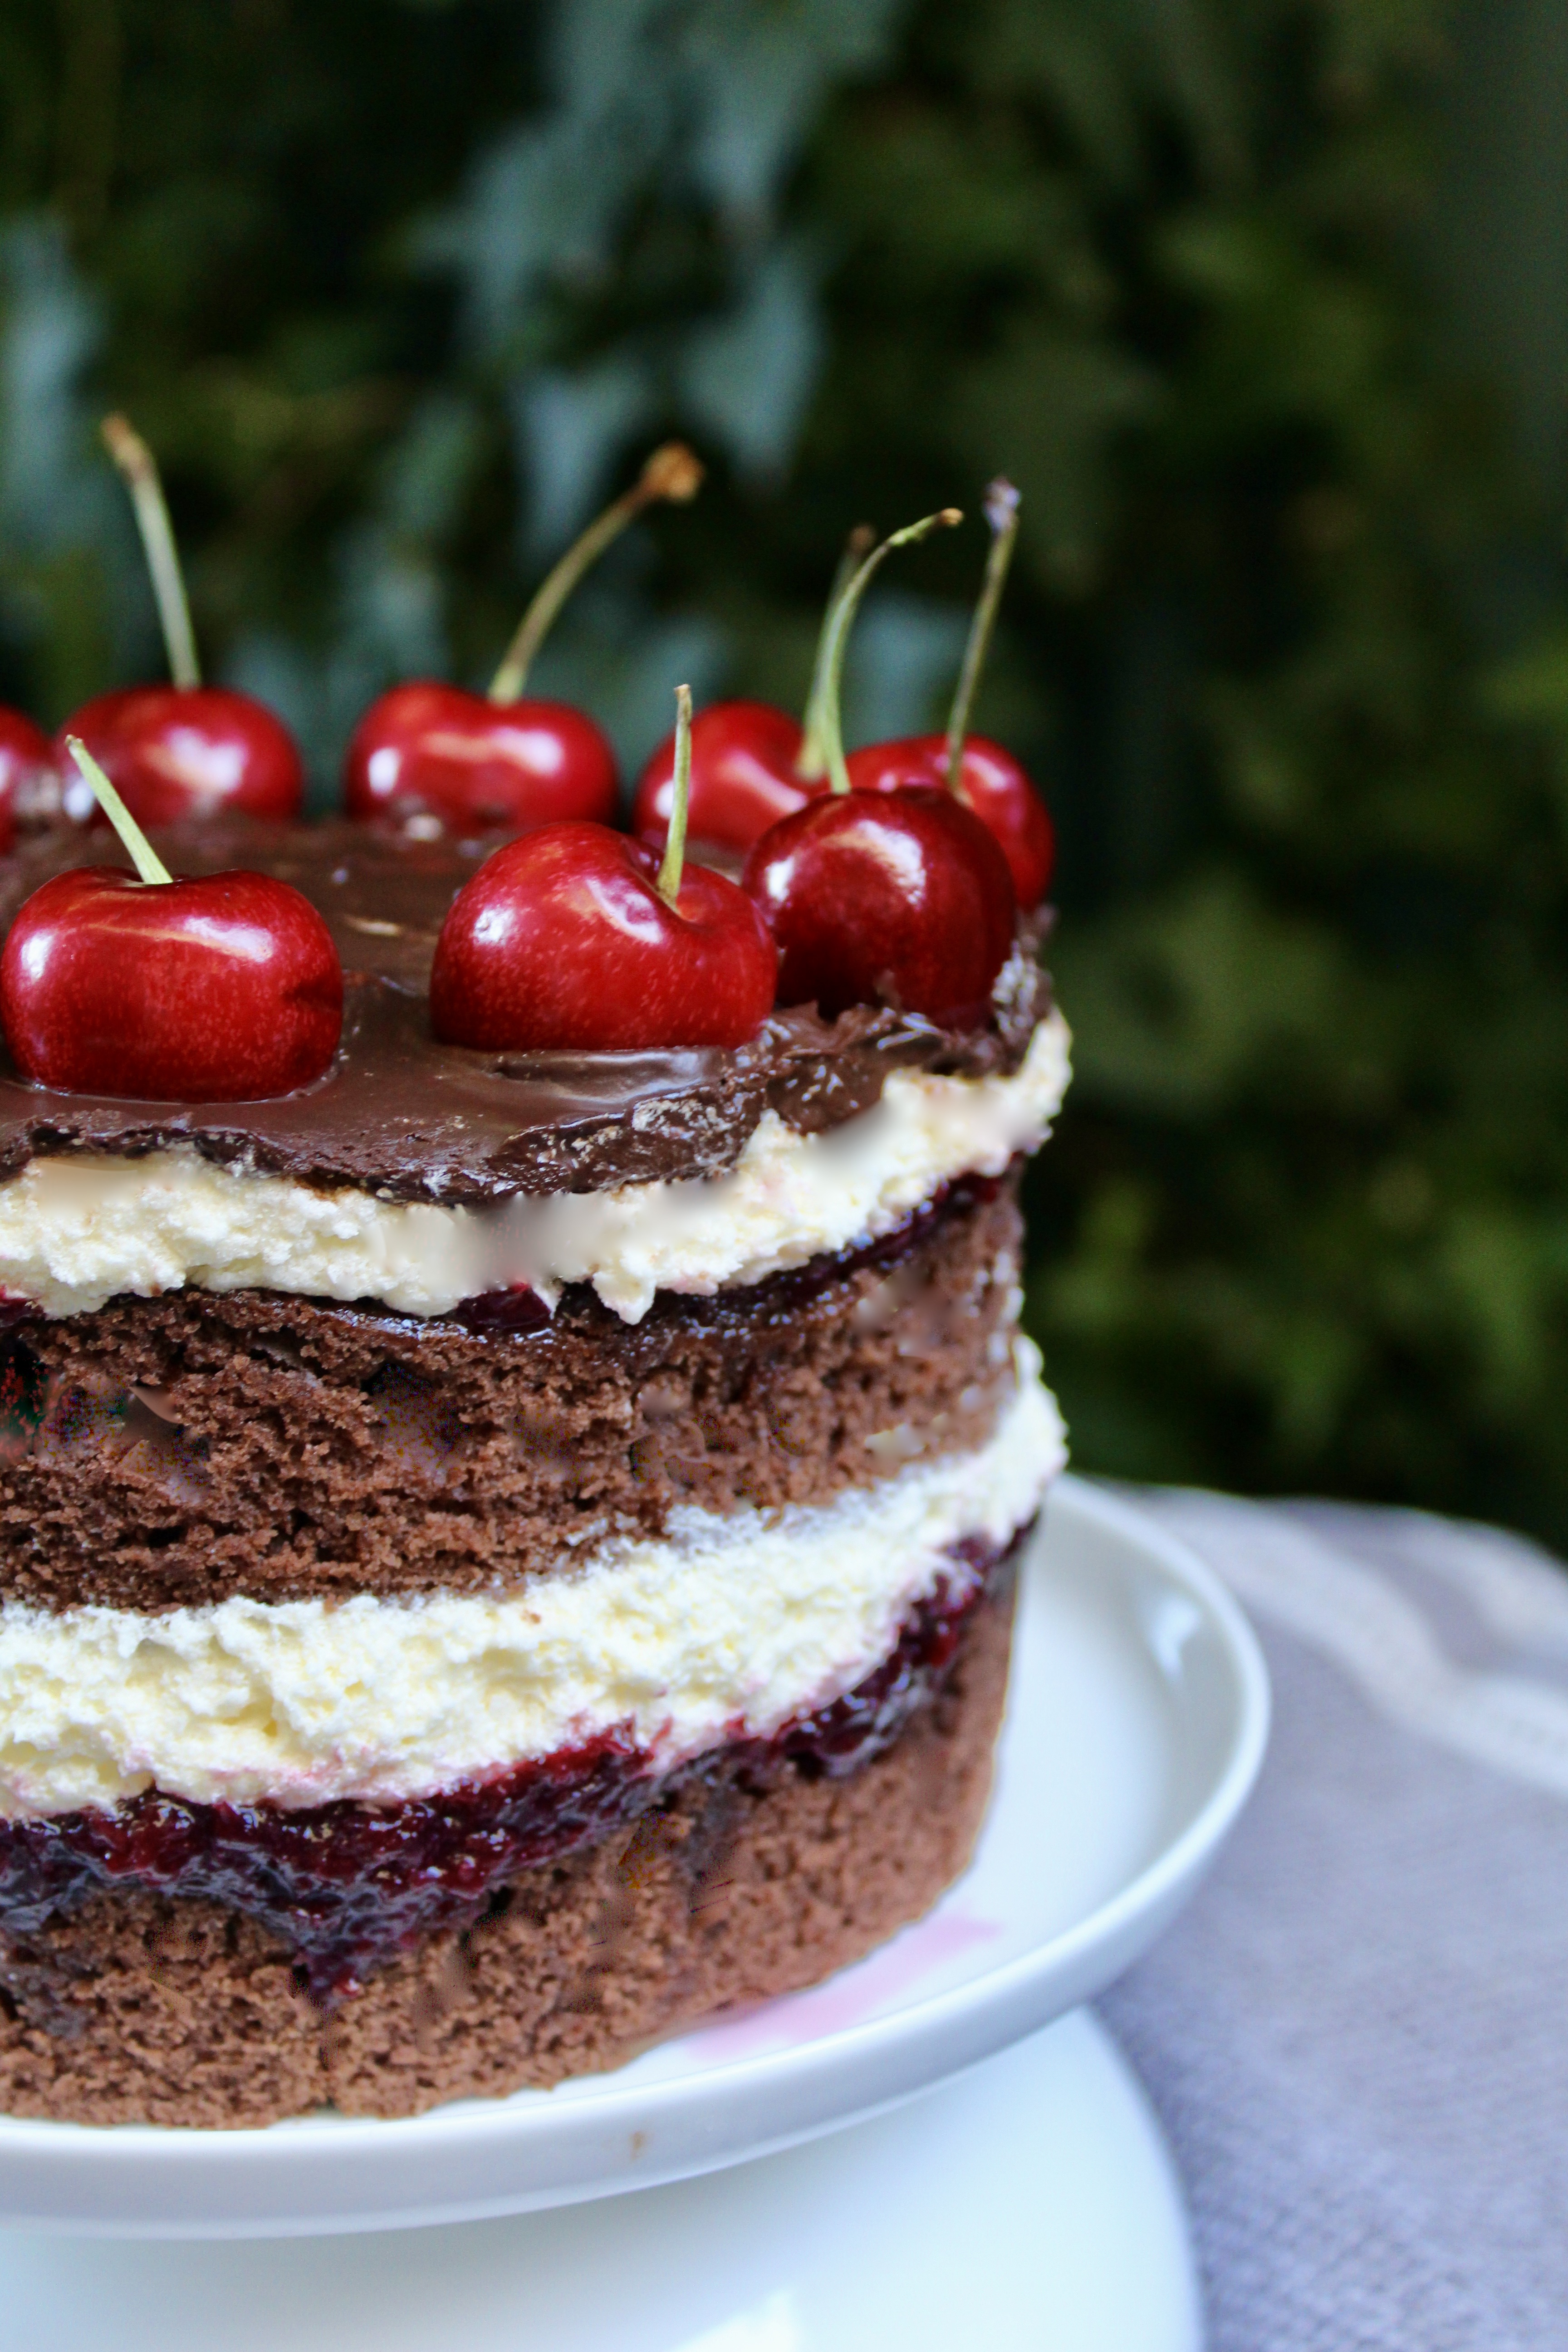
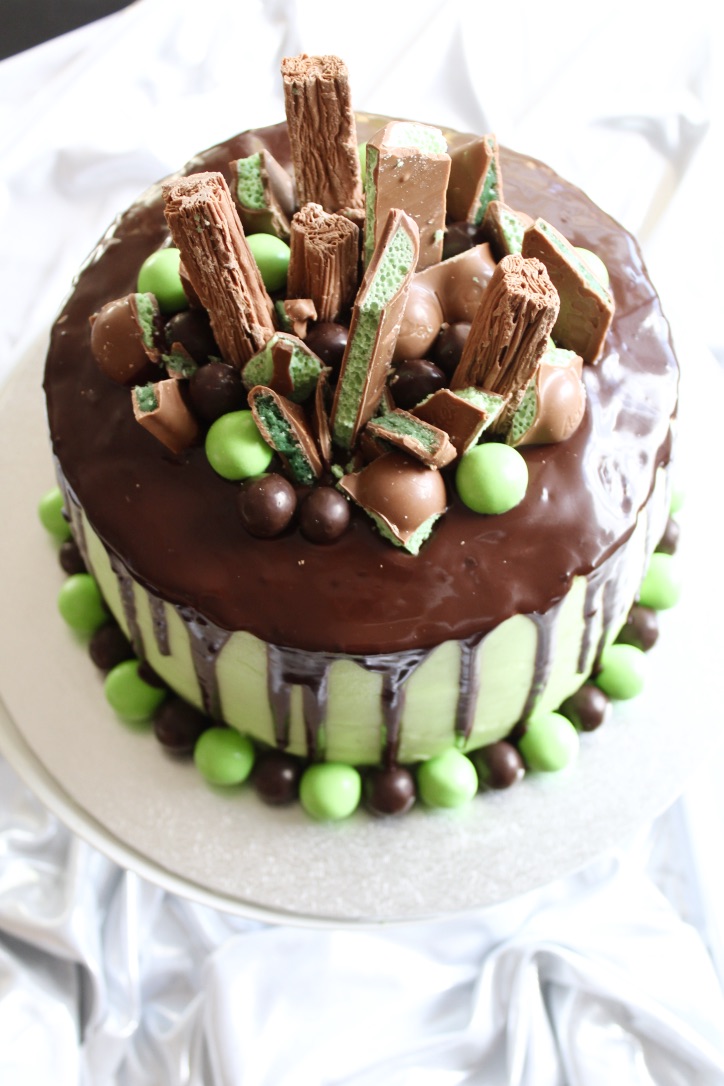
Black forest cakes are a tried and true favourite for a reason – especially when cherries are in season and at their most flavoursome. This is another cake using the Milk Bar method of cutting out rounds from a large rectangular sponge cake, ensuring you get perfectly even layers every time.

While I made this into a 2-layer cake this time as it was a gift for a couple in quarantine who didn’t need a giant cake, the recipe actually makes a 3-layer cake.

Ingredients (serves 12-14)
Equipment
9 x 13 inch “quarter sheet pan”*
A 6 inch cake ring*
6 inch wide acetate roll
Sticky tape

Chocolate Ganache
120g dark chocolate melts
90ml cream

Cake
115g butter, room temperature
300g caster sugar
3 large eggs
120ml buttermilk
60ml canola oil
2 tablespoons chocolate ganache
2 teaspoons vanilla extract
1 teaspoon instant coffee
130g plain flour
15g cornflour
70g cocoa powder
1½ teaspoons baking powder

Cherry Jam
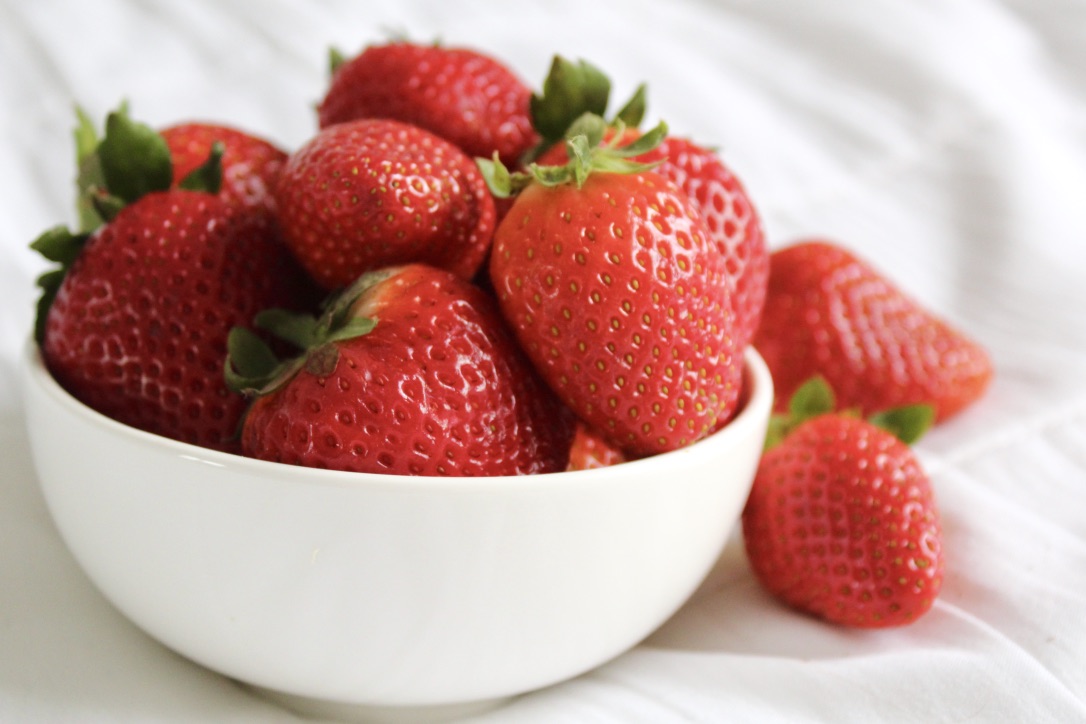
225g fresh or frozen cherries (pitted and chopped finely)
25g caster sugar
1 tablespoon cornflour

Buttercream
115g butter, roughly chopped, room temperature
2 teaspoons vanilla extract
2 cups icing sugar
1 tablespoons full-fat greek yoghurt, room temperature
½-1 tablespoon full-cream milk, room temperature

Cherry Milk Soak
40ml full-cream milk
25ml kirsch (cherry liqueur) or cherry juice

10-12 large fresh cherries, to decorate

Method

Chocolate Ganache
Add the dark chocolate and cream to a small saucepan and stir over a low heat until the chocolate is nearly melted. Remove from the heat and continue stirring until the chocolate is fully melted and smooth. Set aside (at room temperature).

Cake
Preheat oven to 180°C (160°C fan-forced). Spray the base and sides of a quarter sheet pan with cooking oil and line the base with baking paper.

Cream the butter and sugar together in a stand mixer, or a large bowl if using a hand mixer, on a medium speed until light and fluffy. Add the eggs and beat on high until combined.

Add the buttermilk, oil, 2 tablespoons of your pre-prepared chocolate ganache, vanilla and coffee into a small bowl and stir until the coffee has dissolved. Add this chocolate mixture into the the butter mix and beat on high for a few minutes, scraping down the bowl as required.

Sift the flour, cornflour, cocoa powder and baking powder into the batter. Beat on low until the mixture has just combined, and then pour the batter into the lined cake tin. Smooth out flat and tap the tray gently against the bench a few times to get out any air bubbles.

Bake for 25-35 minutes, or until a skewer inserted into the middle comes out clean. Leave to cool in the tin for about 15 minutes and then remove from the tin and place on a wire rack to cool completely.  

Cherry Jam
Place the cherries, caster sugar and cornflour into a saucepan over a medium heat. Stirring constantly, bring the mixture to the boil. Reduce the heat slightly and continue to stir until thickened.

Buttercream
Beat butter in a large mixing bowl with an electric mixer on medium speed for 1-2 minutes until butter is pale and creamy.

Add vanilla and 1 cup of icing sugar. Beat on a low speed to combine, then turn up to medium and mix for 30 seconds. Add the remaining icing sugar along with the greek yoghurt. Beat on medium speed until light and fluffy. If too stiff, add milk. If too wet, add extra icing sugar. It should be fluffy and spreadable.

Cherry Milk Soak
Add milk and kirsch to a small bowl and whisk to combine.

Assembling the Cake
Place your cake on a large chopping/bread board. Using the picture below as a guide, use a 6 inch metal cake cutter to cut out 2 rounds of cake and then two half pieces.

Image courtesy of ‘What Charlotte Baked’

Place the 6 inch cake ring onto a plate or cake stand. Line the inside of the cake ring with a ‘collar’ of acetate, taping the edges together to join.

Place the two half pieces of cake at the bottom and press down firmly. If there are any gaps, use extra cake scraps to fill in the holes and press down very firmly to make one even layer. Carefully remove the cake ring (but leave the acetate).

Spoon 2 tablespoons of the milk soak over the cake layer. Allow to soak for about a minute. Spoon approximately one third of the chocolate ganache onto the cake layer, and spread evenly, ensuring the ganache gets right to the edges of the cake. Spoon half of the cherry filling on top of the ganache and spread out evenly to the edges of the cake. Add a few tablespoons of buttercream on top and smooth with a spatula to ensure the layer is (roughly) even.

Repeat this process for the second layer: cake, cherry milk soak, chocolate ganache, the remaining cherry jam and a thick layer of buttercream. If you need to, attach another round of acetate on top of your current cake collar (using tape to join the two collars) to ensure it is tall enough that all cake is supported.

Add the final layer of cake, spoon with the remaining milk soak and then top with the remaining chocolate ganache. Decorate with a ring of cherries and place in the fridge to set for a few hours. While the cake sets, add any remaining buttercream to the cake offcuts and enjoy as a snack!

Remove the cake from the fridge and gently peel away the acetate strip/s just before serving. Enjoy!

Recipe adapted from What Charlotte Baked ‘Black Forest Naked Cake’. Buttercream recipe adapted from The Sweetest Menu ‘Milk Bar Birthday Cake’.

*If you don’t have a quarter sheet pan and/or round cutter, you can use two 8 inch/three 6 inch round cake pans

Advertisement

Lemon Meringue Sponge Cake

Light as a feather sponge cakes sandwiched with tangy lemon curd and enrobed in pillowy torched meringue – what’s not to love?! I made this cake for my 26th birthday and it has become a favourite. It is best to make the lemon curd the day ahead and the meringue just before serving.

B1F16B08-DD32-4048-9FB8-3561BD1A8DBB_1_105_c

Ingredients (serves 12)
Lemon Curd (makes 2 cups)
1 cup white sugar
3 eggs
1 cup fresh lemon juice (approx. 4-5 lemons)
Zest of 2 lemons
115g butter, melted

Sponge Cake
4 eggs
3/4 cup caster sugar
1 cup self-raising flour
1 tablespoon cornflour
10g butter
1/3 cup boiling water

Meringue
3 egg whites
3/4 cup white sugar
1 teaspoon vanilla extract
Kitchen blowtorch (optional)

2FFCA891-BF02-4BBF-A7B5-4EA4BEFB07AA_1_105_c

To make the lemon curd, whisk together the sugar and eggs in a large microwave safe bowl until thoroughly combined. Whisk in lemon juice, zest and melted butter. Cook in the microwave on full power for 50 second intervals, whisking after each interval. You will know your lemon curd is ready when it coats the back of a metal spoon (approximately 3-5 50 second intervals). Pour into a sterile jar or container and allow to cool to room temperature before covering it with a lid and storing it in the fridge.

To make the sponges, line and grease two deep 20cm round cake pans. Preheat oven to 180°C (160°C fan-forced).

In a large bowl, beat eggs with electric mixer until thick and foamy. Gradually add sugar, about a tablespoonful at a time, beating until sugar is dissolved between additions (total beating time approx. 10 minutes). Sift flour and cornflour together over the egg mixture. Gently fold to combine. Combine butter and water and gently fold through egg mixture.

Divide mixture evenly into prepared pans. Bake sponges about 25 minutes or until a skewer inserted comes out clean. As soon as the sponges are baked, turn out upside-down onto wire racks covered with baking paper to cool.

Once the cakes are completely cool, glue one sponge to a cake stand or serving plate using lemon curd. Spread a generous layer of lemon curd over the top of the cake and gently place the second sponge on top, taking care not to squeeze out too much of the curd from the middle (scrape away any excess from the sides).

To make the meringue, use electric beaters to whisk the egg whites and sugar in a large heat-proof bowl until frothy. Fill a medium saucepan with a few inches of water and place over a medium heat. Place the mixing bowl on top of the saucepan to create a double boiler. Whisking constantly with the beaters, heat the egg white mixture until the sugar dissolves completely and it is warm to the touch. Take the bowl off the saucepan, add the vanilla and mix on high until you have medium-stiff glossy peaks.

Working quickly, heap the meringue mixture onto the top of your sponge cake and gently spread down the edges with a metal spatula until the cake is completely covered. Create some texture with the meringue on the sides and top of the cake (this is one time where you don’t want it to be perfectly smooth). Use a blowtorch on low-medium to toast the meringue until it is your desired colour. Serve immediately.

Note: the cake is best eaten on the day it is made as the meringue changes texture, however it is still good the following day. Store covered at room temperature.

70EE0982-1FB5-4191-8F81-B888612A48AB_1_105_c
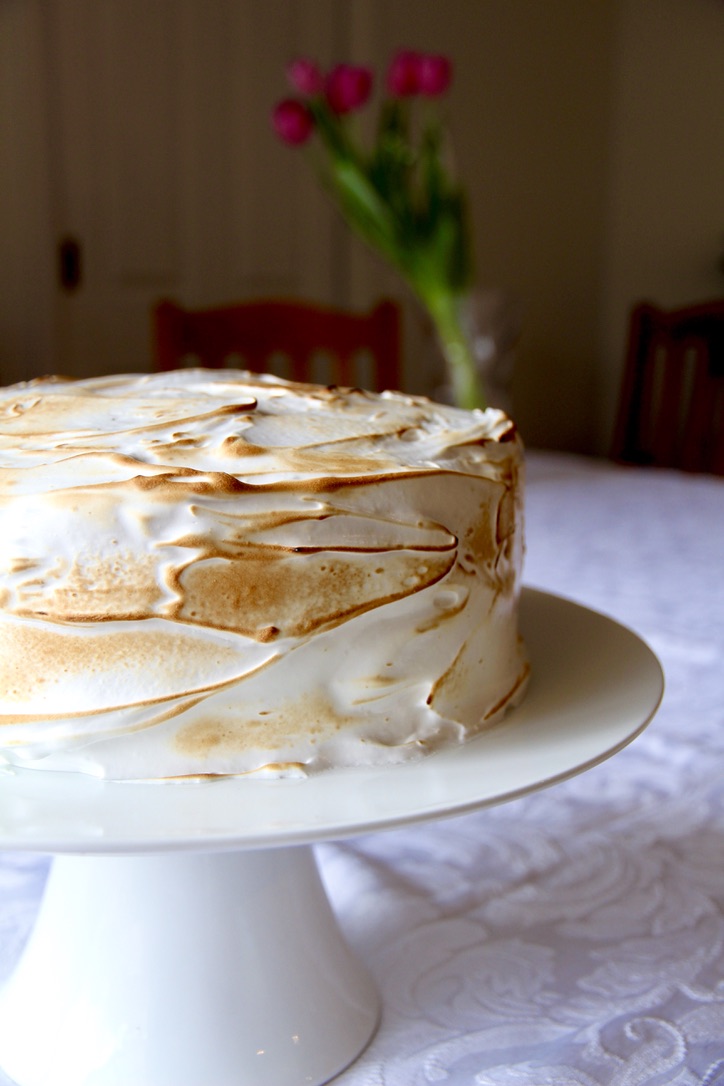
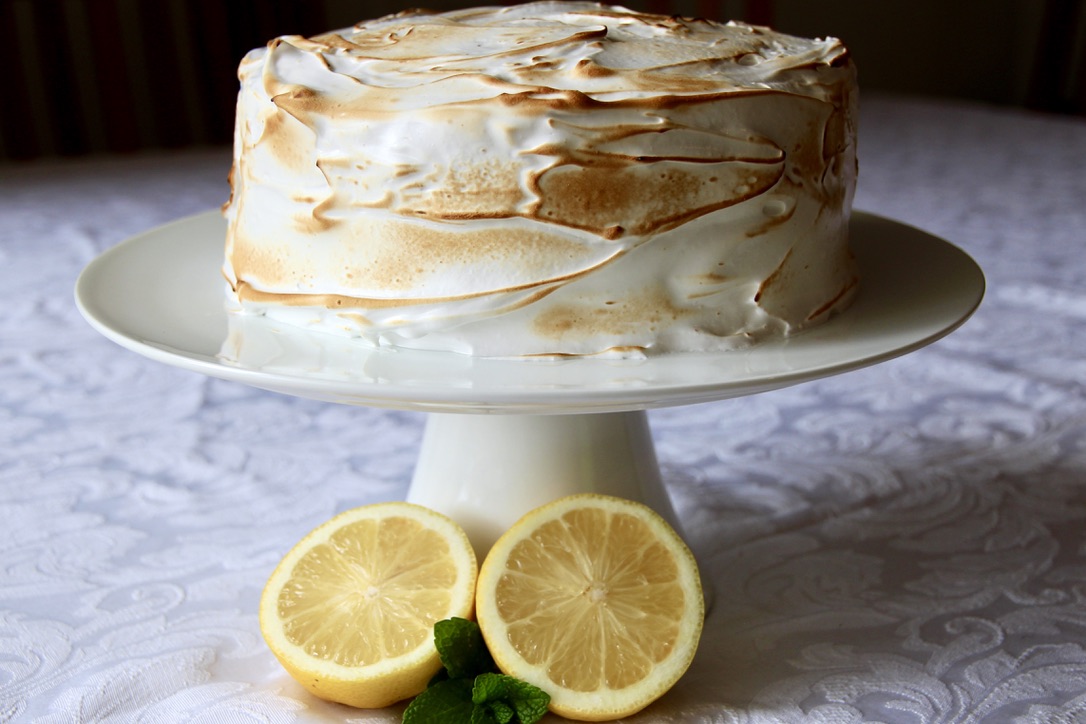
Lemon curd adapted from My Baking Addiction microwave lemon curd.
Sponge cake adapted from the Australian Women’s Weekly ‘Best Ever Sponge Cake’.
Meringue icing adapted from The Cake Blog lemon meringue cake.

Cream Tart Number Cake

I love the look of these number cakes (also known as cream tarts or alphabet cakes) that are all over Instagram and was thrilled when my sister asked me to make her one for her 21st Birthday.

While they’re a bit fiddly to make and decorate, I was surprised by how quick they are to make; largely as they take so little time to bake in the oven. I also love how customisable they are – you can use any letters or numbers you choose, pick your decoration colour scheme, and change the flavour of the filling to taste. I went with a traditional almond biscuit with a vanilla custard filling and decorated with strawberries and pink and white flowers, meringues and macarons.

kYtnHJ%2Rkqf0Zwc3K6auA_thumb_542

Ingredients (makes two A3-sized number cakes, serves approx. 20)
Pâte Sablée (biscuit layers)
– 225g butter, room temperature
– ½ cup icing sugar
– 1 egg
– 2¼ cups flour
– 1 cup almond meal
– 1 teaspoon almond essence
– 1 teaspoon vanilla essence

Vanilla Custard Filling
– 6 cups thickened cream
– 3 100g packets Cottee’s Instant Vanilla Pudding mixes
– 1 cup icing sugar
– 3 teaspoons vanilla essence

Other
– Cut out A3 sized numbers (I used a 1 and a 2 stretched to fill an A3 page each in bolded Arial Black font)
– Extra large square silver cake board
– Fresh, pesticide-free flowers
Macarons
– Meringues
– Sugar flowers
– Strawberries (halved)

3+poHP4ETemEapj2g2DpUQ_thumb_513

  1. To make the biscuit layers, place all pâte sablée ingredients into a food processor and blitz until combined.
  2. Remove the dough from the processor and knead gently for 30 seconds until smooth. Halve the dough, press each into a disc shape, cover in clingfilm and refrigerate for at least 30 minutes.
  3. Pre-heat oven to 180ºC.
  4. Roll one of the pieces of dough between two pieces of baking paper until it’s big enough for your number template (approx. 5-6 mm thick). Carefully cut out the first number from the dough, keeping the excess pieces. Place onto a baking tray lined with baking paper.
  5. Repeat with the same number and the excess dough (remember that you need two of each number).
  6. Bake the two biscuits for 12-15 minutes or until golden brown. Allow to cool completely before VERY gently transferring one of the biscuits onto to the silver cake board and setting the other aside.
  7. Take out the second half of the dough from the refrigerator and repeat steps 4-6 for the second number.
  8. To make the vanilla filling, whip the cream in a large bowl with an electric mixer until peaks form. Alternately add the pudding mix and the icing sugar while beating, until the filling is combined and very thick.
  9. Spoon the filling into a piping bag with a medium-sized round nozzle and pipe even dollops in rows on each number (as below) IMG_9951
  10. Gently sandwich the biscuit pairs on top of the filling and repeat step 9.
  11. Decorate with flowers, macarons and meringues.
  12. Enjoy!

YJt3B8KhQSKFB4j9yIbfeA_thumb_522

Notes:

  • The biscuits can be made the day ahead and kept in an airtight container, but don’t pipe the filling or assemble the cake until the day of serving.
  • If any of your biscuits break, don’t panic, simply ‘glue’ the biscuit back together with some of the vanilla filling prior to piping the filling on top and decorating – no-one will ever know!
  • Can be kept in the refrigerator for up to 3 days but the biscuit layers will go soft.

Biscuit recipe adapted from ‘Cream Tart’ recipe on Home Cooking Adventure.com

Vanilla filling recipe adapted from ‘The Best Whipped Cream Frosting’ on Two Sisters Crafting.com

IMG_9984


Giant Cookie Cake

UNADJUSTEDNONRAW_thumb_61

For my birthday this year, I decided to bake something a little different. As much as I have enjoyed making (and eating!) my layered drip cakes (here and here) over the last couple of years, this year I was after something simpler. Enter the cookie cake.

I have admired the brightly coloured array of delicious looking cookie cakes on Sally’s Baking Addiction (my baking porn website of choice) for years, and finally got around to making it. Boy, am I glad I did! As promised, this ‘cake’ is so quick and simple to make and produces a deliciously chewy and flavoursome giant cookie. The recipe is also very easy to adapt – you could use M&Ms, or mix up the choc chips depending on your taste.

VrWBmyKVSmSUCikS6jWSCA_thumb_58

Ingredients (serves 12-14)
170g softened butter
1 cup brown sugar
1 egg + an extra yolk
5 teaspoons vanilla extract
2 cups flour
2 teaspoons cornflour
1 teaspoon baking powder
1½ cups chocolate chips (I used dark chocolate)
Chocolate frosting for topping (optional)

xDp+PpGzQWSllld1vEVb%A_thumb_4b

Method
Preheat your oven to 180°C. Spray a 23cm (9-inch) pie dish or cake pan thoroughly with nonstick spray.

In a large bowl, beat the butter for 1-2 minutes until light and creamy. Add the brown sugar and beat for about a minute or until combined. Mix in the egg, egg yolk and vanilla on until combined, scraping down the sides of the bowl as required.

In a separate bowl, combine the flours and baking powder. On a low speed, gradually mix into the wet ingredients until combined. Add in 1¼ cups chocolate chips and mix for until evenly dispersed.

Gently press the cookie dough evenly into the prepared pan. Bake for 20-25 minutes or until the cake is lightly golden brown (use a skewer in the centre to check it’s cooked). Remove from the oven and set the pan on a wire rack to cool completely.

Once cooled, use a sharp knife or metal spatula to loosen the sides of the cookie cake from the pan and transfer to a cake stand or serving plate.

Decorate as desired (I made a quick chocolate buttercream using butter, icing sugar and cocoa powder and piped it on using my Wilton 1M tip), top with the remaining chocolate chips and serve with vanilla ice-cream. Enjoy!

zdB0RHF5TnWwFbnTlc6i8g_thumb_62

Recipe adapted from ‘Chocolate Chip Cookie Cake’ on Sally’s Baking Addiction.

kYGL4+ihStuSNZuhr1g5ug_thumb_4f

My Famous Guacamole

It feels a bit cheeky to call this a recipe as it’s so easy and basically impossible to mess up, but it’s been my most requested ‘recipe’ among my friends and it’s about time I shared it. Adjust it to suit your palate (no two guacamoles I make are exactly the same), but here is the basis of the guacamole that features prominently at most Bills gatherings. We usually serve it with salted corn chips, but it also works well with flavoured Doritos, crackers, veggie sticks, or my sister’s weird but delicious favourite, salt and vinegar chips. Of course it is also a perfect addition to tacos, burritos and nachos.

Warning: once you make it for your friends, you will never be allowed to bring anything else to a party… ever!

8%VLuzCnSS68sMxiT+czAQ_thumb_1b82

Ingredients (makes enough for 1 packet of corn chips)
2 ripe avocados
1 medium sized clove of garlic, finely diced
2 teaspoons tomato, finely chopped
3 teaspoons lime juice
2 teaspoons sweet chilli sauce
1 teaspoon Tabasco sauce (optional)
Salt
Pepper
Coriander leaves, to serve
Corn chips, to serve

PsuEvIHjRySbOShBECePuw_thumb_1b77
Ft. Adelaide Crows scarf in the background because it’s AFL Grand Final Day!!

Cut up the avocados into small cubes and scoop into a medium sized bowl. Mash gently with a fork until mostly squashed but with some lumps (I prefer the term ‘texture’) remaining.

Dice the garlic (making the pieces as small as possible) and tomato and add to the avocado. Gently stir through with the fork.

Add in the lime juice, sweet chilli sauce and tabasco sauce (if desired). Stir until combined. Season with salt and pepper. Taste it and add more of any of the ingredients until it’s balanced and to your liking.

Transfer into a small serving bowl, top with a couple of coriander leaves and enjoy!

E2R2gaLZQIGYJ+79TSNpnw_thumb_1b62

Recipe adapted from Emma, my neighbour from Canberra.

And because it’s always stuck in my head, enjoy the horrendously catchy ‘Guacamole Song’ here!!

Chocolate & Mint Drip Cake

I made this cake for a combined Birthday/Bon Voyage dinner last weekend. I love the combination of chocolate and mint and am always keen to try out large layer cakes when cooking for a crowd.

Keep pieces small to ensure it’s not overly rich – maybe try out this technique from the genius Katherine Sabbath!

uyXWQVeBSyGoNWAE7osPcQ_thumb_e36

Ingredients (serves 16-18)
Chocolate Layer Cake
2 boxes Betty Crocker moist devil’s food cake

Mint Buttercream Frosting
200g butter, softened
½ cup milk
½ teaspoon vanilla extract
8 cups icing sugar
2-3 drops peppermint oil (or to taste)
a few drops of green food colouring

Dark Chocolate Ganache
170g dark chocolate melts
¾ cup cream
1 ½ teaspoons corn syrup

Toppings
2 x Flake bars
3 x Peppermint Crisp bars
3 x double Aero bars
1 x packet Darrell Lea BB’s chocolate mint balls
1 x packet dark Maltesers

y0FihIuCSCaDgQastXb44w_thumb_e33

Method
Make 4 cakes, according to packet instructions, by halving the batter from each cake mix and baking in 20cm cake tins. Carefully trim cooked cakes where necessary to ensure they are perfectly flat, and use the best 3 (freeze the 4th for another time).

To make the frosting, cream the butter for 1-2 minutes. Add the milk, vanilla extract and half of the icing sugar and beat for at least 3 minutes or until the mixture is light and fluffy. Add the remaining icing sugar along with the peppermint oil and food colouring and beat for a further 3 minutes or until light and fluffy.

Attach your base cake to a cake board or serving tray by using a small amount of frosting as glue. Spread a layer of frosting onto the top of the cake and then top with the next cake layer. Repeat.

IMG_7703

Spread frosting onto the top and sides of the cake – don’t worry if you get crumbs in it, this is called the crumb coat. Using a spatula or protractor (as I did!), scrape off excess frosting so you have a thin smooth layer. Refrigerate cake for 30 minutes or until frosting is firm.

Add a second layer of frosting onto the top and sides of cake, again scraping off the excess and creating a smooth finish.

Place chocolate melts into medium bowl and set aside. Heat cream in a saucepan over medium-high heat just until it almost starts to simmer. Remove from heat and pour over chocolate. Let sit for about 5 minutes and then stir with a wooden spoon until chocolate is completely melted and smooth. Stir in corn syrup. Allow to cool until slightly thickened.

Use a spoon to add a few purposeful drips over the top edge of the cake. Then spoon more ganache on top of the cake, allowing it to drip at varying points around the cake.

Top cake with Flake pieces, peppermint crisp shards, Aero pieces, Maltesers and bb’s. Alternate Maltesers and bb’s and make a ring around the base of the cake.

Serve by cutting into small pieces. Enjoy!

lWCv5RJDQfOWT5oQnp51Fw_thumb_e4c

Yg8SqPqtQg6TkS%yAuiGHw_thumb_e37

SaveSaveSaveSaveSaveSaveSaveSave

Butterfly Cakes with Strawberries & Cream

4r4f+HrwRyiAVM+exY9USg_thumb_d49

Considering it’s winter, we have been incredibly lucky to have an abundance of delicious, flavoursome strawberries and these cakes take full advantage of them.

zUuD1C6uQ+O34%Yrysxlkw_thumb_d45

These cupcakes are probably the quickest and easiest to make in the history of the world;  you simply blitz the ingredients in a food processor, divide into patty pans and bake!

The cakes are very light with a soft, sponge-like texture, which makes them perfect for butterfly cakes. If butterfly cakes aren’t for you, they’re also delicious with a frosting of your choice (try my vanilla buttercream or marshmallow frosting).

reHoi07+TbijnoL2o8%4NQ_thumb_d17

Ingredients (makes 12)
1 cup (125g) self-raising flour
⅔ cup (125g) caster sugar
125g butter, softened
2 large eggs
1 teaspoon vanilla extract
2 tablespoons milk
Sweetened thickened cream (or whipped cream)
Good quality strawberry jam
Fresh strawberries, halved (optional)
Icing sugar

BKVg8WuiQsWvmNzfzVXnNQ_thumb_d19

Method
Preheat oven to 200ºC and line a 12-hole muffin tin with patty pans.

Put all of the ingredients except for the milk into a food processor and blitz until smooth. Pulse while adding the milk until just combined.

Divide batter evenly among the patty pans (I know it doesn’t look like much batter, but they will rise a lot).

Bake for 15-20 minutes or until a skewer inserted comes out clean. Transfer immediately onto a wire rack to cool completely.

If you will be serving the cakes immediately, make your thickened cream and cut up your strawberries while the cakes cool.

Using a sharp knife at a 45 degree angle, cut out a circle from the top of each cake and cut it in half to make the butterfly wings. Fill the holes with a teaspoon or so of strawberry jam and then top with cream, butterfly wings and another line of jam. If you like, you can serve them like this in the traditional butterfly cake style (below).

cK1kGHjXTt+7BZ+IryKDzg_thumb_d0b

For me though, I love fresh strawberries so I top each cake with a strawberry half and then sprinkle with icing sugar. Enjoy!

NRowYsLGTmuyv9A1XZrSEg_thumb_d16

NB: filled cakes are best eaten with 6 hours
Recipe adapted from Nigella Lawson’s ‘Cupcakes’ in How to Be a Domestic Goddess. 

SaveSaveSaveSaveSaveSave

Funfetti Cupcakes

These delicious vanilla cupcakes are made even better by the addition of sprinkles! Perfect for birthdays, baby showers or any time you feel like celebrating.

thumb_img_2909_1024

Ingredients (makes 24+ cupcakes)
2 ¾ cups plain flour
2 tspns baking powder
200g unsalted butter, softened
1 ¾ cups caster sugar
4 eggs
1 tblspn vanilla extract
1 cup milk
1 cup rainbow sprinkles

Vanilla Buttercream Frosting 
200g butter, softened
½ cup milk
1 tblspn vanilla extract
8 cups icing sugar
A few drops of food colouring as desired
Sprinkles, to decorate

thumb_img_2913_1024

Method
Preheat the oven to 170°C (approximately 150°C fan-forced). Line two 12 hole muffin trays with patty pans.

Sift together the flour and baking powder. In a different bowl, cream the butter for 1-2 mins. Add the caster sugar about a third at a time, beating for 2mins after each addition. After the last of the sugar has been beaten, beat until the mixture is light and fluffy and the sugar dissolved. Add the eggs one at a time, beating for 1 min after each addition or until the mixture is light and fluffy. Add the vanilla and beat until just combined.

Add approximately a third of the flour mixture to the creamed mixture and beat on a low speed until combined. Add half of the milk and beat until combined. Repeat this process until all of the flour and milk is thoroughly combined but be careful not to overbeat (this will toughen the mixture). Add in the sprinkles and gently stir through until evenly dispersed.

Spoon mixture into the patty pans (filling each about 3/4 full) and bake for about 18-20mins or until the top springs back when touched. Remove the cupcakes from the trays immediately and cool on a wire rack for at least half an hour before icing.

To make the frosting, cream the butter for 1-2 mins in a large bowl using an electric mixer. Add the milk, vanilla and half of the icing sugar and beat for at least 3 mins (until the mixture is light and fluffy). Add the remaining icing sugar and beat for a further 3 mins or until of a spreadable consistency. Add extra milk if too dry or extra icing sugar if too wet. Add colouring and beat in until combined and the desired colour has been achieved.

Using a piping bag with a Wilton 2D tip, pipe buttercream in a swirl on the cupcakes and decorate with extra sprinkles.

Enjoy!

thumb_img_2902_1024

thumb_img_2908_1024

Recipes adapted from The Crabapple Cupcake Bakery Cookbook.

#birthdaycakegoals & My Baking Inspiration

I intended to do this as a Mother’s Day tribute… then to post it around my Birthday… but this year has got away from me, and it has only been this weekend while sorting through old photos that this post has been able to become a reality.

A lot of people ask me where I get my motivation to bake from and how I can be bothered to take the time necessary to make my creations look good. Well, the answer is simple: my Mum is my biggest baking inspiration, and I attribute much of my motivation to her exquisite birthday cake creations over the years which are a feast for the eyes as much as for the tastebuds.

While I agree that it’s the taste of the food that counts the most, I think we “eat with our eyes” (to borrow an old MasterChef cliché) and how food is presented really does matter, as it can enhance or detract from the whole experience. I also really enjoy the challenge and creativity involved in making my food look as good as I can and find it as, if not more, fulfilling than eating the end product!

Without further ado, I present to you a small selection of Mum’s finest cakes from my childhood, the very creations that inspired my love of baking (please excuse the 90s-00s photo quality):

Hand made figurines for my Peter Rabbit themed 4th Birthday party.

thumb_img_4064_1024Bananas in Pyjamas cakes for my sister Laura’s 2nd Birthday

thumb_img_4059_1024
My gorgeous 1st Birthday cake 

thumb_img_4073_1024
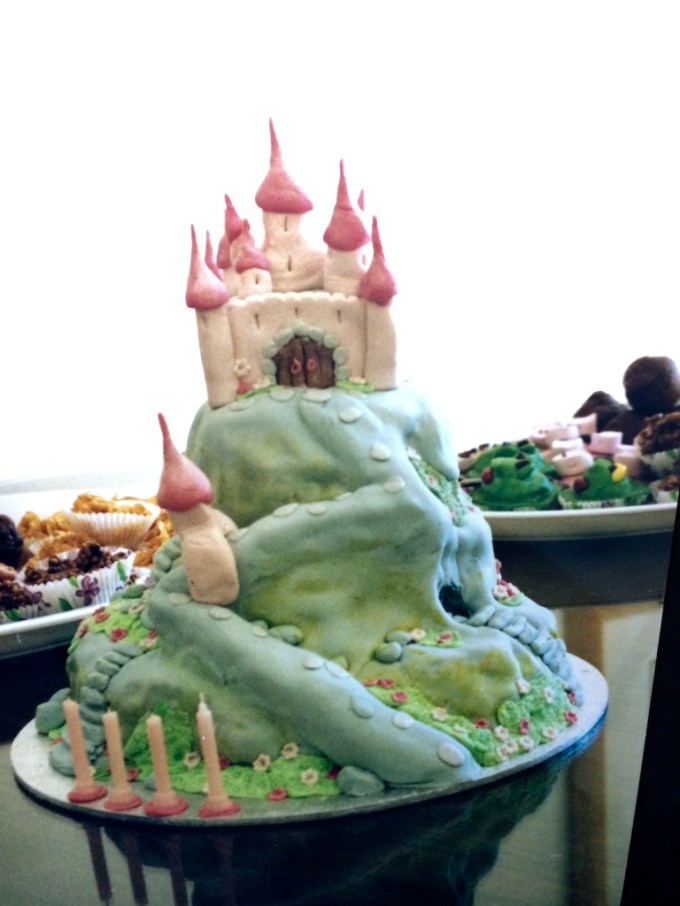
A beautiful fairytale castle cake for Laura’s 4th Birthday 

thumb_img_4062_1024
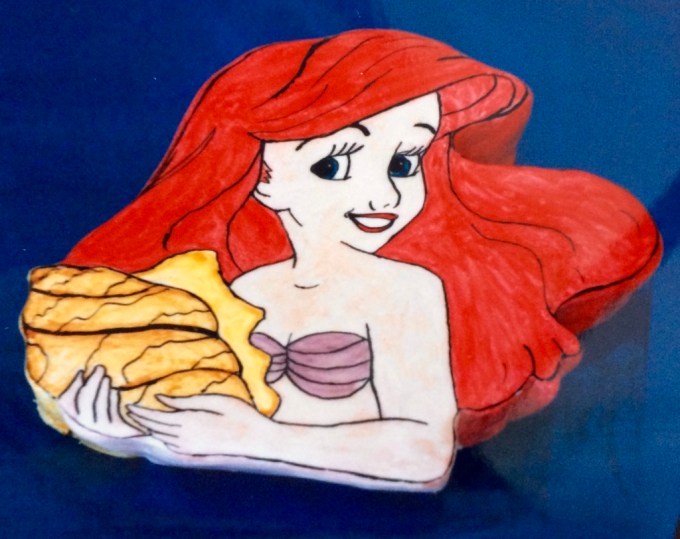
An Ariel cake for my mermaid-themed 5th Birthday party

thumb_img_4068_1024A sleeping dragon cake for my magical 7th Birthday party 

thumb_img_4038_1024A Johnson cake (from Johnson and Friends) for my 3rd birthday 

thumb_img_4075_1024
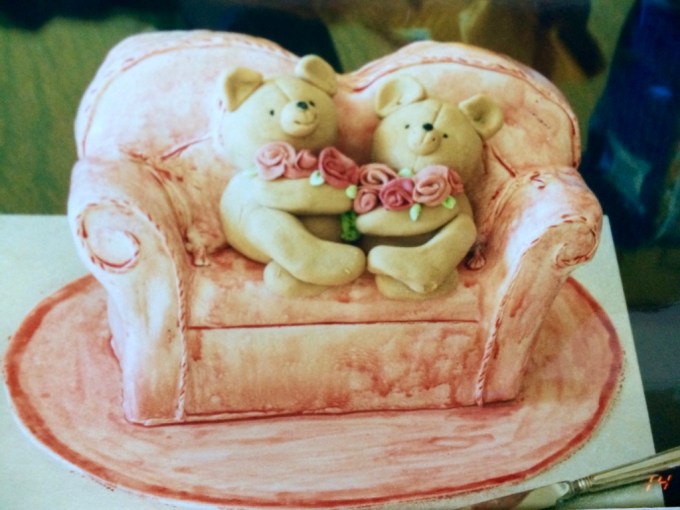
A ‘Forever Friends’ cake for Laura’s 5th Birthday

thumb_img_4106_1024The cake for my 10th Birthday ten-pin bowling party

thumb_img_4104_1024A Shirley Barber inspired fairy cake for my 6th Birthday party

thumb_img_4096_1024A ‘Spot the Dog’ cake for Laura’s 1st Birthday 

thumb_img_4101_1024
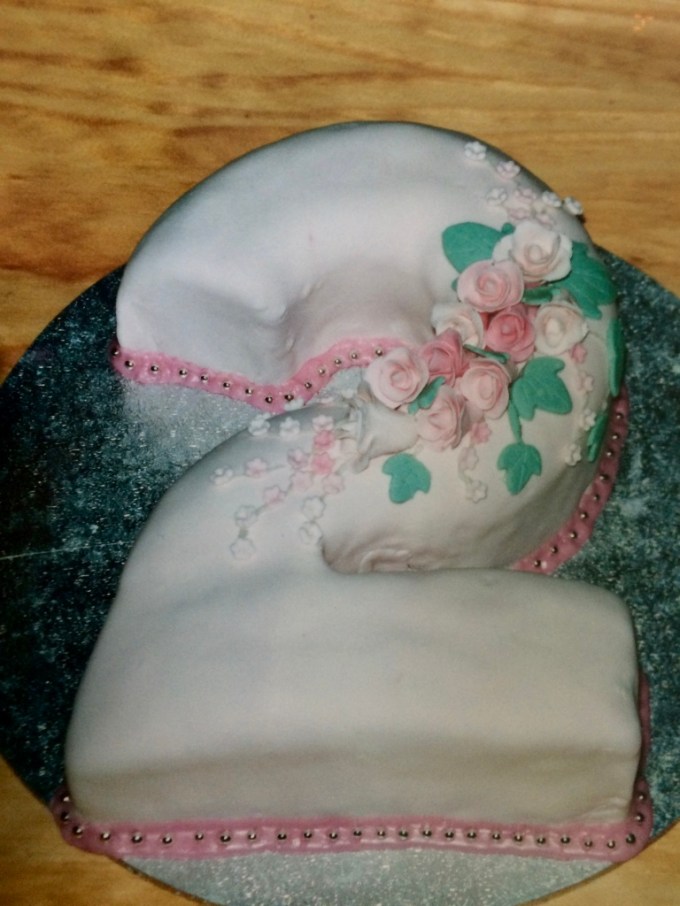
My 2nd Birthday cake 

thumb_img_4082_1024
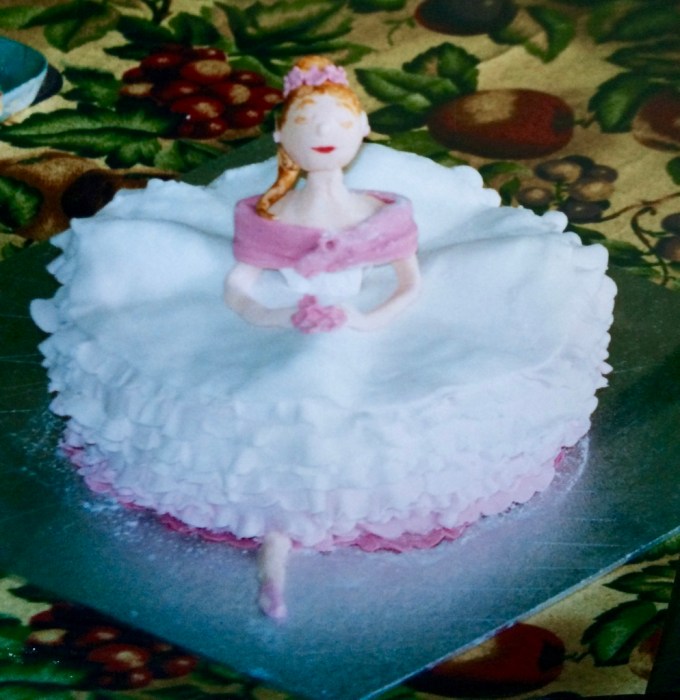
Laura’s 7th Birthday ballerina cake 

Mum, you’re a superstar! Thank you for the all the incredible memories from my childhood and for putting so much effort in to make each and every birthday feel so special. You’re the very definition of #Mumgoals – I love you so so much xx

Peanut Butter, Caramel & Chocolate Drip Cake

thumb_IMG_2205_1024

This cake is highly over-the-top, but highly delicious. 3 layers of rich dark chocolate cake slathered in salted caramel sauce and peanut butter frosting, draped in chocolate ganache and topped with all things good: honeycomb, caramel macarons, peanut brittle, maltesers, snickers pods, jersey caramels and caramel popcorn.

thumb_IMG_2210_1024

Ingredients (serves 16)
Chocolate Layer Cake
2 boxes dark chocolate cake ( I used Betty Crocker moist devil’s food cake)

Salted Caramel Filling 

Peanut Butter Frosting
1 ½ cups smooth peanut butter
375g butter, softened
6 teaspoons vanilla extract
6 cups icing sugar
3 tablespoons milk

Dark Chocolate Ganache
170g dark chocolate melts
¾ cup cream
1 ½ teaspoons corn syrup

Toppings
1 x packet Snickers pods
1 x packet caramel popcorn
1 x packet jersey caramels (halved diagonally)
1 x packet peanut brittle
1 x packet Maltesers
Salted caramel macarons (optional)
Honeycomb

thumb_IMG_2219_1024

Method
Make 4 cakes, according to packet instructions, by halving the batter from each cake mix. Carefully trim cooked cakes where necessary to ensure they are perfectly flat, and use the best 3 (freeze the 4th for another time, or add a 4th layer if you really want to impress).

To make the frosting, beat peanut butter and butter until smooth. Add vanilla and slowly add the icing sugar. Add the milk and beat until just combined.

Spread a generous layer of frosting onto the bottom cake layer, and then top with caramel filling. Repeat with the remaining layer/s.

image2-7.JPG

Spread frosting onto the top and sides of the cake – don’t worry if you get crumbs in it, this is called the crumb coat. Using a spatula or protractor (as I did!), scrape off excess frosting so you have a thin smooth layer.

Refrigerate cake for 30 minutes or until frosting is firm. Add a second layer of frosting onto the top and sides of cake, using the protractor again to scrape off the excess and create a smooth finish. Refrigerate for a further 30 minutes.

thumb_IMG_2187_1024

Place chocolate melts into medium bowl and set aside. Heat cream in a saucepan over medium-high heat just until it almost starts to simmer. Remove from heat and pour over chocolate. Let sit for about 5 minutes and then stir with a wooden spoon until chocolate is completely melted and smooth. Stir in corn syrup.

Use a spoon to add a few purposeful drips over the top edge of the cake. Then spoon more ganache on top of the cake, allowing it to drip at varying points around the cake.

Top cake with honeycomb, caramel popcorn, maltesers, jersey caramels, pods and macarons. Enjoy!

thumb_IMG_2238_1024

thumb_IMG_2199_1024