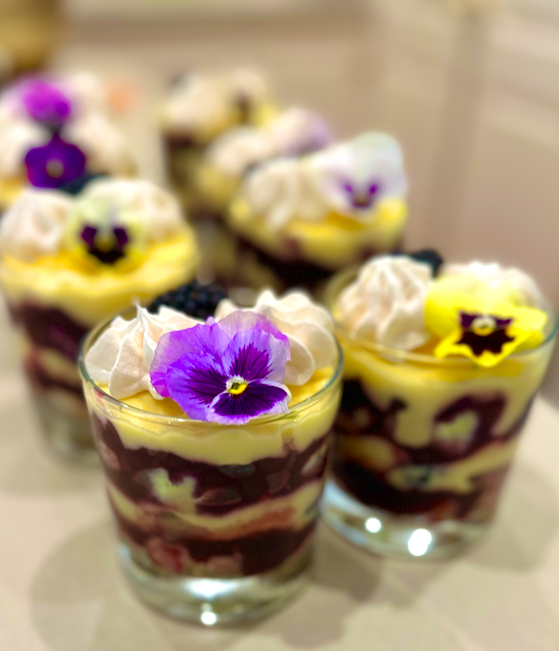
Lemon & Blackberry Miniature Trifles

These adorable trifles are an ideal finish to a big meal (such as Christmas dinner) as they are light and fresh with zesty lemon curd and pops of blackberry. I’ve made 9 individual trifles here, but it also works as one large trifle for a Christmas centrepiece, you may just need to add some chantilly cream on top of the lemon curd layer to get sufficient height.

You’ll want to make the meringues, sponge and curd the day ahead so all you need to do is assemble.

Ingredients (serves 9)
Meringues
3 egg whites
pinch of salt
3/4 cup caster sugar

1½-2 cups luscious lemon curd (or bought curd if you prefer)
1 vanilla sponge cake (or bought if you prefer)
2 x 300g jars blackberry jam (I use Beerenberg)
900g vanilla custard (I used Paul’s Double Thick Custard in French Vanilla)
2 punnets fresh blackberries
Edible flowers (optional)

Method

To make the meringues, preheat oven to 100°C. Line 2 large trays with baking paper. Use a stand mixer with the whisk attachment to beat the egg whites with a pinch of salt until stiff peaks form. Add sugar, a table spoon at a time, beating until the sugar has dissolved between each addition. Keep beating until all of the sugar has been added and the mixture is thick, white and glossy. Transfer to a large piping bag with a large star nozzle (I used Wilton’s 2M). Pipe approximately 50 small rosettes of meringue onto the trays. Bake for 1 hour and 15 minutes, then turn off the oven, prop open the door and leave to cool completely.

Cut the sponge cake in half and spread each half with a layer of blackberry jam. Then carefully cut the sponge cake into small cubes.

To assemble the trifle, put a layer of sponge cake pieces in the bottom of each glass, trying to get a flat and even layer. Spoon approximately 1 teaspoon of extra blackberry jam per glass and spread over the top of the sponge pieces.

Spoon a thick layer of vanilla custard on top of the jam, followed by a generous dollop of lemon curd, then top with crushed meringue pieces and blackberries cut in half (approximately 6 halves per glass).

Repeat the layers – sponge cake, blackberry jam, custard and curd. Then top with a few whole meringues, a couple of blackberries and an edible flower. If not serving immediately, leave off the meringues from the top until just before serving so they stay crisp.

Enjoy!

Meringue recipe adapted from Merle’s Kitchen by Merle Parrish.

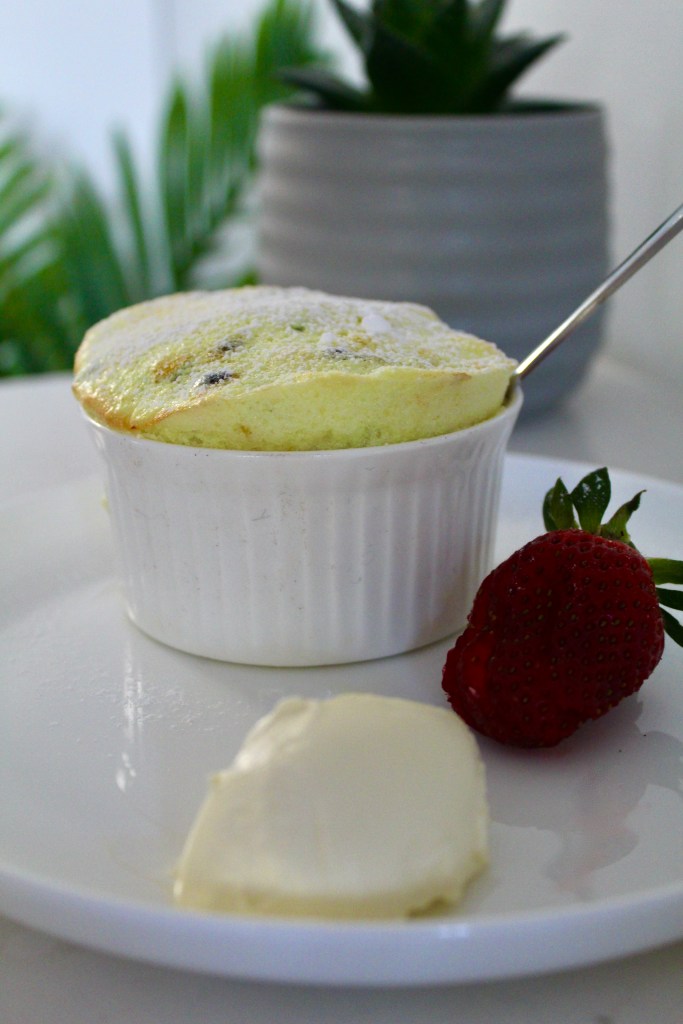
Passionfruit Soufflés

Last year my family and I visited the d’Arenberg Cube in McLaren Vale and had an incredible 3-course lunch at the award winning d’Arry’s Verandah Restaurant. Everything was delicious, but a particular favourite dish was the passionfruit soufflé. While we’re looking forward to dining at d’Arry’s again soon, in the meantime we’re enjoying this copycat version that’s pretty darn close to the real thing.

Soufflés have a reputation for being difficult, but please don’t be afraid of cooking them at home – they’re really very easy. Just make sure you serve immediately as they start to ‘deflate’ quickly.

Ingredients (makes 4)
20g melted butter, for greasing
Caster sugar, for dusting
⅓ cup passionfruit pulp
1½ tablespoons caster sugar
1 tablespoon lemon juice
2 teaspoons corn flour
2 teaspoons water
3 eggwhites
2 tablespoons extra caster sugar
Icing sugar, for dusting
Whipped cream or vanilla ice cream, to serve (optional)


Method
Preheat the oven to 180°C (160°C fan-forced).

Brush the inside of four ¾-cup ramekins with the melted butter, dust with caster sugar and place on a baking tray. 

Place the passionfruit pulp, sugar and lemon juice in a small saucepan over low heat and stir until the sugar has dissolved. Bring to the boil. Combine the cornflour and water in a small bowl and mix to form a smooth paste. Stir the cornflour paste into the passionfruit mixture and whisk continuously for 30 seconds or until the mixture has thickened. Cool the passionfruit mixture in the fridge for 5-10 mins. 

Place the eggwhites in a large bowl and beat with electric beaters until soft peaks form. Gradually add the extra caster sugar and beat until glossy. Gently fold cooled passionfruit mixture into the eggwhites until just combined. Spoon into the ramekins, smooth the tops with a butter knife and bake for 10 minutes or until risen and just golden.

Serve immediately dusted with icing sugar and with ice cream or cream. Enjoy!

Recipe adapted from Donna Hay’s ‘PASSIONFRUIT SOUFFLE’ and inspired by d’Arry’s Verandah Restaurant

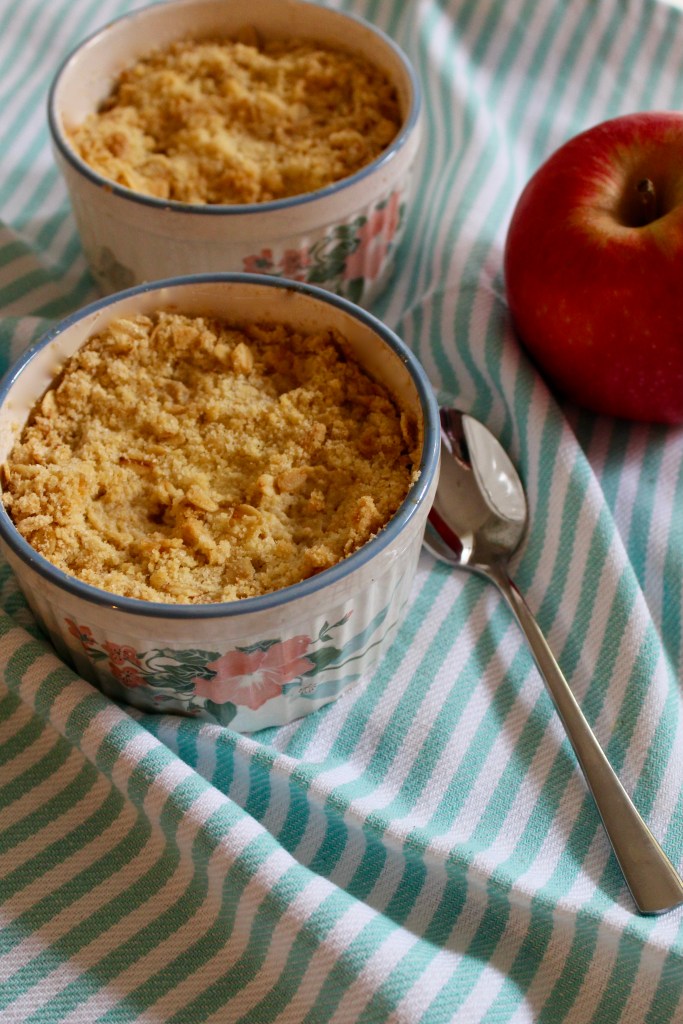
Individual Apple & Cinnamon Crumbles

Apple and cinnamon are a match made in heaven and nothing smells better on a cold winter’s night than apple crumble fresh out of the oven. Instead of making one large crumble, which can be messy to serve and tricky to get the right ratio of crumble to fruit, this makes 4 individual crumbles. Absolutely perfect paired with my traditional vanilla custard.

Ingredients (makes 4)
3 medium apples, peeled, cored and cut into 2cm dice
1½ tablespoons caster sugar
¼ cup water
2 teaspoons ground cinnamon

½ cup self-raising flour
¼ cup sugar
¼ cup rolled oats
2 teaspoons ground cinnamon
75g butter, melted

Preheat oven to 160°C fan-forced.

Cook apples, sugar and water in a medium saucepan over low heat, about 5 minutes. Drain; discard liquid.

Combine dry crumble ingredients in a medium bowl. Pour in melted butter and stir to combine.

Divide apple mixture between 4 medium sized ramekins. Top with crumble mixture.

Bake for 25-35 minutes or until the crumble is golden brown. Serve with vanilla custard, cream or ice cream. Enjoy!

Recipe adapted from an old family recipe by Aunty Rae

Traditional Vanilla Custard

Silky smooth and with the perfect hit of vanilla, this simple custard is the perfect accompaniment to crumbles, pies and puddings.

Ingredients (serves 4-6)
2 teaspoons vanilla bean paste
600ml milk
4 egg yolks
2 tablespoons caster sugar
1 tablespoon cornflour

Method

Add vanilla bean paste and milk to a pan on a medium-low heat and bring to the boil.

Immediately remove it from the heat and leave to cool slightly.

Meanwhile, in a large mixing bowl, whisk the egg yolks with the sugar and cornflour until pale.

Gradually add the warm milk, a tablespoon full at a time, whisking well between each addition.

Pour the mixture back into the pan and cook gently on a low heat, whisking continuously, for about 20 minutes or until very thick. Serve with your choice of dessert. Enjoy!

Recipe adapted from Jamie Oliver’s Vanilla Custard

Passionfruit Pie

The combination of buttery pastry, tangy passionfruit and creamy white chocolate in this pie is absolutely delicious! This is a fairly time-consuming recipe so definitely one I reserve for special occasions. I would recommend using a mixture of fresh and frozen passionfruit pulp to keep it economical unless you have an abundance of fresh passionfruit (in which case, feel free to send some my way!)

Ingredients (serves 12)
White chocolate ganache
125g white chocolate, chopped
½ cup thickened cream

Pastry
1¾ cups plain flour
¼ cup icing sugar mixture
125g cold unsalted butter, cubed
1 egg, lightly beaten

Passionfruit syrup
Pulp of 4 passionfruit
¼ cup caster sugar

Passionfruit crème pâtissière
Pulp of 8 passionfruit
400ml thickened cream
1 teaspoon vanilla paste
1 wide strip lemon zest
4 egg yolks
125g caster sugar
⅓ cup cornflour
50g butter, cubed

Method

To make the ganache, microwave the white chocolate in short bursts until melted. Add the cream and refrigerate for 2 hours until thickened.

For the pastry, place the flour and icing sugar into a food processor and add the butter. Process in short bursts until the mixture has a fine crumb consistency. Add the egg and process until the mixture just starts to come together. Turn out onto a clean bench and gather the dough together. Press into a thick disc, wrap in clingfilm and refrigerate for 15 minutes.

When the dough has chilled, roll it out on a sheet of non-stick baking paper to fit a 26cm loose-based non-stick flan tin. Carefully line the tin with the pastry, easing it into the corners. Trim any overhanging pastry, prick small holes with a fork and refrigerate for 30 minutes. Meanwhile, preheat the oven to 180°C (160°C fan-forced).

Cover the pastry with a sheet of non-stick baking paper and fill it with pastry weights. Blind bake the pastry for 15 minutes, remove the weights and paper, and bake for a further 10-15 minutes or until light golden brown. Remove from the oven and cool completely.

To make the passionfruit syrup, place the passionfruit pulp and sugar in a small saucepan with half a cup of water. Stir over low heat to dissolve the sugar, then bring to the boil, skimming the froth off the top as you go. Boil for about 2 minutes, until thick and syrupy, then remove from the heat.

For the crème pâtissière, place the passionfruit pulp into a strainer over a bowl and leave it to strain. Heat the cream in a saucepan with the vanill and lemon zest until it is just about to boil. Whisk the egg yolks and sugar in a bowl until light and creamy. Strain the cream and pour over the egg yolk mixture, whisking constantly. Add the cornflour and stir over very low heat for approx. 5 minutes. As the mixture starts to thicken, whisk more quickly until it is very thick and smooth. Cover with clingfilm and refrigerate for 20-30 minutes or until the mixture is just warmer than room temperature. Beat in the butter and the strained passionfruit juice.  

Fill the pastry with the passionfruit crème pâtissière mixture, refrigerate for 5-10 minutes and then spread the white chocolate ganache over the top. Drizzle with the passionfruit syrup and refrigerate for about 4 hours.

Enjoy!

Recipe adapted from Julie Goodwin’s ‘Passionfruit puddle pie’ in My Family Table.

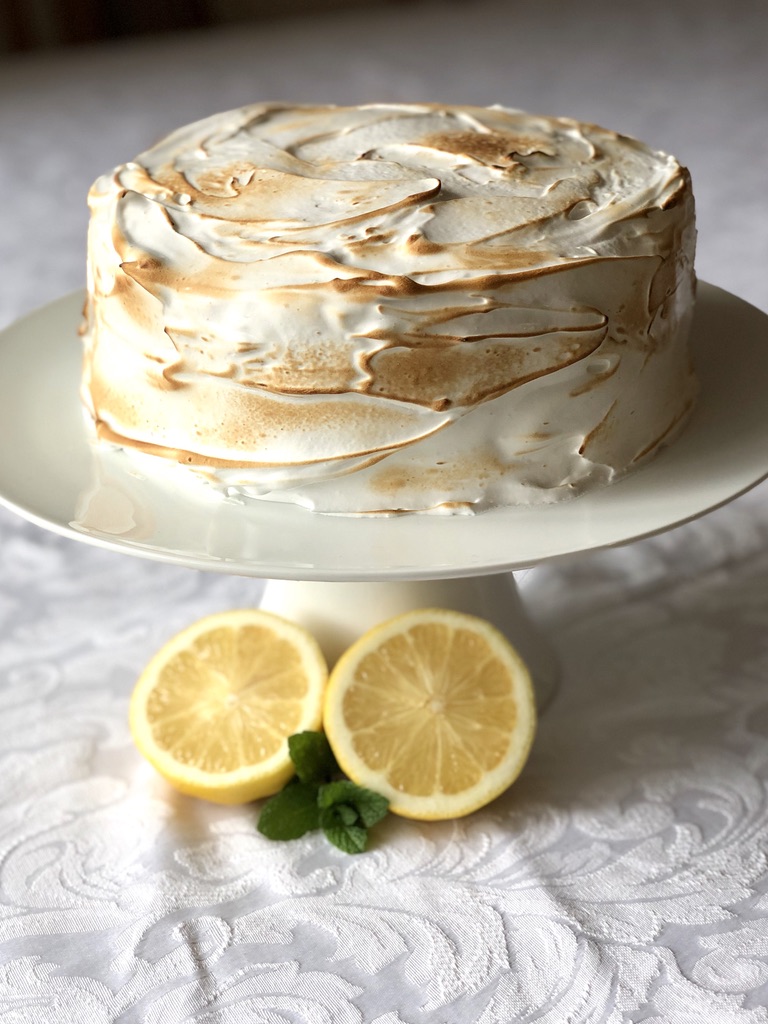
Lemon Meringue Sponge Cake

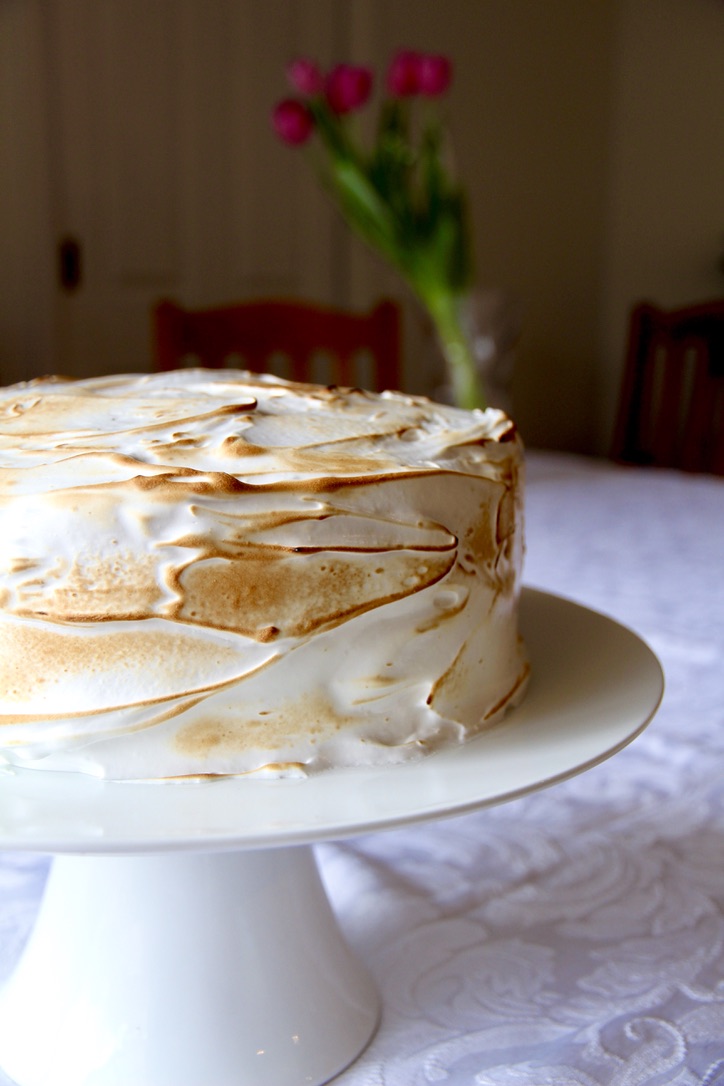
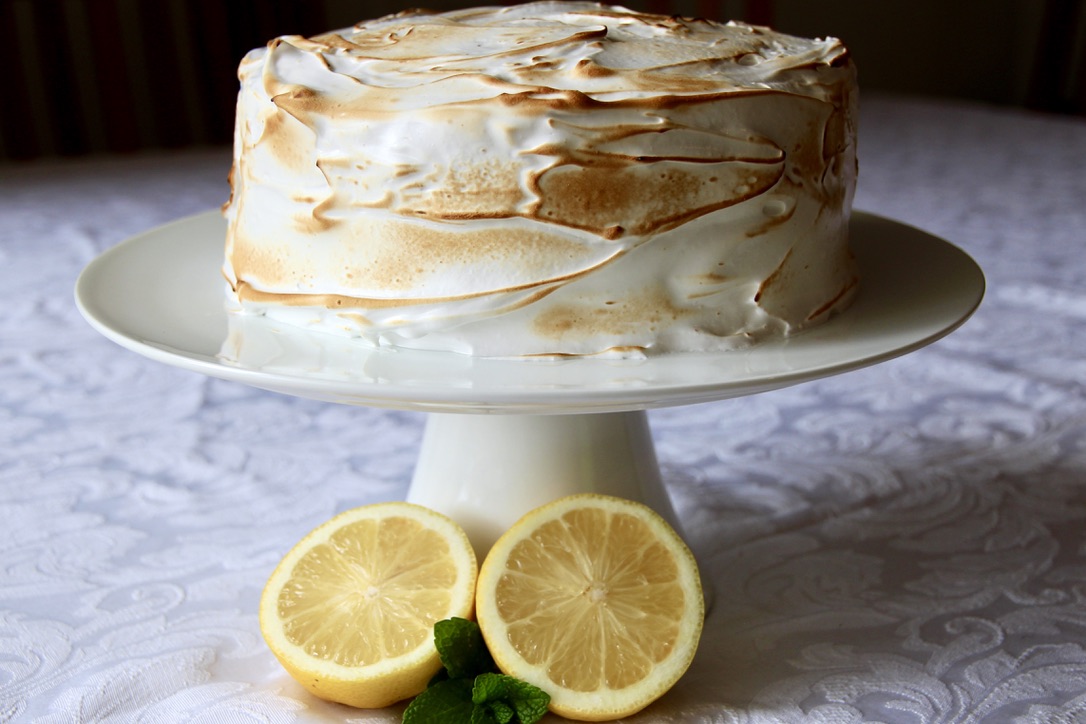
Light as a feather sponge cakes sandwiched with tangy lemon curd and enrobed in pillowy torched meringue – what’s not to love?! I made this cake for my 26th birthday and it has become a favourite. It is best to make the lemon curd the day ahead and the meringue just before serving.

B1F16B08-DD32-4048-9FB8-3561BD1A8DBB_1_105_c

Ingredients (serves 12)
Lemon Curd (makes 2 cups)
1 cup white sugar
3 eggs
1 cup fresh lemon juice (approx. 4-5 lemons)
Zest of 2 lemons
115g butter, melted

Sponge Cake
4 eggs
3/4 cup caster sugar
1 cup self-raising flour
1 tablespoon cornflour
10g butter
1/3 cup boiling water

Meringue
3 egg whites
3/4 cup white sugar
1 teaspoon vanilla extract
Kitchen blowtorch (optional)

2FFCA891-BF02-4BBF-A7B5-4EA4BEFB07AA_1_105_c

To make the lemon curd, whisk together the sugar and eggs in a large microwave safe bowl until thoroughly combined. Whisk in lemon juice, zest and melted butter. Cook in the microwave on full power for 50 second intervals, whisking after each interval. You will know your lemon curd is ready when it coats the back of a metal spoon (approximately 3-5 50 second intervals). Pour into a sterile jar or container and allow to cool to room temperature before covering it with a lid and storing it in the fridge.

To make the sponges, line and grease two deep 20cm round cake pans. Preheat oven to 180°C (160°C fan-forced).

In a large bowl, beat eggs with electric mixer until thick and foamy. Gradually add sugar, about a tablespoonful at a time, beating until sugar is dissolved between additions (total beating time approx. 10 minutes). Sift flour and cornflour together over the egg mixture. Gently fold to combine. Combine butter and water and gently fold through egg mixture.

Divide mixture evenly into prepared pans. Bake sponges about 25 minutes or until a skewer inserted comes out clean. As soon as the sponges are baked, turn out upside-down onto wire racks covered with baking paper to cool.

Once the cakes are completely cool, glue one sponge to a cake stand or serving plate using lemon curd. Spread a generous layer of lemon curd over the top of the cake and gently place the second sponge on top, taking care not to squeeze out too much of the curd from the middle (scrape away any excess from the sides).

To make the meringue, use electric beaters to whisk the egg whites and sugar in a large heat-proof bowl until frothy. Fill a medium saucepan with a few inches of water and place over a medium heat. Place the mixing bowl on top of the saucepan to create a double boiler. Whisking constantly with the beaters, heat the egg white mixture until the sugar dissolves completely and it is warm to the touch. Take the bowl off the saucepan, add the vanilla and mix on high until you have medium-stiff glossy peaks.

Working quickly, heap the meringue mixture onto the top of your sponge cake and gently spread down the edges with a metal spatula until the cake is completely covered. Create some texture with the meringue on the sides and top of the cake (this is one time where you don’t want it to be perfectly smooth). Use a blowtorch on low-medium to toast the meringue until it is your desired colour. Serve immediately.

Note: the cake is best eaten on the day it is made as the meringue changes texture, however it is still good the following day. Store covered at room temperature.

70EE0982-1FB5-4191-8F81-B888612A48AB_1_105_cLemon curd adapted from My Baking Addiction microwave lemon curd.
Sponge cake adapted from the Australian Women’s Weekly ‘Best Ever Sponge Cake’.
Meringue icing adapted from The Cake Blog lemon meringue cake.

Easy No-Bake Lemon Cheesecake

This is my favourite cheesecake recipe which was kindly given to me by my high-school friend, Antonia. The filling has a silky texture with a delicious punch of lemon, and sets without needing gelatin. It’s a perfect no-stress summer dessert as you can make it the night before and leave it to set without a second thought.

EgPDroCrTrWtwotWH1C4Ng_thumb_149b

Ingredients (serves 8-10)
Juice and rind of 1 large lemon
400ml condensed milk
250g cream cheese, softened
300ml thickened cream
1 x 250g packet Arnott’s Granita biscuits (or equivalent)
75g butter, melted

fAazRrvcSWKBJGXZlNd0kQ_thumb_14a8

Method
Grease and line a 25cm round springform tin.

Crush the biscuits in a food processor and add the melted butter. Use the crumb mixture to line the bottom and part way up the sides of the prepared tin, pressing it in firmly with the bottom of a glass to ensure it is even.

In a large bowl, beat the cream cheese and condensed milk until smooth.

In a separate bowl, beat the cream until it is very thick but not fully whipped.

Gently combine the cream into the cream cheese mixture and stir until just combined. Add in the lemon rind and gradually add the juice (to taste).

Pour into the crumb lined tin. Cover the top with foil and secure with a rubber band.

Refrigerate overnight or until set (at least 7 hours).

viMDqy1rQhODcuC0zrw_thumb_149d

Recipe from Antonia

cIklnsqQQp20WtDihTgicA_thumb_14ab


Cream Tart Number Cake

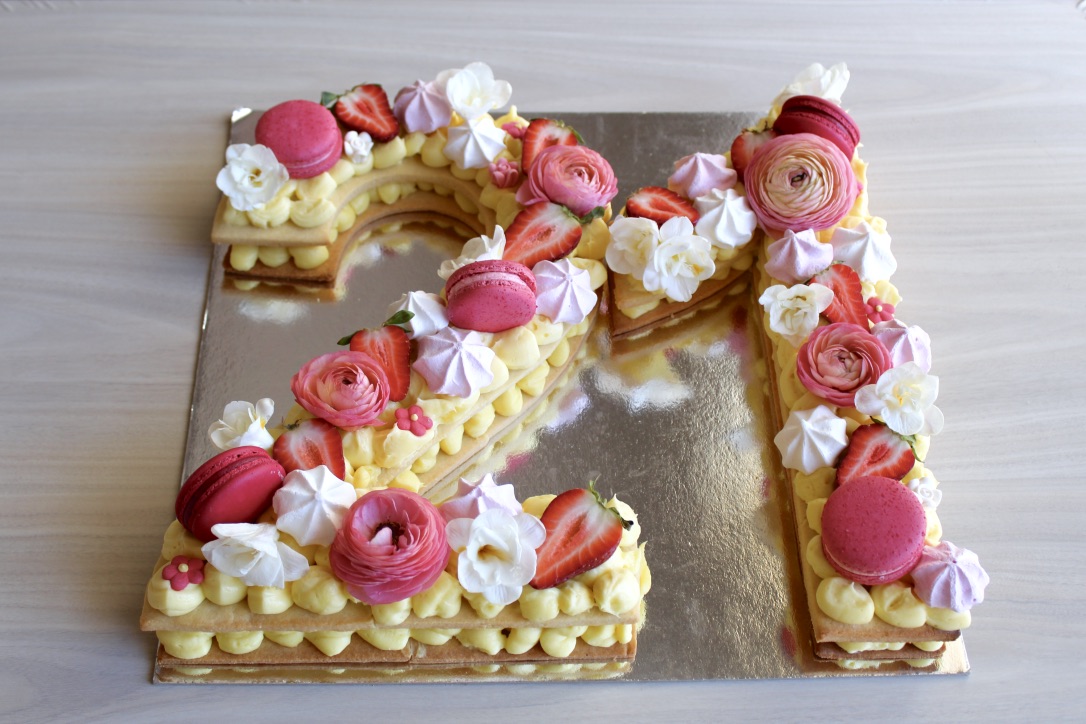
I love the look of these number cakes (also known as cream tarts or alphabet cakes) that are all over Instagram and was thrilled when my sister asked me to make her one for her 21st Birthday.

While they’re a bit fiddly to make and decorate, I was surprised by how quick they are to make; largely as they take so little time to bake in the oven. I also love how customisable they are – you can use any letters or numbers you choose, pick your decoration colour scheme, and change the flavour of the filling to taste. I went with a traditional almond biscuit with a vanilla custard filling and decorated with strawberries and pink and white flowers, meringues and macarons.

kYtnHJ%2Rkqf0Zwc3K6auA_thumb_542

Ingredients (makes two A3-sized number cakes, serves approx. 20)
Pâte Sablée (biscuit layers)
– 225g butter, room temperature
– ½ cup icing sugar
– 1 egg
– 2¼ cups flour
– 1 cup almond meal
– 1 teaspoon almond essence
– 1 teaspoon vanilla essence

Vanilla Custard Filling
– 6 cups thickened cream
– 3 100g packets Cottee’s Instant Vanilla Pudding mixes
– 1 cup icing sugar
– 3 teaspoons vanilla essence

Other
– Cut out A3 sized numbers (I used a 1 and a 2 stretched to fill an A3 page each in bolded Arial Black font)
– Extra large square silver cake board
– Fresh, pesticide-free flowers
Macarons
– Meringues
– Sugar flowers
– Strawberries (halved)

3+poHP4ETemEapj2g2DpUQ_thumb_513

  1. To make the biscuit layers, place all pâte sablée ingredients into a food processor and blitz until combined.
  2. Remove the dough from the processor and knead gently for 30 seconds until smooth. Halve the dough, press each into a disc shape, cover in clingfilm and refrigerate for at least 30 minutes.
  3. Pre-heat oven to 180ºC.
  4. Roll one of the pieces of dough between two pieces of baking paper until it’s big enough for your number template (approx. 5-6 mm thick). Carefully cut out the first number from the dough, keeping the excess pieces. Place onto a baking tray lined with baking paper.
  5. Repeat with the same number and the excess dough (remember that you need two of each number).
  6. Bake the two biscuits for 12-15 minutes or until golden brown. Allow to cool completely before VERY gently transferring one of the biscuits onto to the silver cake board and setting the other aside.
  7. Take out the second half of the dough from the refrigerator and repeat steps 4-6 for the second number.
  8. To make the vanilla filling, whip the cream in a large bowl with an electric mixer until peaks form. Alternately add the pudding mix and the icing sugar while beating, until the filling is combined and very thick.
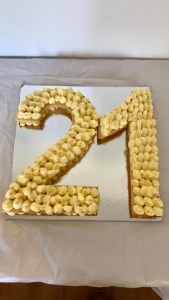
  9. Spoon the filling into a piping bag with a medium-sized round nozzle and pipe even dollops in rows on each number (as below) IMG_9951
  10. Gently sandwich the biscuit pairs on top of the filling and repeat step 9.
  11. Decorate with flowers, macarons and meringues.
  12. Enjoy!

YJt3B8KhQSKFB4j9yIbfeA_thumb_522

Notes:

  • The biscuits can be made the day ahead and kept in an airtight container, but don’t pipe the filling or assemble the cake until the day of serving.
  • If any of your biscuits break, don’t panic, simply ‘glue’ the biscuit back together with some of the vanilla filling prior to piping the filling on top and decorating – no-one will ever know!
  • Can be kept in the refrigerator for up to 3 days but the biscuit layers will go soft.

Biscuit recipe adapted from ‘Cream Tart’ recipe on Home Cooking Adventure.com

Vanilla filling recipe adapted from ‘The Best Whipped Cream Frosting’ on Two Sisters Crafting.com

IMG_9984


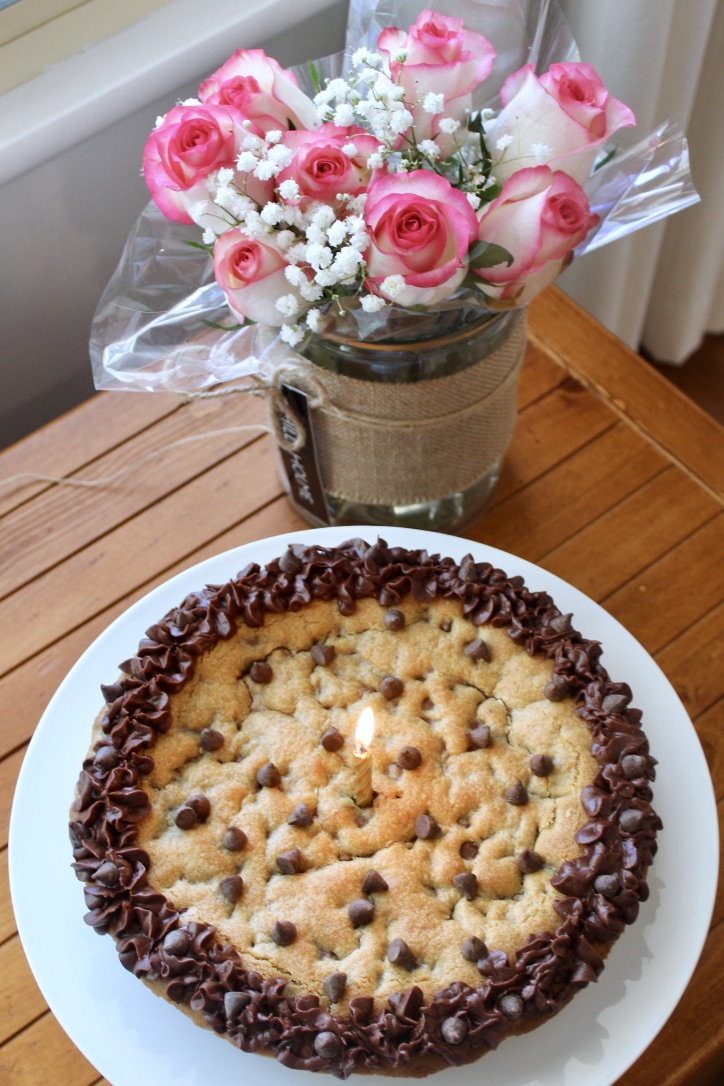
Giant Cookie Cake

UNADJUSTEDNONRAW_thumb_61

For my birthday this year, I decided to bake something a little different. As much as I have enjoyed making (and eating!) my layered drip cakes (here and here) over the last couple of years, this year I was after something simpler. Enter the cookie cake.

I have admired the brightly coloured array of delicious looking cookie cakes on Sally’s Baking Addiction (my baking porn website of choice) for years, and finally got around to making it. Boy, am I glad I did! As promised, this ‘cake’ is so quick and simple to make and produces a deliciously chewy and flavoursome giant cookie. The recipe is also very easy to adapt – you could use M&Ms, or mix up the choc chips depending on your taste.

VrWBmyKVSmSUCikS6jWSCA_thumb_58

Ingredients (serves 12-14)
170g softened butter
1 cup brown sugar
1 egg + an extra yolk
5 teaspoons vanilla extract
2 cups flour
2 teaspoons cornflour
1 teaspoon baking powder
1½ cups chocolate chips (I used dark chocolate)
Chocolate frosting for topping (optional)

xDp+PpGzQWSllld1vEVb%A_thumb_4b

Method
Preheat your oven to 180°C. Spray a 23cm (9-inch) pie dish or cake pan thoroughly with nonstick spray.

In a large bowl, beat the butter for 1-2 minutes until light and creamy. Add the brown sugar and beat for about a minute or until combined. Mix in the egg, egg yolk and vanilla on until combined, scraping down the sides of the bowl as required.

In a separate bowl, combine the flours and baking powder. On a low speed, gradually mix into the wet ingredients until combined. Add in 1¼ cups chocolate chips and mix for until evenly dispersed.

Gently press the cookie dough evenly into the prepared pan. Bake for 20-25 minutes or until the cake is lightly golden brown (use a skewer in the centre to check it’s cooked). Remove from the oven and set the pan on a wire rack to cool completely.

Once cooled, use a sharp knife or metal spatula to loosen the sides of the cookie cake from the pan and transfer to a cake stand or serving plate.

Decorate as desired (I made a quick chocolate buttercream using butter, icing sugar and cocoa powder and piped it on using my Wilton 1M tip), top with the remaining chocolate chips and serve with vanilla ice-cream. Enjoy!

zdB0RHF5TnWwFbnTlc6i8g_thumb_62

Recipe adapted from ‘Chocolate Chip Cookie Cake’ on Sally’s Baking Addiction.

kYGL4+ihStuSNZuhr1g5ug_thumb_4f

Silky Chocolate Mousse

This is one of my favourite desserts because it takes so little effort and you can make it well ahead of time – the perfect set and forget dinner party dessert. I like a hint of Bailey’s Irish Cream in my mousse, but this can be omitted if you’re serving it to children or swapped for any other liqueur of your choice – creme de menthe for a choc-mint or Cointreau for a choc-orange mousse would both work well.

fullsizeoutput_17a5

Ingredients (serves 8)
300g good quality dark chocolate
50g butter
3 eggs, separated
1-2 tblspns Bailey’s Irish Cream (optional)
¼ cup caster sugar
300ml thickened cream

fullsizeoutput_17a0.jpeg

Method
Melt butter and chocolate in a small saucepan over a low heat until smooth. Remove from heat.

Stir in egg yolks, one a a time, and Bailey’s liqueur. Transfer to a large bowl and leave to cool.

Beat egg whites in a medium bowl until soft peaks form. Add sugar, one tablespoon at a time, beating until it dissolves between additions.

Beat cream until thoroughly whipped and thick. Gently combine with the chocolate mixture and then fold in the egg white mixture in two batches, taking care not to over-mix the mousse.

Divide mousse among eight ½-cup serving dishes (I use glasses). Cover with clingfilm and refrigerate until set (at least 2 hours).

Serve with fresh raspberries. Enjoy!

fullsizeoutput_179b.jpeg

Recipe adapted from The Australian Women’s Weekly Best Food Desserts.