Lime Meringue Pie

To celebrate my five year anniversary of working in the Public Service and winning an exciting new employment policy role, I decided to treat myself and buy a kitchenaid (not sponsored, I’m just a long time admirer and now proud owner!) Of course, it couldn’t be just any kitchenaid, it had to be one of their beautiful new pastel shades. I tossed up between the rose pink and ice blue, but ultimately decided on the gorgeous blue.

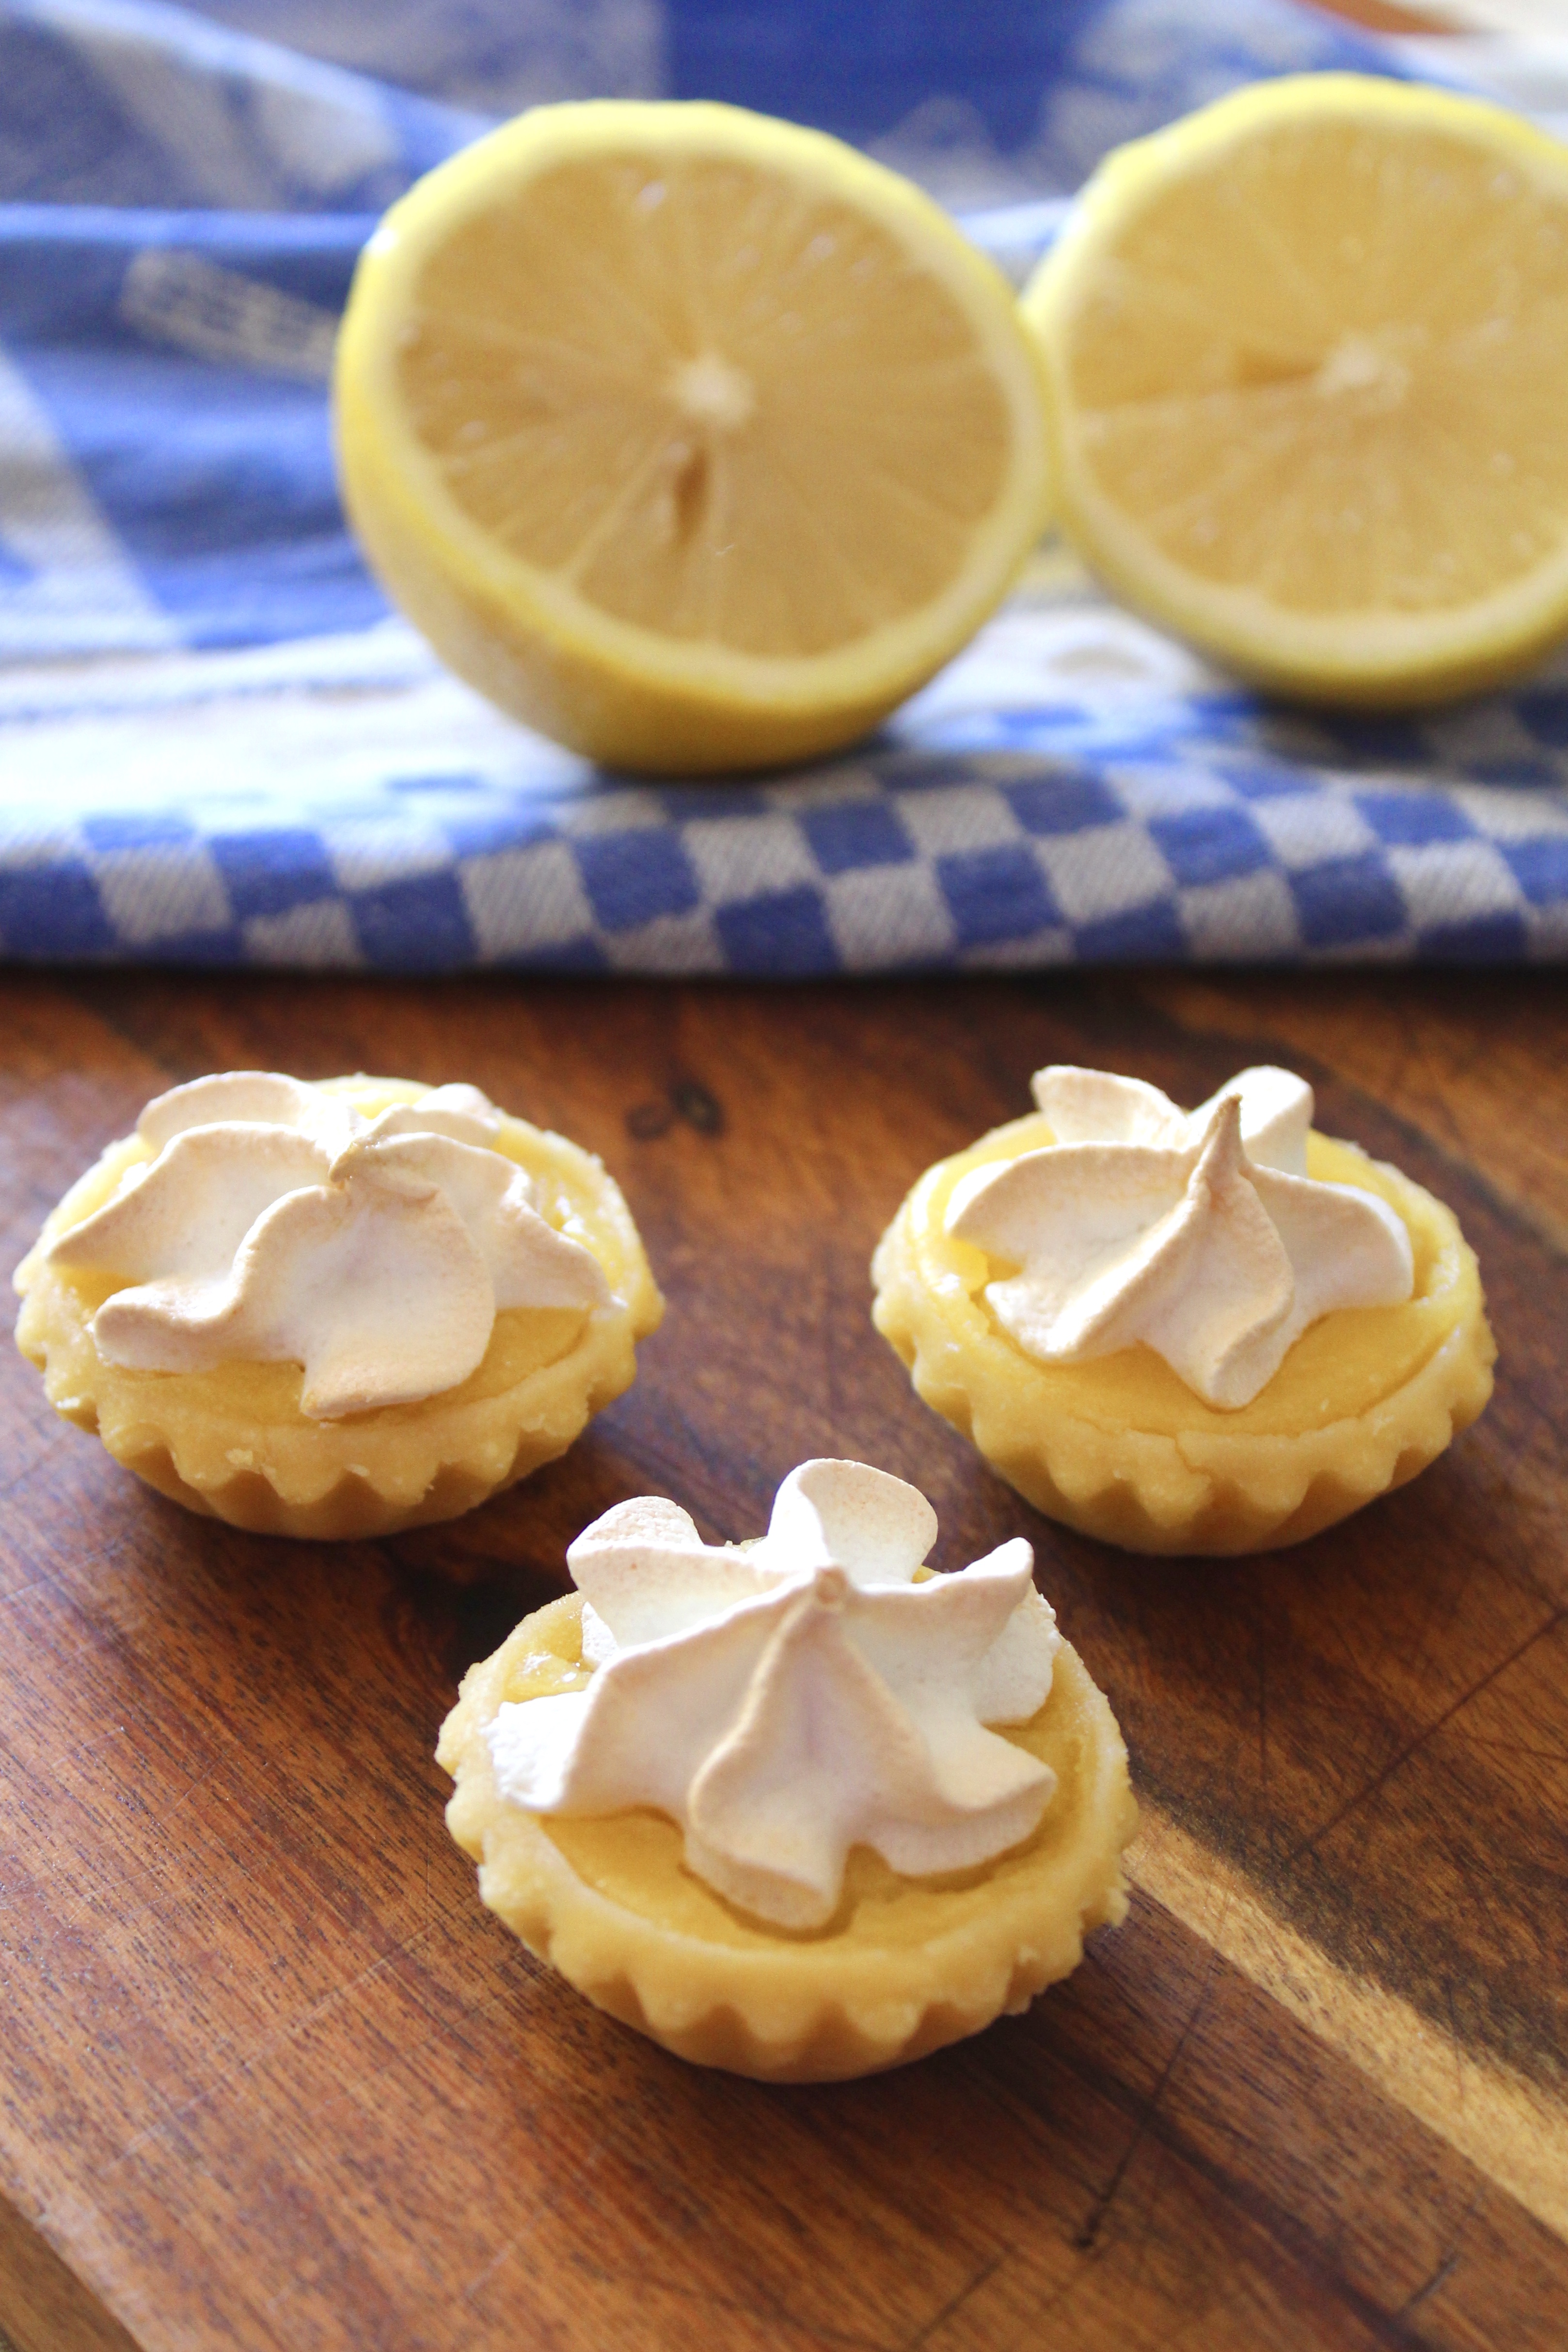
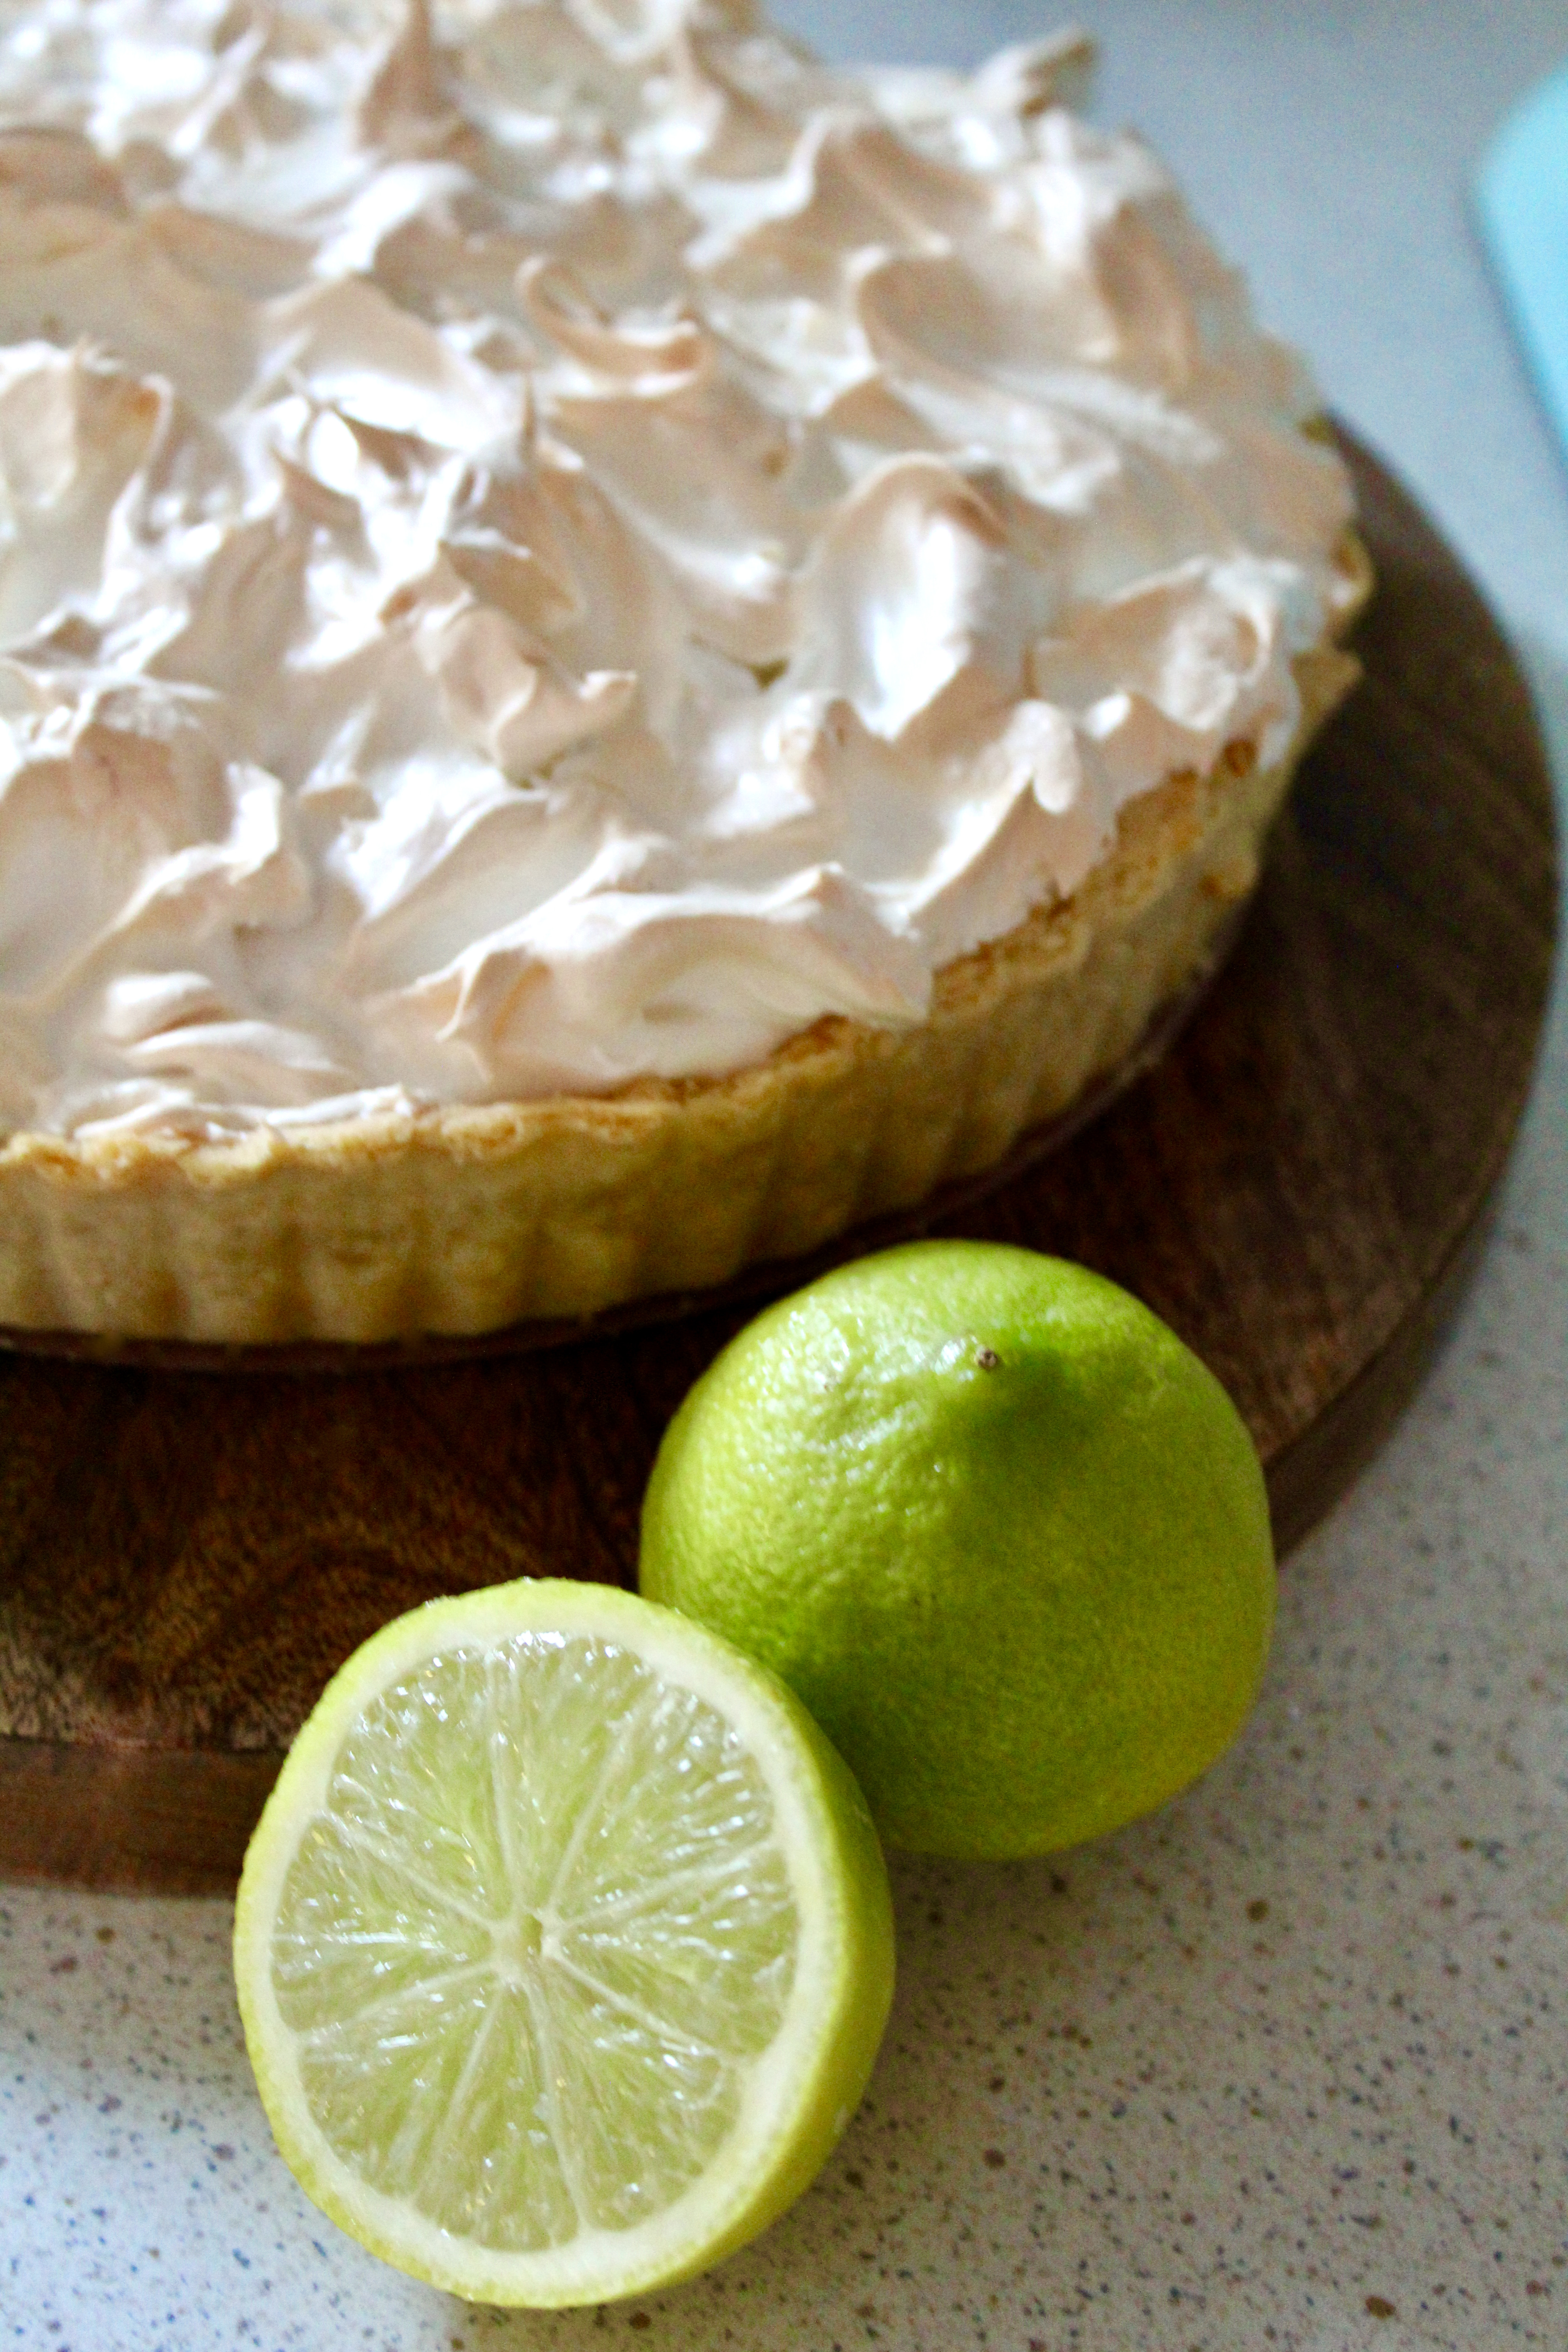
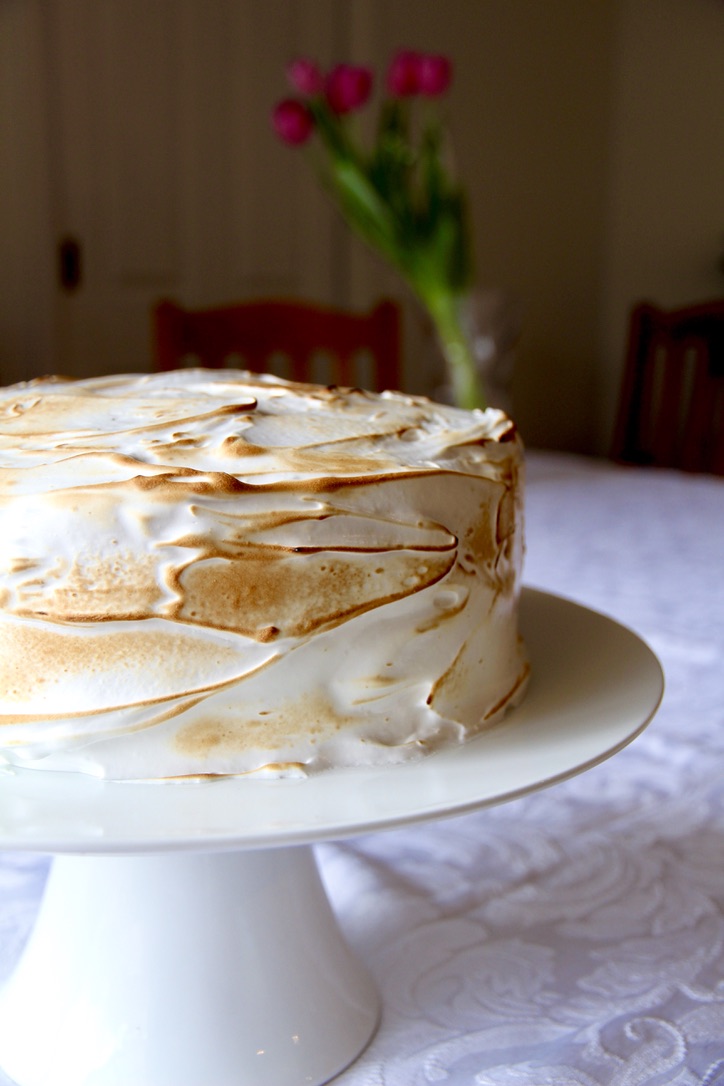
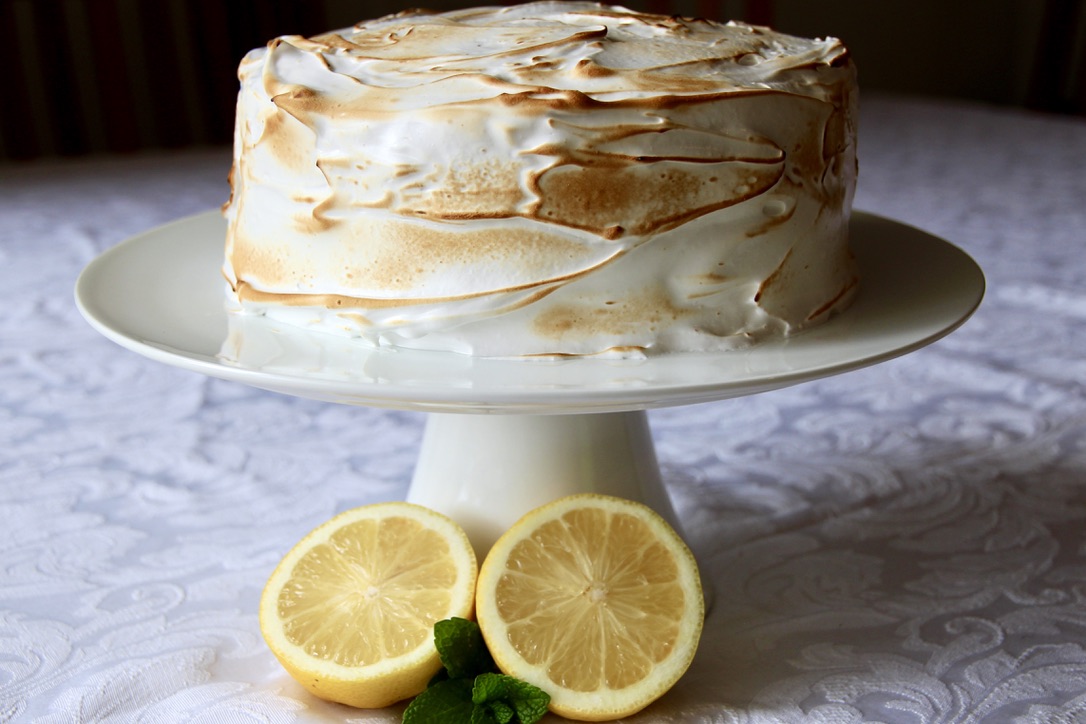
In order to christen it properly, I knew I had to make something with meringue to take advantage of not having to hold beaters while the eggwhites are whipping. Mum’s lime tree is absolutely chokkas at the moment, so a lime meringue pie was the obvious choice.

The pie is zesty, sweet and packed with lime flavour. Enjoy!

Ingredients (serves 8)
Pastry
1½ cups plain flour
3 tspns icing sugar
140g cold butter, chopped
1 egg yolk
2 tblspns water

Lime filling
½ cup cornflour
1 cup caster sugar
½ cup lime juice
1¼ cups water
2 tspns finely grated lime rind
3 egg yolks
50g butter
Green food colouring (if desired)

Meringue
3 egg whites
½ cup caster sugar

Method
Put flour, icing sugar, butter, yolk and water into a food processor and process until just come together. Press dough into a ball, knead gently on a floured surface until smooth; cover, refrigerate 30 mins.

Preheat oven to 180°C fan-forced. Grease a 24cm flan tin. After resting, roll dough on floured surface until it is large enough to line the tin. Lift pastry into tin, ease into sides and trim the edge.

Place tin on an oven tray, line pastry with baking paper and fill with pie weights or uncooked rice. Bake for 10mins then remove baking paper and weights and bake, uncovered for a further 10 mins or until pastry case is browned lightly. Leave to cool. Reduce oven temperature to 160°C fan-forced.

To make filling: combine corn flour and sugar in a medium saucepan. Gradually stir in lime juice and water. Stir over heat until mixture boils and thickens (mixture should be very thick, jelly-like). Reduce heat, simmer, stirring for 30 secs. Remove from heat and quickly stir in egg yolks, butter and rind. Stir until smooth. If you wish to make the filling greener, add a few drops of food colouring. Leave until it cools to room temperature.

Once at room temperature, spread filling into pastry case.

To make meringue: beat egg whites in a medium bowl with electric mixer until soft peaks form. Gradually add sugar, beating until dissolved after each addition. Mixture should be smooth and glossy.

Top pie with meringue mixture (I like to make it look rustic with mounds of differing heights) and bake for 5 – 10 mins at 160°C fan-forced until browned lightly. Stand for 5 mins before serving.

Enjoy!

Adapted from ‘The Women’s Weekly’ Lemon Meringue Pie

Advertisement

Black Forest Meringues

Cherry season is always too fleeting for my liking, but while it’s here, I try to make the most of it. These black forest meringues showcase the cherries in a light and delicious summer dessert.

Ingredients (makes 6)
50g dark chocolate
2 egg whites, room temperature
Pinch of cream of tartar
½ cup caster sugar
Cherry Sauce
12 cherries, pitted and quartered
1 dessertspoon white sugar
1 dessertspoon water
1 teaspoon cornflour
Whipped Cream
250ml thickened cream
1 dessertspoon icing sugar
2 teaspoons vanilla extract
Dark Chocolate Sauce
200g dark chocolate melts
200ml thickened cream
To serve
24 cherries, pitted and halved
6 whole cherries

Preheat oven to 120°C. Line 2 large baking trays with non-stick baking paper.

Melt dark chocolate in the microwave or on the stove.

In a large bowl, use an electric mixer or electric hand beaters to whisk the egg whites until soft peaks form. Add the cream of tartar and then the sugar, a spoonful at a time, whisking until dissolved before adding the next spoonful (test this by rubbing a little of the mixture between your thumb and forefinger).

Use a dessert spoon to spoon the mixture onto the prepared trays. Shape into 6 even meringues with a slight well in the centre. Spoon melted chocolate onto each meringue and use a skewer to swirl it through the meringue mixture.

Place the meringues into the oven and reduce the temperature to 90°C. Leave the oven on for 1 hour or until the meringues are crisp and sound hollow when tapped on the base. Turn the oven off and allow the meringues to cool gradually in the oven (approximately 2 hours).

While the meringues are in the oven, make the cherry sauce by blitzing the cherries and water in a stick blender until smooth. Add to a small saucepan with the sugar and cornflour and stir constantly until thickened. Refrigerate until ready to serve.

Just before you are ready to serve, make the whipped cream and chocolate sauce. To make the whipped cream, blitz the cream, sugar and vanilla with a stick blender until thickened. To make the chocolate sauce, combine the chocolate and cream in a small saucepan over a low heat until melted and combined.

To serve, smear the cherry sauce on the plate and place a meringue on top. Top with whipped cream, halved cherries and then drizzle with chocolate sauce. Add a whole cherry on top and enjoy!

Meringue recipe adapted from Taste.com.au ‘Basic Meringues’ and Donna Hay’s ‘No Fail Meringue Mixture’.

Inspiration from Matt Preston’s ‘Individual chewy Black Forest meringues’ in delicious.

Lemon Meringue Sponge Cake

Light as a feather sponge cakes sandwiched with tangy lemon curd and enrobed in pillowy torched meringue – what’s not to love?! I made this cake for my 26th birthday and it has become a favourite. It is best to make the lemon curd the day ahead and the meringue just before serving.

B1F16B08-DD32-4048-9FB8-3561BD1A8DBB_1_105_c

Ingredients (serves 12)
Lemon Curd (makes 2 cups)
1 cup white sugar
3 eggs
1 cup fresh lemon juice (approx. 4-5 lemons)
Zest of 2 lemons
115g butter, melted

Sponge Cake
4 eggs
3/4 cup caster sugar
1 cup self-raising flour
1 tablespoon cornflour
10g butter
1/3 cup boiling water

Meringue
3 egg whites
3/4 cup white sugar
1 teaspoon vanilla extract
Kitchen blowtorch (optional)

2FFCA891-BF02-4BBF-A7B5-4EA4BEFB07AA_1_105_c

To make the lemon curd, whisk together the sugar and eggs in a large microwave safe bowl until thoroughly combined. Whisk in lemon juice, zest and melted butter. Cook in the microwave on full power for 50 second intervals, whisking after each interval. You will know your lemon curd is ready when it coats the back of a metal spoon (approximately 3-5 50 second intervals). Pour into a sterile jar or container and allow to cool to room temperature before covering it with a lid and storing it in the fridge.

To make the sponges, line and grease two deep 20cm round cake pans. Preheat oven to 180°C (160°C fan-forced).

In a large bowl, beat eggs with electric mixer until thick and foamy. Gradually add sugar, about a tablespoonful at a time, beating until sugar is dissolved between additions (total beating time approx. 10 minutes). Sift flour and cornflour together over the egg mixture. Gently fold to combine. Combine butter and water and gently fold through egg mixture.

Divide mixture evenly into prepared pans. Bake sponges about 25 minutes or until a skewer inserted comes out clean. As soon as the sponges are baked, turn out upside-down onto wire racks covered with baking paper to cool.

Once the cakes are completely cool, glue one sponge to a cake stand or serving plate using lemon curd. Spread a generous layer of lemon curd over the top of the cake and gently place the second sponge on top, taking care not to squeeze out too much of the curd from the middle (scrape away any excess from the sides).

To make the meringue, use electric beaters to whisk the egg whites and sugar in a large heat-proof bowl until frothy. Fill a medium saucepan with a few inches of water and place over a medium heat. Place the mixing bowl on top of the saucepan to create a double boiler. Whisking constantly with the beaters, heat the egg white mixture until the sugar dissolves completely and it is warm to the touch. Take the bowl off the saucepan, add the vanilla and mix on high until you have medium-stiff glossy peaks.

Working quickly, heap the meringue mixture onto the top of your sponge cake and gently spread down the edges with a metal spatula until the cake is completely covered. Create some texture with the meringue on the sides and top of the cake (this is one time where you don’t want it to be perfectly smooth). Use a blowtorch on low-medium to toast the meringue until it is your desired colour. Serve immediately.

Note: the cake is best eaten on the day it is made as the meringue changes texture, however it is still good the following day. Store covered at room temperature.

70EE0982-1FB5-4191-8F81-B888612A48AB_1_105_cLemon curd adapted from My Baking Addiction microwave lemon curd.
Sponge cake adapted from the Australian Women’s Weekly ‘Best Ever Sponge Cake’.
Meringue icing adapted from The Cake Blog lemon meringue cake.

Mini Lemon Meringue Pies

These adorable mini lemon meringue pies make entertaining simple. I use bought miniature pastry cases, filled them with the simplest ever homemade lemon curd and topped them with a dollop of meringue – delicious! The best part is, the recipe makes more lemon curd than is required for the pies so you will have plenty to use in cakes, on scones, to give as a gift, or to eat with a spoon (no shame!)

Note: for best results, make the lemon curd the day ahead

fullsizeoutput_178f.jpeg

Ingredients (makes 32 mini pies)
For the lemon curd
1 cup white sugar
3 eggs
1 cup fresh lemon juice (approx. 4-5 lemons)
zest of 2 lemons
½ cup butter, melted

30 x 5cm tart shells (I use the Baylies Epicurean Delights brand)
2 egg whites
½ cup caster sugar

fullsizeoutput_1791.jpeg

To make the curd,whisk together the sugar and eggs in a large microwave safe bowl until thoroughly combined. Whisk in lemon juice, zest and melted butter.

Cook in the microwave on full power for 50 second intervals, whisking after each interval. You will know your lemon curd is ready when it coats the back of a metal spoon (approximately 3-5 50 second intervals).

Pour into a sterile jar or container and allow to cool to room temperature before covering it with a lid and storing it in the refrigerator.

To assemble the pies, preheat oven 200°C (180°C fan-forced).

Place egg whites in a large bowl and beat with an electric mixer until soft peaks form. Gradually add the sugar, beating until it dissolved between additions. Spoon meringue into a piping bag with a large star tip nozzle.

Place pastry cases onto a baking tray and carefully fill each with lemon curd. Pipe stars of meringue onto each pie.

Bake in the oven for 8-10 minutes or until the meringue is lightly browned.

fullsizeoutput_1786

Lemon curd recipe adapted from My Baking Addiction and meringue recipe from 9 Honey Kitchen.


Coffee & Walnut Torte

While the ingredients for this torte look a little odd (particularly the Jatz biscuits!) the end result is absolutely delicious – the torte is crisp on the outside and chewy on the inside with a subtle coffee flavour. It’s a firm family favourite that always disappears far too quickly.

thumb_IMG_3532_1024

Ingredients (serves 6-8)
3 egg whites
1 cup caster sugar
½ teaspoon white vinegar
1 teaspoon vanilla extract
20 Jatz biscuits, crushed
⅔ cup walnuts

1 tablespoon icing sugar
½ teaspoon vanilla extract
1 teaspoon instant coffee (dissolved in a small amount of water)
1 cup cream
Chocolate shavings (to decorate)
Walnuts (to decorate)

thumb_IMG_3524_1024

Preheat oven to 180°C (160°C fan-forced). Line a 9″ pie plate with baking paper.

Beat egg whites until stiff peaks form. Gradually add caster sugar, vinegar and vanilla and beat until very stiff. Fold in Jatz biscuits and walnuts. Spread in prepared pie plate and smooth the top.

Bake for 35 minutes. Prop open the oven door and allow to cool in the oven for approximately 20 minutes. Then transfer to a wire rack and allow to cool completely. Trim the baking paper so it can no longer be seen.

To make the coffee cream, add icing sugar, vanilla, coffee and cream to a medium bowl and bit until thickened and stiff.

Spread generously over the cooled torte and, if desired, decorate with chocolate shavings and extra walnuts. Keep in the fridge until ready to serve. Enjoy!

thumb_IMG_3533_1024

Recipe from Kaye Potter.

Pavlova

The pavlova is a quintessential Aussie dessert that is said to have been inspired by the Russian ballet dancer Anna Pavlova after a chef saw her perform on her world tour in 1926. A good pavlova has a beautiful high, crisp crust and a soft, pillowy marshmallow inside. It is one of my favourite summer desserts, especially when topped with seasonal fruit.

fullsizeoutput_5df

Ingredients (Serves 6-8)
1 large cup of sugar
1 teaspoon vanilla
1 teaspoon white vinegar
1 teaspoon cornflour
2 egg whites (at room temperature)
4 tablespoons boiling water
300ml cream, thickened
Fresh fruit (this time I used a mango, strawberries and blueberries)

fullsizeoutput_5c9.jpeg

Method
Preheat the oven to 180°C. Line a large tray with baking paper and trace a circle around the bottom of an 18cm cake tin (or other round object of the desired size). Turn the baking paper over (so it is pencil side down).

Add eggs whites to a large bowl. Put cornflour and caster sugar to one side of the bowl.  Add boiling water to egg whites, pour in vanilla and white vinegar, and beat on high for 10-20 minutes until thick, glossy and the sugar has dissolved (you can test this by putting a small amount of mixture on your index finger and rubbing it with your thumb, if you can feel the sugar, keep beating). **It is hugely important that you have the sugar dissolved, otherwise the pavlova may crack and weep during cooking**

Using the circle on the baking paper as your guide, spoon the pavlova mixture onto the tray and shape.

Cook at 180°C for about 8 minutes and then reduce heat to 90°C and cook for another 45 minutes. Turn the oven off and leave the pavlova to cool in the oven for at least an hour, to prevent collapsing.

When fully cool and you’re ready to serve it (keep the meringue free of toppings until right before serving), gently spread the thickened cream over the top and decorate with fruit.

jIdOiH2sTH2BujFeWf6rNA.jpg

Recipe from my lovely Grandmother, Margaret Payne.

Chocolate Berry Meringue Nests

These meringue nests are the perfect conclusion to a summer dinner party or BBQ. They are light, flavoursome and not too sweet when paired with fresh berries and whipped cream. I especially love that they look like you’ve gone to a lot of effort (when they’re really very simple to make) and they don’t heat up the house too much while baking!

thumb_IMG_1228_1024

Ingredients (makes 4)
3 egg whites
¾ cup (165g) caster sugar
1 ½ teaspoons vanilla essence
1 tablespoon dark dutch cocoa powder
300ml thickened cream, whipped
Fresh berries, to decorate (I used strawberries, raspberries and blueberries)

Method
Preheat oven to 120 degrees C (~100 degrees C fan-forced). Line a large oven tray with baking paper.

Beat egg whites in a medium bowl with an electric mixer or mixmaster until soft peaks form. Add caster sugar, a tablespoon at a time, beating until the sugar dissolves between each addition. Add in vanilla essence and cocoa powder.

Divide the meringue mixture into 4 roughly equal sized dollops on the baking tray, and spread into circles approximately 11cm in diameter.

Bake in the oven for approximately 45 minutes or until meringues are firm. Turn off the oven and let meringues cool for 5 minutes, before letting them cool completely with the door ajar.

Top meringues with whipped cream and berries. Enjoy!

thumb_IMG_1212_1024

thumb_IMG_1223_1024

Adapted from ‘Chocolate Berry Meringues’ in The Australian Women’s Weekly cookbook ‘Best Food’, 2005 reprint.

Vanilla Raspberry Layer Cake

Well.. I lied. I completely intended to blog more in the last few weeks (as evidenced by my last post!) but I’ve just been too busy. I had my 21st Birthday to plan, uni assessments galore, the Psychology ball to organise, and now Laura’s 18th is coming up in a couple of weeks. Yikes, I get exhausted just thinking about it all! However, while I haven’t been blogging, I have been baking.

Here is the cake I made for my 21st Birthday afternoon tea – triple layer vanilla cake with a tangy raspberry filling & super glossy meringue frosting, topped with vanilla bean macarons. The raspberry filling was perfect as, otherwise, this cake was going to be too sweet, so I would certainly recommend leaving it (or perhaps substituting it for a tangy lemon curd if you’re not a raspberry fan) to cut the sweetness from the frosting.

Elise's 21st Birthday 039
Don’t worry, the empty plates in the background didn’t stay empty!

For my 21st birthday cake, I used 2 packets of Betty Crocker’s SuperMoist Vanilla cake mix, with some extra vanilla added so they tasted more ‘home-made’ divided into 3 20cm lined pans. I did this for 2 main reasons; it saved a lot of time (and time was precious as I had so much other cooking to do!), and because it reliably produces an even, stable, fine-crumbed cake that is easy to work with. If you don’t want to use cake mixes, just make a double batch of your favourite vanilla/butter cake and that will work as well 🙂

The raspberry filling needs to be made at least a day ahead but keeps well in the fridge so can be made up to a week ahead.

I also made the macaron shells a couple of days ahead to save me some stress on the actual party day.

The frosting should be made the day of serving as it does not keep particularly well.

Ingredients

For the raspberry filling (make at least a day ahead)
340g frozen raspberries
⅔ cups water
½ cup white, granulated sugar
1 tblspn lemon juice
2 ½ tblspns cornstarch dissolved in ¼ cup of water

For the cake
2 boxes Betty Crocker’s SuperMoist Vanilla cake mix (made following instructions, so add the eggs, milk, butter etc. as specified by the box)
½ tablespoon vanilla extract

For the meringue frosting
6 egg whites
1 ¾ cups caster sugar
2 tblspns liquid glucose (or light corn syrup)
¼ teaspoon cream of tartar
2 teaspoons vanilla extract

For the macarons
https://bakerholicsanonymous.wordpress.com/recipes-2/cookies-biscuits-macarons/vanilla-bean-macarons/

Elise's 21st Birthday 048

Method
To make the raspberry filling:
In a saucepan combine the raspberries, water, sugar, and lemon juice. Bring to boil and simmer for 15-20mins  or until the raspberries have broken down.
Remove the mixture from the heat and strain with a fine mesh sieve. Return the stained mixture to the heat. Dissolve the cornstarch in water. Whisk the cornstarch mix into the raspberry mixture.
Bring the mixture back to a boil and simmer for 5 more minutes, stirring occasionally. Remove from heat and cool completely.
Refrigerate overnight to set.

To make the cakes: Line & grease 3 20cm cake pans. Set oven to temperature specified by the cake mix boxes. Make cakes according to box instructions, add ½ teaspoon of vanilla extract to each cake mix & divide mixture among the three pans. Bake for specified time, or until a skewer inserted comes out clean.

To assemble the cake: Carefully place a cake layer on your serving platter. Top with a generous amount of raspberry filling and spread gently using a spatula to make an even layer. Top with another cake layer and repeat. Finally, top with the final cake, ready to be frosted.

Elise August 2015 111

To make the meringue frosting: Add egg whites, sugar, liquid glucose and cream of tartar, and simmer over a pot of water (not boiling), whisking constantly but gently, until temperature reaches 54°C on a thermometer (be patient, it does get there eventually!).
Beat heated mixture with electric beaters on a low speed for 2 minutes, then increase the speed to medium and beat for 2 more minutes. Increase the speed to high and beat until it is very thick and glossy, about 5 minutes.
Add vanilla and beat to combine.
Frost cake immediately by piling the frosting on top of the cake and, using a metal spatula, gently spreading from the top down. Smoothe as much as possible with your spatula.

Top with 6 macarons, 3 of each colour and a candle (if desired).

Serve each piece with a macaron & enjoy!

Elise's 21st Birthday 048

Elise August 2015 131

Elise August 2015 132

Raspberry filling recipe adapted from: Pinterest (various sources with the same basic recipe)

Meringue frosting recipe adapted from Sweetapolita’s ‘Perfectly Pink Angel Food Cake’ http://sweetapolita.com/2015/05/perfectly-pink-angel-food-cake/