Celebration Sponge Cake

image1

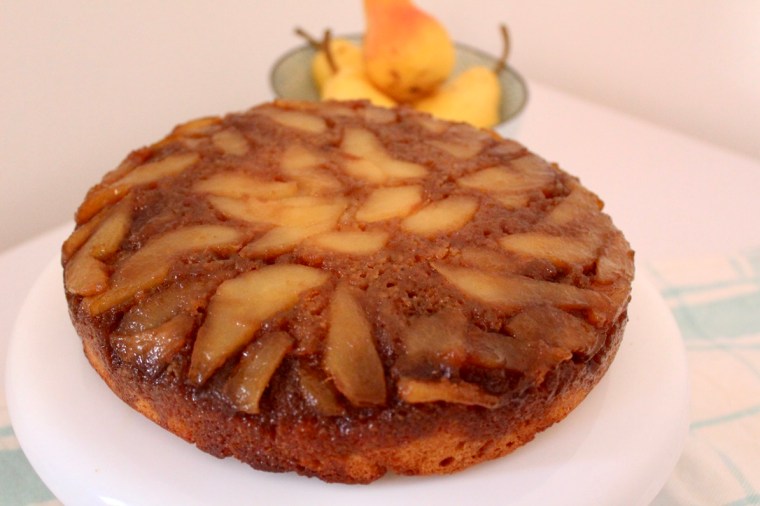
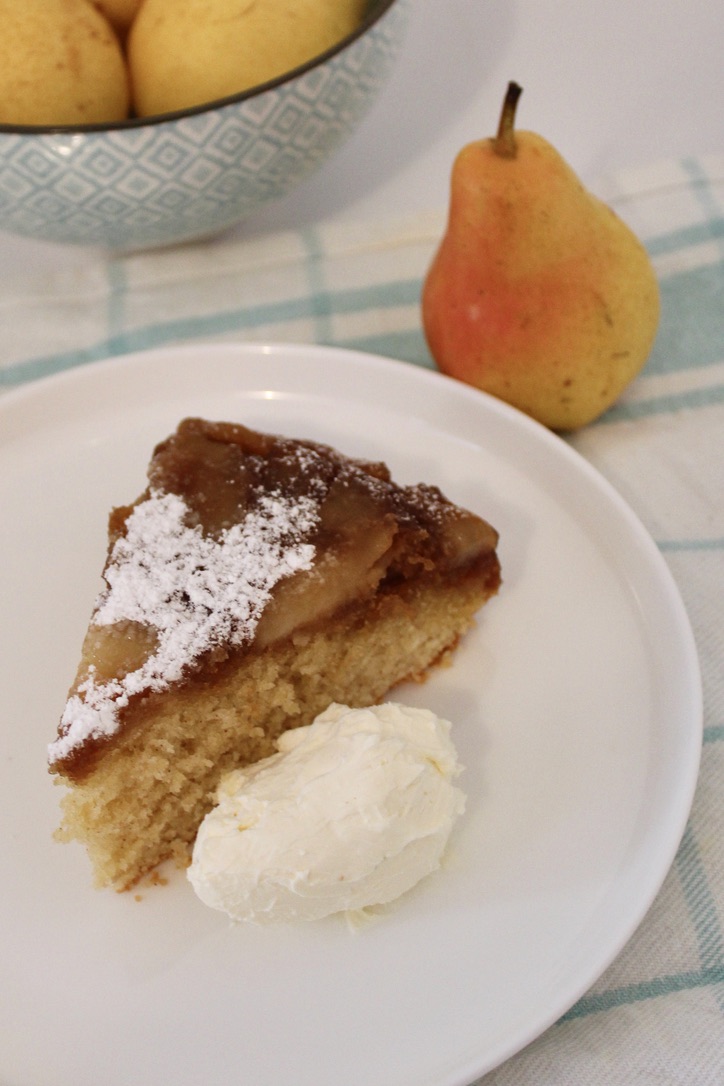
I made this sponge cake over the weekend for my Grandma’s 80th Birthday. I really wanted to make something special as it is widely accepted that my Grandma is one of the most amazing humans on the planet (really, she’s exceptional). This cake looked amazing, tasted delicious and is very adaptable – you can use any fruit that’s in season to put on top, and fill it with anything you like. If I was in a rush I would even be inclined to buy a sponge cake, cut in half and decorate it to get the effect with minimal time and effort.

Ingredients
For the sponge: 
3 eggs, separated
1 cup caster sugar
½ cup cold water
1 teaspoon vanilla extract
2 teaspoons baking powder
1 cup plain flour
1 tbsp cornflour

For the sweetened, thickened cream:
500ml thickened cream
Icing sugar (to taste)
Vanilla extract (to taste)

For the jam: https://bakerholicsanonymous.wordpress.com/recipes-2/frostings-icing-condiments/raspberry-jam/, alternatively you can use store bought (but it is likely to be sweeter)

For decorating: 
2 punnets fresh strawberries
1 punnet fresh raspberries
1 punnet fresh blueberries
1 pomegranate
Fresh mint

For the macarons: https://bakerholicsanonymous.wordpress.com/recipes-2/cookies-biscuits-macarons/raspberry-macarons/ (with the raspberry jam to sandwich)

Method
Make the raspberry jam according to instructions.

If desired, make the macarons according to instructions. Sandwich with some of the jam.

For the sponge: 

Preheat oven to 160°C (fan-forced). Grease two 20cm round, shallow tins and line the bases with baking paper.

Use electric beaters to beat the egg yolks, sugar, water, and vanilla for approximately 10 minutes, until very pale and thick. Wash the beaters and then, in a separate bowl, beat the egg whites and baking powder until stiff peaks form.

Fold the sifted flours into the yolk mixture and then gently mix in the egg whites.

Divide evenly between the tins and bake for 20 minutes or until springy in the centre and the cake has come away from the sides of the tins.

Gently turn cakes, face up, onto wire cooling racks with clean tea towels on them (this stops the wire from denting your cakes). Leave to cool entirely.

For the Cream

Add cream, icing sugar (to taste) and vanilla extract (to taste) into a large stick blender/master container (or bowl) and blend until the cream is very thick.

To Assemble 

Lay one of your sponges top-down on your serving platter.

Spread with raspberry jam (or desired filling).

image2-4

Spread a generous layer of whipped cream on top.

image1-4

Top with strawberry slices, chopped evenly.

image2-3

Gently place the other sponge, top-side up onto the cake.

image1-3

Top liberally with cream and spread it evenly, right out to the edge (but not down the edge, you still want to see the cake).

image2-2

Top with fruit and mint leaves (the more the better often for aesthetics – and flavour!) And, if desired, place macarons with a blob of cream and a raspberry on top, evenly around the cake.

10805270_10152794404659463_823488353_n

Enjoy!

Recipe from Grandma

Caramel & Pear Upside-down Cake

First off, I would like to apologise profusely for my extended hiatus! No, I didn’t hibernate through winter (quite), instead I was on holidays in the Greek Islands and then my time was filled with Birthdays, work & uni assessment.

photo

However, today I have an absolutely delicious recipe for you; one so good that only moments ago I finished gobbling up a piece and felt I had to share it right away!

EAD3A10D-9E61-4442-8317-8BFCF2DD97B5_1_105_c

Ingredients (serves 8)
175g butter
2/3 cup brown sugar
2 large pears, peeled & sliced thinly
½ cup white sugar
3 eggs
1 teaspoon ground cinnamon
1 teaspoon ground nutmeg
1 teaspoon vanilla essence
¾ cup almond meal
1 cup self-raising flour
1/3 cups milk

725BCEDA-DBB2-456E-A96A-E776E0F993B1_1_105_c

Method
Preheat the oven to 180°C (160°C fan-forced) and grease and line a round 23cm springform cake tin.

Melt 55g of the butter in a small saucepan and then stir in brown sugar over a low heat until combined into a caramel.

Pour the caramel mixture into the base of your prepared tin. Arrange your pears on the caramel. I tried to make neat circles, but this was a challenge as my pear was quite soft!

Using electric beaters, cream the butter and sugar. Once combined, add eggs, almond meal , vanilla and spices and beat until combined. Finally, add flour and milk and beat until just combined.

Gently spread the batter over your pears and bake in the oven for between 50-60 minutes (until a skewer inserted in the centre comes out clean).

Allow the cake to sit in the tin for around 15 minutes before turning out.

Serve with cream or ice-cream and a dusting of icing sugar if desired.

5A971CA0-7ED4-4C61-A00D-947FCC5B879E_1_105_c

Recipe adapted from ‘Caramel pear cake’ on BestRecipes.com.au


Mars Bar Slice

This delicious, easy slice is a winner with kids & adults, and always sells  well at fetes and cake stalls.

Image

Ingredients
3 x 58g Mars Bars, chopped
90g butter
2 cups Rice Bubbles
200g milk chocolate

Method
Line a slice tray with baking paper.

Combine Mars Bars and butter in a small saucepan over a low heat, stirring constantly, until the mixture is smooth.

Stir in Rice Bubbles and press the mixture firmly and evenly into the lined tray.

Melt the chocolate in a bowl over a saucepan of hot water (or in the microwave) and stir until completely smooth.

Quickly spread the melted chocolate evenly over the slice mixture and refrigerate until set.

Once set, cut into rectangles or squares and enjoy.

Image

Recipe adapted from ‘Mars Bar Slice’ on bestrecipes.com.au

NB: Snickers can be used as a substitute for Mars Bars

Peanut Butter Cookies with Chocolate Chunks

Image

Wow! These cookies are to die for. Based on a Curtis Stone recipe I found in LA last year (but waited until SwotVac to try for procrastibaking purposes), these cookies are so ridiculously chewy and chocolatey and perfect that even the sun wanted in (photographic evidence above and below). Warning: highly addictive.

Ingredients
1 cup flour
½ tspn baking soda
1 cup crunchy peanut butter
1 cup brown sugar
125g butter, softened
1 ½ tblspns honey
1 large egg
1 tspn vanilla extract
155g dark chocolate, roughly chopped

Image


Method
Preheat oven to 180°C (160°C fan-forced) and line 3 large baking trays with baking paper.

Sift the baking soda and flour into a medium bowl. Set aside.

Using an electric mixer, beat the peanut butter, brown sugar, butter, honey, egg, and vanilla in a large bowl until well combined.

Stir the dry ingredients into the peanut mixture in 2 additions.

Stir in the chopped chocolate.

Scoop a heaped teaspoon (so that it is about the size of a ping pong ball) of dough for each cookie onto the prepared baking sheet (spacing so there is room for spreading).

Bake for about 7 minutes, or until the cookies are starting to turn golden but are still soft to the touch.

Cool the cookies on the tray for 5-10 mins (this is where they will harden slightly) and then transfer to a cooling rack or eat warm.

Makes around 36 cookies, provided you don’t eat too much dough (not that I would ever do that or anything).

IMG_3347

Recipe from Curtis Stone