Speckled Egg Easter Cakes

3C675F08-FE00-409B-B093-942AC5AD116B_1_105_c

Happy (almost) Easter everyone! Today I’m sharing my super simple recipe for these adorable miniature chocolate cakes topped with a Flake nest and speckled eggs. To make it even easier, feel free to use a packet mix cake (I like Betty Crocker’s Devil’s Food Cake mix).

2CA73BE1-E883-4540-9DFD-F49E567F92EC_1_105_c

Ingredients (makes 2 10cm cakes, 1 10cm cake and 12 cupcakes, or 24 cupcakes)
125g butter, softened
1 teaspoon vanilla extract
1¼ cups caster sugar
2 eggs
1 1/3 cup self-raising flour
½ cup cocoa powder
2/3 cup (160ml) water

90g dark chocolate melts
30g butter
1 cup icing sugar
2 tablespoons hot water

1 packet Speckled Easter eggs (I used Darrell Lea)
3 Flake bars, lightly crushed

321AFCB4-C4B9-417A-9544-2DE13C3DDF33_1_105_c

Method

Preheat the oven to 180°C (160 fan-forced). Spray a 10cm round cake pan with cooking oil and line the base with a baking paper. Fill a 12-hole muffin tin with patty pans*.

Place the butter, vanilla, sugar, eggs, sifted flour and cocoa, and water into a large bowl. Beat with an electric mixer on low speed until the ingredients are just combined. Beat the mixture for a further 3 minutes on medium speed until smooth and pale in colour.

Fill the round cake pan about 2/3 way full and divide the remaining mixture evenly among the patty pans. Bake the cupcakes for approximately 18-20 minutes and the mini cake for 25-30 minutes or until a skewer inserted comes out clean. Leave to cool on a wire rack.

Meanwhile, make the chocolate icing. Place the chocolate and butter in a small heatproof bowl. Half-fill a small saucepan with water; bring to the boil and then turn down the heat to a simmer. Put the bowl of chocolate mixture on top of the saucepan and stir until smooth. Add a little of the sifted icing sugar and some of the water; stir until mixture is smooth. Keep adding the sifted icing sugar and the water, a little bit at a time, stirring, until the icing is spreadable.

When the cakes are completely cold, spread with chocolate icing using a metal spatula. Shape the Flake pieces into a nest on top of the cakes and top with speckled eggs. Enjoy!

54BA1B5F-7992-4345-B2A7-384833C6389C_1_105_c

*Alternatively spray and line a second 10cm round cake pan, or prepare two 12-hole muffin tins with patty pans.

Cake and icing recipe adapted from Australian Women’s Weekly ‘Quick Mix Chocolate Cake’ and decoration inspiration from taste.com.au

Advertisement

Spinach, Leek & Feta Tart

This savoury tart is a delicious and easy way to eat your greens. I always associate it with spring picnics (which it is perfect for!) but it is also a great midweek meal or work/school lunch.

hPXpS5rUTVS%Ya0NrNq0IA_thumb_1ba6

Ingredients (Serves 4-6)
200g Greek feta, crumbled
1 leek
20g butter
160g baby spinach leaves
½ cup sour cream
½ cup thickened cream
3 eggs, lightly beaten
2 tablespoons shredded basil leaves
2 sheets frozen puff pastry, thawed

eFkSKhIjQrWiHxRw2gSSjg_thumb_1ba9

Method
Preheat oven to 200ºC. Cut the leek in half and thinly slice the white and pale green part to achieve 1 cup full.

Melt the butter in a saucepan and lightly sauté the leek over a medium heat for 4 minutes. Transfer to a bowl and set aside.

Add spinach to the saucepan, cover and cook until wilted. Take off the heat and then press leaves into a strainer to remove excess moisture.

In a bowl, combine sour cream, cream and eggs. Add the feta, leek, spinach and basil. Stir will and season to taste.

Line a non-stick rectangular quiche pan (35cm x 13cm) with the two pieces of pastry, overlapping slightly, and gently push the pieces together in the middle to seal the pastry case. Trim excess pastry. Lightly prick the pastry base with a fork and place the quiche pan onto an oven tray.

Bake the pastry case for 5-10mins until it has started to colour and puff.

Pour in prepared filling and bake for 30-35mins until firm and golden in the centre.

Remove from baking tray and allow to cool slightly before serving. Enjoy!

0fs7PRL6RoiuX5S%TaJ9Bw_thumb_1bad

Adapted from Baker’s Secret

My Famous Guacamole

It feels a bit cheeky to call this a recipe as it’s so easy and basically impossible to mess up, but it’s been my most requested ‘recipe’ among my friends and it’s about time I shared it. Adjust it to suit your palate (no two guacamoles I make are exactly the same), but here is the basis of the guacamole that features prominently at most Bills gatherings. We usually serve it with salted corn chips, but it also works well with flavoured Doritos, crackers, veggie sticks, or my sister’s weird but delicious favourite, salt and vinegar chips. Of course it is also a perfect addition to tacos, burritos and nachos.

Warning: once you make it for your friends, you will never be allowed to bring anything else to a party… ever!

8%VLuzCnSS68sMxiT+czAQ_thumb_1b82

Ingredients (makes enough for 1 packet of corn chips)
2 ripe avocados
1 medium sized clove of garlic, finely diced
2 teaspoons tomato, finely chopped
3 teaspoons lime juice
2 teaspoons sweet chilli sauce
1 teaspoon Tabasco sauce (optional)
Salt
Pepper
Coriander leaves, to serve
Corn chips, to serve

PsuEvIHjRySbOShBECePuw_thumb_1b77
Ft. Adelaide Crows scarf in the background because it’s AFL Grand Final Day!!

Cut up the avocados into small cubes and scoop into a medium sized bowl. Mash gently with a fork until mostly squashed but with some lumps (I prefer the term ‘texture’) remaining.

Dice the garlic (making the pieces as small as possible) and tomato and add to the avocado. Gently stir through with the fork.

Add in the lime juice, sweet chilli sauce and tabasco sauce (if desired). Stir until combined. Season with salt and pepper. Taste it and add more of any of the ingredients until it’s balanced and to your liking.

Transfer into a small serving bowl, top with a couple of coriander leaves and enjoy!

E2R2gaLZQIGYJ+79TSNpnw_thumb_1b62

Recipe adapted from Emma, my neighbour from Canberra.

And because it’s always stuck in my head, enjoy the horrendously catchy ‘Guacamole Song’ here!!

Passionfruit Slice

Passionfruit is one of my favourite fruits – I love its intense tangy flavour which, to me, tastes like summer. It should come as no surprise then, that I love this slice which pairs passionfruit with lemon in a creamy cheesecake-like layer on top of a chewy coconut-ty base – delicious! I also love it because it’s so quick and easy to make, perfect for whipping up quickly the night before a morning tea at work.

thumb_IMG_0256_1024

thumb_IMG_0280_1024
It smells so good that Bailey wouldn’t leave it alone! 

Ingredients (makes 24 pieces)
1 cup self-raising flour
1 cup desiccated coconut
½ cup caster sugar
100g butter, melted
395g can condensed milk
½ cup fresh lemon juice
4 tablespoons passionfruit pulp

thumb_IMG_0257_1024

Method
Preheat oven to 180°C. Line a 16 x 26cm pan with non-stick baking paper, allowing it to hang over the sides.

Combine the flour, coconut, sugar and butter in a large bowl. Use your hands to bring it together into a dough. Using a metal spoon, press dough into the base of the prepared pan.

Bake for 12 minutes or until lightly golden. Set aside to cool.

Reduce oven temperature to 150°C. Whisk together condensed milk, lemon juice and passionfruit pulp in a large bowl until well-combined. Pour onto the cooled base and spread evenly.

Bake for 15 minutes or until just firm. Set aside to cool completely before cutting into squares. Enjoy!

thumb_IMG_0282_1024
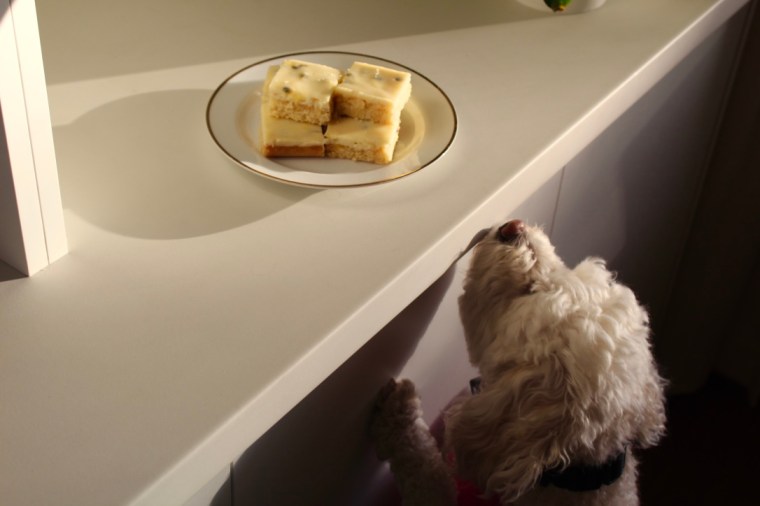
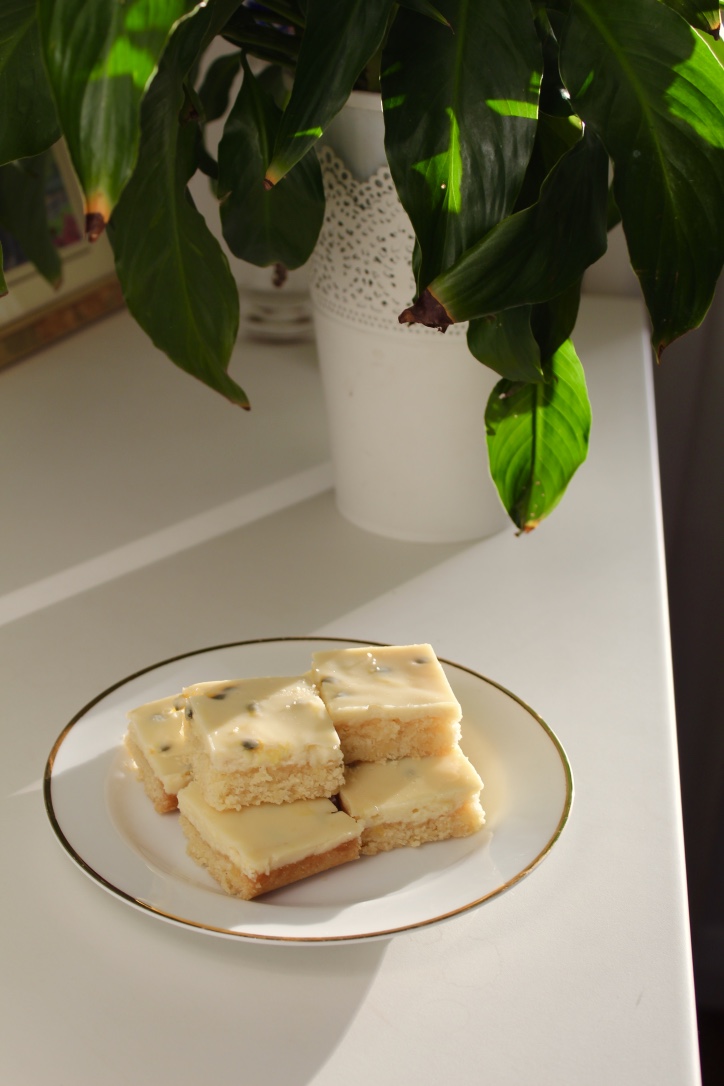
Adapted from Passionfruit Slice on Taste.com.au


Bacon, Caramelised Onion & Thyme Piroshki

thumb_IMG_3749_1024

Piroshki (also known as pirozhki or pyrizhky), literally translating to ‘small pie’, are individual-sized buns with either a sweet or savoury filling. There are many variants of piroshki across Eastern Europe, but this recipe most closely resembles the Russian version. These piroshki are baked rather than fried and stuffed with the dreamy combination of bacon, caramelised onion and thyme. We usually serve these as hors d’oeuvres but they are great for lunches and picnics as they are easily transportable and don’t make a mess.

While they do take time and effort to make, they more than make up for it in terms of flavour and I find the baking process is very rewarding. There’s something so satisfying about making things from scratch and I’m always left feeling very self-righteous (plus who doesn’t love kneading dough? So fun and therapeutic). Next time you have a free afternoon, try making a batch – your tastebuds will definitely thank you for it!

thumb_IMG_3740_1024

Ingredients (makes 35-40)
60g fresh yeast
2 tablespoons sugar
315ml lukewarm milk
375g plain flour
Salt & pepper
125g melted butter
3 large brown onions, chopped
55g butter, extra
250g bacon
2 tablespoons fresh thyme leaves
1 egg, beaten

Method
Combine the yeast and sugar; stir in the milk.

In a large bowl, mix flour and 2 teaspoons salt and make a well in the centre. Pour the yeast mixture and the melted butter into the centre. Beat well for 3 minutes until a smooth batter is formed. Cover with Gladwrap and leave in a warm place for 1 hour or until doubled in size.

Gently cook onions in extra butter until golden. Chop bacon finely and add to the onions along with a teaspoon of pepper and the thyme leaves.

Knead the risen dough lightly and then divide into 35 to 40 portions. Wrap a teaspoon of the bacon filling into each portion of the dough. Allow the buns to prove in a warm place on greased trays for 15 minutes.

Preheat oven to 230°C.

Brush each bun with egg and bake in the prepared oven for 10-15 minutes or until golden brown. Enjoy!

thumb_IMG_3745_1024

thumb_IMG_3752_1024

Recipe adapted from Hors D’Oeuvres (1988) by June Budgen.

Pavlova

The pavlova is a quintessential Aussie dessert that is said to have been inspired by the Russian ballet dancer Anna Pavlova after a chef saw her perform on her world tour in 1926. A good pavlova has a beautiful high, crisp crust and a soft, pillowy marshmallow inside. It is one of my favourite summer desserts, especially when topped with seasonal fruit.

fullsizeoutput_5df

Ingredients (Serves 6-8)
1 large cup of sugar
1 teaspoon vanilla
1 teaspoon white vinegar
1 teaspoon cornflour
2 egg whites (at room temperature)
4 tablespoons boiling water
300ml cream, thickened
Fresh fruit (this time I used a mango, strawberries and blueberries)

fullsizeoutput_5c9.jpeg

Method
Preheat the oven to 180°C. Line a large tray with baking paper and trace a circle around the bottom of an 18cm cake tin (or other round object of the desired size). Turn the baking paper over (so it is pencil side down).

Add eggs whites to a large bowl. Put cornflour and caster sugar to one side of the bowl.  Add boiling water to egg whites, pour in vanilla and white vinegar, and beat on high for 10-20 minutes until thick, glossy and the sugar has dissolved (you can test this by putting a small amount of mixture on your index finger and rubbing it with your thumb, if you can feel the sugar, keep beating). **It is hugely important that you have the sugar dissolved, otherwise the pavlova may crack and weep during cooking**

Using the circle on the baking paper as your guide, spoon the pavlova mixture onto the tray and shape.

Cook at 180°C for about 8 minutes and then reduce heat to 90°C and cook for another 45 minutes. Turn the oven off and leave the pavlova to cool in the oven for at least an hour, to prevent collapsing.

When fully cool and you’re ready to serve it (keep the meringue free of toppings until right before serving), gently spread the thickened cream over the top and decorate with fruit.

jIdOiH2sTH2BujFeWf6rNA.jpg

Recipe from my lovely Grandmother, Margaret Payne.

Christmas Wreath Cupcakes

thumb_img_2654_1024

Ingredients (makes 24)
24 cupcakes of your desired flavour (red velvetflourless chocolate or Christmas spice work well)
250g butter, softened
3 cups icing sugar
4 tablespoons milk
Optional: Peppermint essence
Green food colouring
Red mini M&Ms

thumb_img_2651_1024

Method
Beat butter in a medium bowl with electric mixer until light and fluffy. Beat in icing sugar, milk, and, if desired, 1-2 drops of peppermint essence.

Spread thin layer of the frosting over each cupcake.

Colour remaining icing with 1-2 drops of green food colouring. Spoon into a piping bag with a star attachment and pipe icing in a ring around the edge of the cupcakes to make a wreath. Top with red M&Ms. Enjoy!

thumb_img_2658_1024

Elsa’s Snowflake Cookies

These beautiful snowflake cookies look like something Elsa from Frozen would make, and are a fantastic way to get your kids involved in the kitchen. These are perfect for Christmas or for a Frozen themed Birthday party.

thumb_img_2705_1024

Ingredients (makes around 40 cookies)
Equipment:
1 large snowflake cookie cutter
1 small snowflake cookie cutter

For the cookies:

½ cup butter
½ cup sugar
1 teaspoons vanilla
1 teaspoon mixed spice
1 small egg
½ teaspoon water
1 ½ cups flour
¾ teaspoons baking powder

To decorate:
Blue hard lollies (we used Melbourne Rock Candy Bo Peep collection)
White chocolate, melted

thumb_img_2699_1024

Method
Cream butter, sugar & vanilla using electric beaters until well combined. Add the egg and water and beat until light and fluffy.

Using a wooden spoon or silicone spatula, mix sifted dry ingredients into wet ingredients until a dough forms. Divide into 2 roughly equal pieces, cover with glad wrap (or plastic wrap) and refrigerate for an hour.

Line 3 large trays with baking paper.

Roll out dough using a rolling pin until it is approximately 1cm thick. Use the large snowflake cutter to cut out snowflakes from the dough, and carefully place on the lined trays (no need to leave room for spreading as they don’t). Then line up the smaller cutter in the centre of the large snowflake to cut out the dough – you can either bake these little snowflakes as cookies or put them back into the dough to cut out more large snowflakes.

Preheat oven to 190-200°C  (180°C fan-forced).

Blitz blue hard candy in a blender until they are fine crystals. Using a teaspoon, carefully sprinkle the crystals into the empty centres of the cookies ensuring that the centre is fully covered. Brush away any crystals not in the centre as these will discolour the cookies.

Bake cookies for 8-12 minutes, until lightly golden. Leave to cool on the baking trays for 5 minutes, before gently transferring onto a wire rack to cool completely.

Once the cookies are cool, decorate by piping melted white chocolate onto the cookies.

Enjoy!

thumb_img_2703_1024

thumb_img_2689_1024

Sugar cookie recipe adapted from ‘Alice & Lois.com’ – ‘The Best Valentine Sugar Cookies’

Design idea from Pinterest.

Coconut & Raspberry Bread

This is a ‘bread’ like banana bread, in that it’s really more like a bread-shaped cake. Name aside, it’s super simple to make and perfect for brunch, afternoon tea or dessert. I like it because it’s deliciously moist and not too sweet, but feel free to dust it with icing sugar to make it extra decadent. thumb_img_2444_1024

Ingredients (serves 8-10)
1 ¾ cups desiccated coconut
1 ½ cups coconut milk (I use Vitasoy unsweetened coconut milk found in the longlife milk section at most supermarkets)
¾ cup caster sugar
1 egg
1 teaspoon vanilla essence
1 ⅔ cups self-raising flour
1 cup frozen raspberries

thumb_img_2420_1024

Method
Add the coconut and coconut milk to a large bowl and stir to combine. Cover with Gladwrap and let it stand for 30 minutes.

Preheat the oven to 170°C. Spray a loaf pan with cooking oil and line with baking paper, ensuring you have overhang at both sides to help get it out.

Stir sugar, egg and vanilla essence in to the coconut mixture. Gently stir in the flour and then fold through the frozen raspberries.

Spoon into prepared pan and bake for 1 hour and 10 minutes, or until a skewer inserted come out clean. Cool in pan for 5 minutes, then lift onto a wire rack to cool completely.

Dust with icing sugar to serve if desired. Enjoy!

thumb_img_2449_1024
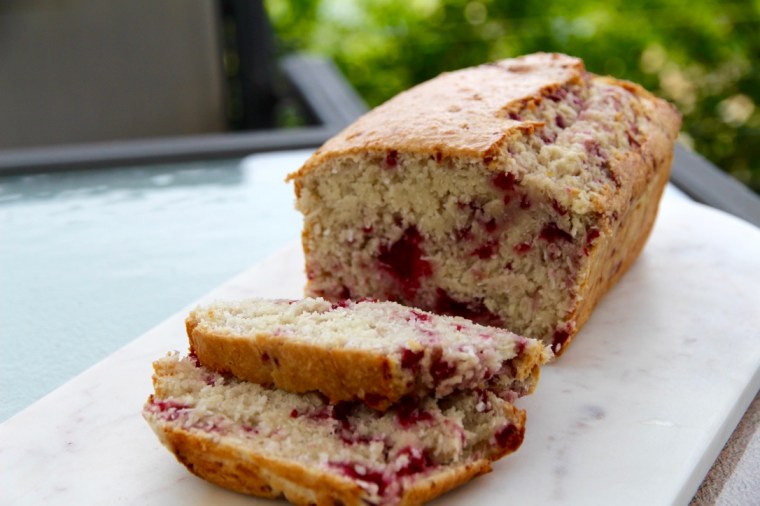
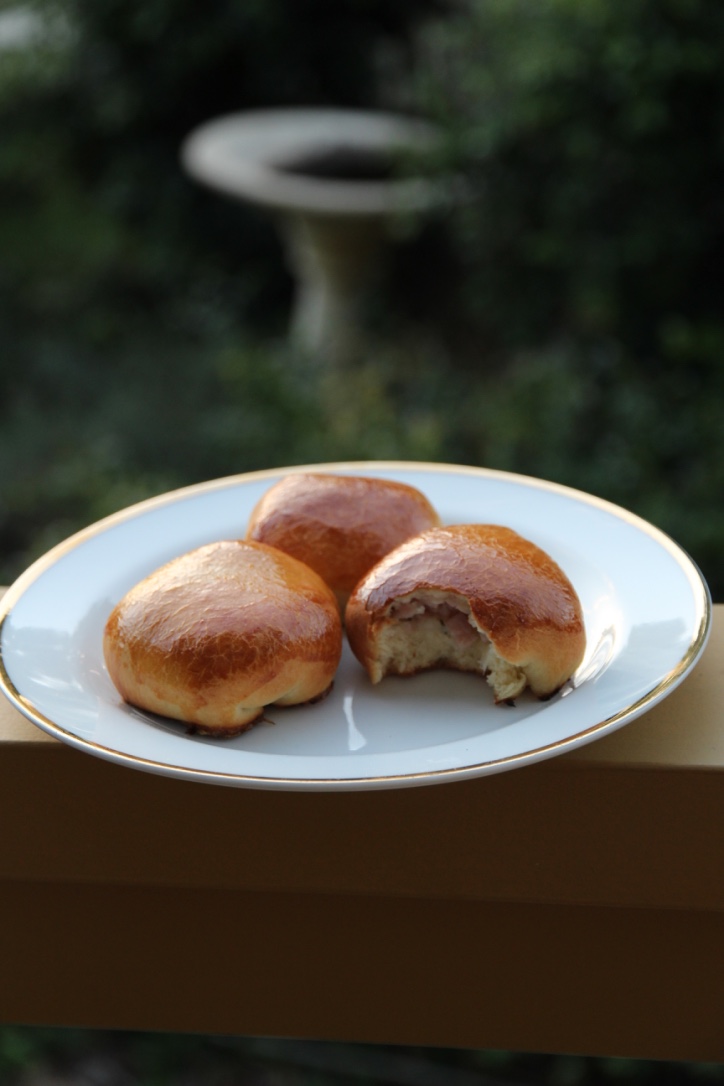
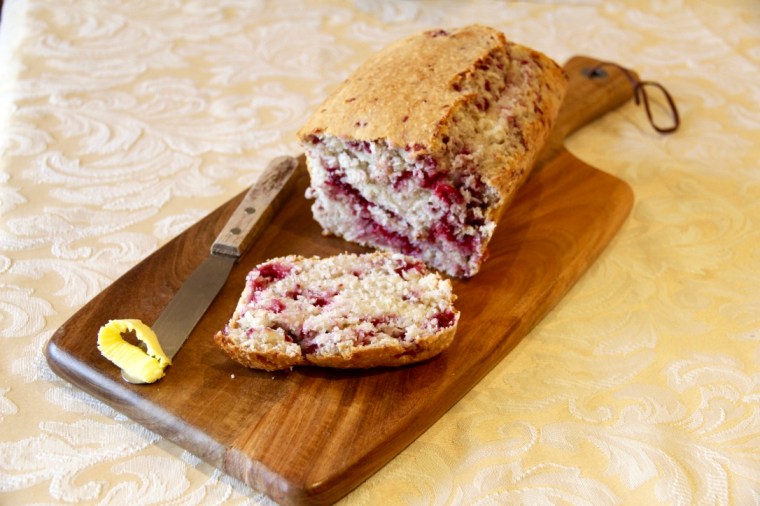
It’s also delicious toasted with margarine or butter!

Recipe adapted from a 2006 issue of Super Food Ideas.

Honeycomb

This is an old family recipe for delicious honeycomb – perfect enjoyed by itself, dipped in chocolate to make home-made ‘crunchies’, or as decorations on cakes.

Note: best consumed on the day it is made and stored immediately in an airtight container so it doesn’t go sticky.

thumb_IMG_2210_1024

Ingredients
6 tablespoons white sugar
2 tablespoons honey
½ tablespoon water
1 teaspoon bicarb soda

Method

Place a sheet of non-stick baking paper on a tray.

Place sugar, honey and water in a medium saucepan over high heat.

Bring to the boil. Boil for 3 minutes or until deep golden in colour.

Take off the heat and lightly sprinkle over bicarb soda, stirring any lumps if required (but otherwise leaving it to froth and bubble).

Pour mixture onto prepared tray (don’t spread it too much or you will lose aeration), and allow it to set at room temperature.

thumb_IMG_2193_1024

Once set, break it into desired size pieces. Enjoy!

Recipe adapted from my Great Grandmother, Doreen James.