Santa Hat Cupcakes

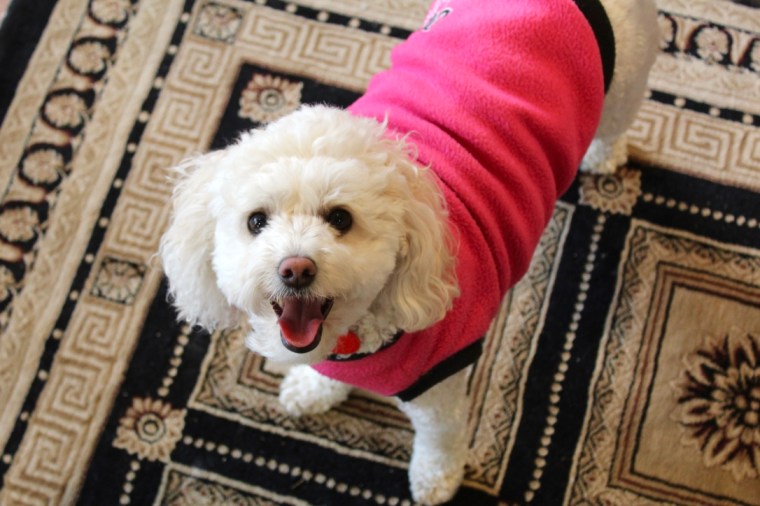
Christmas is just around the corner which means one thing…

IMG_1533.jpg

….Bailey is being forced into a whole range of ridiculous but adorable costumes :’)

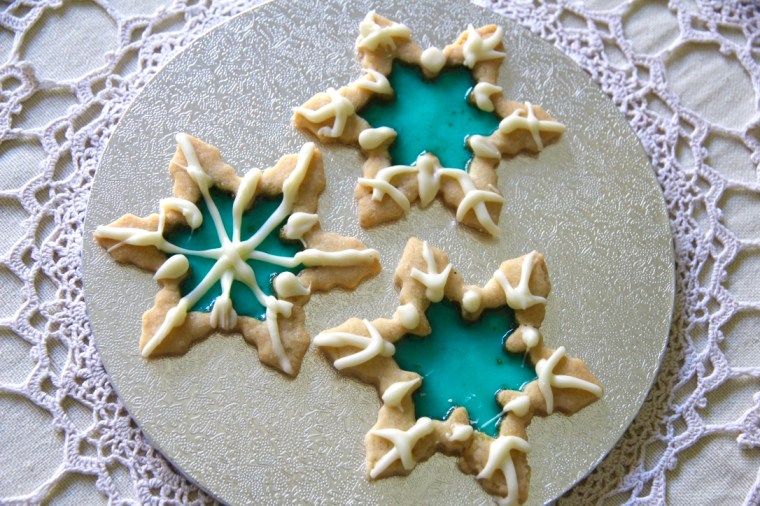
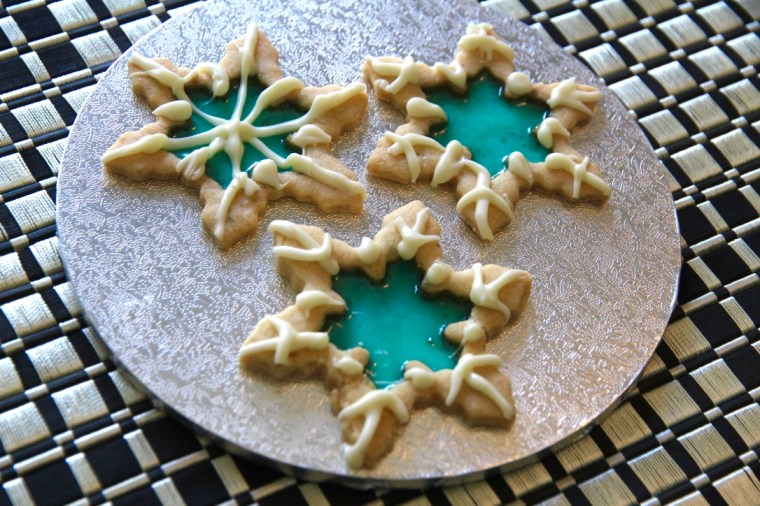
It also means that our kitchen is filled with the delicious scent of Christmas baking – cinnamon, nutmeg, cloves and ginger are being added to just about everything!

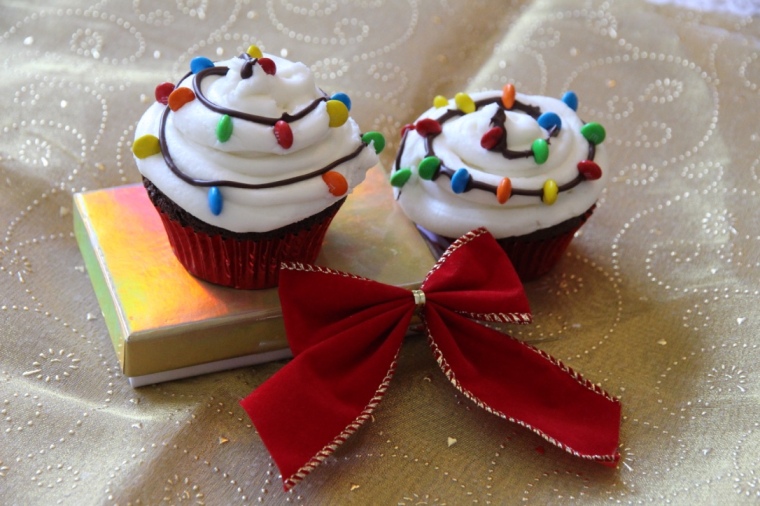
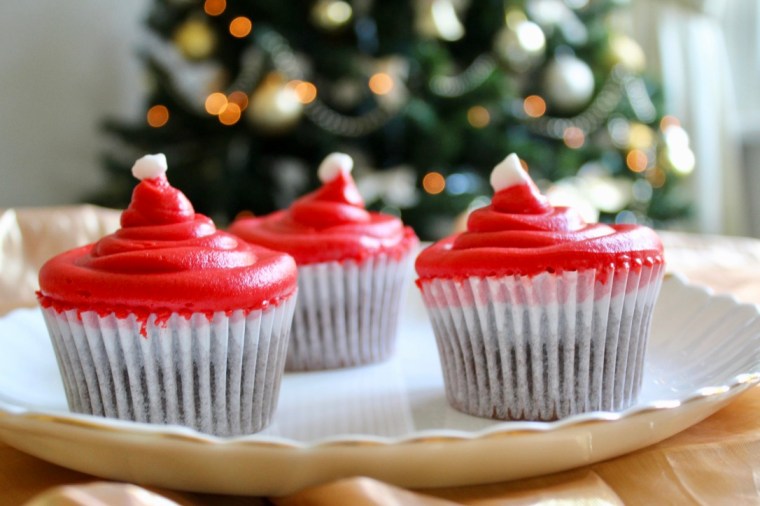
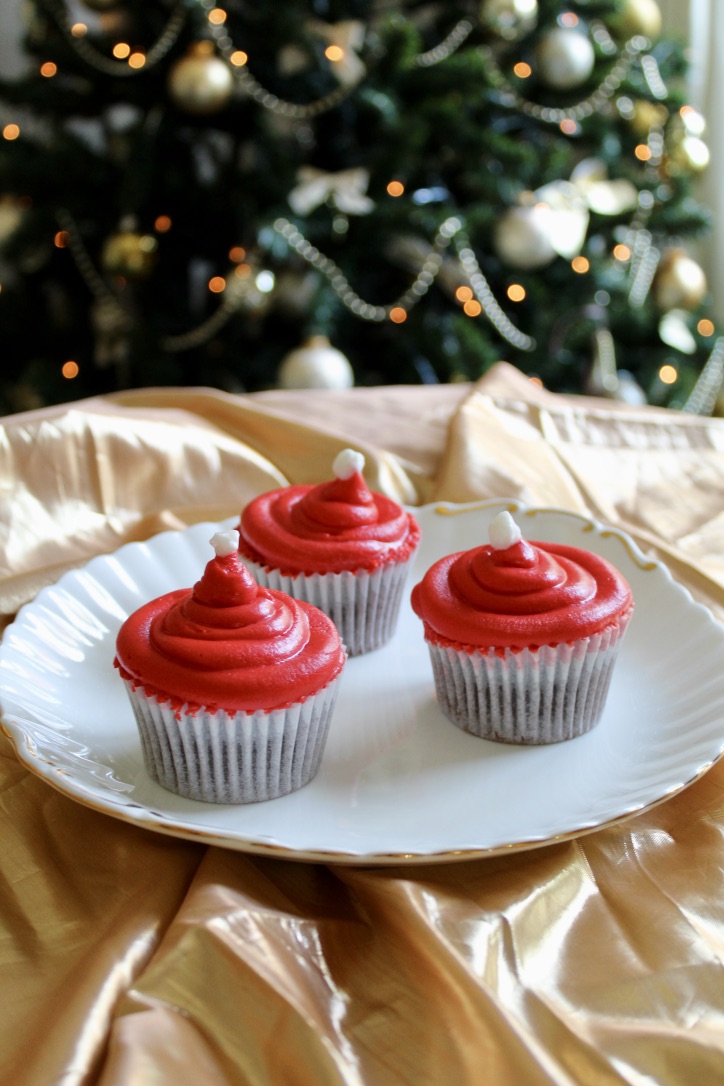
These cupcakes are no exception with a rich Christmas spiced mocha flavour. I’ve topped them with a vibrant red buttercream and a white mini marshmallow to look like Santa hats, but decorate them however you like.

MC4Nt7grRG68V5Y1D0P4ew_thumb_14e3

Ingredients (makes 12)
Christmas Spice Cupcakes
150g plain flour
1 teaspoon baking powder
½ teaspoon bicarb soda
1 teaspoon ground mixed spice
100g butter, softened
160g brown sugar
2 large eggs
3 tablespoons sour cream
125ml boiling water
75g dark chocolate
1 teaspoon instant coffee

Frosting
100g butter, softened
1/4 cup milk
1 teaspoon vanilla extract
4 cups icing sugar
Wilton colouring gel in Red
12 white mini marshmallows

LIq6KzWSQj62tLHHlovg9w_thumb_14e6

Method

Preheat the oven to 180ºC fan-forced. Line a 12-hole muffin pan with patty pans.

In a large bowl, combine flour, baking powder, bicarb and mixed spice. In another bowl, cream the butter and sugar with an electric mixer. Add the eggs one at a time, mixing well after each, and then beat in a third of the flour mixture followed by a tablespoon of the sour cream, repeating until all used.

Put the water, chocolate and instant coffee in a pan and heat gently until the chocolate melts. Fold this into the cake batter, being careful not to over beat.

Pour the batter into the patty pans and put in the oven for about 20-25 minutes, until each cake is cooked through but still dense and damp.

Leave to cool for 5 minutes in the tray before transferring to a wire rack to cool completely.

Once cool, cut the domes off the cupcakes until you have a flat surface.

To make the frosting, cream the butter for 1-2 mins in a large bowl using an electric mixer. Add the milk, vanilla and half of the icing sugar and beat for at least 3 mins (until the mixture is light and fluffy). Add the remaining icing sugar and beat for a further 3 mins or until of a spreadable consistency. Add extra milk if too dry or extra icing sugar if too wet. Add colouring and beat in until combined and the desired colour has been achieved.

Spoon the frosting into a piping bag fitted with a large, plain nozzle. Pipe frosting onto the cakes in a circular motion from the outside in until it looks like a santa hat. Top with a white mini marshmallow.

Enjoy!

nMz3APuzRjKuOSpPV7e2TA_thumb_14e4

Cake recipe from Nigella Lawson ‘How to be a Domestic Goddess’
Frosting recipe adapted from the ‘Crabapple Cupcake Bakery’ cookbook.

Baileys Waffles with Whipped Cream

My family has a thing for Baileys. It’s our go-to after dessert liquor, holiday staple, and even the name of our dog!

thumb_IMG_0227_1024
Our adorable Bailey girl ♥

These waffles celebrate all things Baileys and are the perfect decadent Christmas morning breakfast (or any other breakfast, because every day is worth celebrating, right?!) They would also work well for dessert, perhaps served with chocolate sauce (#cleaneating).

0618FUomTnu107FzxSg_thumb_1bc1

Waffles (makes 8 large square waffles)
2 cups flour
4 teaspoons baking powder
2 eggs, separated
2 tablespoons white sugar
½ cup canola oil
1 cup milk
1 cup Baileys Irish Cream

Whipped Cream
1 cup thickened cream
¼ cup Baileys Irish Cream
1 teaspoon vanilla extract
2 tablespoons icing sugar

fHBIVBTVRaGJT8Af8aAmtg_thumb_1bbc

Sift the dry ingredients into a large bowl and make a well in the centre.

Whip the egg whites in a medium bowl with a handheld beater until stiff peaks form.

In a separate bowl, combine egg yolks, sugar, oil, milk and Baileys. Pour into the well in the centre of the dry ingredients and mix until there are no more lumps.

Gently fold in the whipped egg whites.

Heat your waffle iron to a medium-high heat and spray generously with cooking oil. Pour the mix into the waffle iron and cook until golden brown. Repeat with remaining mixture.

While the waffles are cooking, make the Baileys whipped cream by beating the cream, Baileys, vanilla and icing sugar with an electric mixer until very thick.

Serve waffles with whipped cream and berries. Enjoy!

1aT6v5cQRGWGiiS73yHHGg_thumb_1bc5

Adapted from Buzzfeed Tasty ‘Bailey’s Waffles’

Pavlova Wreath

WxtVq30NTRKQBIe97L7k%Q_thumb_d52

I made this pavlova wreath for a friend’s Christmas in July themed Birthday lunch. It’s a great, light way to finish a meal (perfect after a rich Christmas feast!) and looks festive without being kitsch. It’s great for Christmas Day as you can make and decorate it well ahead of time, giving you more time to focus on the main course and mingle with guests.

Uut8X+CPQ4qhE1T2VL9HsQ_thumb_d63

Ingredients (serves 10-12)
6 large free-range egg whites
350g caster sugar
1 teaspoon white vinegar
1 teaspoon cornflour

For the topping
600ml cream
2 teaspoons vanilla essence
½ – 1 tablespoon icing sugar (to taste)
2 punnets of strawberries
⅔ punnet of raspberries
½ punnet of blueberries
½ punnet blackberries
Mint leaves (optional)

upDTuTgac+qipn%VAyQ_thumb_d50

Method
Preheat oven to 160°C (140°C fan-forced). Line a large baking tray (or round pizza tray as I used) with baking paper and draw a 30cm circle in the centre.

Whisk egg whites with an electric mixer in a large, clean bowl until soft peaks form. Gradually add the sugar a little at a time, whisking on maximum speed until stiff and glossy. Once all of the sugar has been added, continue mixing for 10 minutes or until all of the sugar has been dissolved (test this by rubbing the meringue mixture between your fingertips and ensuring it is smooth). Mix the vinegar and cornflour in a cup and stir it into the egg whites.

Spoon dollops of meringue mixture onto the prepared circle on the baking paper as below:5xNnVspLSUuZc9DoPgiObg_thumb_d68

Transfer to the oven and immediately reduce the temperature to 140°C (120°C fan-forced). Bake the pavlova for 1 hour–1 ¼ hours, until the outside is hard but still white. Turn the oven off, prop the oven door open with a matchbox and leave the pavlova inside for an hour to cool and dry.

To assemble, whip the cream, vanilla and icing sugar until thickened. Gently spread over the top of the wreath and top with fruit and mint leaves. Enjoy!

ltCc+nBNQa+jJHl+g6tvIg_thumb_d4b

Recipe adapted from Mary Berry’s Christmas Pavlova recipe on BBC Food.

SaveSaveSaveSave

Festive Chocolate Ginger Nut Cookies

These cheat’s festive cookies are cheap and easy, but look a million bucks! Choose your favourite decoration option, or make some of each.

Option 1: Mini Christmas Puddings
1 packet Arnott’s Ginger Nut Biscuits
100g dark chocolate, melted
20g white chocolate, melted
Original M&Ms (red & green)
Mini M&Ms (red)

Spread the melted dark chocolate onto your biscuits and let harden. Using a butter knife, spread the melted white chocolate onto the top of your cookies to look like custard. Top with M&Ms.

thumb_img_2745_1024

Option 2: Glitzy Gold
1 packet Arnott’s Ginger Nut Biscuits
100g dark chocolate, melted
Gold cachous
Gold sugar crystals

Spread the melted dark chocolate onto your biscuits and top with gold cachous and sugar crystals.thumb_img_2750_1024

Option 3: Strawberry, Pistachio & Almond
1 packet Arnott’s Ginger Nut Biscuits
100g dark chocolate, melted
Slivered almonds
1 tablespoon pistachios, finely chopped
Dried strawberries, finely chopped

Spread the melted dark chocolate onto your biscuits and top with dried strawberries, almonds and pistachios.
thumb_img_2751_1024

Recipe adapted from Better Homes & Gardens Magazine, Christmas 2015

Stained Glass Christmas Cookies

These gorgeous stained glass cookies are as fun to make as they are to eat! You can use any shaped cutters you like and could even join the cookies together to make a stained glass cookie wreath.

thumb_img_2709_1024

Ingredients (makes approximately 50 cookies)
½ cup butter
½ cup sugar
1 teaspoons vanilla
1 teaspoon mixed spice
1 small egg
½ teaspoon water
1 ½ cups flour
¾ teaspoons baking powder

Hard/boiled lollies (I used Melbourne Rock Candy Bo Peep collection)
White chocolate, melted

thumb_img_2714_1024

Method
Cream butter, sugar & vanilla using electric beaters until well combined. Add the egg and water and beat until light and fluffy.

Using a wooden spoon or silicone spatula, mix sifted dry ingredients into wet ingredients until a dough forms. Divide into 2 roughly equal pieces, cover with glad wrap (or plastic wrap) and refrigerate for an hour.

Line 3 large trays with baking paper.

Roll out dough using a rolling pin until it is approximately 1cm thick. Use assorted cutters to cut out shapes from the dough, and carefully place them on the lined trays (no need to leave room for spreading as they don’t). Then line up the smaller cutter of the shape in the centre of each, and cut out the centre dough.

Preheat oven to 190-200°C  (180°C fan-forced).

Divide the hard lollies into colours and blitz them, one colour at a time, in a blender until they are fine crystals. Using a teaspoon, carefully sprinkle the crystals into the empty centres of the cookies ensuring that the centre is fully covered. Brush away any crystals not in the centre as these will discolour the cookies.

Bake cookies for 8-12 minutes, until lightly golden. Leave to cool on the baking trays for 5 minutes, before gently transferring onto a wire rack to cool completely.

Once they are cool, decorate by piping melted white chocolate onto the cookies.

Enjoy!

thumb_img_2712_1024

Sugar cookie recipe adapted from ‘Alice & Lois.com’ – ‘The Best Valentine Sugar Cookies’
Design idea from Pinterest

Christmas Wreath Cupcakes

thumb_img_2654_1024

Ingredients (makes 24)
24 cupcakes of your desired flavour (red velvetflourless chocolate or Christmas spice work well)
250g butter, softened
3 cups icing sugar
4 tablespoons milk
Optional: Peppermint essence
Green food colouring
Red mini M&Ms

thumb_img_2651_1024

Method
Beat butter in a medium bowl with electric mixer until light and fluffy. Beat in icing sugar, milk, and, if desired, 1-2 drops of peppermint essence.

Spread thin layer of the frosting over each cupcake.

Colour remaining icing with 1-2 drops of green food colouring. Spoon into a piping bag with a star attachment and pipe icing in a ring around the edge of the cupcakes to make a wreath. Top with red M&Ms. Enjoy!

thumb_img_2658_1024

Elsa’s Snowflake Cookies

These beautiful snowflake cookies look like something Elsa from Frozen would make, and are a fantastic way to get your kids involved in the kitchen. These are perfect for Christmas or for a Frozen themed Birthday party.

thumb_img_2705_1024

Ingredients (makes around 40 cookies)
Equipment:
1 large snowflake cookie cutter
1 small snowflake cookie cutter

For the cookies:

½ cup butter
½ cup sugar
1 teaspoons vanilla
1 teaspoon mixed spice
1 small egg
½ teaspoon water
1 ½ cups flour
¾ teaspoons baking powder

To decorate:
Blue hard lollies (we used Melbourne Rock Candy Bo Peep collection)
White chocolate, melted

thumb_img_2699_1024

Method
Cream butter, sugar & vanilla using electric beaters until well combined. Add the egg and water and beat until light and fluffy.

Using a wooden spoon or silicone spatula, mix sifted dry ingredients into wet ingredients until a dough forms. Divide into 2 roughly equal pieces, cover with glad wrap (or plastic wrap) and refrigerate for an hour.

Line 3 large trays with baking paper.

Roll out dough using a rolling pin until it is approximately 1cm thick. Use the large snowflake cutter to cut out snowflakes from the dough, and carefully place on the lined trays (no need to leave room for spreading as they don’t). Then line up the smaller cutter in the centre of the large snowflake to cut out the dough – you can either bake these little snowflakes as cookies or put them back into the dough to cut out more large snowflakes.

Preheat oven to 190-200°C  (180°C fan-forced).

Blitz blue hard candy in a blender until they are fine crystals. Using a teaspoon, carefully sprinkle the crystals into the empty centres of the cookies ensuring that the centre is fully covered. Brush away any crystals not in the centre as these will discolour the cookies.

Bake cookies for 8-12 minutes, until lightly golden. Leave to cool on the baking trays for 5 minutes, before gently transferring onto a wire rack to cool completely.

Once the cookies are cool, decorate by piping melted white chocolate onto the cookies.

Enjoy!

thumb_img_2703_1024

thumb_img_2689_1024

Sugar cookie recipe adapted from ‘Alice & Lois.com’ – ‘The Best Valentine Sugar Cookies’

Design idea from Pinterest.

Christmas Light Cupcakes

These adorable cupcakes are very easy to decorate but look great! Just pipe white buttercream in a swirl on your favourite flavoured cupcakes, pipe a dark chocolate swirl as the wire and attach mini M&Ms.

thumb_img_2679_1024

Ingredients
24 cupcakes of your desired flavour (red velvet, flourless chocolate or Christmas spice would work well)
250g butter, softened
3 cups icing sugar
4 tablespoons milk
Optional: 1-2 drops peppermint essence
Dark chocolate melts
1 pack mini M&Ms

thumb_img_2669_1024

Method
Beat butter in a medium bowl with electric mixer until light and fluffy. Beat in icing sugar and milk and, if desired, 1-2 drops of peppermint essence.

Using a piping bag with a wide circular nozzle, pipe frosting in a circular motion on each cupcake, starting from the outside and working your way into the middle, gradually building it up to a peak in the centre. Repeat with remaining cakes.

Melt the dark chocolate and spoon into a zip-lock bag. Cut just the very corner of the bag and pipe a thin line of the chocolate on each cupcake in a swirl to make the ‘lighting wire’. Place M&Ms vertically along the dark chocolate lines ‘to make the lights’. Enjoy!

thumb_img_2664_1024

Design adapted from Pinterest.

Santa Cupcakes

It’s beginning to look a lot like Christmas…

thumb_img_2594_1024

…so what better way to celebrate the start of the festive season than with these gorgeous Santa cupcakes? The cakes taste like a cross between chocolate and gingerbread and look like they take a lot of time and skill, but are really very easy – perfect to take to a Christmas function or to share with your family and friends.

thumb_img_2647_1024

Ingredients (makes 12)
Christmas Spice Cupcakes
150g plain flour
1 teaspoon baking powder
½ teaspoon bicarb soda
1 teaspoon ground mixed spice
100g butter, softened
160g brown sugar
2 large eggs
3 tablespoons sour cream
125ml boiling water
75g dark chocolate
1 teaspoon instant coffee

Decorations
Raspberry jam
Red fondant icing
Black fondant icing
Yellow fondant icing

thumb_img_2633_1024

Method

Preheat the oven to 180ºC fan-forced. Line a 12-hole muffin pan with patty pans.

In a large bowl, combine flour, baking powder, bicarb and mixed spice. In another bowl, cream the butter and sugar with an electric mixer. Add the eggs one at a time, mixing well after each, and then beat in a third of the flour mixture followed by a tablespoon of the sour cream, repeating until all used.

Put the water, chocolate and instant coffee in a pan and heat gently until the chocolate melts. Fold this into the cake batter, being careful not to over beat.

Pour the batter into the patty pans and put in the oven for about 20-25 minutes, until each cake is cooked through but still dense and damp.

While the cakes are cooking, cut 12 circles out of red fondant approximately the size of the cupcakes (I used the rim of a glass as my cutter). To make Santa’s belt, cut rectangles out of the black fondant with a sharp knife, ensuring each is long enough to span the width of the middle of the circles. To make the belt buckle, cut a small rectangle out of yellow fondant, then cut a smaller rectangle out from within it leaving the belt frame. If desired, cut a small piece of fondant to make the belt “prong”.

Let cakes cool in the tin for 5 minutes, then place on a wire rack until completely cold.

Heat the jam in the microwave (mix with water if still thick) and use it as glue to stick the fondant circles to the tops of the cakes. Again using the jam as glue (sparingly), stick down the belts and buckles to the centre of the circles. Enjoy!

thumb_img_2641_1024

Cake recipe from Nigella’s ‘How to Be a Domestic Goddess’ cookbook. Design idea from Pinterest.

Xmas Reblog: Easy Chocolate Yule Log

Today I’m sharing with you an incredibly easy yet delicious cheat’s version of the classic French Christmas dessert – Bûche de Noël.

For a traditional pudding-hater like myself, Christmas dessert has never brought much joy. Sure, you can smother your piece of pudding in custard (which I do) and that helps a bit, but somehow the fruity-boozy flavour that I hate so much still overpowers it. Anyway, fortunately I’m not the only pudding-hater in my family and so last year Mum made this Bûche de Noël (chocolate yule log) in addition to the pudding for dessert. This yule log is sweet (but not overly so) and very light – perfect for a hot summer’s day. It proved so popular last year that we’ll be making it again this year 🙂

December '13 - June '14 279

Ingredients (Serves up to 12)
1x 250g packet Arnott’s chocolate ripple biscuits (or equivalent)
600ml thickened cream
1 tspn caster sugar
1 tspn vanilla essence
20g cocoa powder
Grated chocolate, to decorate
Spearmint leave lollies, to decorate
Raspberries, to decorate

Method
Using an electric mix, mix cream, sugar and vanilla together until stiff.

Fold in the cocoa until combined.

Spread a small amount of the cream along a long, rectangular serving plate to make a base. Spread 1 biscuit with 1 ½ teaspoons of cream and then top with another biscuit. Top with another 1 ½ teaspoons of cream and then place biscuits on their side onto the cream base on the serving platter.

Repeat until all biscuits have been used, to form a log.

Spread remaining cream over entire log, reserving a small amount for the branch.

Cover loosely with foil and refrigerate for at least 6 hours to set.

Just before serving, cut cake diagonally about a quarter of the way in and use that piece as a branch off the main log.

Patch it up with the remaining cream so it looks attached.

Use a fork to make some lines along the branch to look natural and then sprinkle with grated chocolate.

Decorate with some raspberries and spearmint leaves and serve. Enjoy!

December '13 - June '14 279

Adapted from Arnott’s ‘Bake and Create’ Recipe booklet.