Vanilla Bean Macarons

Elise August 2015 113

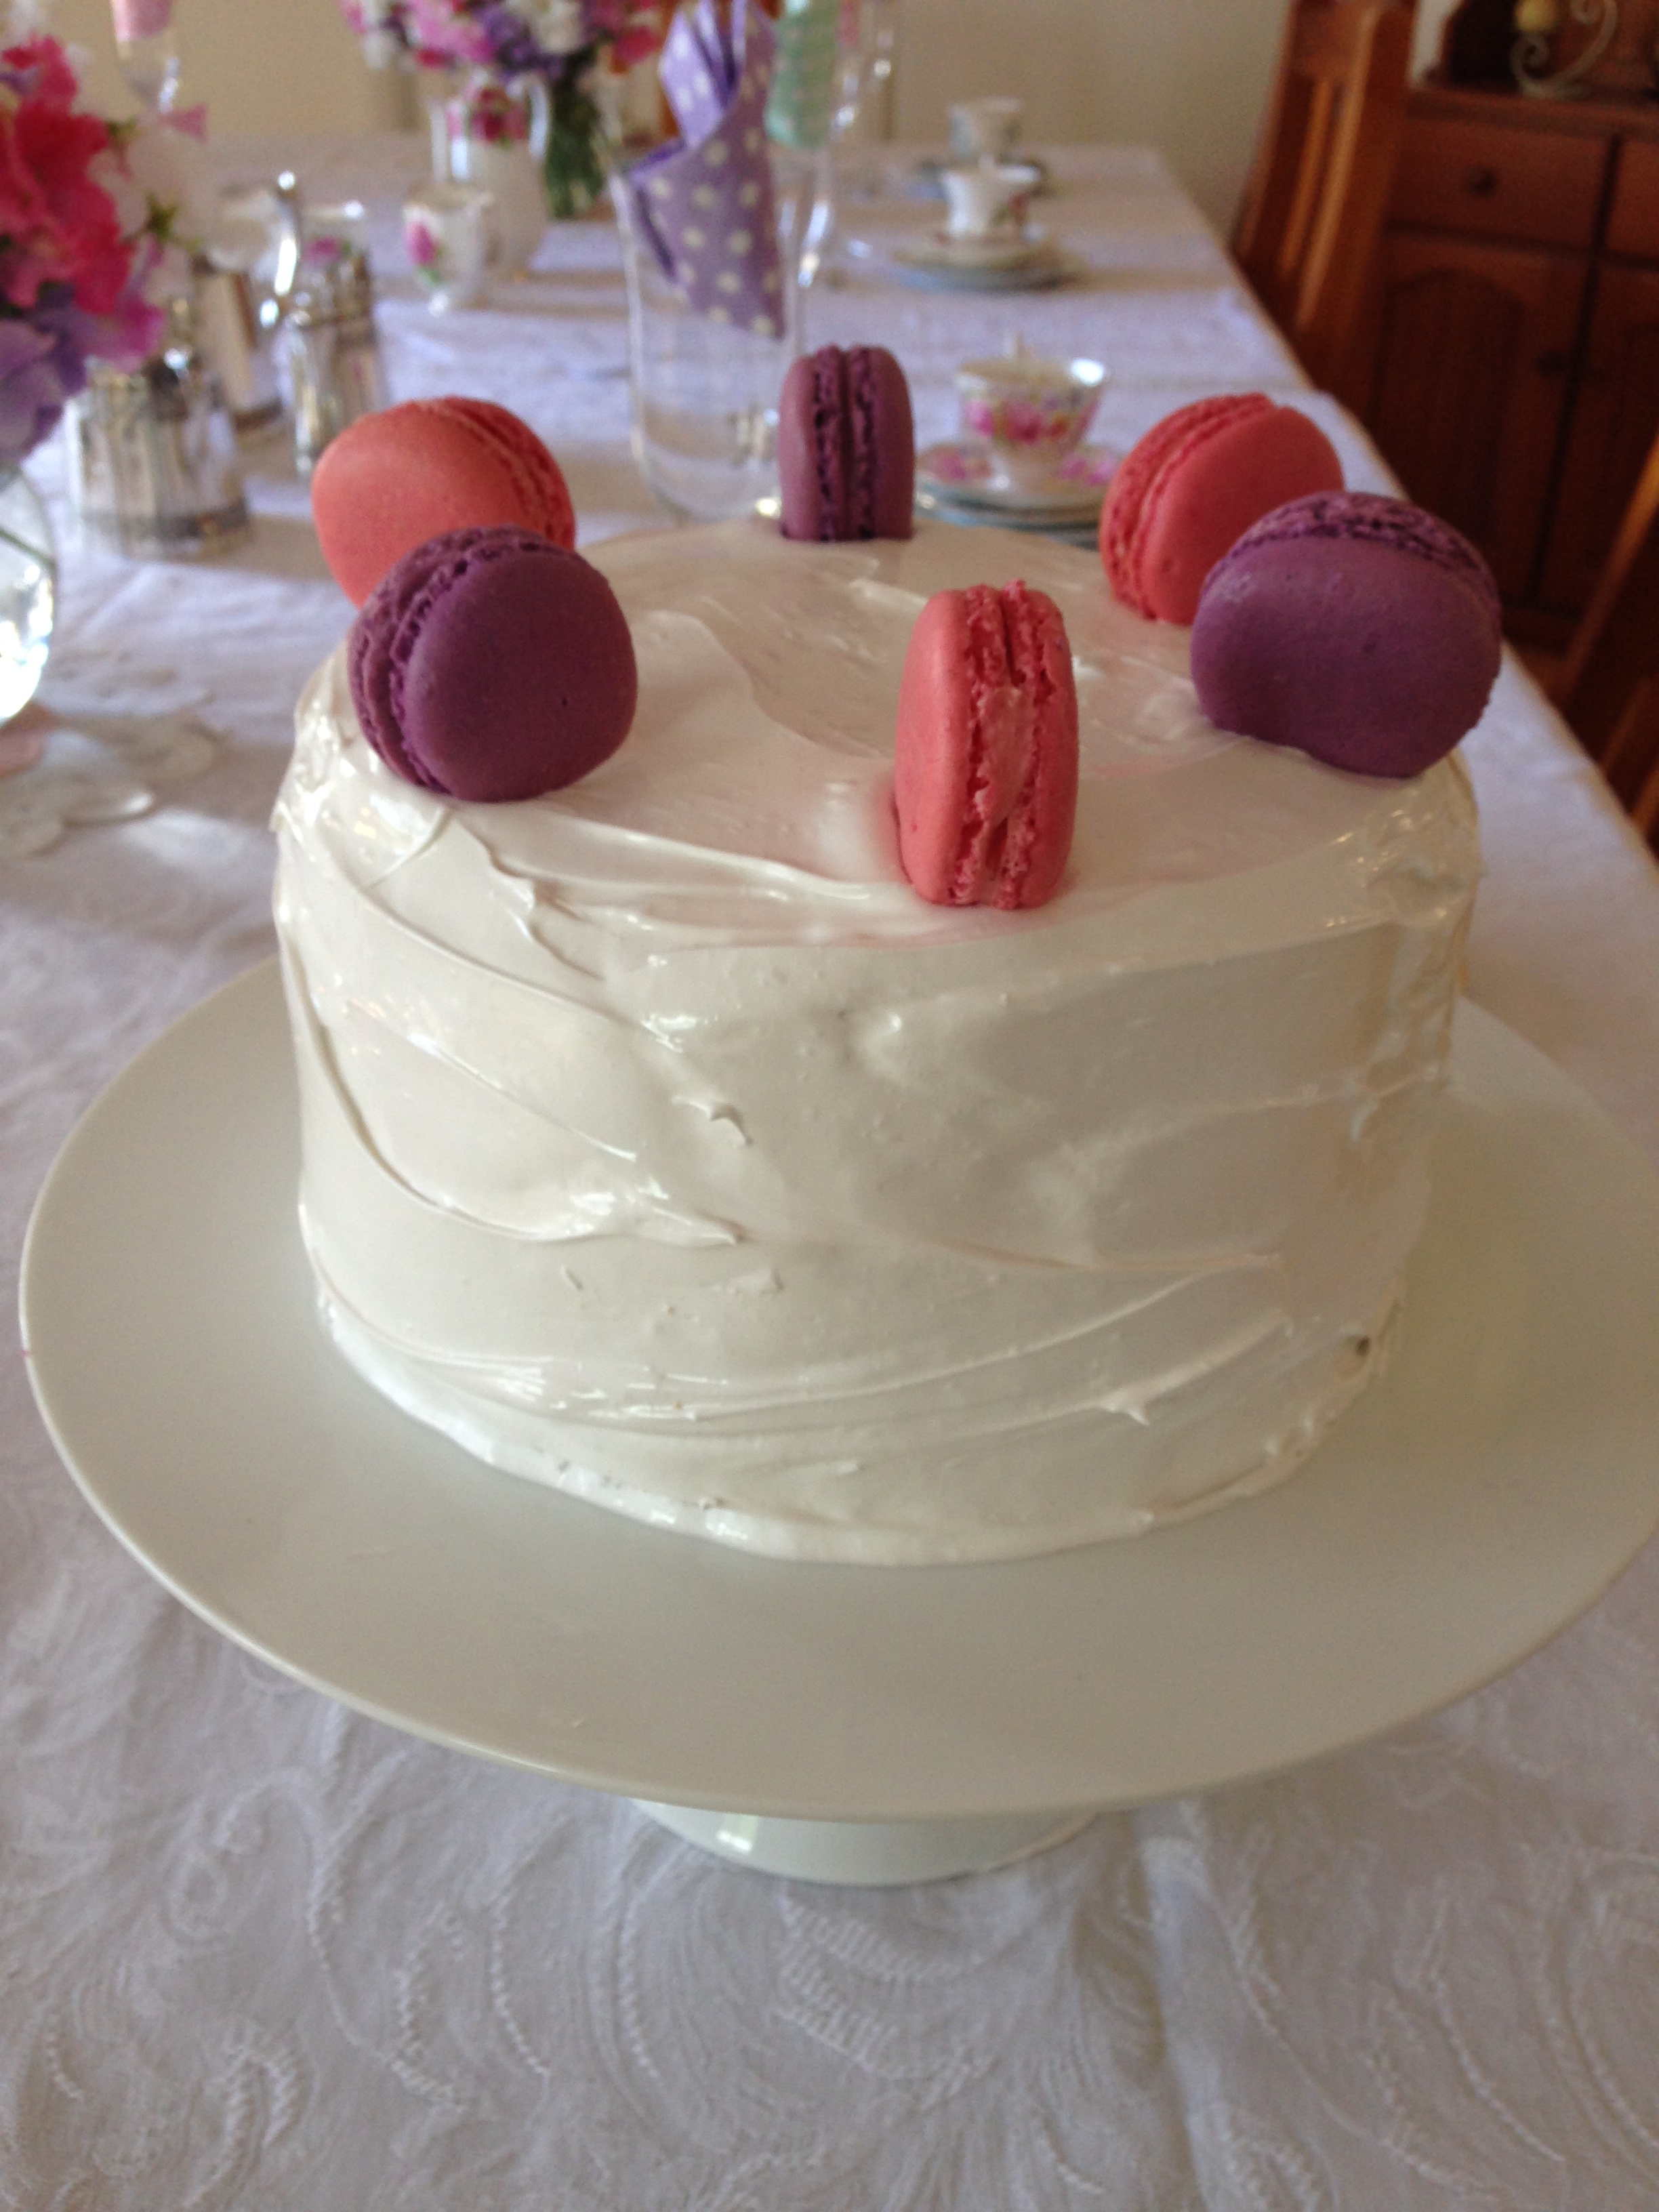
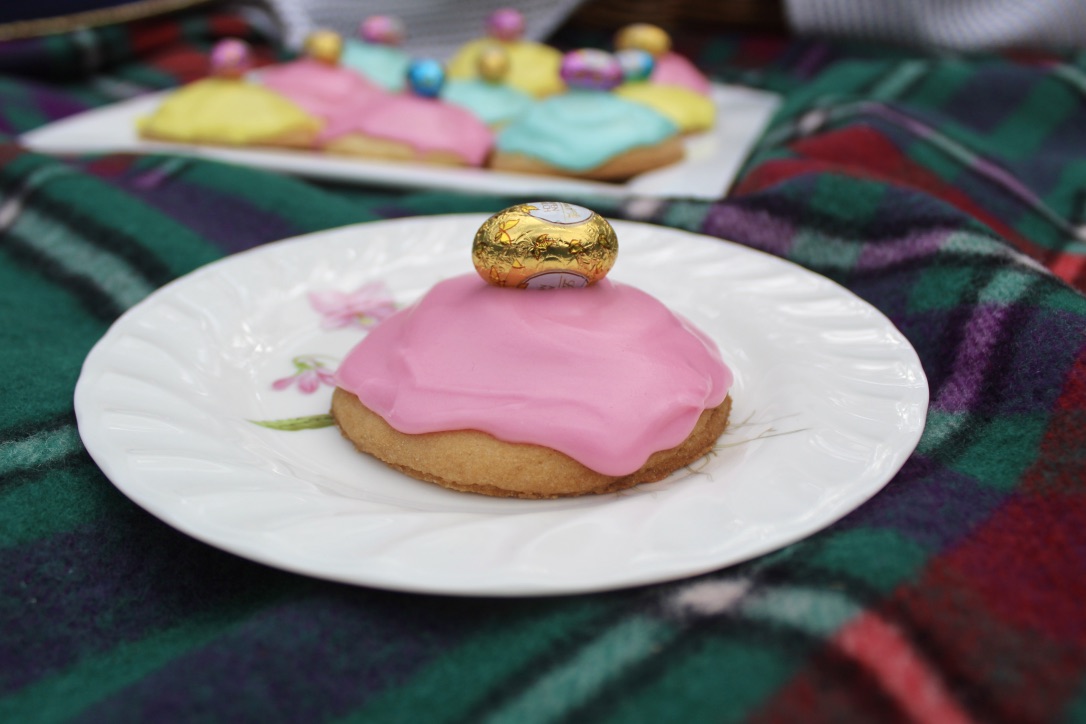
I made these particular macarons to sit on top of my 21st birthday cake (and because I think no afternoon tea is complete without them!) Feel free to adapt the colours or flavours as you wish.

Ingredients (makes around 40 macarons, 20 paired)
Macaron shells
225g pure icing sugar
130g almond meal
115g egg whites
60g caster sugar
1g bicarb soda
A few drops of rose pink & violet food colouring

Vanilla bean filling
100g butter, softened
¼ cup milk
½  tblspn organic vanilla bean paste
4 cups icing sugar
Rose pink & violet food colouring

Method
Preheat oven to 150°C fan forced. Grease and line two large baking trays with baking paper.

Separately sift icing sugar and almond meal into medium bowls or over sheets of baking paper. Repeat process 3 times and re-weigh ingredients (I know this seems excessive but trust me, it’s worth it). You will need to top up the ingredients as you may have lost some in the sifting process. Sift icing sugar and almond meal into a bowl and repeat, ensure there are no lumps.

Whisk egg whites until doubled in size using electric beaters or an electric stand mixer. While still whisking, gradually add caster sugar and bicarb, whisking until mixture forms very stiff peaks.

Gently fold almond meal mixture into meringue using a spatula until incorporated.

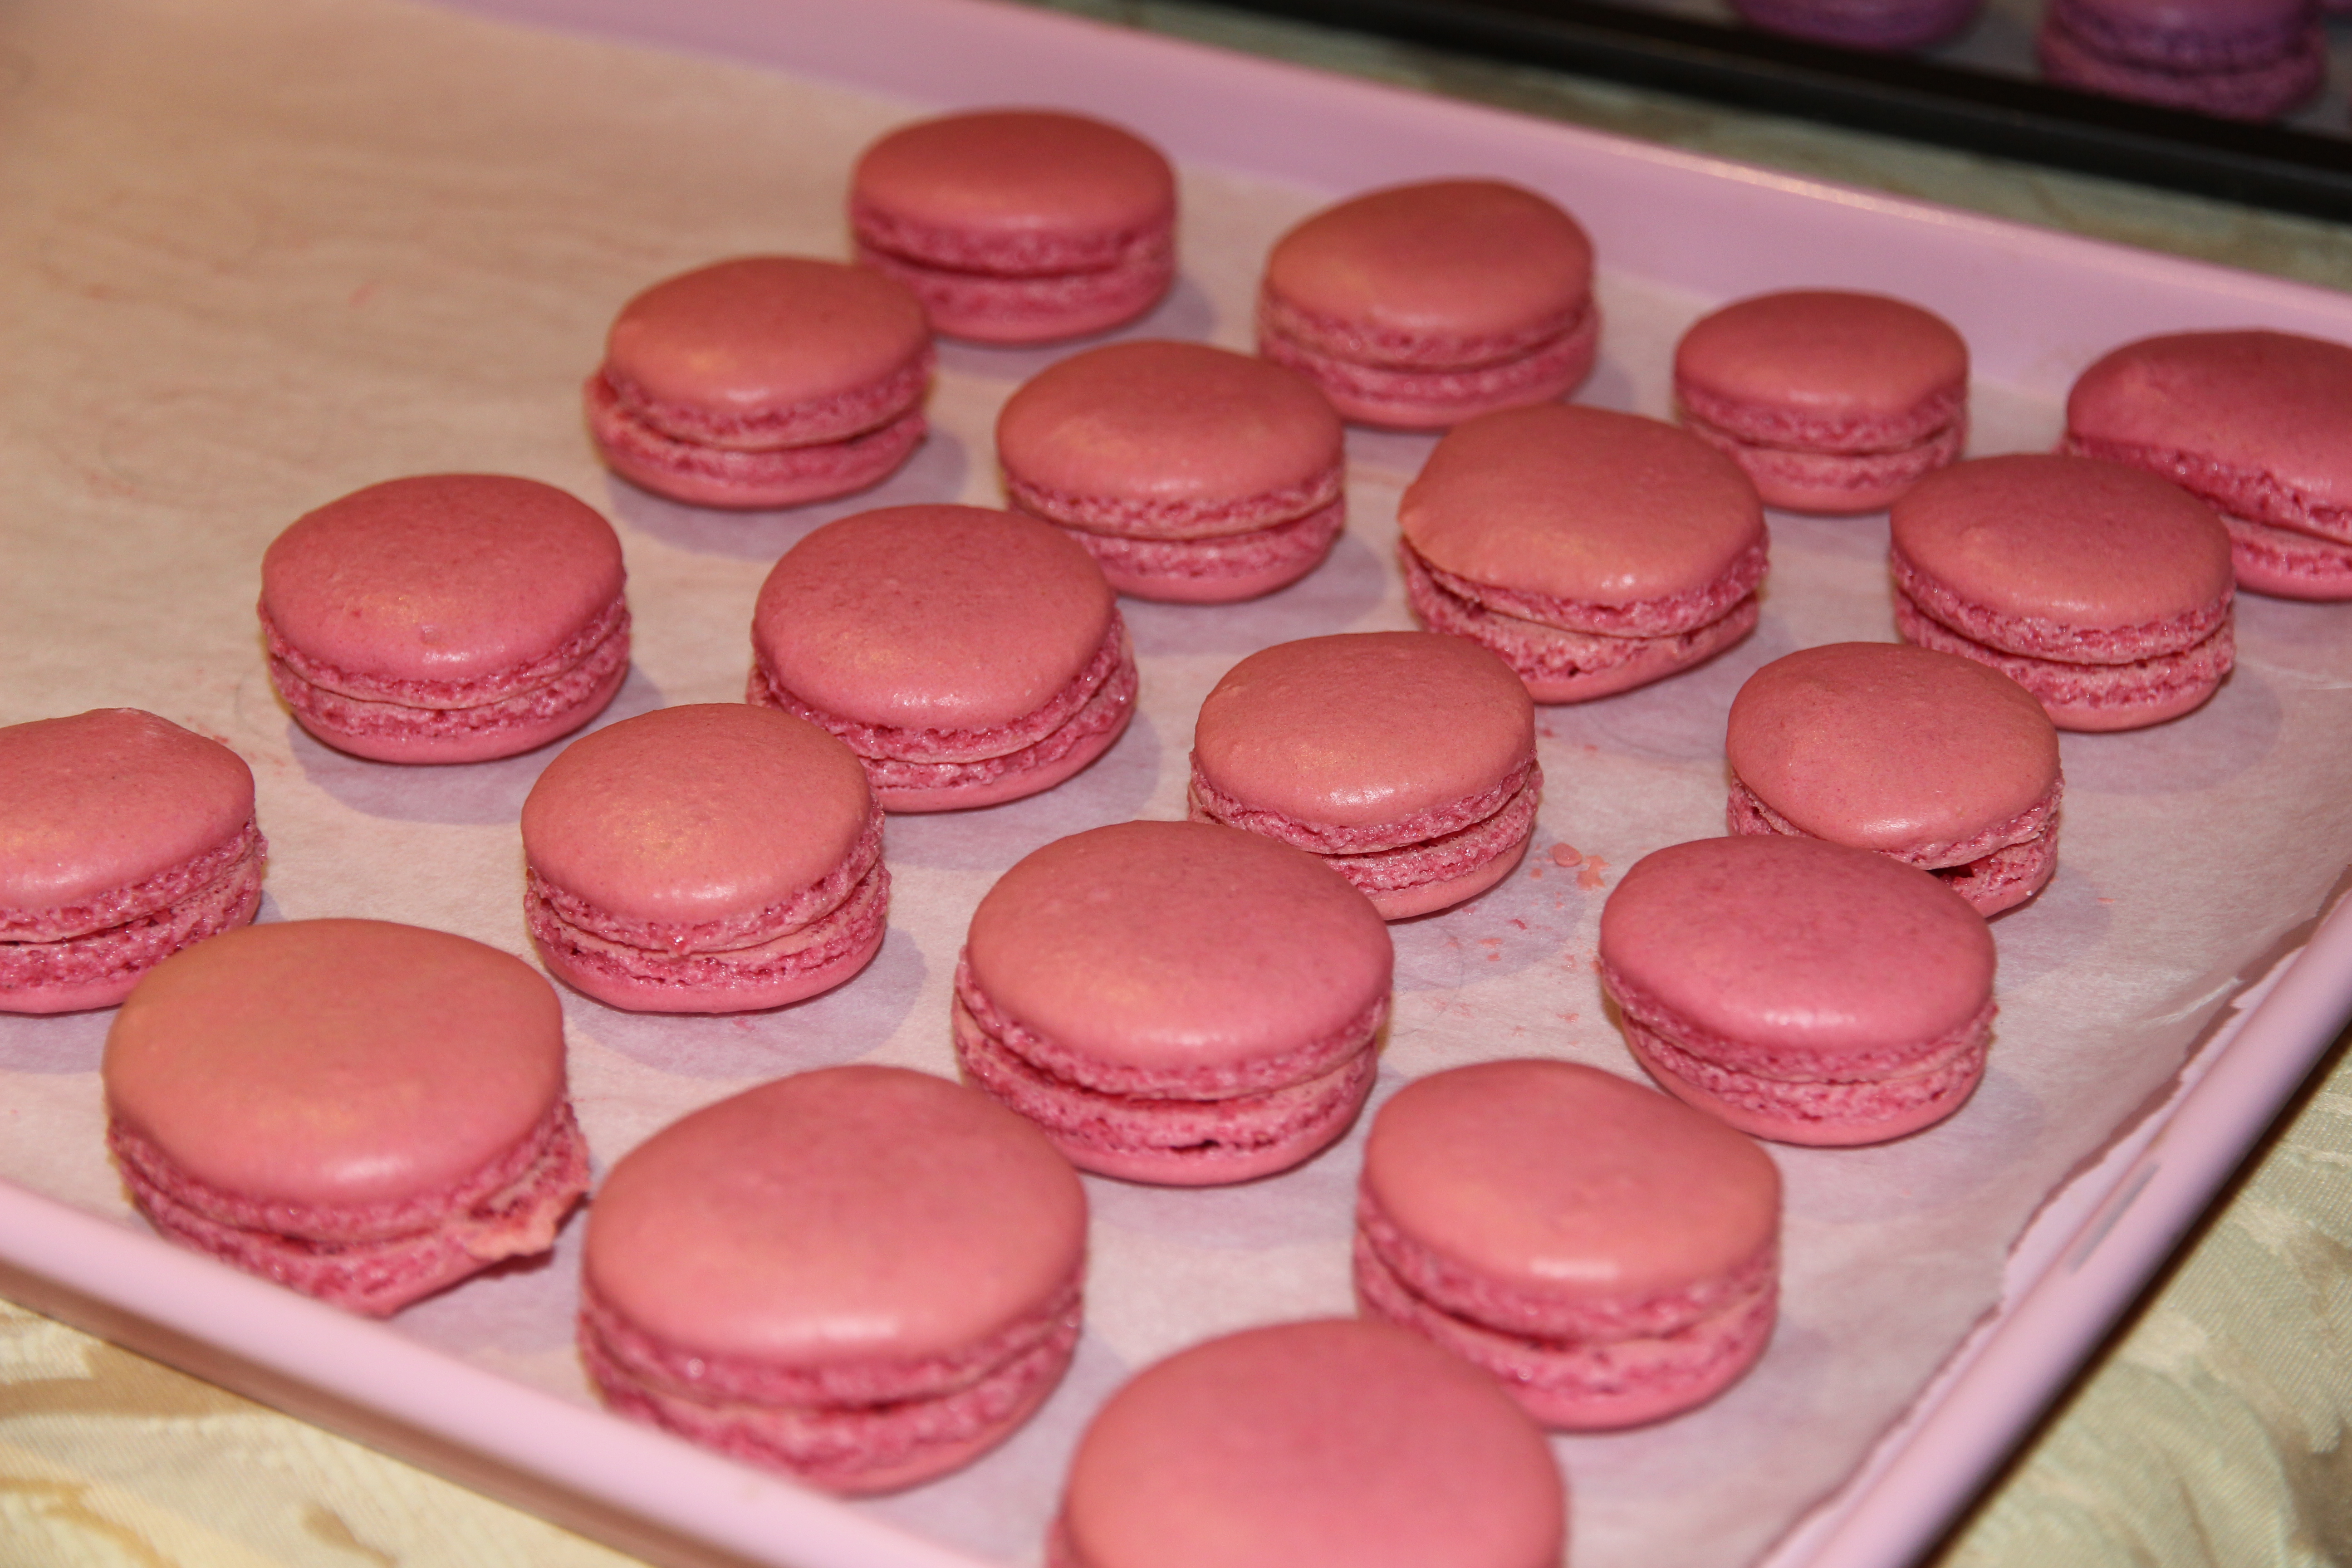
Divide mixture into 2 bowls. Add food colouring (pink to one, purple to the other) one drop at time, stirring very gently with a spatula, until desired colour reached.

Spoon into a piping bag fitted with a 9mm round nozzle (approximately). Hold nozzle close to the baking tray and pipe 3cm diameter circles onto prepared trays – don’t make a circular motion àla soft serve. Tap the underside of the tray to allow macarons to settle and air bubbles to escape. If there is still a little peak on top, dip a teaspoon in water and use the back to smooth the surface. Repeat with other colour. 217929_10151403883896183_1104201680_n

Leave to rest for at least 20-30 minutes or until the macarons form a skin and the top is no longer shiny or sticky to the touch (this is VERY important as it will give your macaron its lovely ‘foot’).

Bake for 12 minutes. Remove trays from the oven and allow macarons to cool on the tray. They will still be soft at this stage but will firm up on cooling.

Elise August 2015 087

To make the buttercream, cream the butter for 1-2 mins. Add the milk, vanilla and half of the icing sugar and beat for at least 3 mins (until the mixture is light and fluffy).

Add the remaining icing sugar and beat for a further 3 mins or until of a spreadable consistency. Add extra milk if too dry or extra icing sugar if too wet.

Halve the mixture and add a drop of rose food colouring to one half and a drop of violet colouring to the other.

Pipe a generous amount of buttercream onto half the macarons and sandwich with a second macaron.

Elise's 21st Birthday 003

Elise's 21st Birthday 004

Elise's 21st Birthday 039

Recipe adapted from Callum Hann’s ginger macarons

Salted Caramel Blondies

These delicious blondies taste like a cross between choc chip cookies and cake. Be careful not to over cook them as they’re definitely best when fudgy.

GlGdzQI2RmuJf%EzUYw+DQ_thumb_1b88

Z7qs2o8yQdeQ+yZpNoD%Yw_thumb_1b8b

Ingredients (Makes about 25 blondies)
180g unsalted butter, melted
1 ½ cups lightly packed brown sugar
2 eggs
2 teaspoons vanilla extract
1 ½ cups plain flour
Sea salt flakes
½  cup white chocolate melts
½ cup white chocolate chips
½ cup milk chocolate chips (optional)

Method
Preheat the oven to 190°C (or 170 fan-forced). Line a 20cm square baking tin with baking paper.

Mix the melted butter and brown sugar together in a large bowl. Beat in the eggs, one at a time, and then the vanilla extract.

Gently stir in the flour and a pinch of sea salt. Carefully fold in the chocolate, making sure it is evenly dispersed.

Spoon the mixture into the prepared baking tin and smooth the top with a spatula. Sprinkle a couple of pinches of salt over the top and then bake for 20-30 minutes, or until the outside is cooked and the middle has a slight wobble.

Remove from the oven, sprinkle once more with a pinch or two of salt, and allow to cool for 30 minutes in the tin. Gently remove the blondie from the tin by the baking paper and leave to cool for a further 5-10 minutes on a cooling rack.

Once cool, cut into squares. Enjoy!

wojLkPEET7SYVKkYi%3Krw_thumb_1b8c

Adapted from Callum Hann’s ‘Salted Dirty Blondies’ in I’d Eat That, 2014.


Rhubarb & Cinnamon Muffins

These are some of my favourite muffins and one of the most delicious ways to use rhubarb. The combination of the tart rhubarb and buttermilk with the crunchy sugar and cinnamon crust is a match made in heaven. Try them warm out of the oven and try and stop at one!

990305F6-4C1E-4651-A3D3-7F6EE5C00CFD_1_105_c

Ingredients (makes 16)
For the rhubarb mixture
1 bunch rhubarb, washed, ends trimmed
2 tablespoons water
2 tablespoons sugar

For the muffins
1 cup rhubarb mixture
1 ¼ cups plain flour
½ cup sugar
2 teaspoons baking powder
¾ cup buttermilk
¾ cup olive oil
1 egg

For the sugar-cinnamon crust
⅓ cup sugar
2 tablespoons ground cinnamon

CD1DA4F0-1CC6-4710-807D-CD8B6740F7CA_1_105_c

Method
Preheat the oven to 180°C fan-forced. Line muffin tins with 16 patty pans.

Chop rhubarb into small, even pieces and cook with water and sugar in a small saucepan over a medium heat until the rhubarb is tender and the sugar has dissolved. Stand for 5 minutes to cool.

Add flour, sugar and baking powder into a large bowl and make a well in the centre. Carefully pour in the buttermilk, olive oil and egg and gently stir to combine. Mix in the cooked rhubarb, being careful not to over-stir (note: the mixture is supposed to be very wet, don’t worry!)

Spoon mixture evenly into muffin cases & top with mixed sugar and cinnamon.

Bake for 25-30 minutes or until a skewer inserted comes out clean. Top with extra stewed rhubarb and cream if desired. Enjoy!

0718D069-BC73-4A0C-8BC3-DEB786181367_1_105_c

Recipe adapted from Grandma

Rich Chocolate Tart

image2-10

This was the main component of the dessert I made for Mother’s Day (in addition to the raspberry sorbet) and it was a winner with everyone. It’s not difficult to make (but looks it) and is the perfect conclusion to any meal.

image1-11

Ingredients (serves 10)
4 egg yolks
2 eggs
¼ cup caster sugar
⅓ cup thickened cream
300g dark chocolate, melted
1 teaspoon vanilla extract

1 quantity of sweet pastry

Method
Make the pastry. Reduce the oven temperature to 160°C (approx. 140-150°C  fan-forced, depending on your oven).

Beat egg yolks, eggs & caster sugar in a large bowl with an electric mixer until thick and creamy. Gently fold in cream, melted chocolate and vanilla.

Pour the chocolate mixture into the pastry case.

image1-8

Bake, uncovered, for approximately 30 minutes, or until the filling is just set.

image2-7

Cool for 10 minutes. Serve dusted with sifted cocoa and raspberry sorbet (if desired). Enjoy!

image2-11

Recipe adapted from the Australian Women’s Weekly “Best Food: Desserts” cookbook (2004)

image1-14
Image Source: The Australian Women’s Weekly

Raspberry Sorbet

Happy Mother’s Day to all the Mums out there! Tonight, I have the honour of preparing the Mother’s Day dessert for a dinner party with my extended family. After much thought, I have decided to make a rich chocolate tart to serve with raspberry sorbet.

This raspberry sorbet recipe is one of the first I ever used when cooking by myself. In the school holidays, my sister and I would each cook one thing out of the Australian Women’s Weekly cookbooks we purchased in 2007. Mine would be from “Good Food: Desserts” (surprise, surprise) and Laura’s from “Potatoes”. As you can tell, it certainly wasn’t the most nutritious meal! But it was a lot of fun and helped Laura and I get into cooking.

I still love this sorbet – it’s perfectly tangy but sweet with a strong raspberry flavour. It’s also great as it doesn’t require an ice-cream machine. Hopefully it’s as useful for you as it has been for me 🙂

thumb_img_2822_1024

Ingredients (serves 8-10 on the side or 6-8 as the whole dessert)
1 ½ cups water
1 cup caster sugar
900g frozen raspberries
1 ½ tablespoons lemon juice
3 egg whites

Method
Stir the water & sugar in a small saucepan over a medium heat, without boiling, until the sugar dissolves. Bring to the boil. Reduce the heat & simmer, uncovered, without stirring for 5 minutes.

Blend the raspberries, lemon juice & sugar syrup in a blender until smooth.

image2

Push mixture through a fine sieve into a 20cm x 30cm lamington pan (or 2 smaller pans) lined with clingfilm. Discard seeds. Cover with foil; freeze until firm.

image1-2

image2-2

Coarsely chop the frozen berry mixture and add it to the blender with the egg whites. Blend until smoother and paler in colour. Return mixture to the pan, cover & freeze until firm.

Serve & enjoy!

thumb_img_2819_1024

Recipe adapted from the Australian Women’s Weekly ‘Good Food: Desserts’

thumb_img_2821_1024

Honey Joys

Also known as honey jumbles or honey crackles, these delicious sweet treats were a staple birthday party food of my childhood. They always bring back wonderful memories and I really should make them more often as they require incredibly little effort & take about 10 minutes to make from start to finish.

thumb_IMG_1883_1024

Ingredients (Makes approximately 40 small or 16-20 large)
1 heaped tablespoon of good quality honey
60g butter
90g sugar
125g cornflakes

thumb_IMG_1887_1024

Method
Preheat oven to 150°C.

Melt butter, sugar & honey in a small saucepan over a medium heat.

Pour gradually over cornflakes in a large bowl, and stir until well mixed.

Place dessert spoonfuls of mixture into small paper patties, and bake for 6 minutes.

Enjoy!

thumb_IMG_1884_1024

Recipe from my amazing Mum, Anne Bills

Figolli (Maltese Easter Biscuits)

When my family lived in Canberra, our lovely friends would bring us some Figolli (traditional Maltese Easter biscuits) every Easter Sunday. As they were such a favourite with all of us, when we moved to Adelaide we decided that we couldn’t be without Figolli at Easter, and so we started making them ourselves.

This has just been our third Easter in Adelaide and I’m pretty confident that we’ve perfected them by now – consistently getting a rich buttery biscuit outside and perfectly chewy almond-citrus filling. We tend to to make ours round (although by all means use any shape you like) and decorate them simply with pastel icing and topped with an Easter egg. Do yourself a favour and try them!

ON97+3tZRPe7d6dM2gB8eQ_thumb_2901

Ingredients (makes approx. 24)
Pastry
400g plain flour, sifted
175g caster sugar
200g butter
2 egg yolks
Grated rind of ½ a lemon

Filling
300g icing sugar, icing
300g ground almonds
2 egg whites
Grated rind of 1 lemon
2½ teaspoons orange blossom water

Icing
3 cups icing sugar
50g butter, softened
2 tablespoons milk
½ teaspoon vanilla extract
Food colouring

24 mini eggs or Easter eggs to decorate

wyHme7j4Qsye8nGn9Bo6Mw_thumb_28f8

Method
In a food processor, blitz flour, sugar & butter until it resembles fine breadcrumbs.

Add egg yolks, lemon zest & sufficient cold water to bring the dough together. Knead gently to form a smooth ball and then cover in cling film and refrigerate for 20mins.

Meanwhile, add the lemon zest, orange blossom water, egg whites & sugar to the ground almonds. Mix until combined.

Preheat oven to 180°C or 160°C fan-forced.

Roll pastry out to a 1-1½mm thickness on a lightly floured surface. Use a 7cm diameter round cutter to cut out 2 circles of pastry.

image1-3

Spread almond paste on one half and lay matching shapes on top, pressing the edges together.

image2-2

Repeat with remaining mixture. Bake on a tray lined with baking paper for approximately 20-30 mins or until golden brown.

Make the icing by combining icing sugar, butter, milk and vanilla in a medium bowl with electric beaters. Add a touch of extra icing sugar or milk to reach desired consistency. Add a drop or two of food colouring. Set aside.

Allow biscuits to cool before decorating with icing & Easter eggs.

yl7ijVZiR6yuXhIukZDwWQ_thumb_28fd

Adapted from ‘The Food and Cookery of Malta’ (1999)

dfMv4W+jQtecrwPu2fE8wA_thumb_28ff

Never-fail Chocolate Chip Cookies

I’ve been making these cookies for 10 years and they have never failed me. They’re so good in fact that I’ve never once strayed from this recipe – they have the perfect chewy texture and a rich, full flavour. Try and stop at one!

thumb_img_2869_1024

Ingredients (makes approx. 48)
125g unsalted butter, softened
1 ¼ cups brown sugar, tightly packed
4 teaspoons vanilla essence
1 egg
1 ½ cups plain flour
½ teaspoon baking powder
2 cups chocolate chips

thumb_img_2881_1024

Method
Preheat oven to 180°C (or 160°C fan-forced).

Place butter & sugar in a bowl & beat until light & creamy. Add vanilla & egg & stir to combine.

Stir in sifted flour & baking powder until just combined. Fold through chocolate chips.

Place teaspoonfuls of cookie mix on a baking tray lined with baking paper, allowing room for spreading.

Bake for 10-15mins or until pale gold, but still soft. Allow to cool on tray for 5 minutes before moving onto a wire rack.

Try not to eat them all at once! I believe that they will last up to a fortnight in an airtight container (although they’ve never lasted long enough for me to test this). Enjoy!

thumb_img_2879_1024

Recipe adapted from ‘Macadamia & White Chocolate Chip Cookies’ by Caroline’s Kitchen.

thumb_img_2880_1024

Key Lime Pie

Happy Pi Day everyone! And what an exciting one it is (3.14.15).
This pie is perfectly seasonal – being both a pie (for Pi day) and a fabulous shade of green which is appropriate for St. Patrick’s Day next week 🙂
It’s also very easy to make and a delicious way to take advantage of the abundance of limes we are lucky to have at this time of the year.

Ingredients (serves 8-10)
135g digestive biscuits, finely crushed
60g caster sugar
75g butter, softened
1x 400g can sweetened condensed milk
125ml fresh lime juice
2 teaspoons grated lime zest
2 eggs, separated
Green food colouring (optional)
300ml thickened cream

Method
Preheat oven to 170°C. In a shallow 20-23cm pie dish, press combined biscuit crumbs, sugar & butter into the base and up this sides, making a small rim.

In a medium bowl, whisk condensed milk with lime juice, zest and egg yolks until the mixture thickens. Add 1-2 drops of green food colouring.

In a small bowl with electric mixer on full power, beat egg whites to stiff peaks. Gently fold into lime mixture.

Pour lime filling into the biscuit crust and smooth the top.

Bake the pie for 15-20 mins or until lime filling is just firm.

Cool pie in this dish and then refrigerate until chilled, approximately 3 hours.

Whip cream in a small bowl until stiff peaks form. Pipe a border of cream around the edge of the pie and top with h lime wedges if desired. Enjoy!

Adapted from Mary Berry’s ‘Key lime Pie’ in Step By Step Desserts and Confections. 

Giant Vanilla Cupcake

I haven’t made a giant cupcake for about 18 months but I’m so glad I found my giant cupcake cases again because they’re so much fun to make (and eat!) They’re also really easily adaptable as you can make them any flavour you like and decorate them in a million different ways. This time I’ve used buttercream roses but you could ice it as simply (or complexly) as you like – there’s a link to my fondant ‘soft serve’ icing instructions at the bottom of the page.image1-16

Ingredients (serves 10-12):
Cake
375g butter, softened
375g caster sugar
6 eggs
1 tablespoon vanilla extract
375g self-raising flour
3 tablespoons milk

Cupcake Case
375g white chocolate melts or Wilton candy melts

Buttercream icing
250g butter, softened
800g icing sugar
1 ½ tablespoons vanilla extract
4 tablespoons of milk
Food colouring

image1-17

Method
Spray silicone giant cupcake pan liberally with canola oil and preheat oven to 160°C fan-forced.

Cream together butter and sugar with an electric mixer until light and fluffy. Add in vanilla and then eggs, one at a time, ensuring that each egg is fully incorporated before adding the next. Add in half of the flour followed by two tablespoons of the milk, and then add remaining flour and milk. Mix until just combined.

Fill the giant cupcake pans, starting with the cupcake top. Fill until approximately 2cm shy of the top of the pan. Then fill the bottom pan with the remaining batter.

Bake in the oven for between 40-70 minutes, checking regularly. Note: the cupcake top will bake faster than the bottom so take it out before the bottom is done. The cake is ready when a skewer inserted into the middle of the cake comes out clean.

Leave cakes in their pans for at least 20 minutes before gently peeling the silicone off and allowing the cakes to cool completely on a cooling rack.

jan-proj3-041-Copy
Image credit: The Pink Whisk

While the cakes are cooling, wash and dry the bottom cupcake pan ready to make the cupcake case. Melt half the chocolate/candy melts and pour into the bottom cupcake pan. Spread evenly up the sides using a pastry brush. Refrigerate for 20 minutes and then repeat with the remaining melts. Refrigerate for 30 minutes and then gently peel off the silicone mould.

tumblr_inline_mmyiwlTG1X1qz4rgp
Image credit: She Who Bakes

tumblr_inline_mmyixnTdp41qz4rgp
Image credit: She Who Bakes

tumblr_inline_mmyj0njISG1qz4rgp
Image credit: She Who Bakes

Using a serrated bread knife, trim around bottom cake so all crunchy edges are removed. Level top (of base) and then cut base in half. Cut off bottom layer off top piece. Level base (of top).

Make buttercream by beating all ingredients but the food colouring until light and fluffy. Set half aside for the crumb coat, and then add the food colouring to the remaining buttercream.

Put a 1cm thick coating of the uncoloured buttercream between 2 bottom layers of cake and then between the base and top (ensure level – cut if necessary). Then put a thin layer of buttercream on the inside of the chocolate case and gently ease cake into it. Cover top of cake liberally with buttercream to form a protective barrier against crumbs.

image1.PNG-2

Put the coloured buttercream into a piping bag fitted with a Wilton 2D nozzle (to make roses) or equivalent, and pipe icing in a rose swirl pattern, starting from the bottom of the cake and working your way up.

Decorate with icing flowers, sprinkles, silver cachous, glitter… basically whatever you like!

image2-15

Alternatively, if you’d prefer a soft-serve, fondant look. Halve the buttercream recipe to only make the crumb coat & then follow these directions: https://bakerholicsanonymous.wordpress.com/recipes-2/cakes/giant-cupcake/

Recipe adapted from ‘Vanilla Giant Cupcake Recipe’ by The Pink Whisk