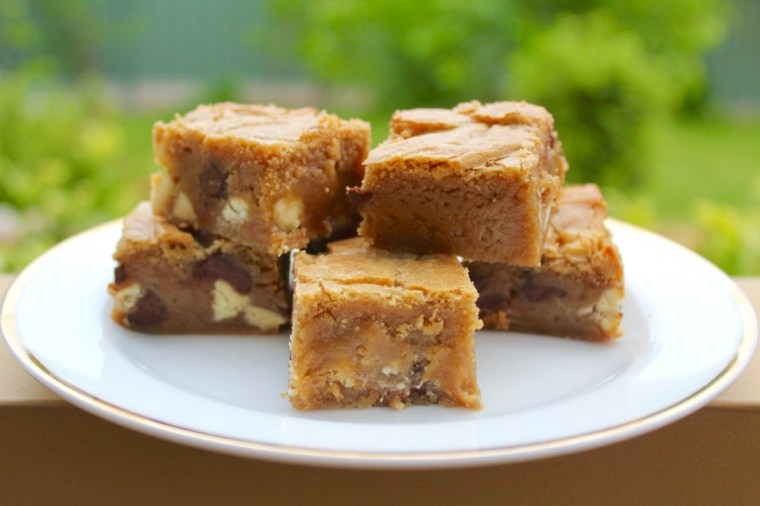
These delicious blondies taste like a cross between choc chip cookies and cake. Be careful not to over cook them as they’re definitely best when fudgy.
Ingredients (Makes about 25 blondies) 180g unsalted butter, melted
1 ½ cups lightly packed brown sugar
2 eggs
2 teaspoons vanilla extract
1 ½ cups plain flour
Sea salt flakes
½ cup white chocolate melts
½ cup white chocolate chips
½ cup milk chocolate chips (optional)
Method Preheat the oven to 190°C (or 170 fan-forced). Line a 20cm square baking tin with baking paper.
Mix the melted butter and brown sugar together in a large bowl. Beat in the eggs, one at a time, and then the vanilla extract.
Gently stir in the flour and a pinch of sea salt. Carefully fold in the chocolate, making sure it is evenly dispersed.
Spoon the mixture into the prepared baking tin and smooth the top with a spatula. Sprinkle a couple of pinches of salt over the top and then bake for 20-30 minutes, or until the outside is cooked and the middle has a slight wobble.
Remove from the oven, sprinkle once more with a pinch or two of salt, and allow to cool for 30 minutes in the tin. Gently remove the blondie from the tin by the baking paper and leave to cool for a further 5-10 minutes on a cooling rack.
Once cool, cut into squares. Enjoy!
Adapted from Callum Hann’s ‘Salted Dirty Blondies’ in I’d Eat That, 2014.
These are some of my favourite muffins and one of the most delicious ways to use rhubarb. The combination of the tart rhubarb and buttermilk with the crunchy sugar and cinnamon crust is a match made in heaven. Try them warm out of the oven and try and stop at one!
Ingredients (makes 16) For the rhubarb mixture
1 bunch rhubarb, washed, ends trimmed
2 tablespoons water
2 tablespoons sugar
For the muffins
1 cup rhubarb mixture
1 ¼ cups plain flour
½ cup sugar
2 teaspoons baking powder
¾ cup buttermilk
¾ cup olive oil
1 egg
For the sugar-cinnamon crust
⅓ cup sugar
2 tablespoons ground cinnamon
Method Preheat the oven to 180°C fan-forced. Line muffin tins with 16 patty pans.
Chop rhubarb into small, even pieces and cook with water and sugar in a small saucepan over a medium heat until the rhubarb is tender and the sugar has dissolved. Stand for 5 minutes to cool.
Add flour, sugar and baking powder into a large bowl and make a well in the centre. Carefully pour in the buttermilk, olive oil and egg and gently stir to combine. Mix in the cooked rhubarb, being careful not to over-stir (note: the mixture is supposed to be very wet, don’t worry!)
Spoon mixture evenly into muffin cases & top with mixed sugar and cinnamon.
Bake for 25-30 minutes or until a skewer inserted comes out clean. Top with extra stewed rhubarb and cream if desired. Enjoy!
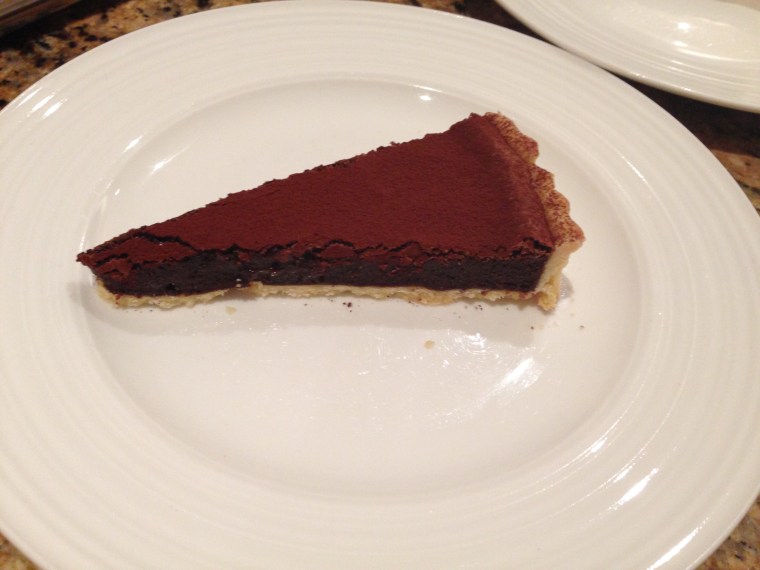
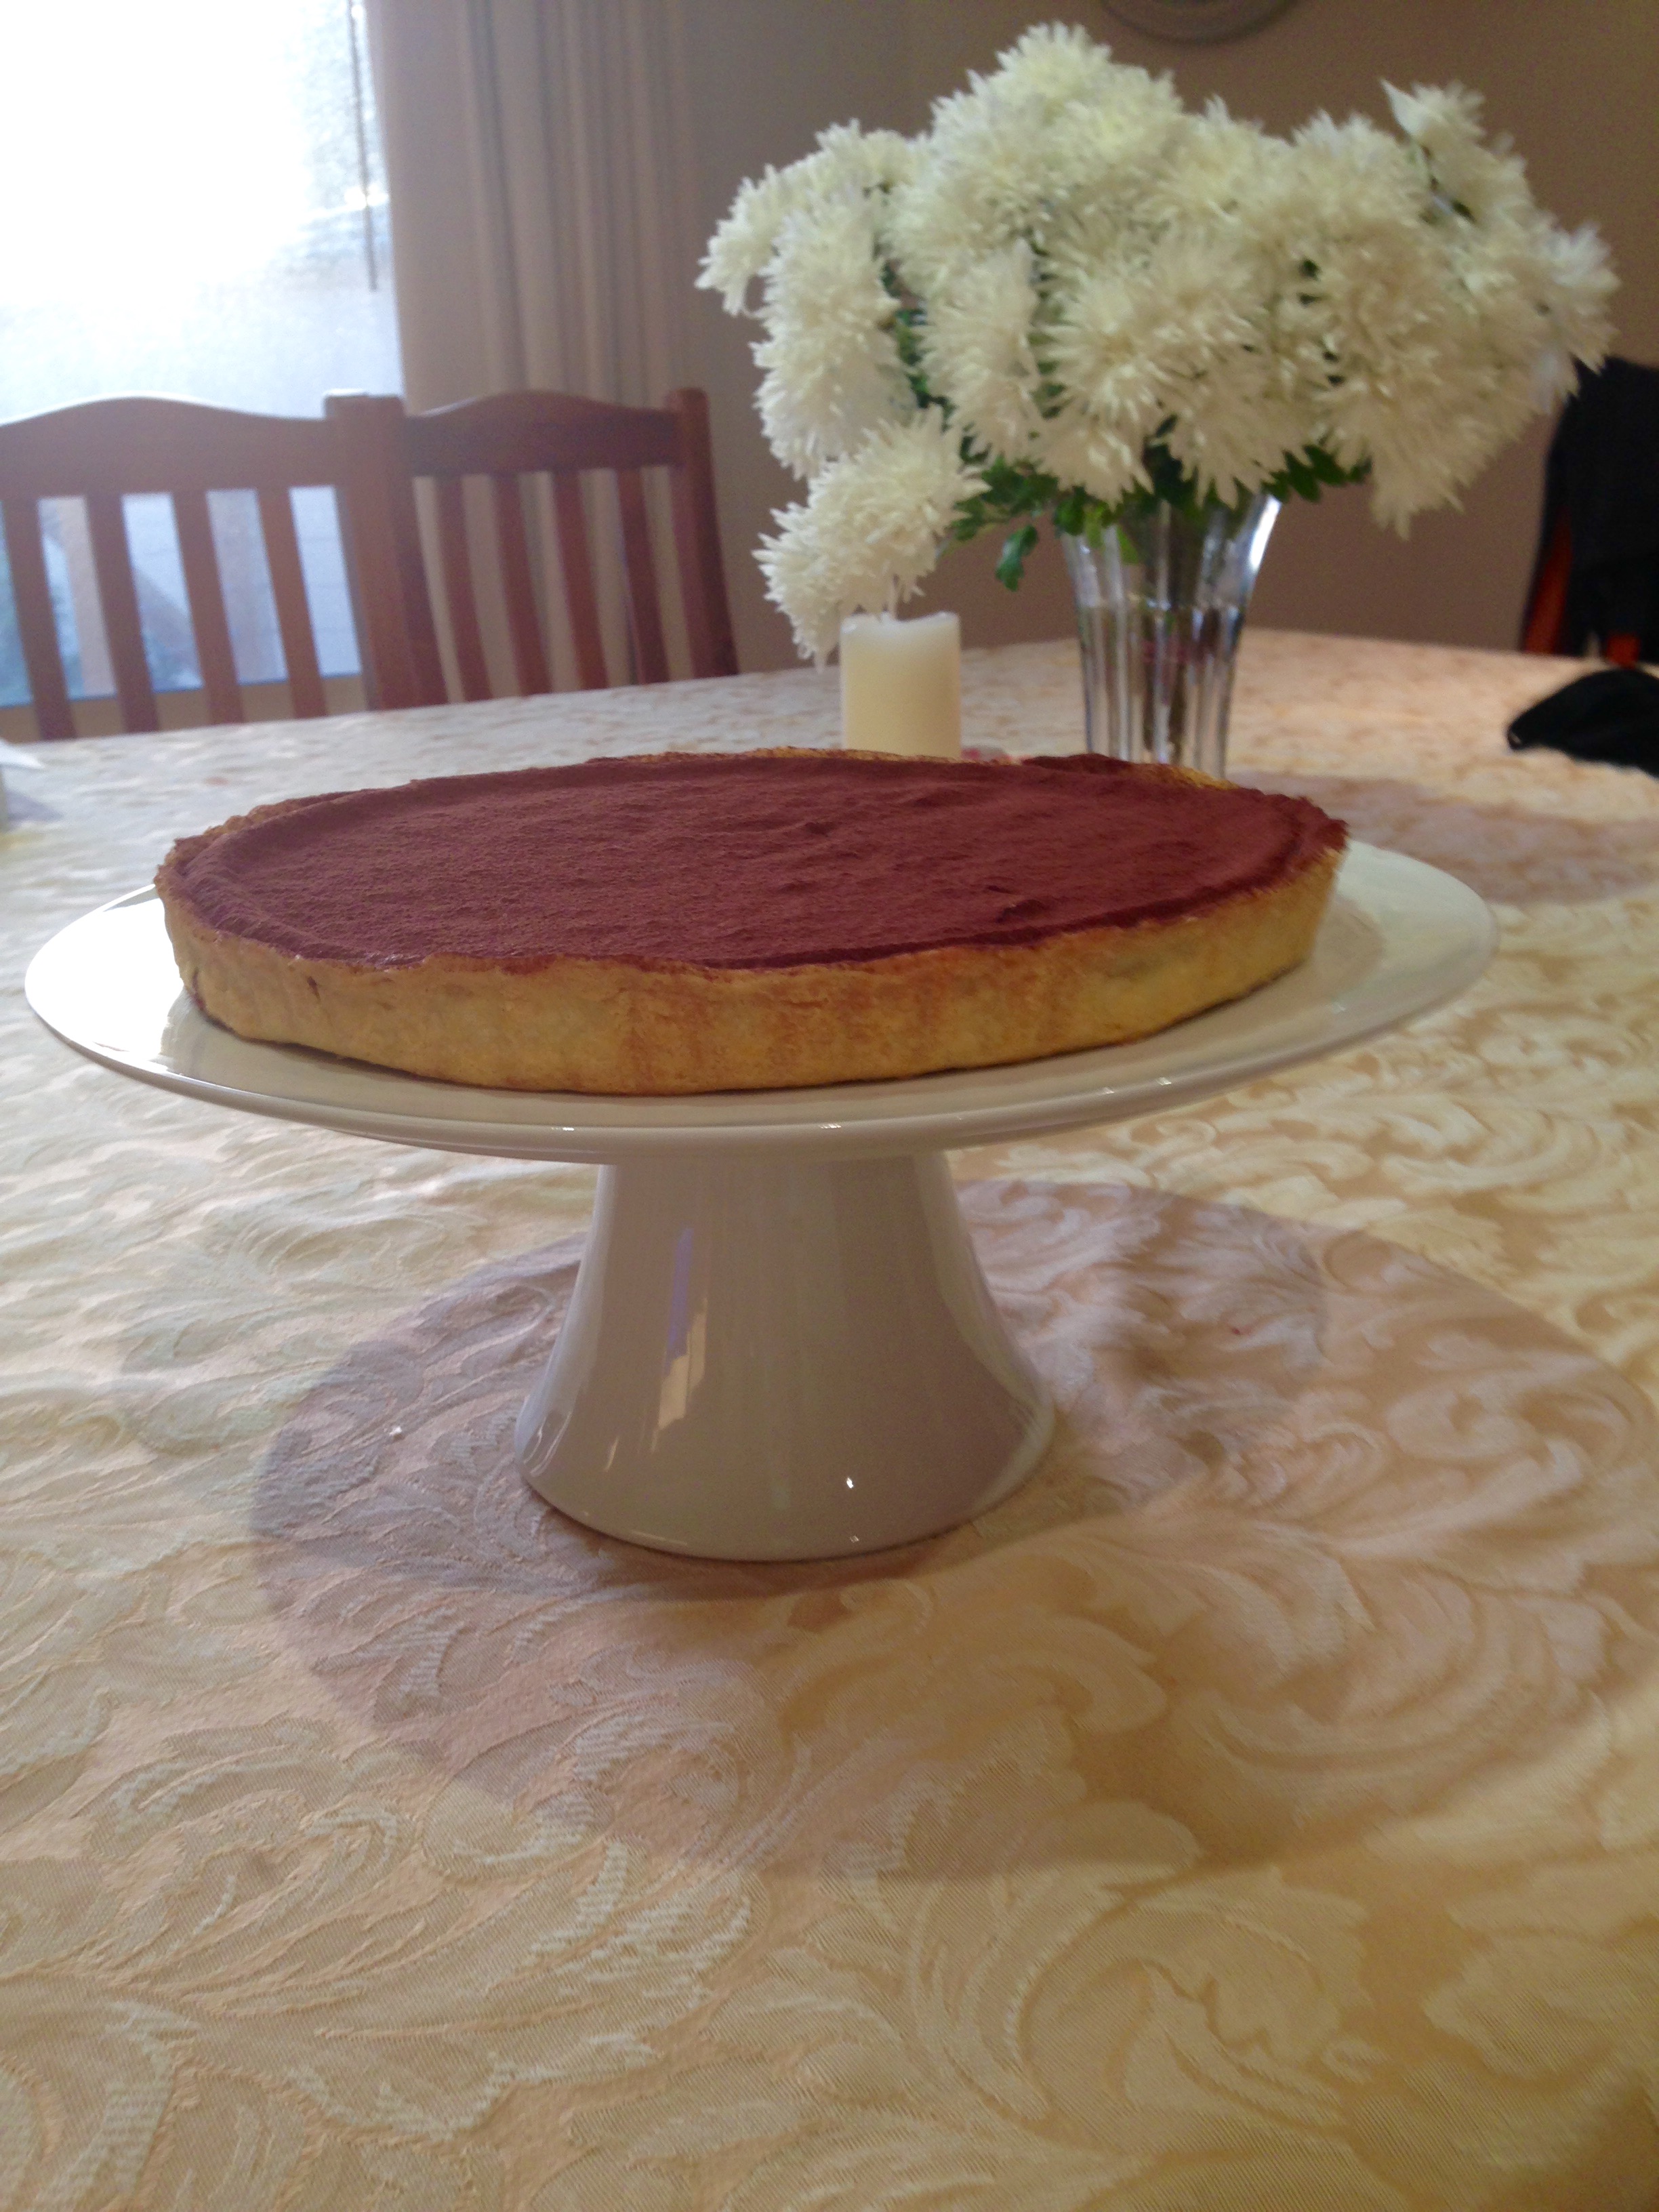
This was the main component of the dessert I made for Mother’s Day (in addition to the raspberry sorbet) and it was a winner with everyone. It’s not difficult to make (but looks it) and is the perfect conclusion to any meal.
Ingredients (serves 10) 4 egg yolks
2 eggs
¼ cup caster sugar
⅓ cup thickened cream
300g dark chocolate, melted
1 teaspoon vanilla extract
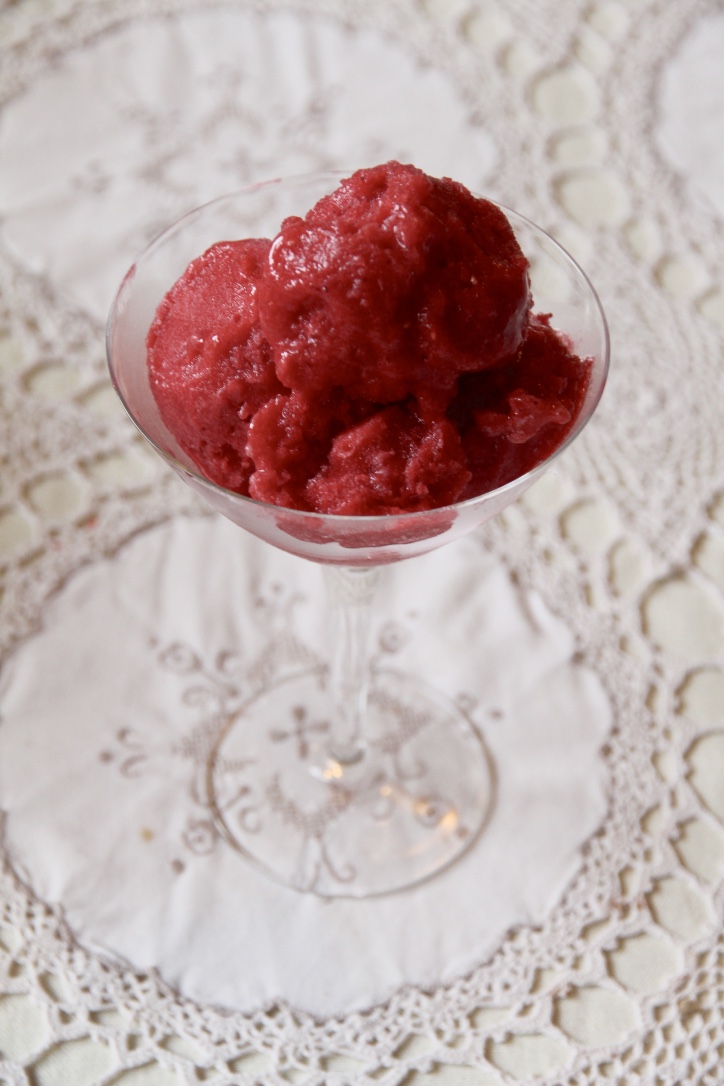
Happy Mother’s Day to all the Mums out there! Tonight, I have the honour of preparing the Mother’s Day dessert for a dinner party with my extended family. After much thought, I have decided to make a rich chocolate tart to serve with raspberry sorbet.
This raspberry sorbet recipe is one of the first I ever used when cooking by myself. In the school holidays, my sister and I would each cook one thing out of the Australian Women’s Weekly cookbooks we purchased in 2007. Mine would be from “Good Food: Desserts” (surprise, surprise) and Laura’s from “Potatoes”. As you can tell, it certainly wasn’t the most nutritious meal! But it was a lot of fun and helped Laura and I get into cooking.
I still love this sorbet – it’s perfectly tangy but sweet with a strong raspberry flavour. It’s also great as it doesn’t require an ice-cream machine. Hopefully it’s as useful for you as it has been for me
Ingredients (serves 8-10 on the side or 6-8 as the whole dessert) 1 ½ cups water
1 cup caster sugar
900g frozen raspberries
1 ½ tablespoons lemon juice
3 egg whites
Method Stir the water & sugar in a small saucepan over a medium heat, without boiling, until the sugar dissolves. Bring to the boil. Reduce the heat & simmer, uncovered, without stirring for 5 minutes.
Blend the raspberries, lemon juice & sugar syrup in a blender until smooth.
Push mixture through a fine sieve into a 20cm x 30cm lamington pan (or 2 smaller pans) lined with clingfilm. Discard seeds. Cover with foil; freeze until firm.
Coarsely chop the frozen berry mixture and add it to the blender with the egg whites. Blend until smoother and paler in colour. Return mixture to the pan, cover & freeze until firm.
Serve & enjoy!
Recipe adapted from the Australian Women’s Weekly ‘Good Food: Desserts’
Also known as honey jumbles or honey crackles, these delicious sweet treats were a staple birthday party food of my childhood. They always bring back wonderful memories and I really should make them more often as they require incredibly little effort & take about 10 minutes to make from start to finish.
Ingredients (Makes approximately 40 small or 16-20 large) 1 heaped tablespoon of good quality honey
60g butter
90g sugar
125g cornflakes
Method Preheat oven to 150°C.
Melt butter, sugar & honey in a small saucepan over a medium heat.
Pour gradually over cornflakes in a large bowl, and stir until well mixed.
Place dessert spoonfuls of mixture into small paper patties, and bake for 6 minutes.
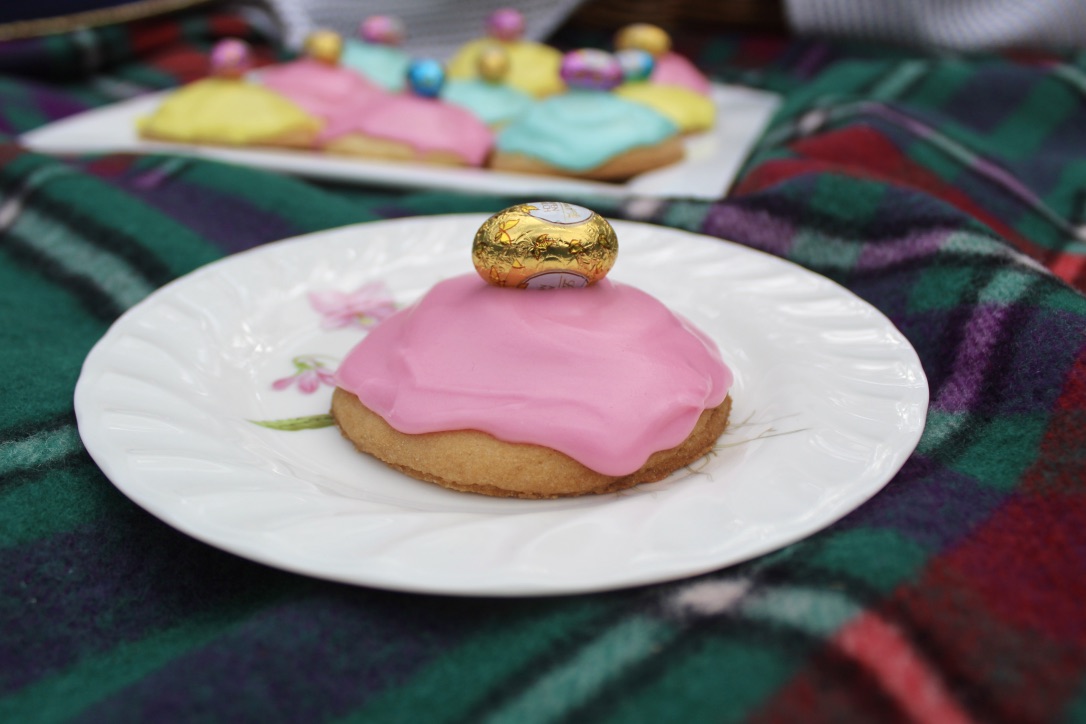
When my family lived in Canberra, our lovely friends would bring us some Figolli (traditional Maltese Easter biscuits) every Easter Sunday. As they were such a favourite with all of us, when we moved to Adelaide we decided that we couldn’t be without Figolli at Easter, and so we started making them ourselves.
This has just been our third Easter in Adelaide and I’m pretty confident that we’ve perfected them by now – consistently getting a rich buttery biscuit outside and perfectly chewy almond-citrus filling. We tend to to make ours round (although by all means use any shape you like) and decorate them simply with pastel icing and topped with an Easter egg. Do yourself a favour and try them!
Ingredients (makes approx. 24) Pastry 400g plain flour, sifted 175g caster sugar 200g butter 2 egg yolks Grated rind of ½ a lemon
Method In a food processor, blitz flour, sugar & butter until it resembles fine breadcrumbs.
Add egg yolks, lemon zest & sufficient cold water to bring the dough together. Knead gently to form a smooth ball and then cover in cling film and refrigerate for 20mins.
Meanwhile, add the lemon zest, orange blossom water, egg whites & sugar to the ground almonds. Mix until combined.
Preheat oven to 180°C or 160°C fan-forced.
Roll pastry out to a 1-1½mm thickness on a lightly floured surface. Use a 7cm diameter round cutter to cut out 2 circles of pastry.
Spread almond paste on one half and lay matching shapes on top, pressing the edges together.
Repeat with remaining mixture. Bake on a tray lined with baking paper for approximately 20-30 mins or until golden brown.
Make the icing by combining icing sugar, butter, milk and vanilla in a medium bowl with electric beaters. Add a touch of extra icing sugar or milk to reach desired consistency. Add a drop or two of food colouring. Set aside.
Allow biscuits to cool before decorating with icing & Easter eggs.
Adapted from ‘The Food and Cookery of Malta’ (1999)
I love this cake, it’s so quick and effortless to put together and is absolutely delicious (also, because it contains carrot it’s basically a salad, right?!). It’s great at any time of year but is particularly good as a treat around Easter for someone who doesn’t like chocolate or for people who are chocolated out!
Ingredients (serves 8-10)
1 ½ cups grated carrot (lightly packed)
½ cup chopped walnuts
1 cup plain flour
2 eggs
1 teaspoon bicarb soda
1 cup caster sugar
1 teaspoon mixed spice
¾ cup vegetable oil
½ teaspoon salt
½ teaspoon vanilla
To decorate (if desired): Extra chopped walnuts
The thin end of a small carrot cut into 2 halves
4 sprigs of coriander
Method Preheat oven to 180°C (160°C fan-forced).
Grease an 8″ round cake pan with margarine and line the base with baking paper.
Combine eggs, sugar, oil, vanilla & sifted dry ingredients in a large bowl & beat on low speed.
Stir in carrots & walnuts. Mix well.
Pour mixture into the prepared cake tin and bake in the oven for approx. 40 – 45mins or until a skewer inserted in the middle of the cake comes out clean.
Let the cake cool in the tin for 5-10 minutes, before placing it on a wire rack to cool completely.
To make the cream cheese frosting, beat butter & cream cheese until smooth and creamy. Add in the lemon rind and icing sugar and beat until smooth. Spread evenly over the top and sides of the cake.
If desired, decorate by placing the finely chopped walnuts around the edge of the cake and the carrot pieces in the centre of the cake with two coriander sprigs above each carrot. Enjoy!
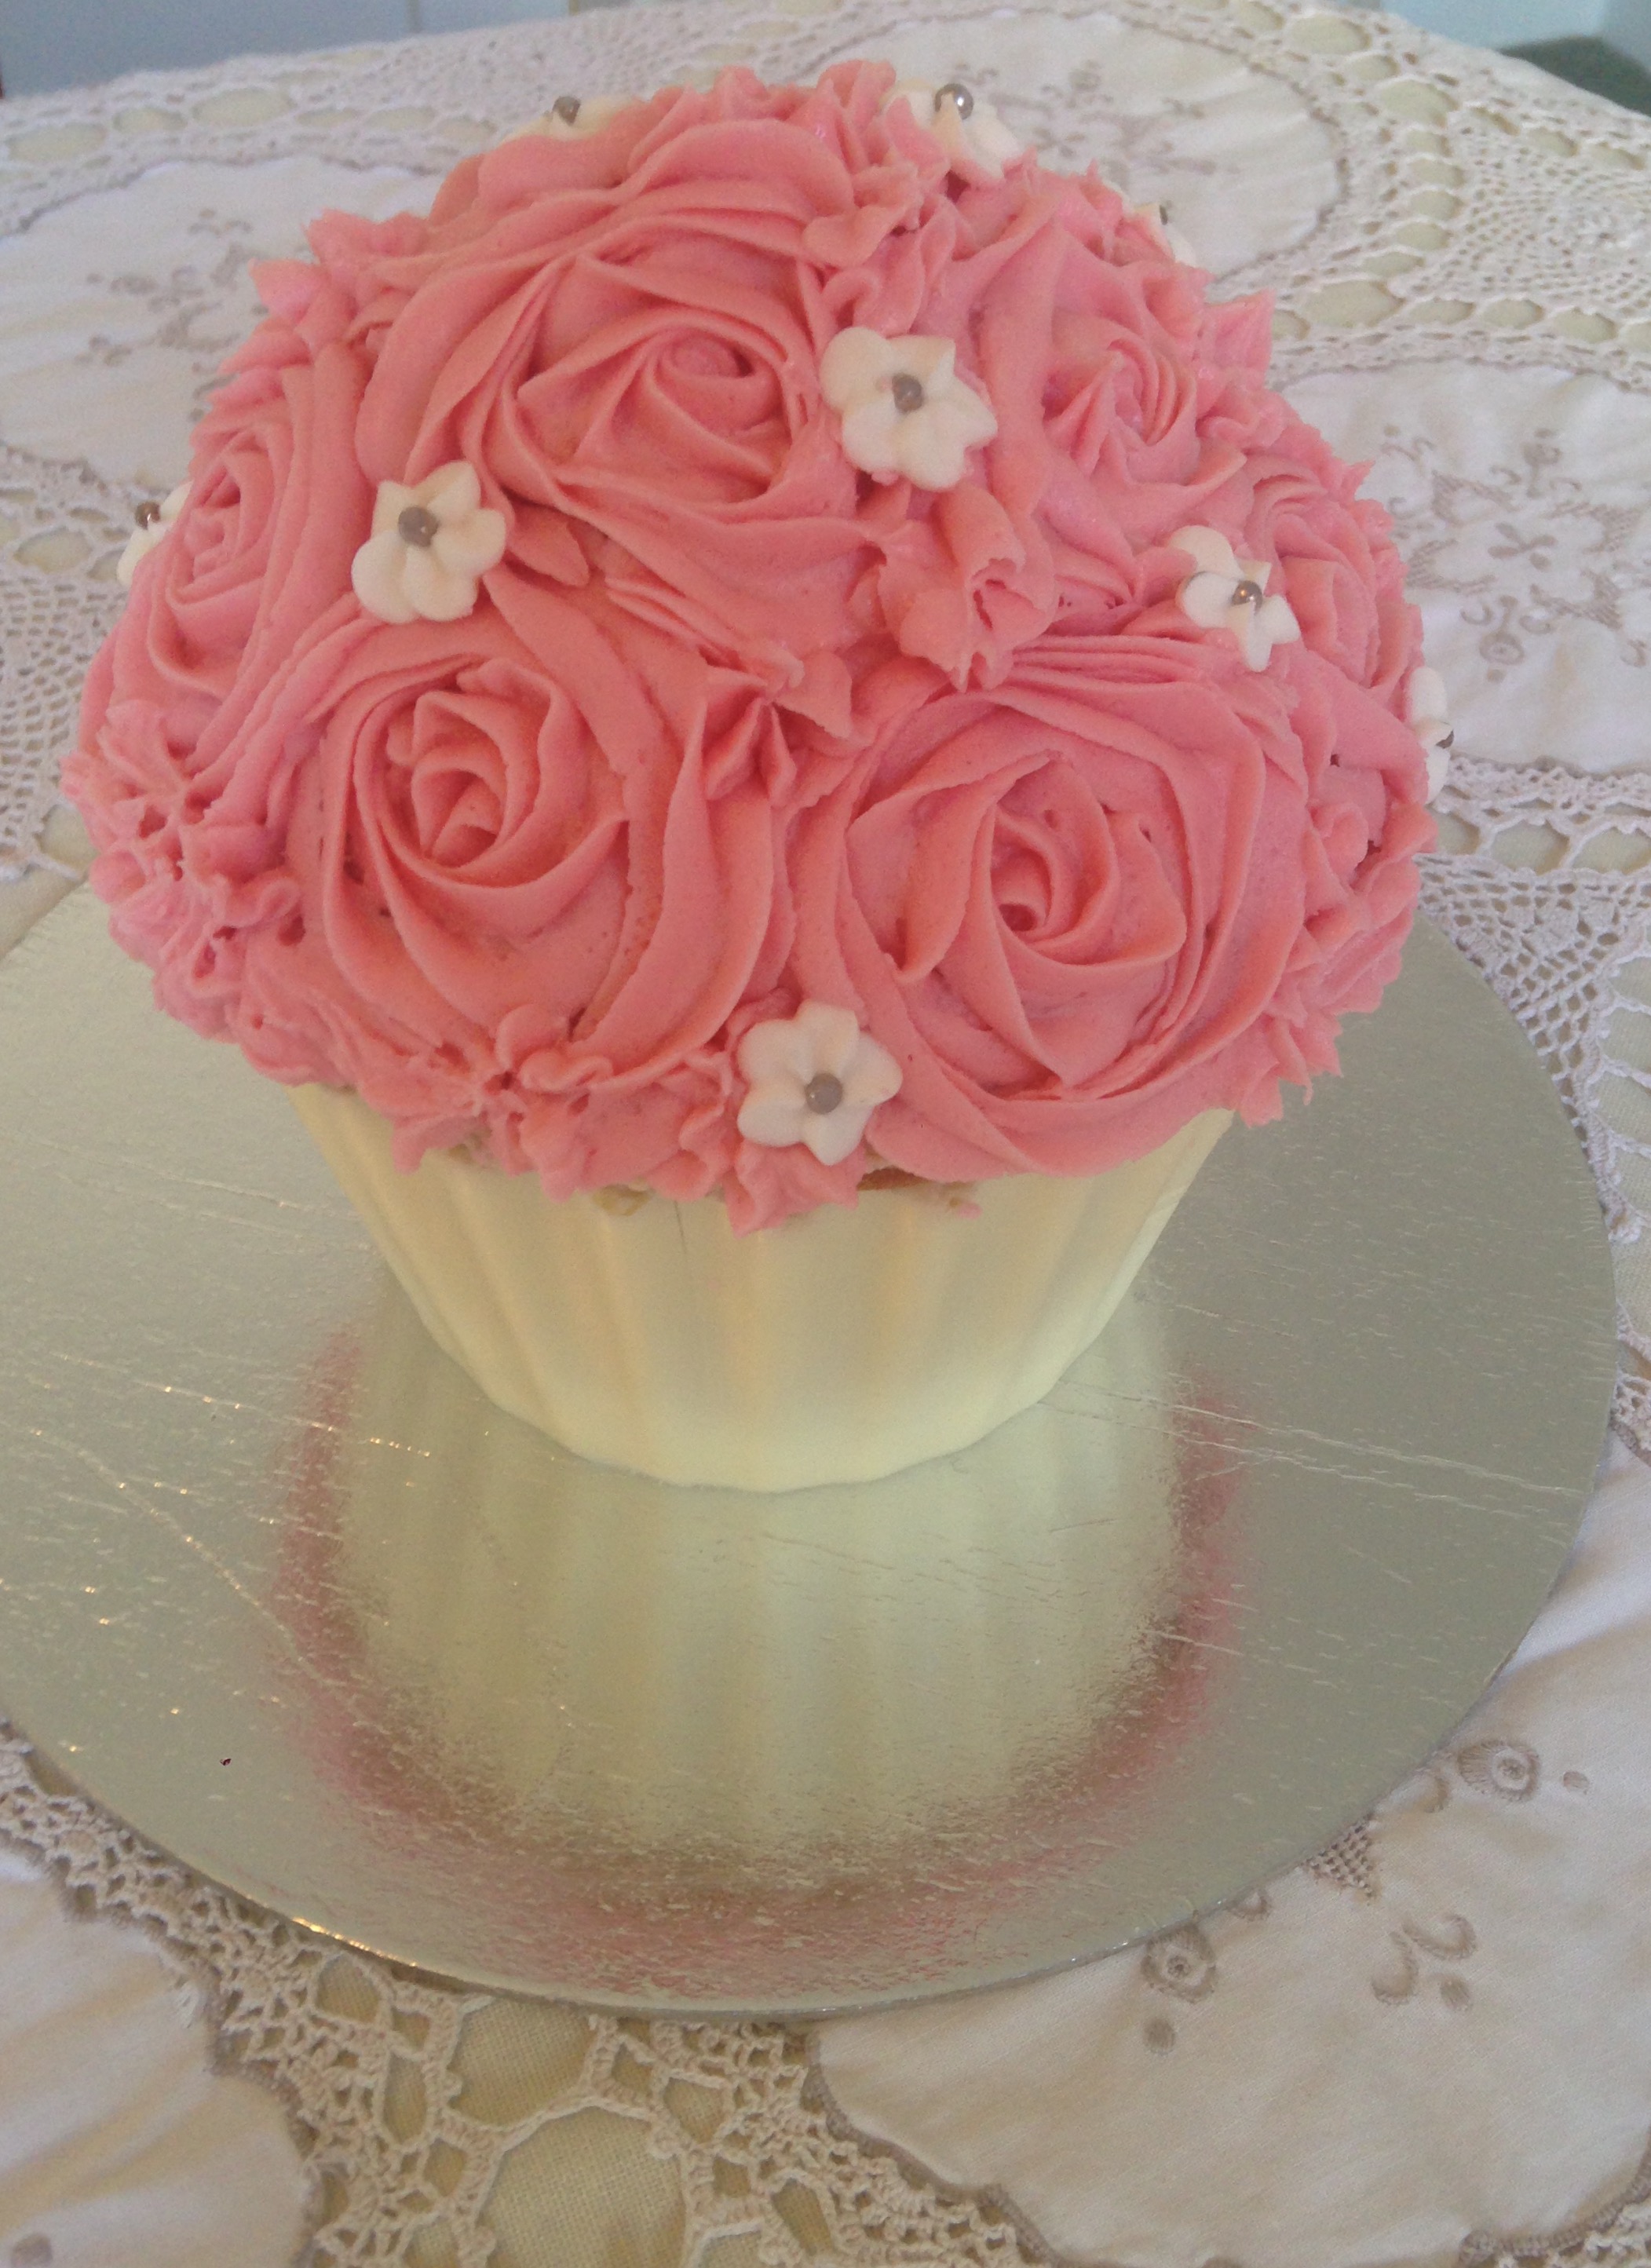
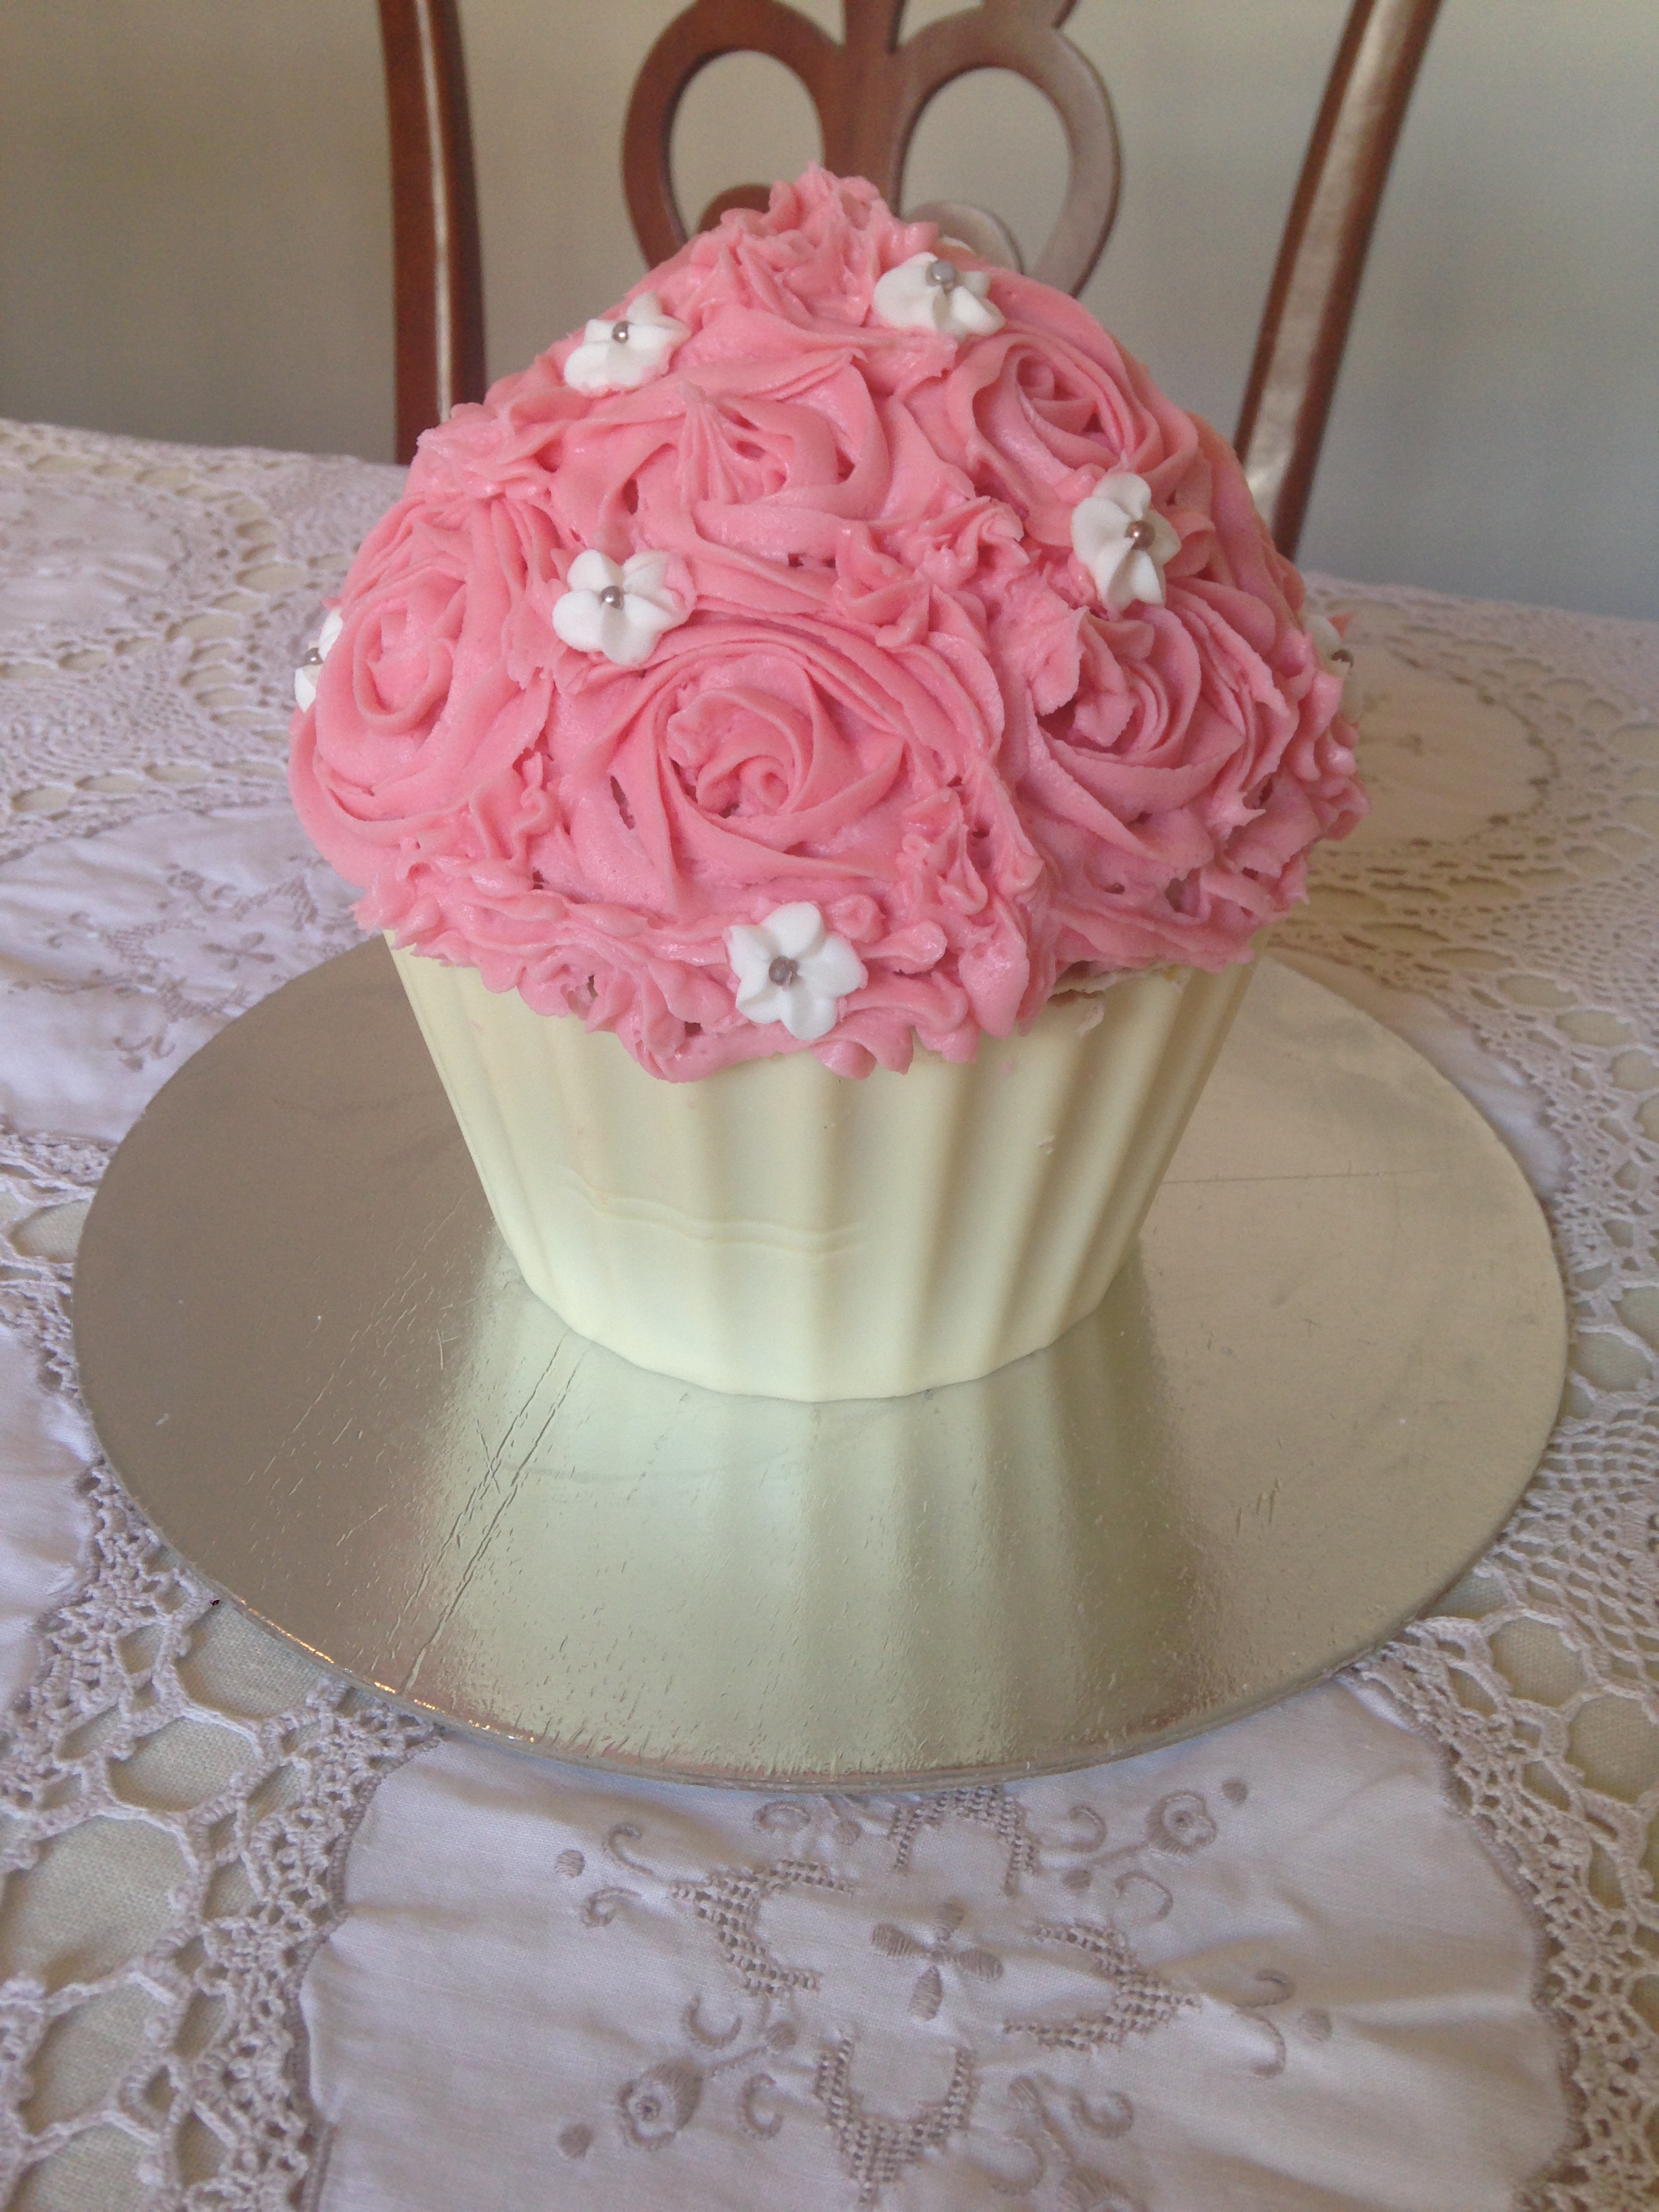
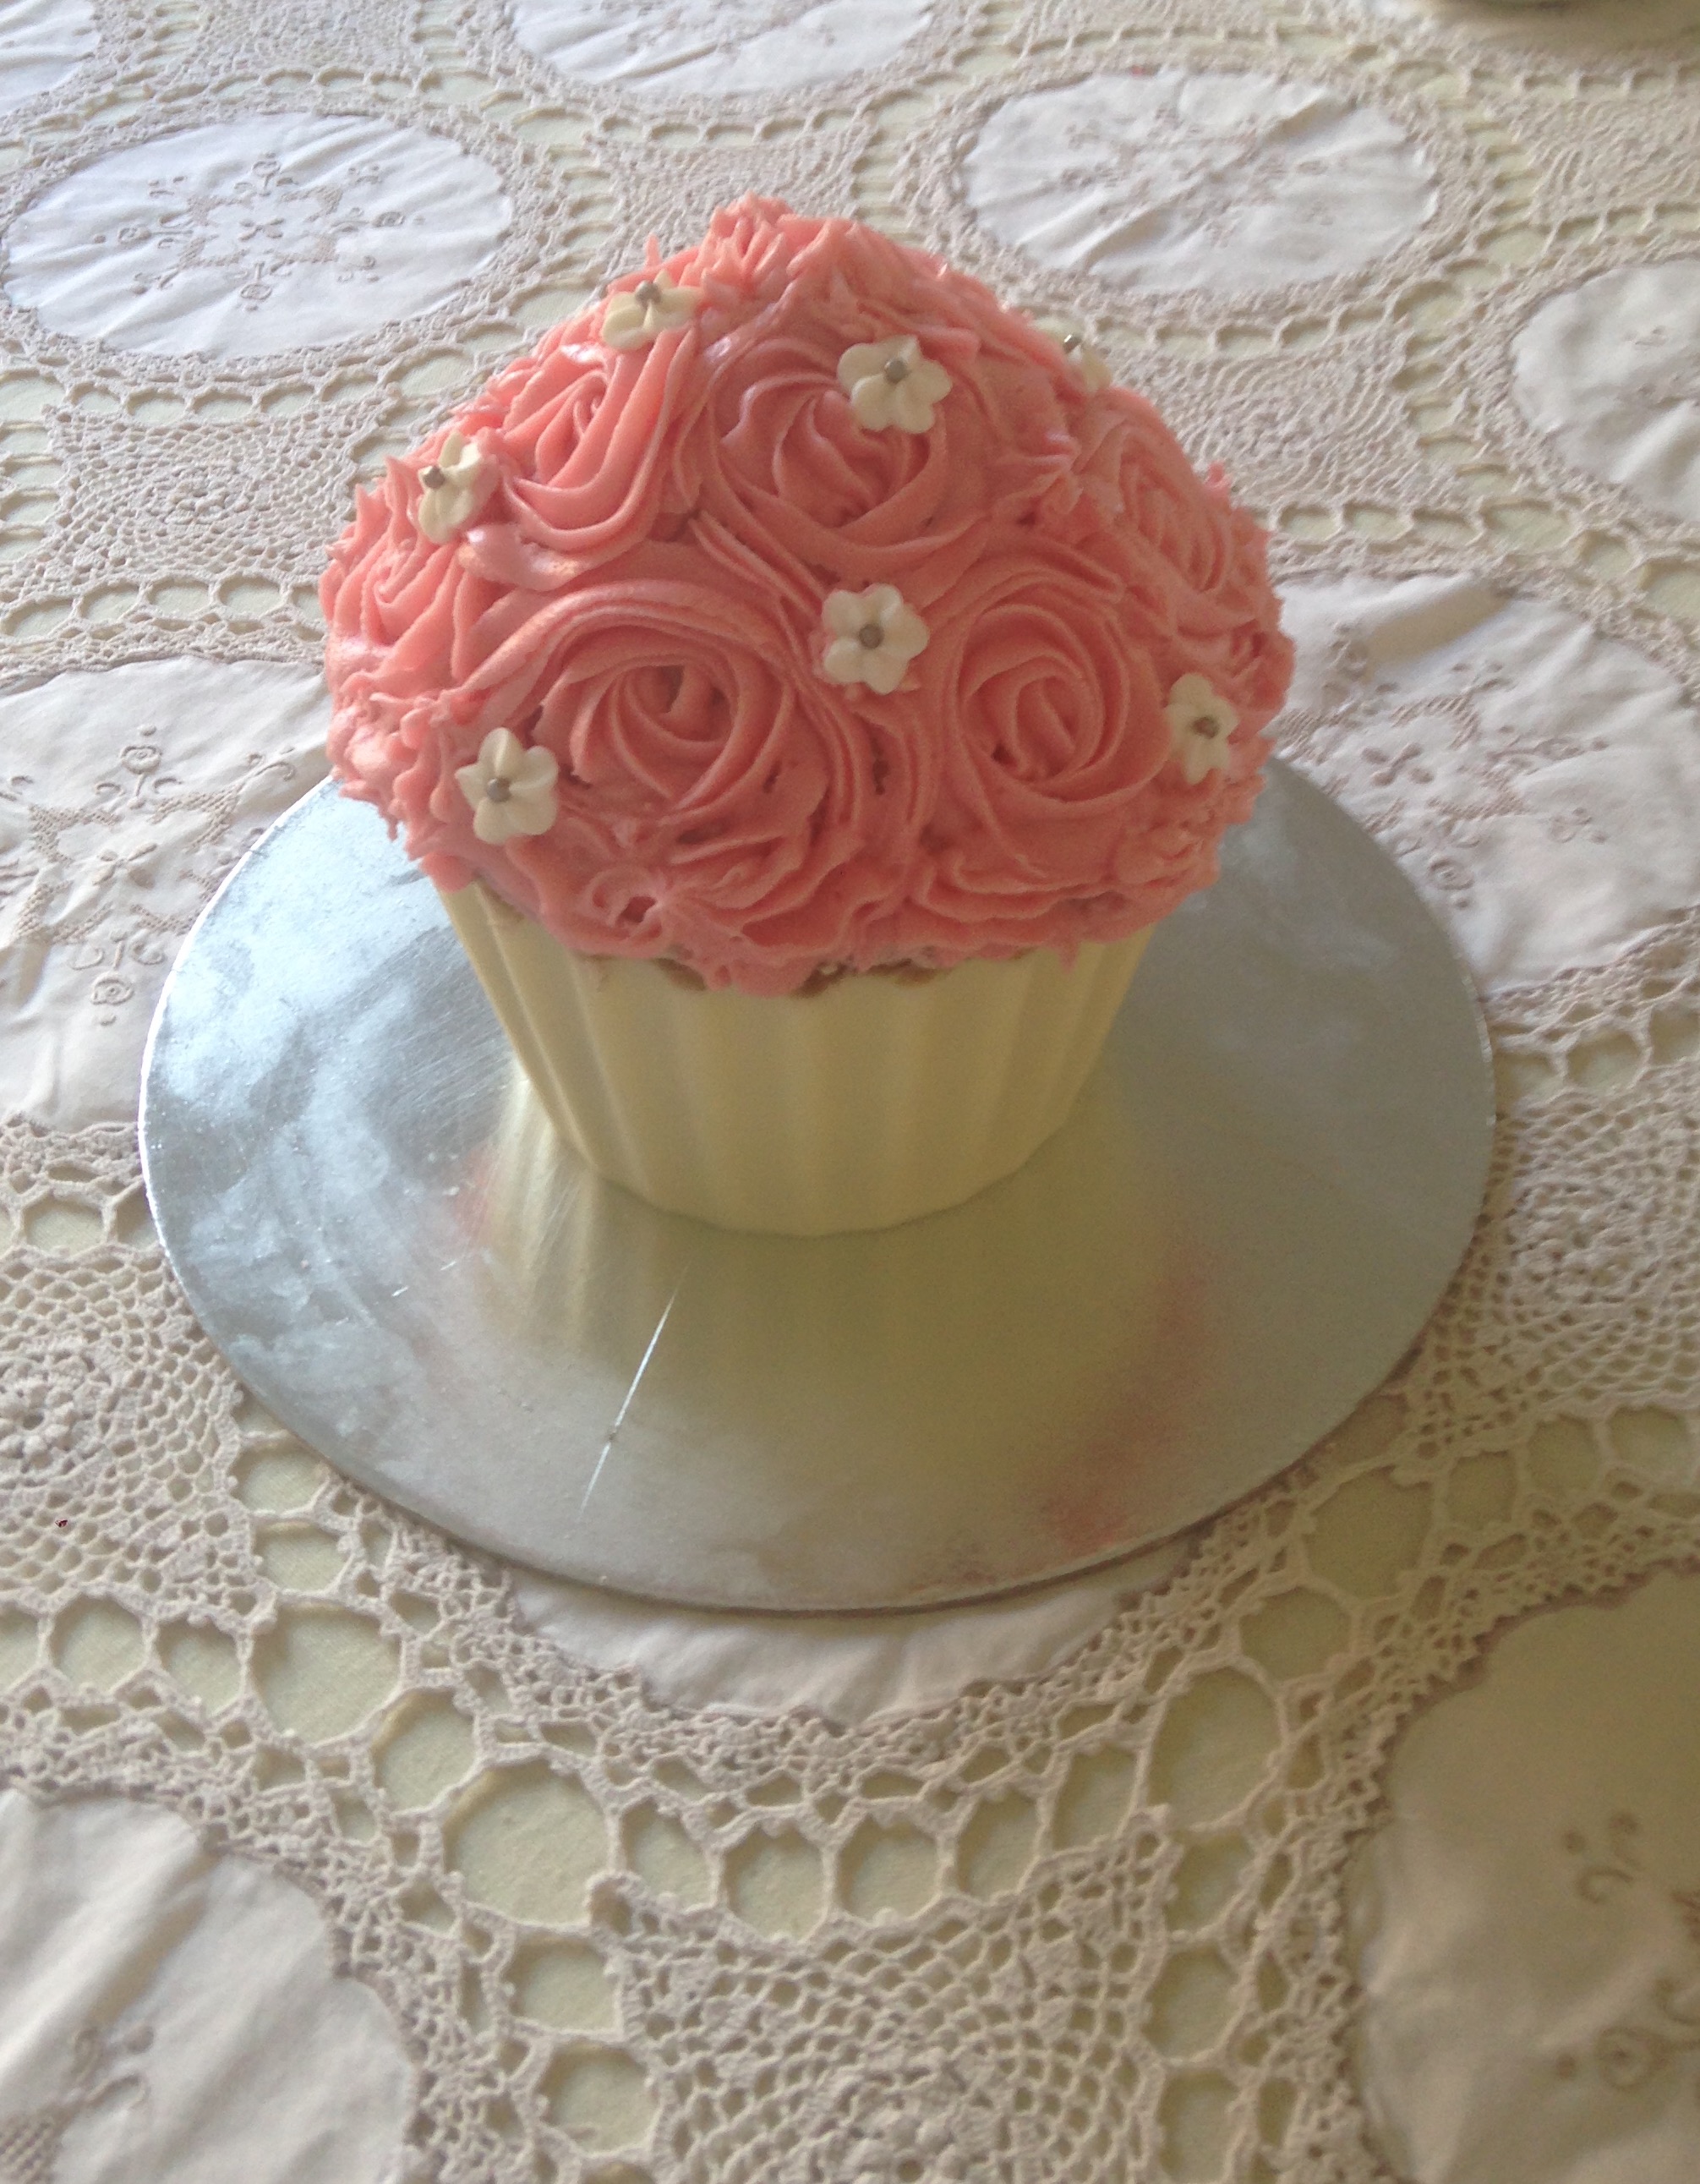
I haven’t made a giant cupcake for about 18 months but I’m so glad I found my giant cupcake cases again because they’re so much fun to make (and eat!) They’re also really easily adaptable as you can make them any flavour you like and decorate them in a million different ways. This time I’ve used buttercream roses but you could ice it as simply (or complexly) as you like – there’s a link to my fondant ‘soft serve’ icing instructions at the bottom of the page.
Cupcake Case 375g white chocolate melts or Wilton candy melts
Buttercream icing 250g butter, softened
800g icing sugar
1 ½ tablespoons vanilla extract
4 tablespoons of milk
Food colouring
Method Spray silicone giant cupcake pan liberally with canola oil and preheat oven to 160°C fan-forced.
Cream together butter and sugar with an electric mixer until light and fluffy. Add in vanilla and then eggs, one at a time, ensuring that each egg is fully incorporated before adding the next. Add in half of the flour followed by two tablespoons of the milk, and then add remaining flour and milk. Mix until just combined.
Fill the giant cupcake pans, starting with the cupcake top. Fill until approximately 2cm shy of the top of the pan. Then fill the bottom pan with the remaining batter.
Bake in the oven for between 40-70 minutes, checking regularly. Note: the cupcake top will bake faster than the bottom so take it out before the bottom is done. The cake is ready when a skewer inserted into the middle of the cake comes out clean.
Leave cakes in their pans for at least 20 minutes before gently peeling the silicone off and allowing the cakes to cool completely on a cooling rack.
Image credit: The Pink Whisk
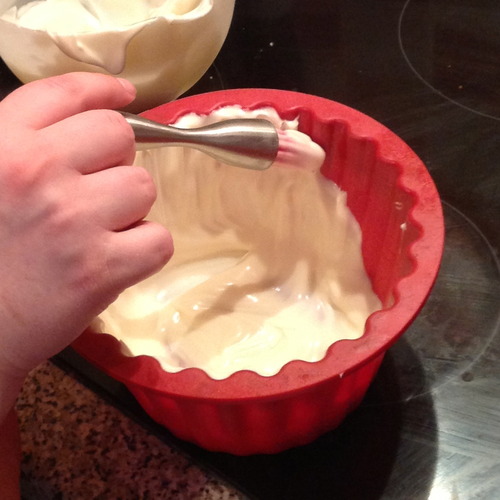
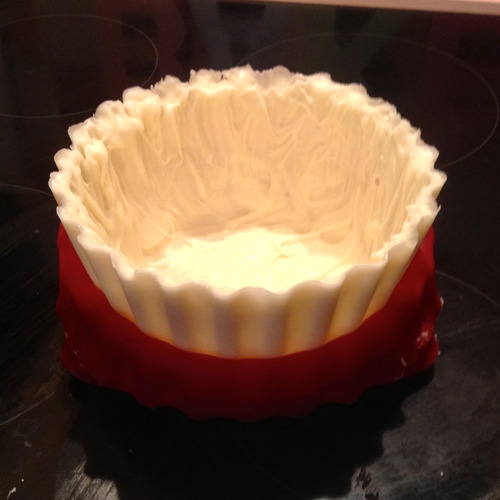
While the cakes are cooling, wash and dry the bottom cupcake pan ready to make the cupcake case. Melt half the chocolate/candy melts and pour into the bottom cupcake pan. Spread evenly up the sides using a pastry brush. Refrigerate for 20 minutes and then repeat with the remaining melts. Refrigerate for 30 minutes and then gently peel off the silicone mould.
Image credit: She Who Bakes
Image credit: She Who Bakes
Image credit: She Who Bakes
Using a serrated bread knife, trim around bottom cake so all crunchy edges are removed. Level top (of base) and then cut base in half. Cut off bottom layer off top piece. Level base (of top).
Make buttercream by beating all ingredients but the food colouring until light and fluffy. Set half aside for the crumb coat, and then add the food colouring to the remaining buttercream.
Put a 1cm thick coating of the uncoloured buttercream between 2 bottom layers of cake and then between the base and top (ensure level – cut if necessary). Then put a thin layer of buttercream on the inside of the chocolate case and gently ease cake into it. Cover top of cake liberally with buttercream to form a protective barrier against crumbs.
Put the coloured buttercream into a piping bag fitted with a Wilton 2D nozzle (to make roses) or equivalent, and pipe icing in a rose swirl pattern, starting from the bottom of the cake and working your way up.
Decorate with icing flowers, sprinkles, silver cachous, glitter… basically whatever you like!
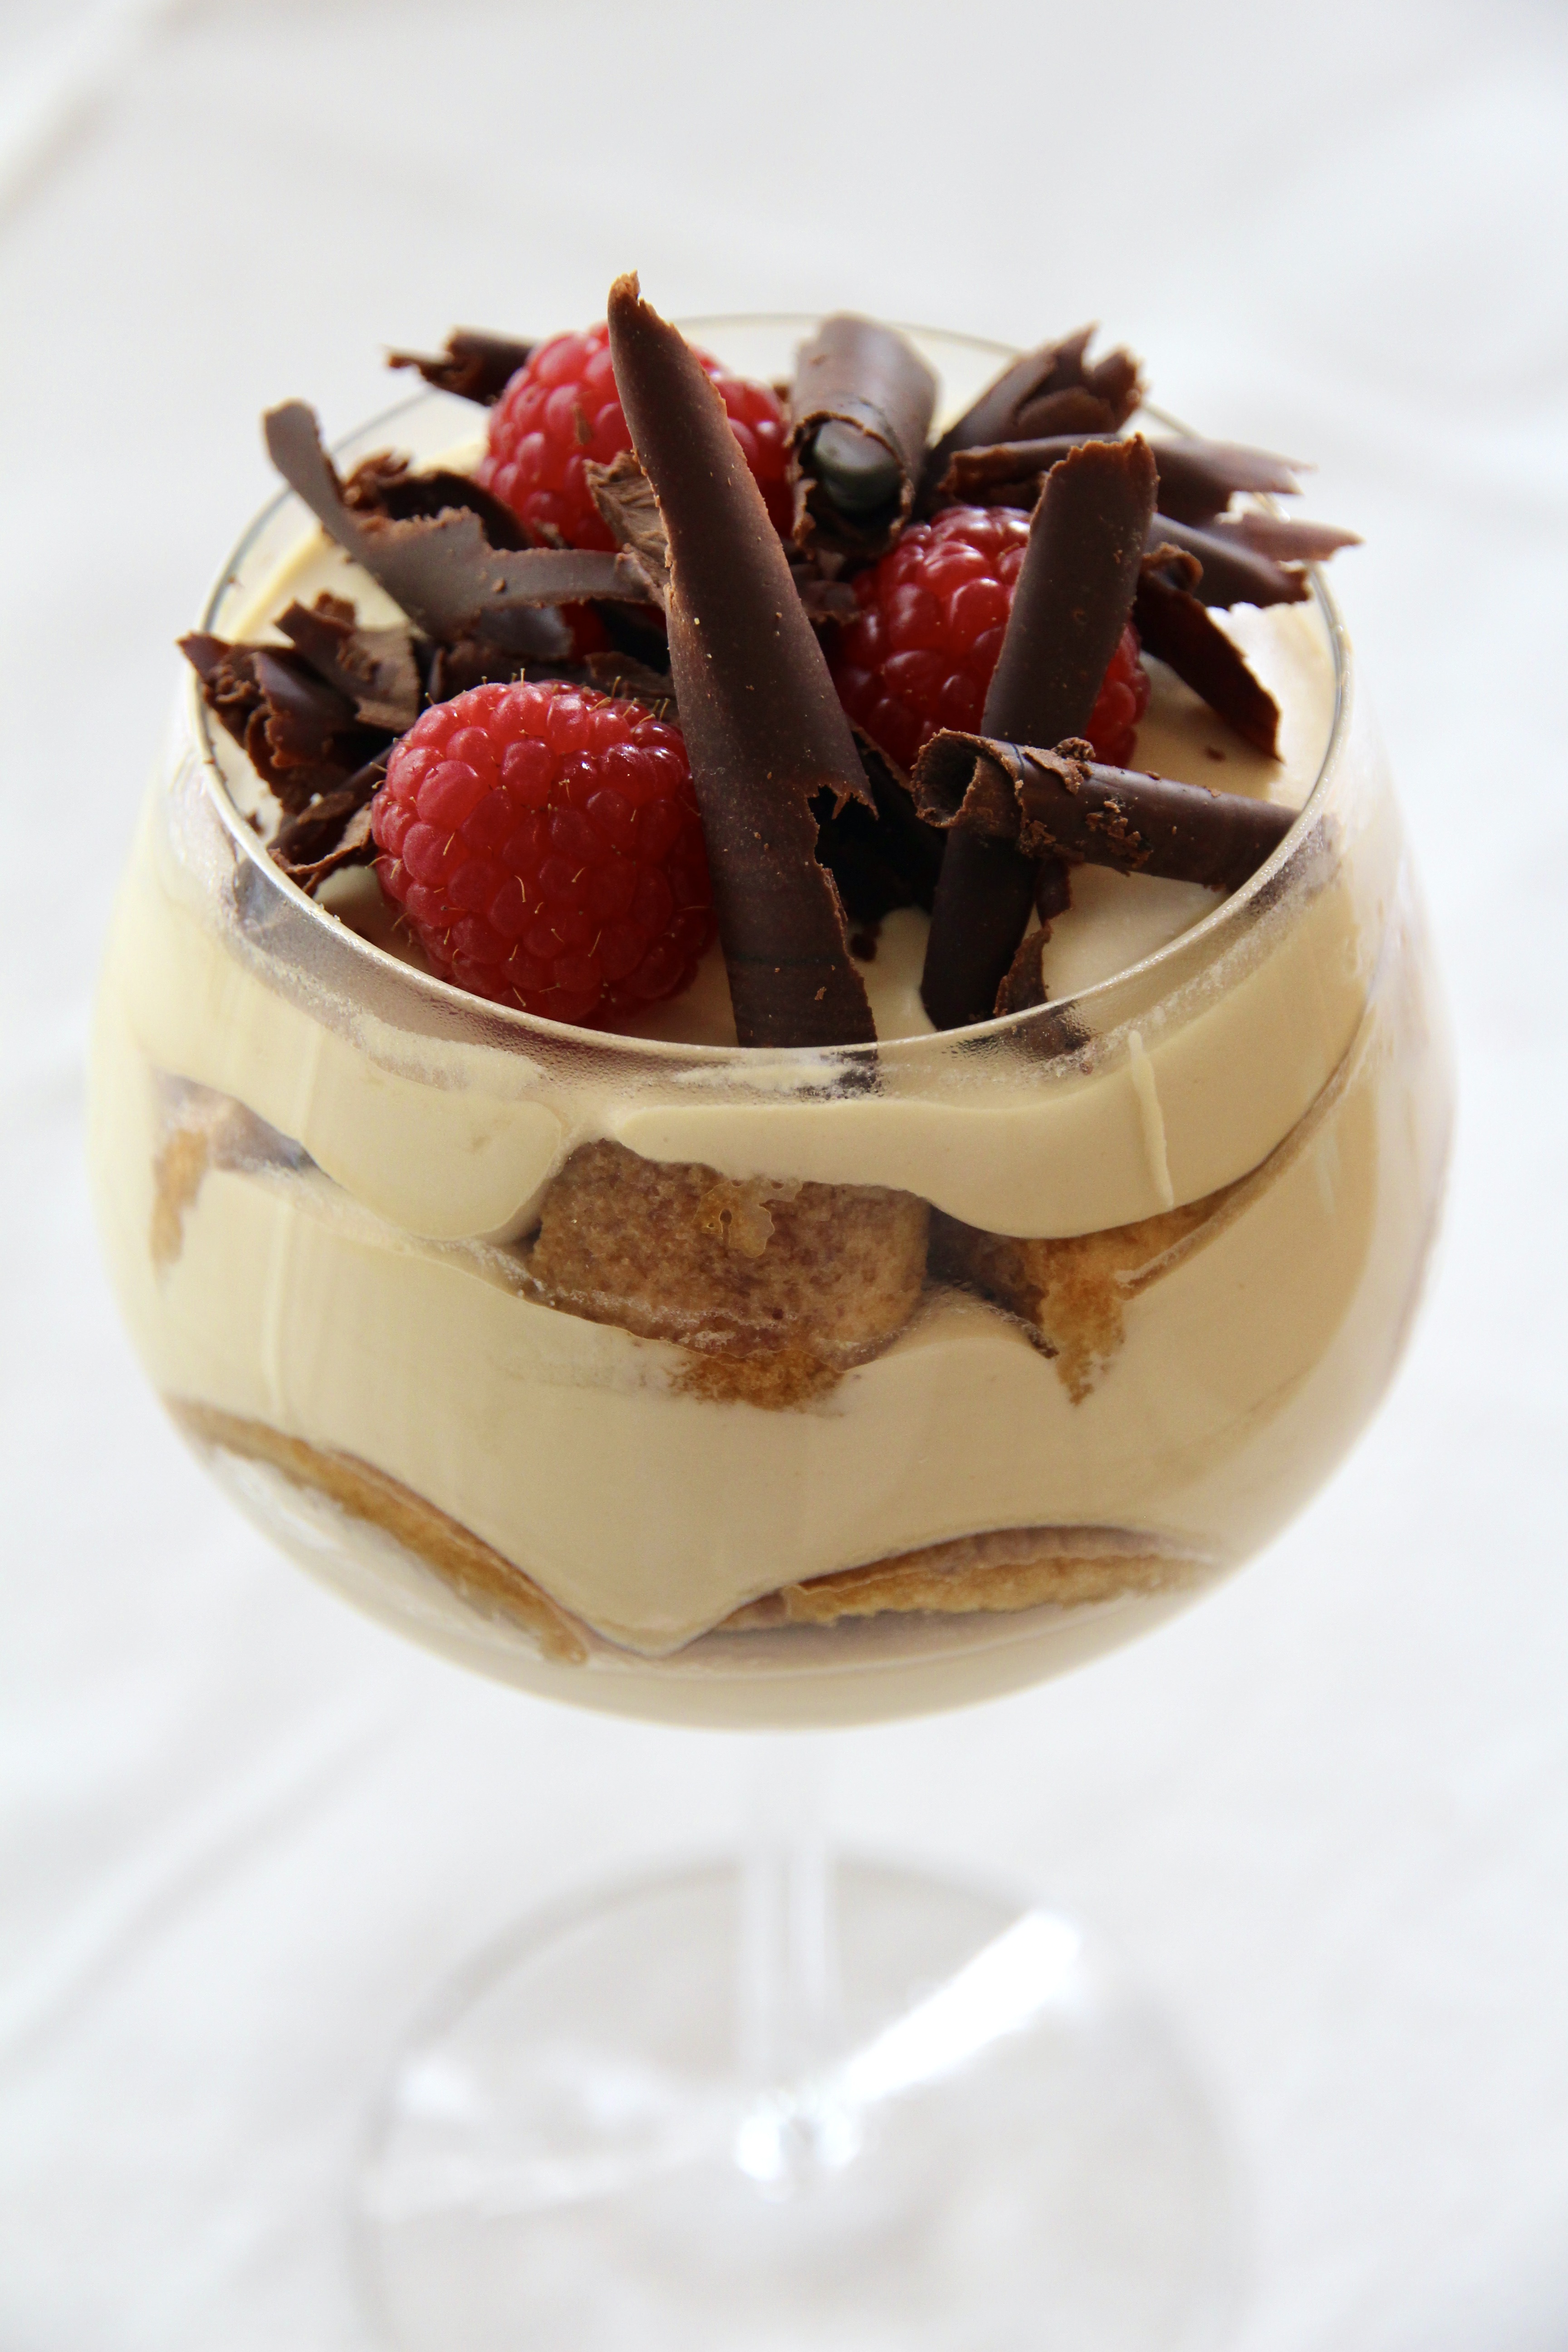
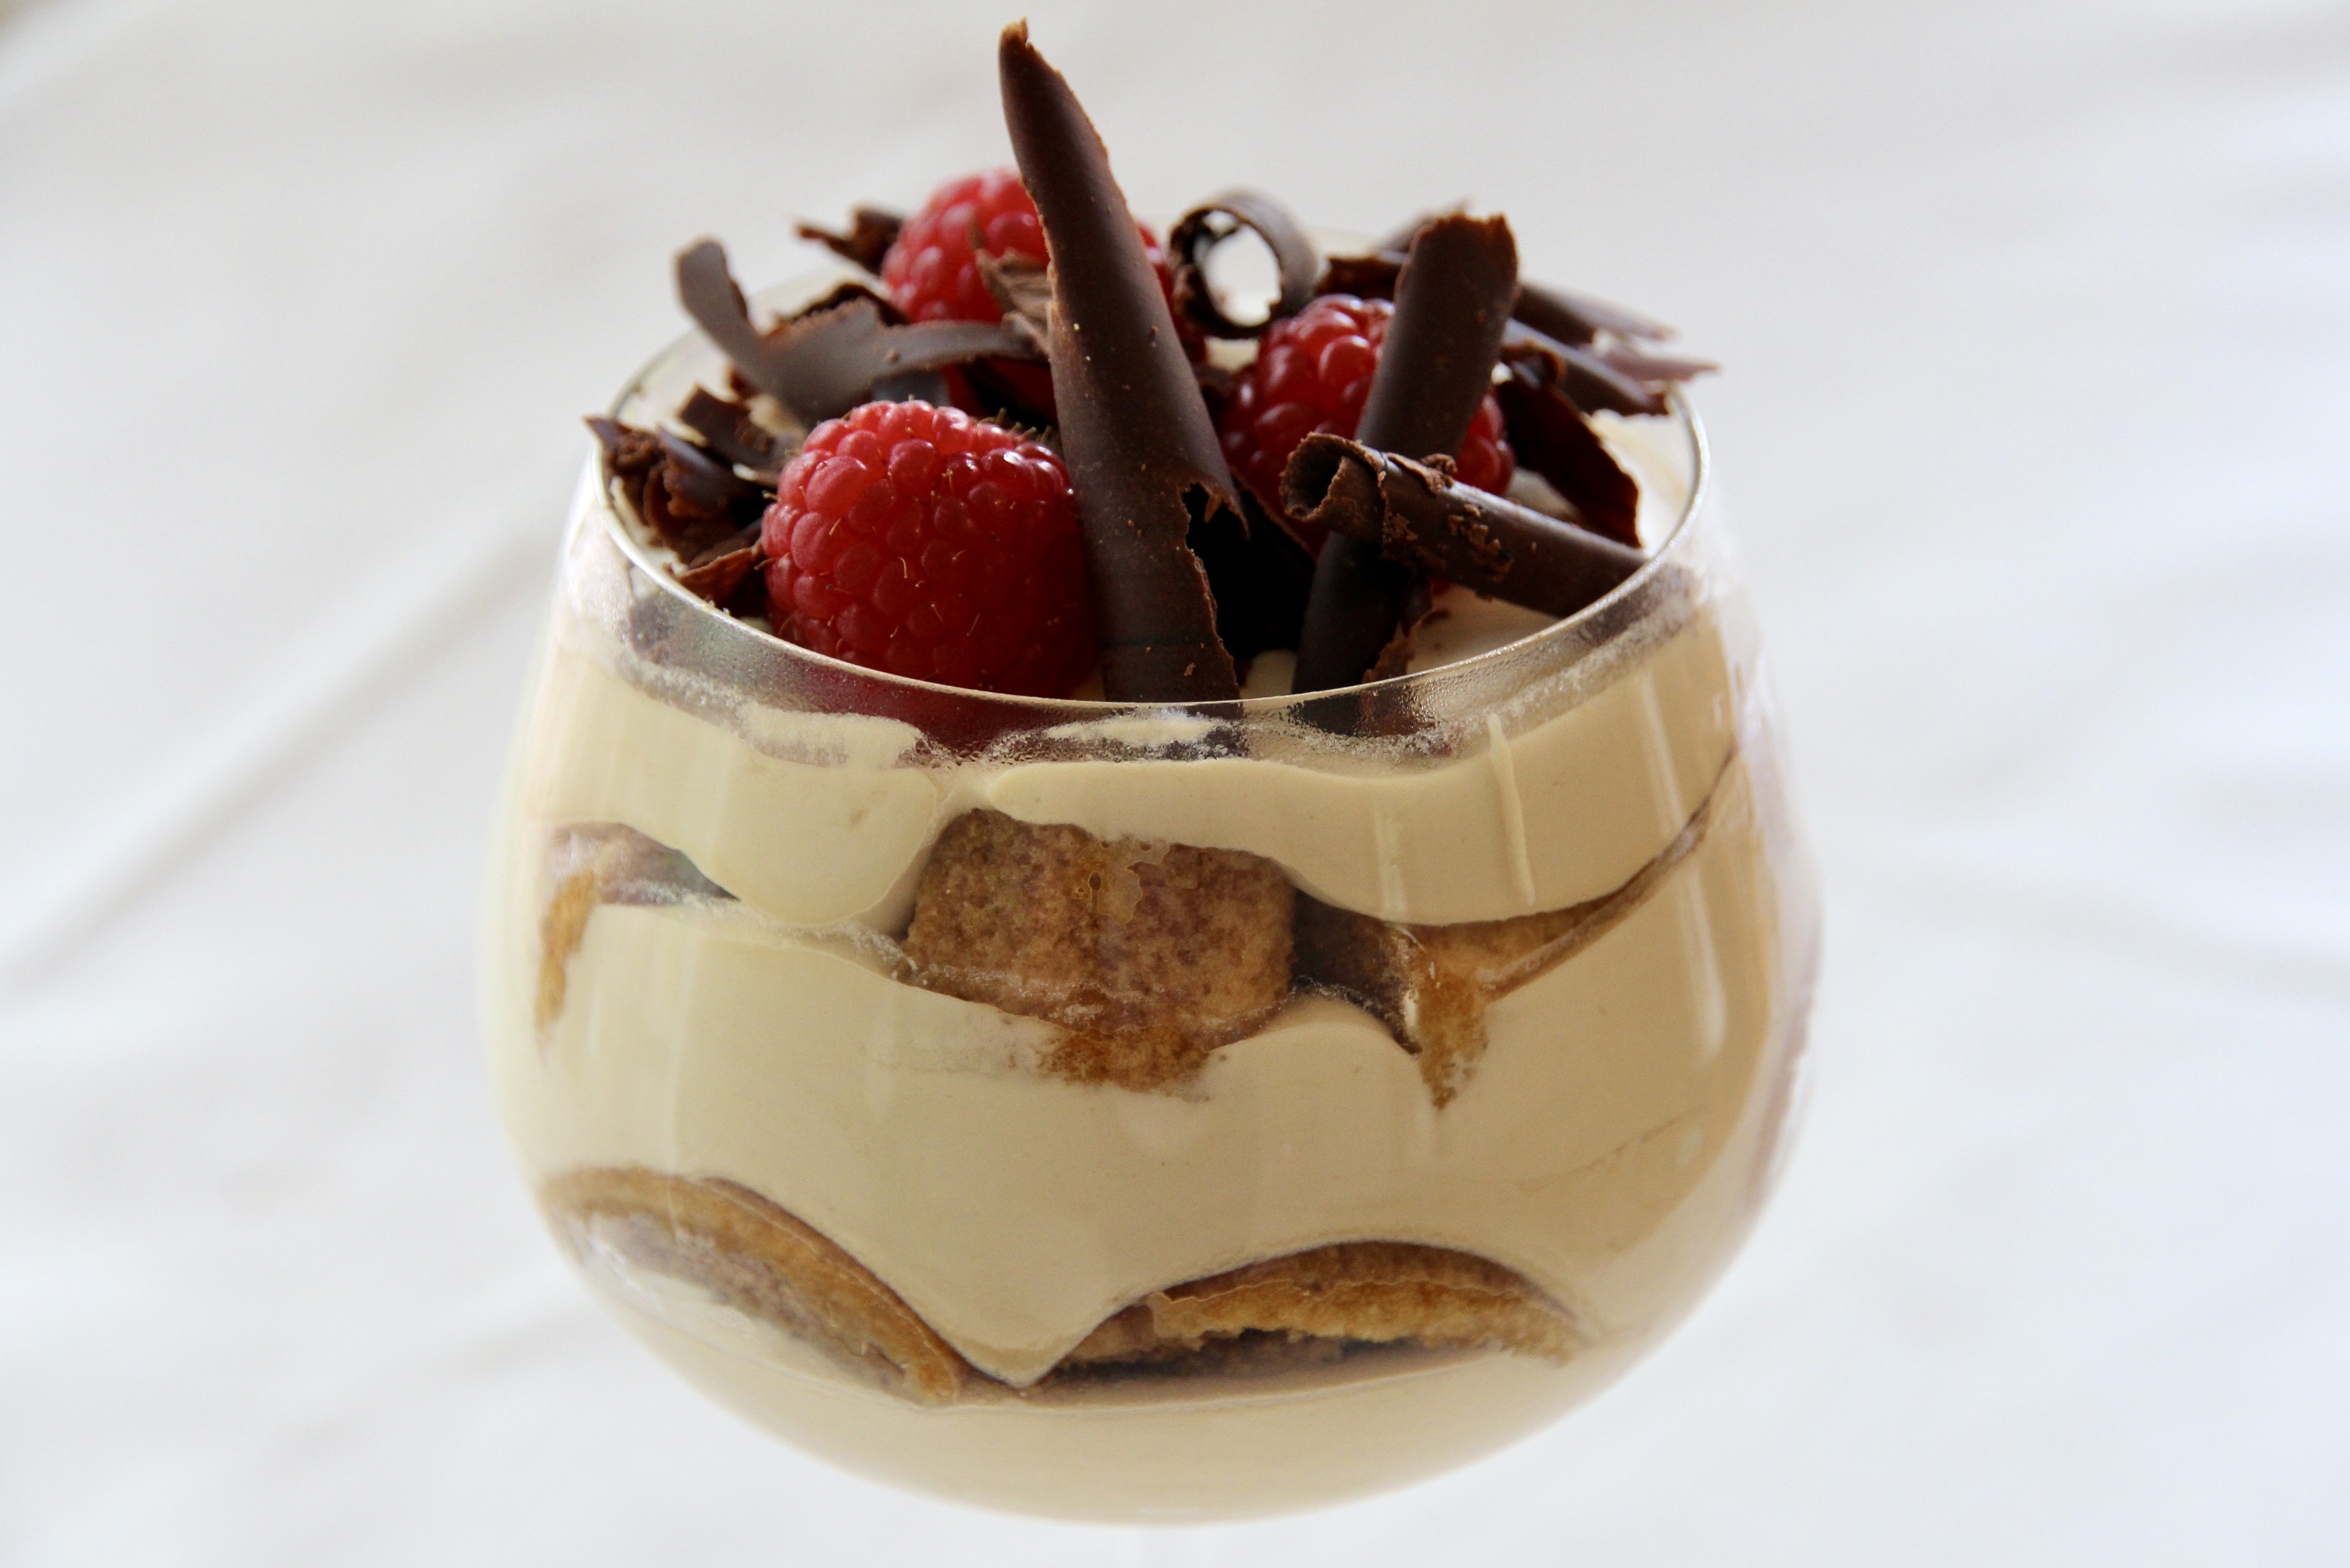
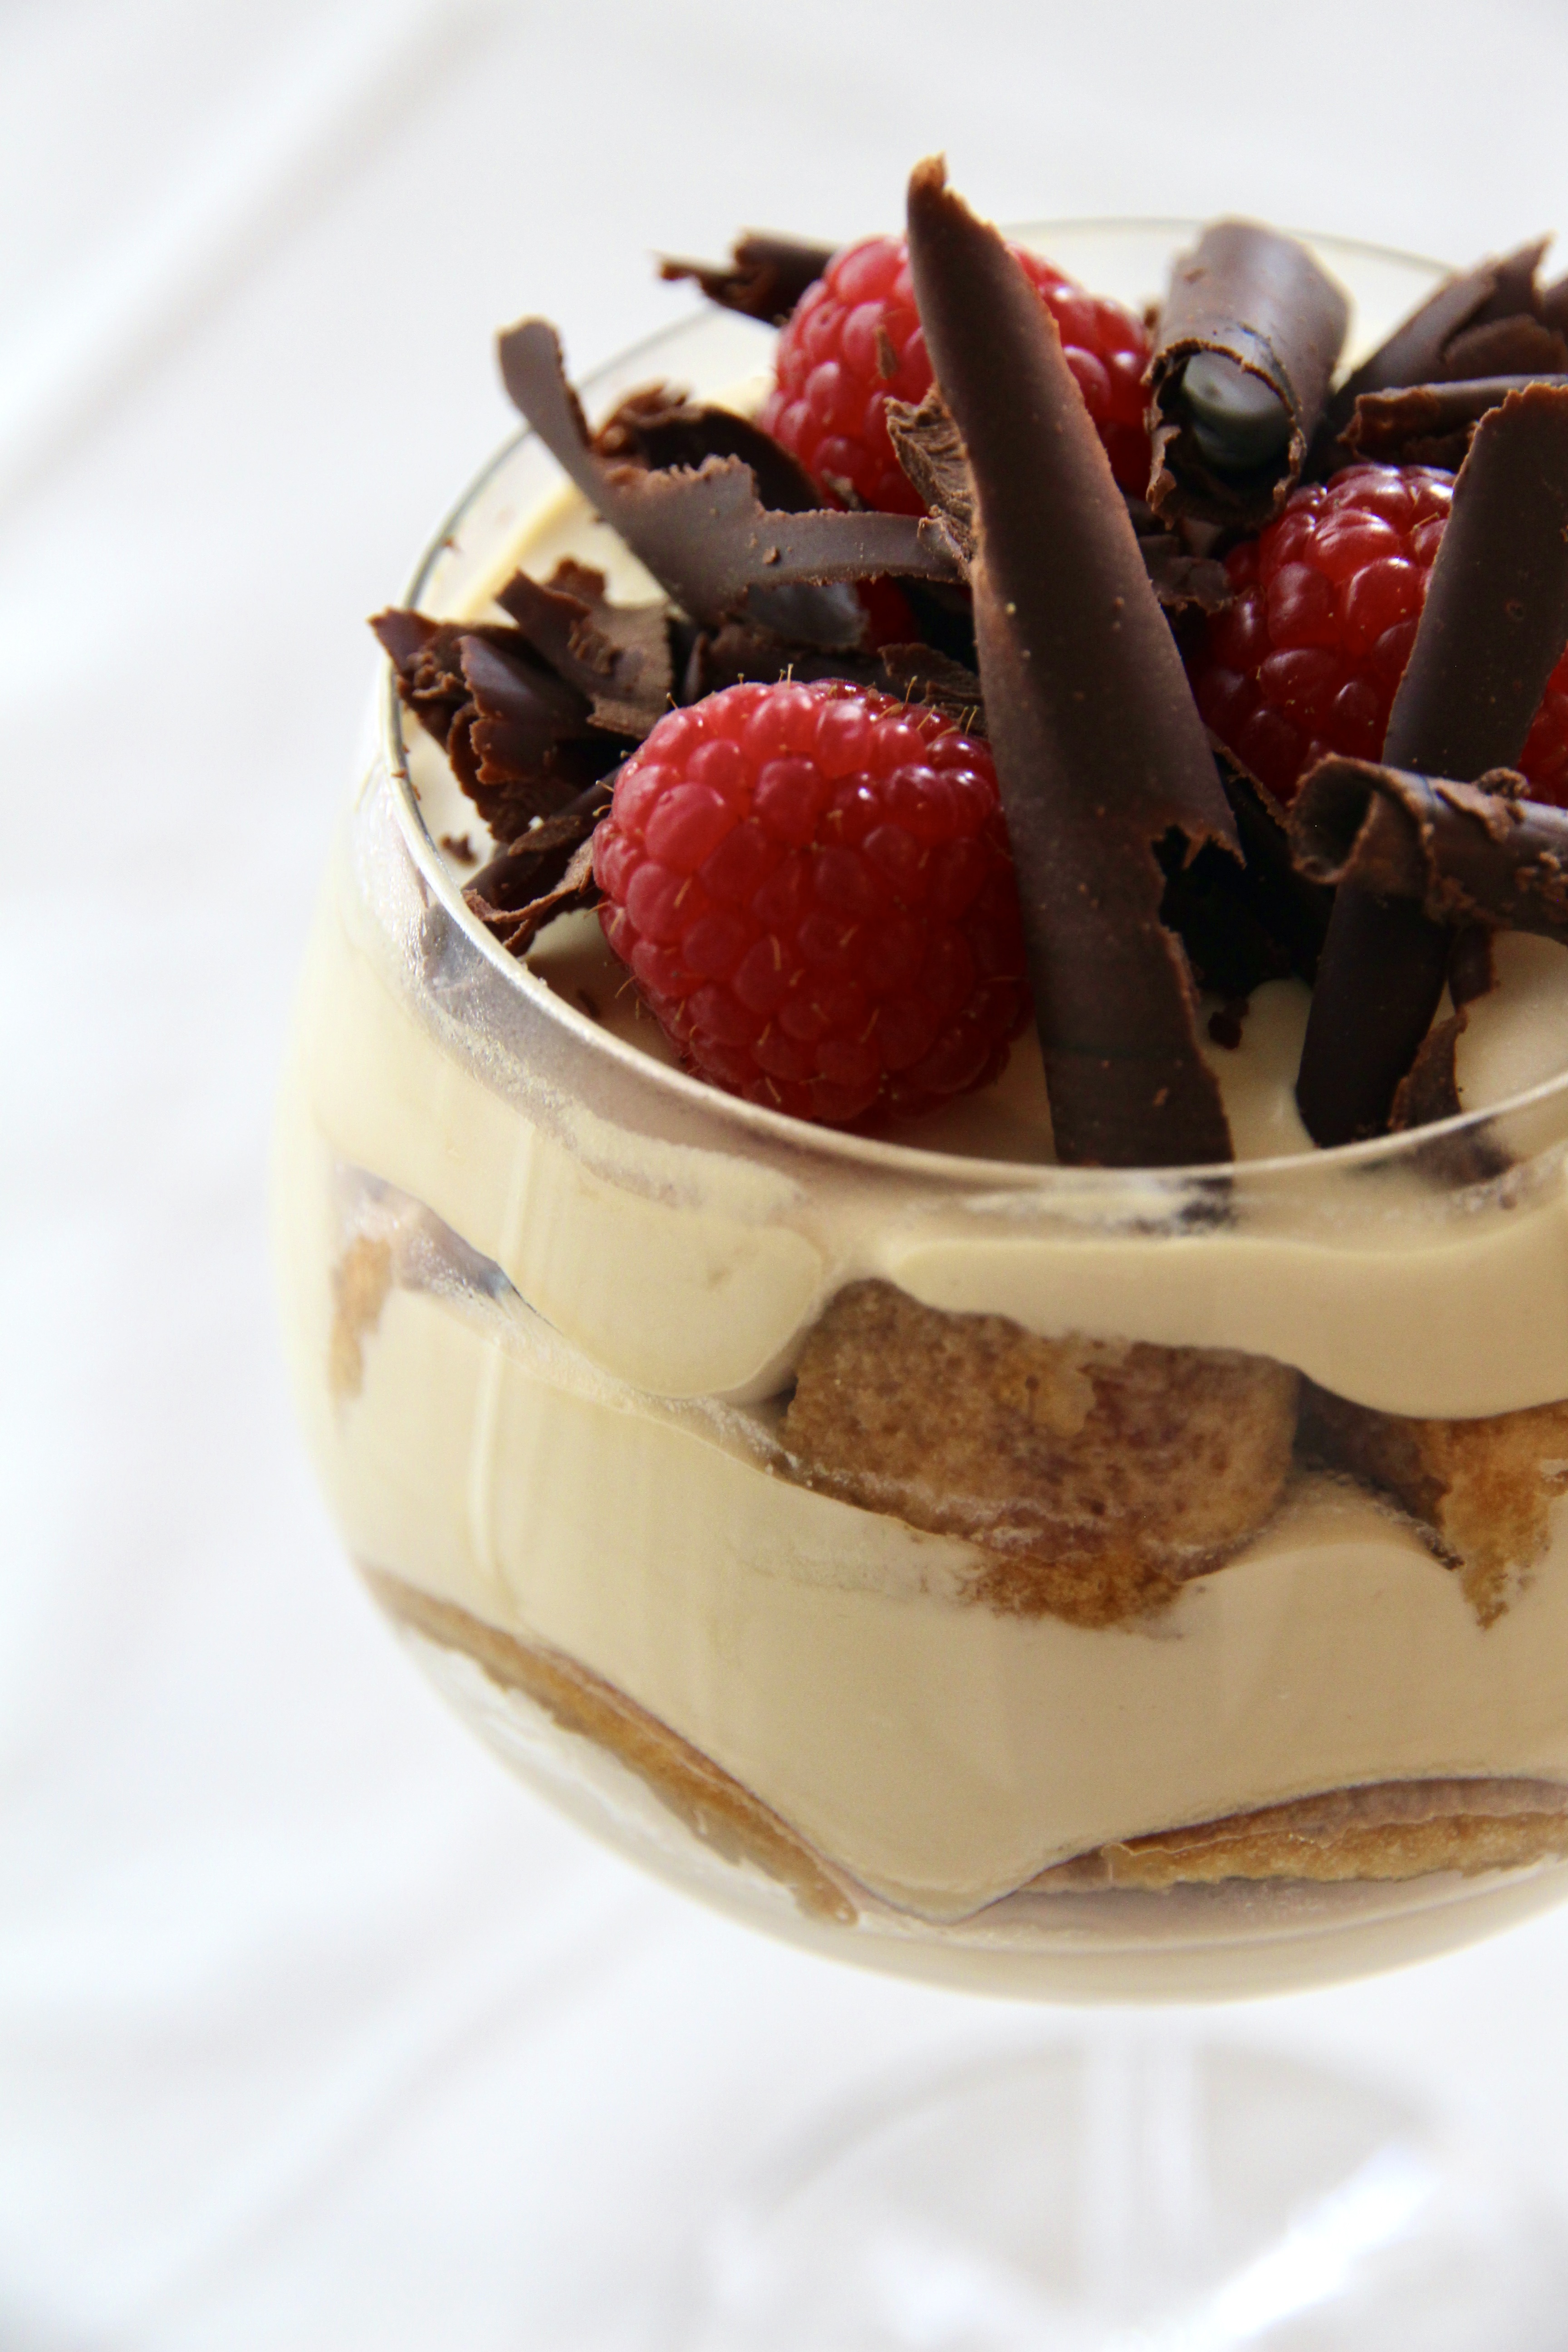
This ice cream is easy, light and utterly delicious. It is quite sweet, more like a Vietnamese iced coffee than a traditional coffee, but works beautifully with the tartness of raspberries. I’ve chosen to serve mine in individual glasses here, but it works well as one large ice cream cut into slabs too – I’ve included the instructions for both.
Start this recipe at least 7 hours ahead of serving.
Ingredients (serves 6) 2 tablespoons instant coffee (I use decaf) ⅓ cup boiling water 2 tablespoons Tia Maria (or equivalent coffee liqueur) 400g can skim condensed milk 550ml cream ¼ cup milk 1 x 300g packet sponge finger biscuits Raspberries & dark chocolate curls or chocolate covered coffee beans (to decorate)
Method Combine coffee, water & Tia Maria and set aside until cool.
Combine condensed milk and cream in a large bowl and beat with an electric mixer until thickened. Beat in half of the coffee mixture.
To make 6 individual servings, prepare 6 medium sized glasses. Split the cream mixture equally into 3 bowls. Divide the first bowl’s worth of cream mixture evenly between the glasses.
Combine remaining coffee mixture with milk. Cut 6 sponge finger biscuits into halves and dip into this coffee mixture until evenly coated. Fit two half biscuits in a single layer into each glass. Cut approximately 2-3 additional biscuits into 5 small pieces and dip into the coffee mixture. Use to fill the gaps so you have a fairly full layer of biscuits.
Evenly divide the second bowl of cream mixture between the glasses. Repeat the previous sponge finger process.
Finally, top each glass with an even share of the remaining cream mixture. Freeze until set.
Serve with raspberries and chocolate curls.
To make one large ice cream, line a 20cm square cake pan with aluminium foil. Spoon half of the cream mixture into the tray.
Combine remaining coffee mixture with milk. Dip 12 sponge finger biscuits into this coffee mixture until evenly coated. Place in a single layer on top of the ice-cream mixture in the tray (you may need to cut some sponge fingers to make it fit).
Top the sponge finger biscuits with the remaining cream mixture and freeze until set.
To serve, cut into rectangular slices and serve with raspberries and chocolate covered coffee beans.
Only 12 days until Christmas!! I LOVE Christmas time (and I mean LOVE) and have been madly baking and decorating along to Christmas tunes ready for the big day. I have also been joined by a little puppy, Bailey, who has made baking more of a challenge but has by no means curbed my enthusiasm for it.
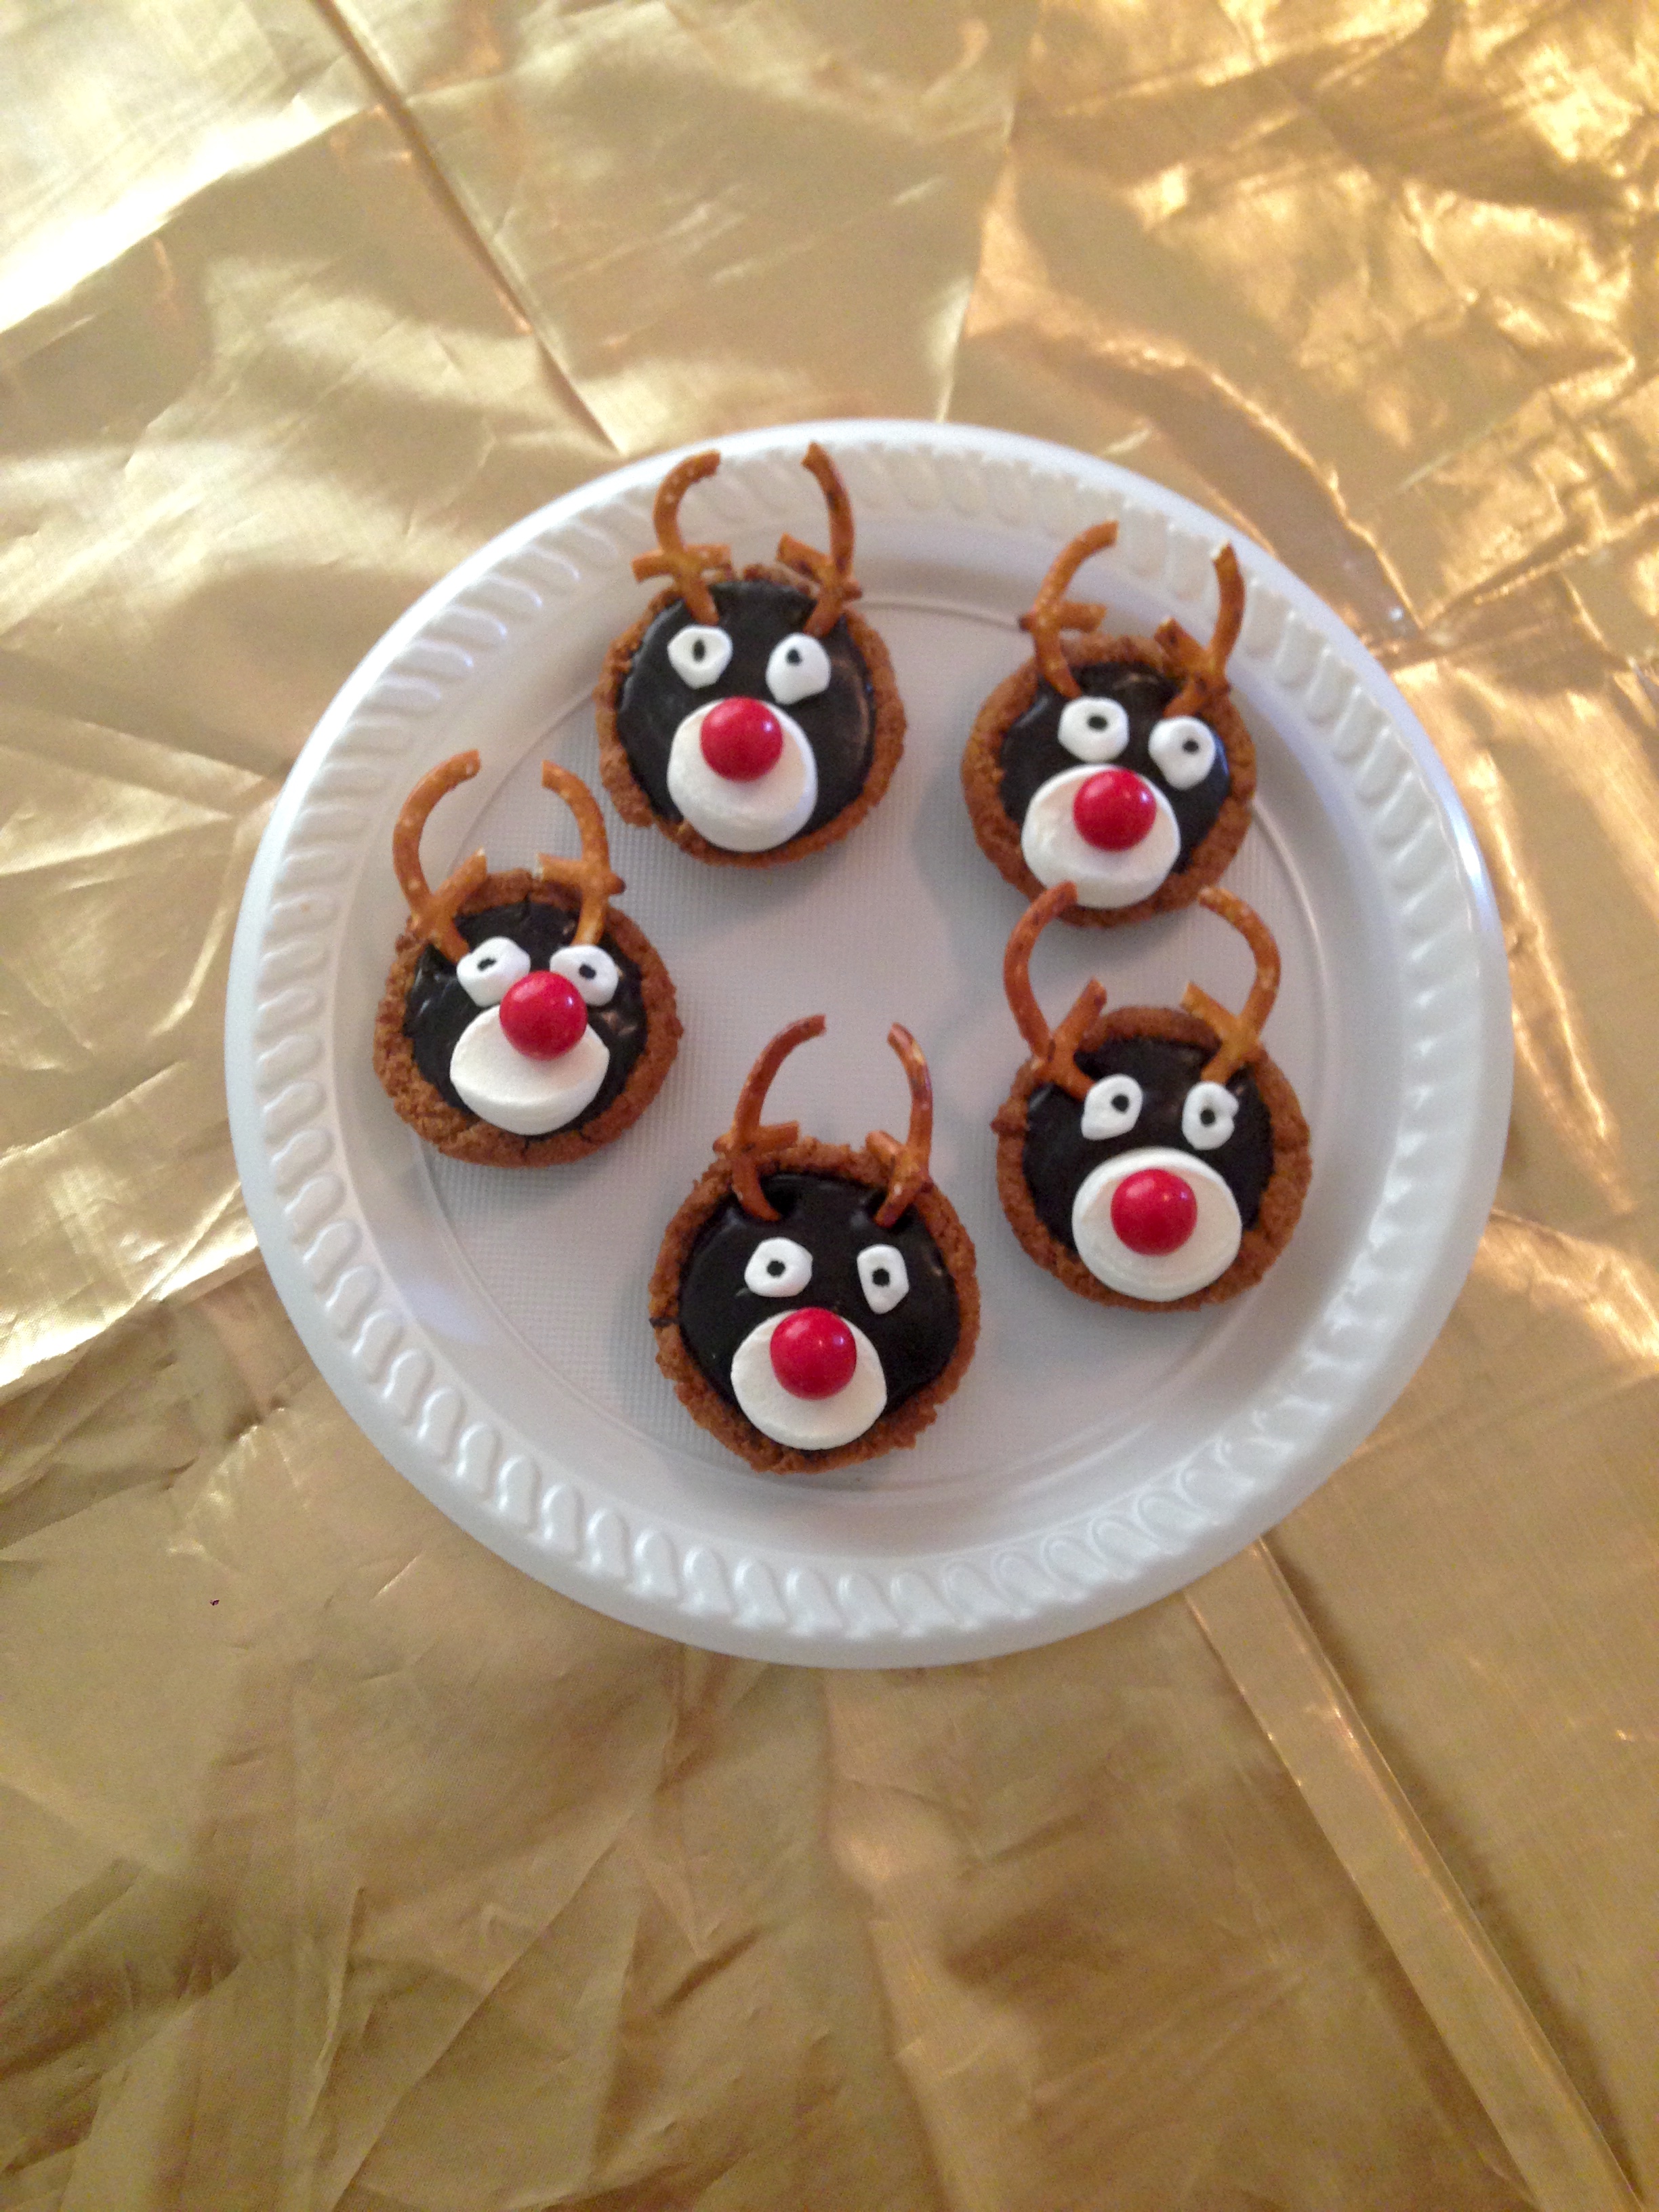
These adorable reindeer tartlets are delicious and so easy to make – a perfect recipe to involve the kids in and to take to the multitude of Christmas functions where you need to ‘bring a plate’. If you don’t want all the reindeer to be Rudolphs, feel free to swap the jaffas for brown m&ms 🙂
Ingredients (makes 20) 1 packet Butternut Snap Biscuits (or equivalent)
65g butter, chopped
⅓ cup cream
200g dark chocolate melts
Approximately 10 white marshmallows, halved
20 jaffas or equivalent red lollies
20 white mini marshmallows, halved
Chocolate writing icing (or black icing pen, or additional melted chocolate applied with a toothpick)
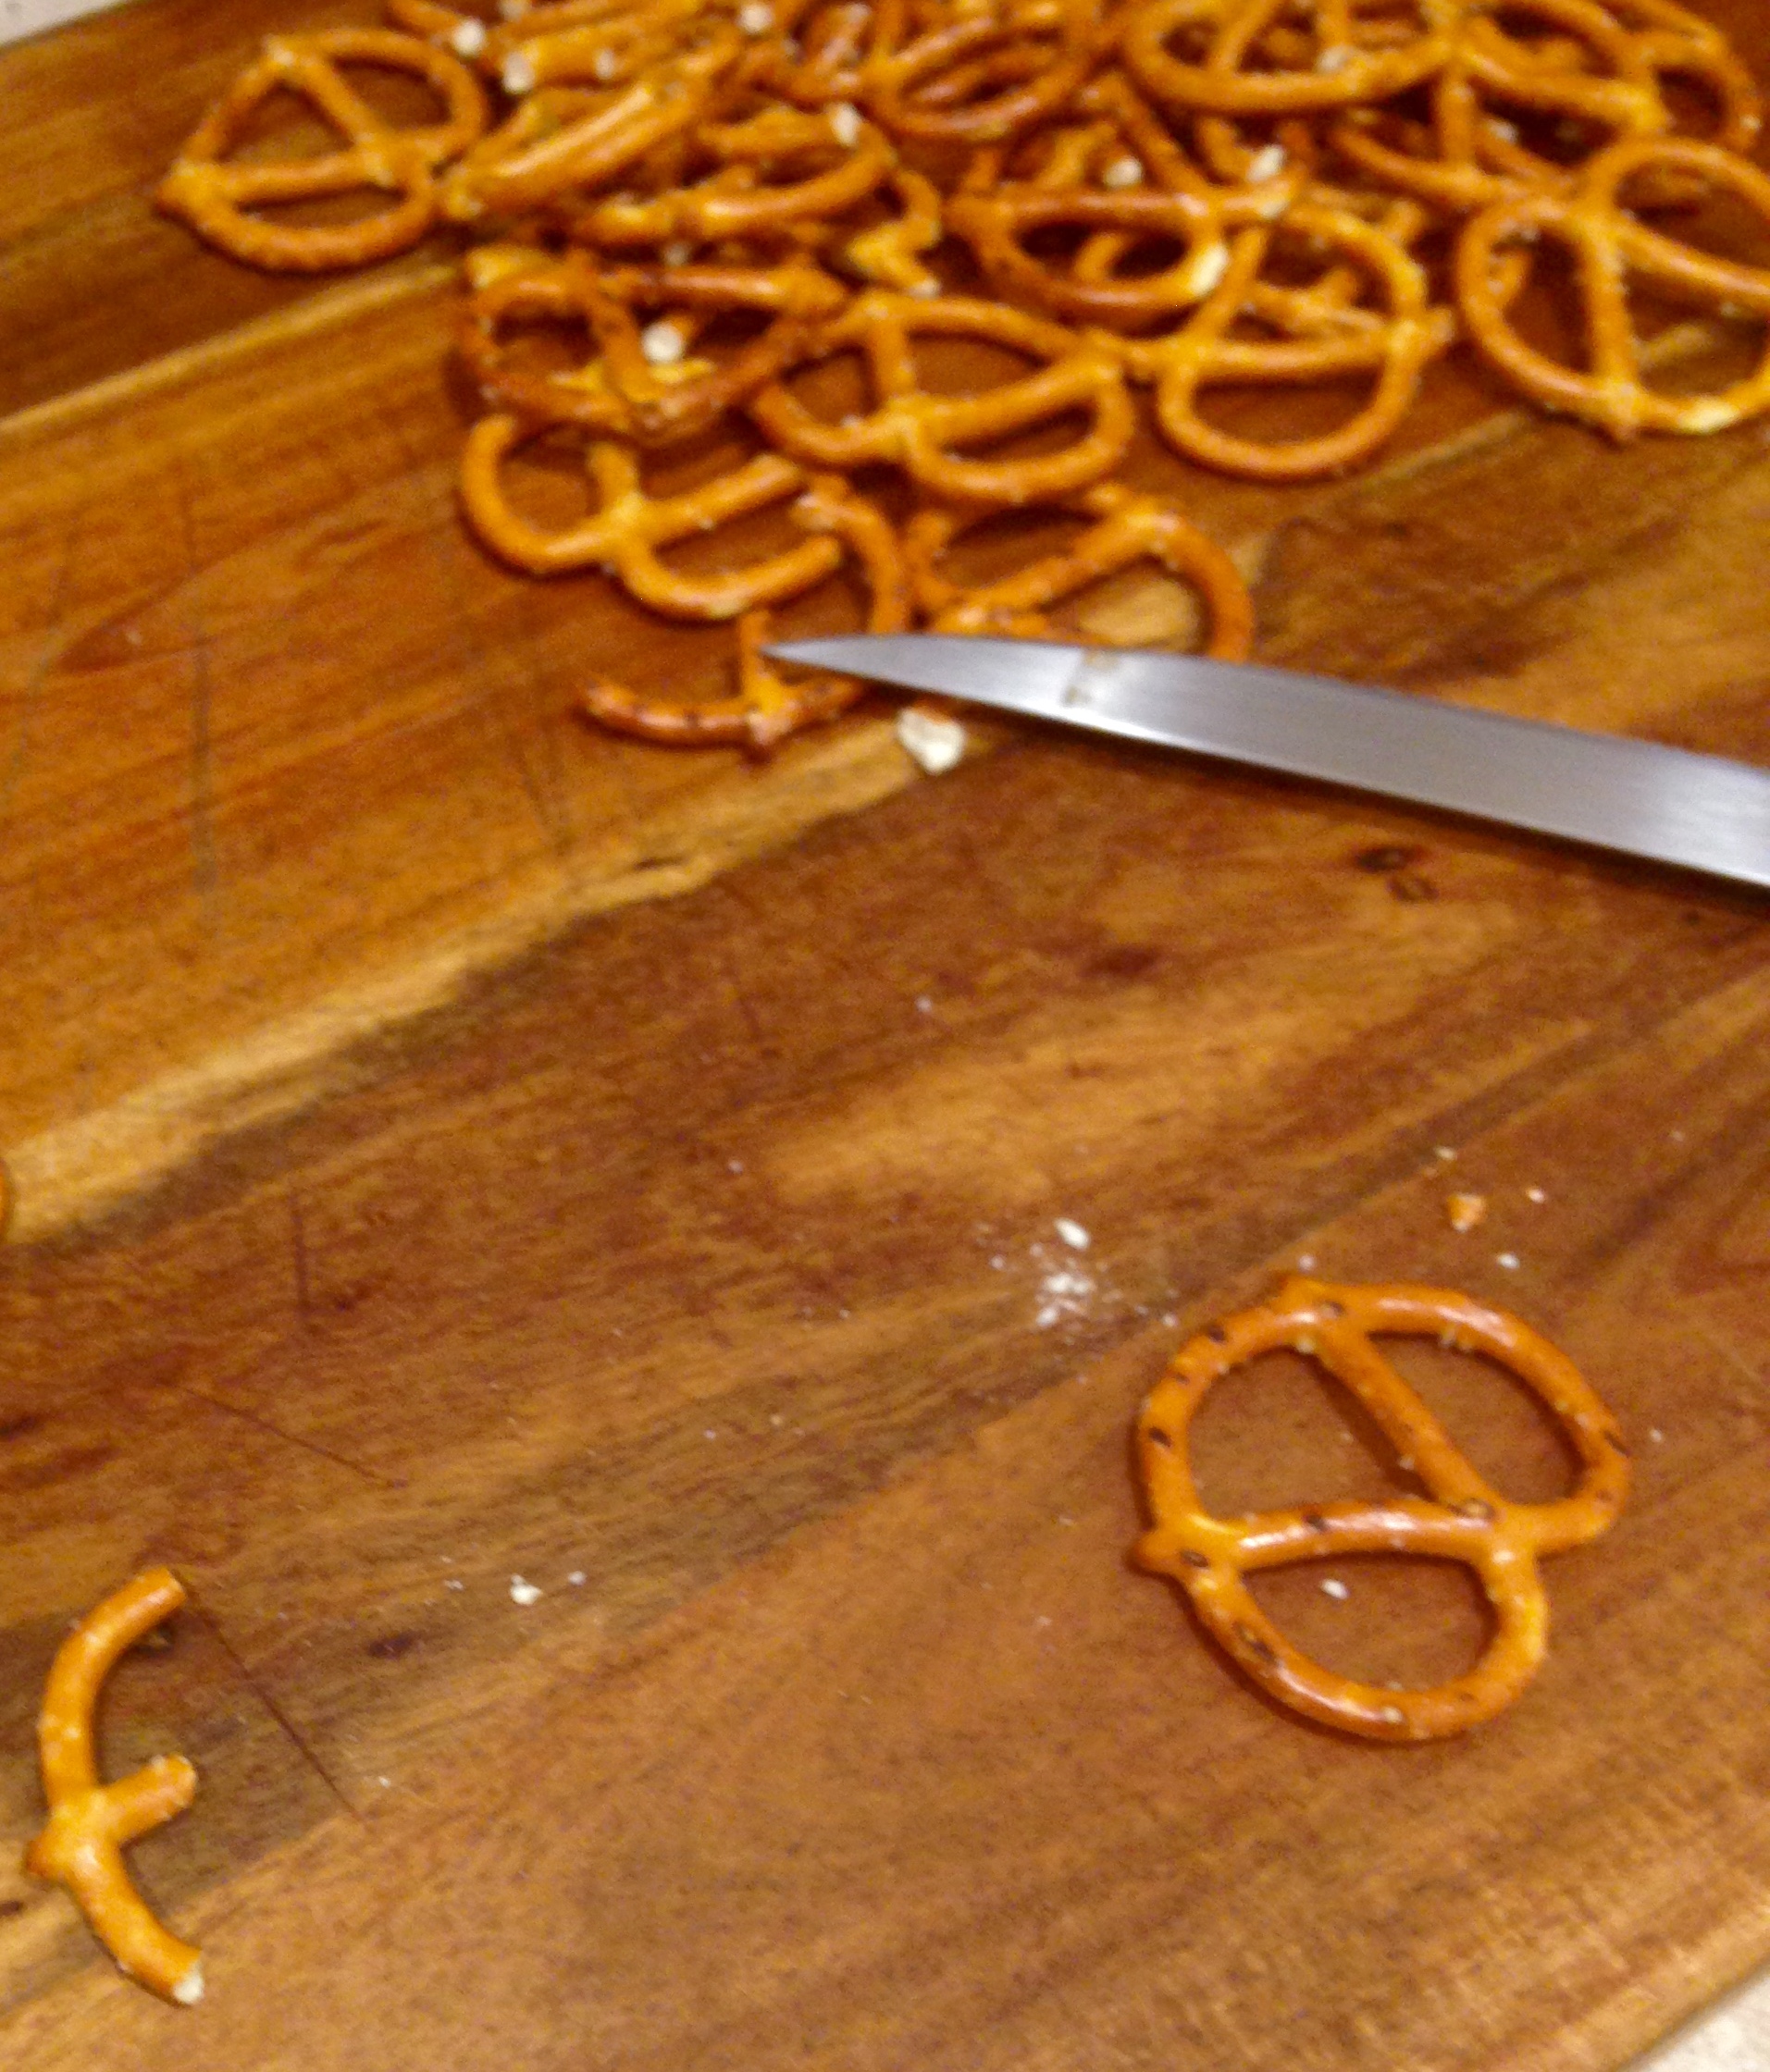
1 packet of pretzels
Method Preheat oven to 160°C fan-forced. Place 1 biscuit per hole in a 12-hole, round-based tartlet tin. Bake for 2-3 minutes or until soft. Remove from oven. Carefully press softened biscuits into tin to mould into a cup shape (use a spoon to make it easier if you like). Allow to cool slightly before transferring to a plate and repeating with remaining biscuits.
Heat butter, cream and chocolate in a saucepan over very low heat. Stir constantly for approximately 5 minutes or until melted and smooth. Pour into a clean, dry bowl and refrigerate for 20 minutes or until cool but not set.
Fill biscuit cases with 1 heaped teaspoon of chocolate mixture. Refrigerate until set.
While the ganache is setting, carefully cut pretzels in half and trim so it looks like a lower case ‘f’ for the antlers (I seem to break as many as I successfully cut so that’s why I recommend allowing a full packet!!)
Gently press 1 marshmallow half, sticky side up into each tartlet.
Attach 1 jaffa to each marshmallow.
Attach 2 mini marshmallow halves above nose, cut-side up, to form eyes. Use an icing pen/or a spot of chocolate ganache applied with a toothpick to create the pupils.
Place 2 pretzel pieces above eyes. Press to secure. Serve & enjoy!
Recipe adapted from Arnott’s ‘Chocolate Butternut Snap Tartlets’ recipe.