Figolli (Maltese Easter Biscuits)

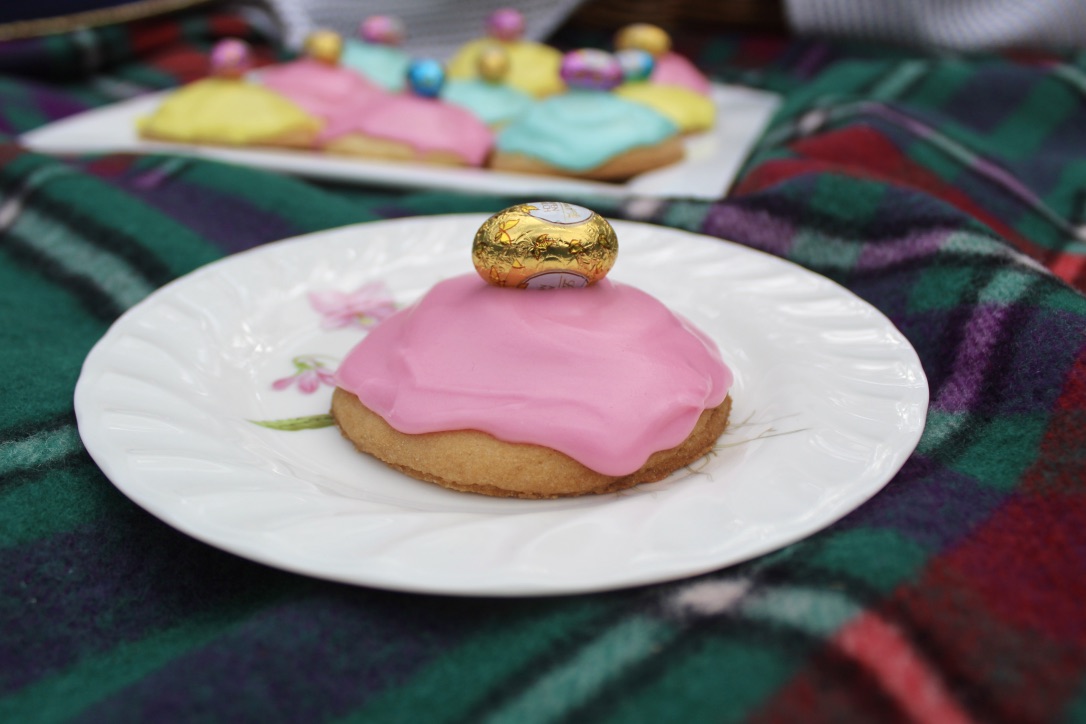
When my family lived in Canberra, our lovely friends would bring us some Figolli (traditional Maltese Easter biscuits) every Easter Sunday. As they were such a favourite with all of us, when we moved to Adelaide we decided that we couldn’t be without Figolli at Easter, and so we started making them ourselves.

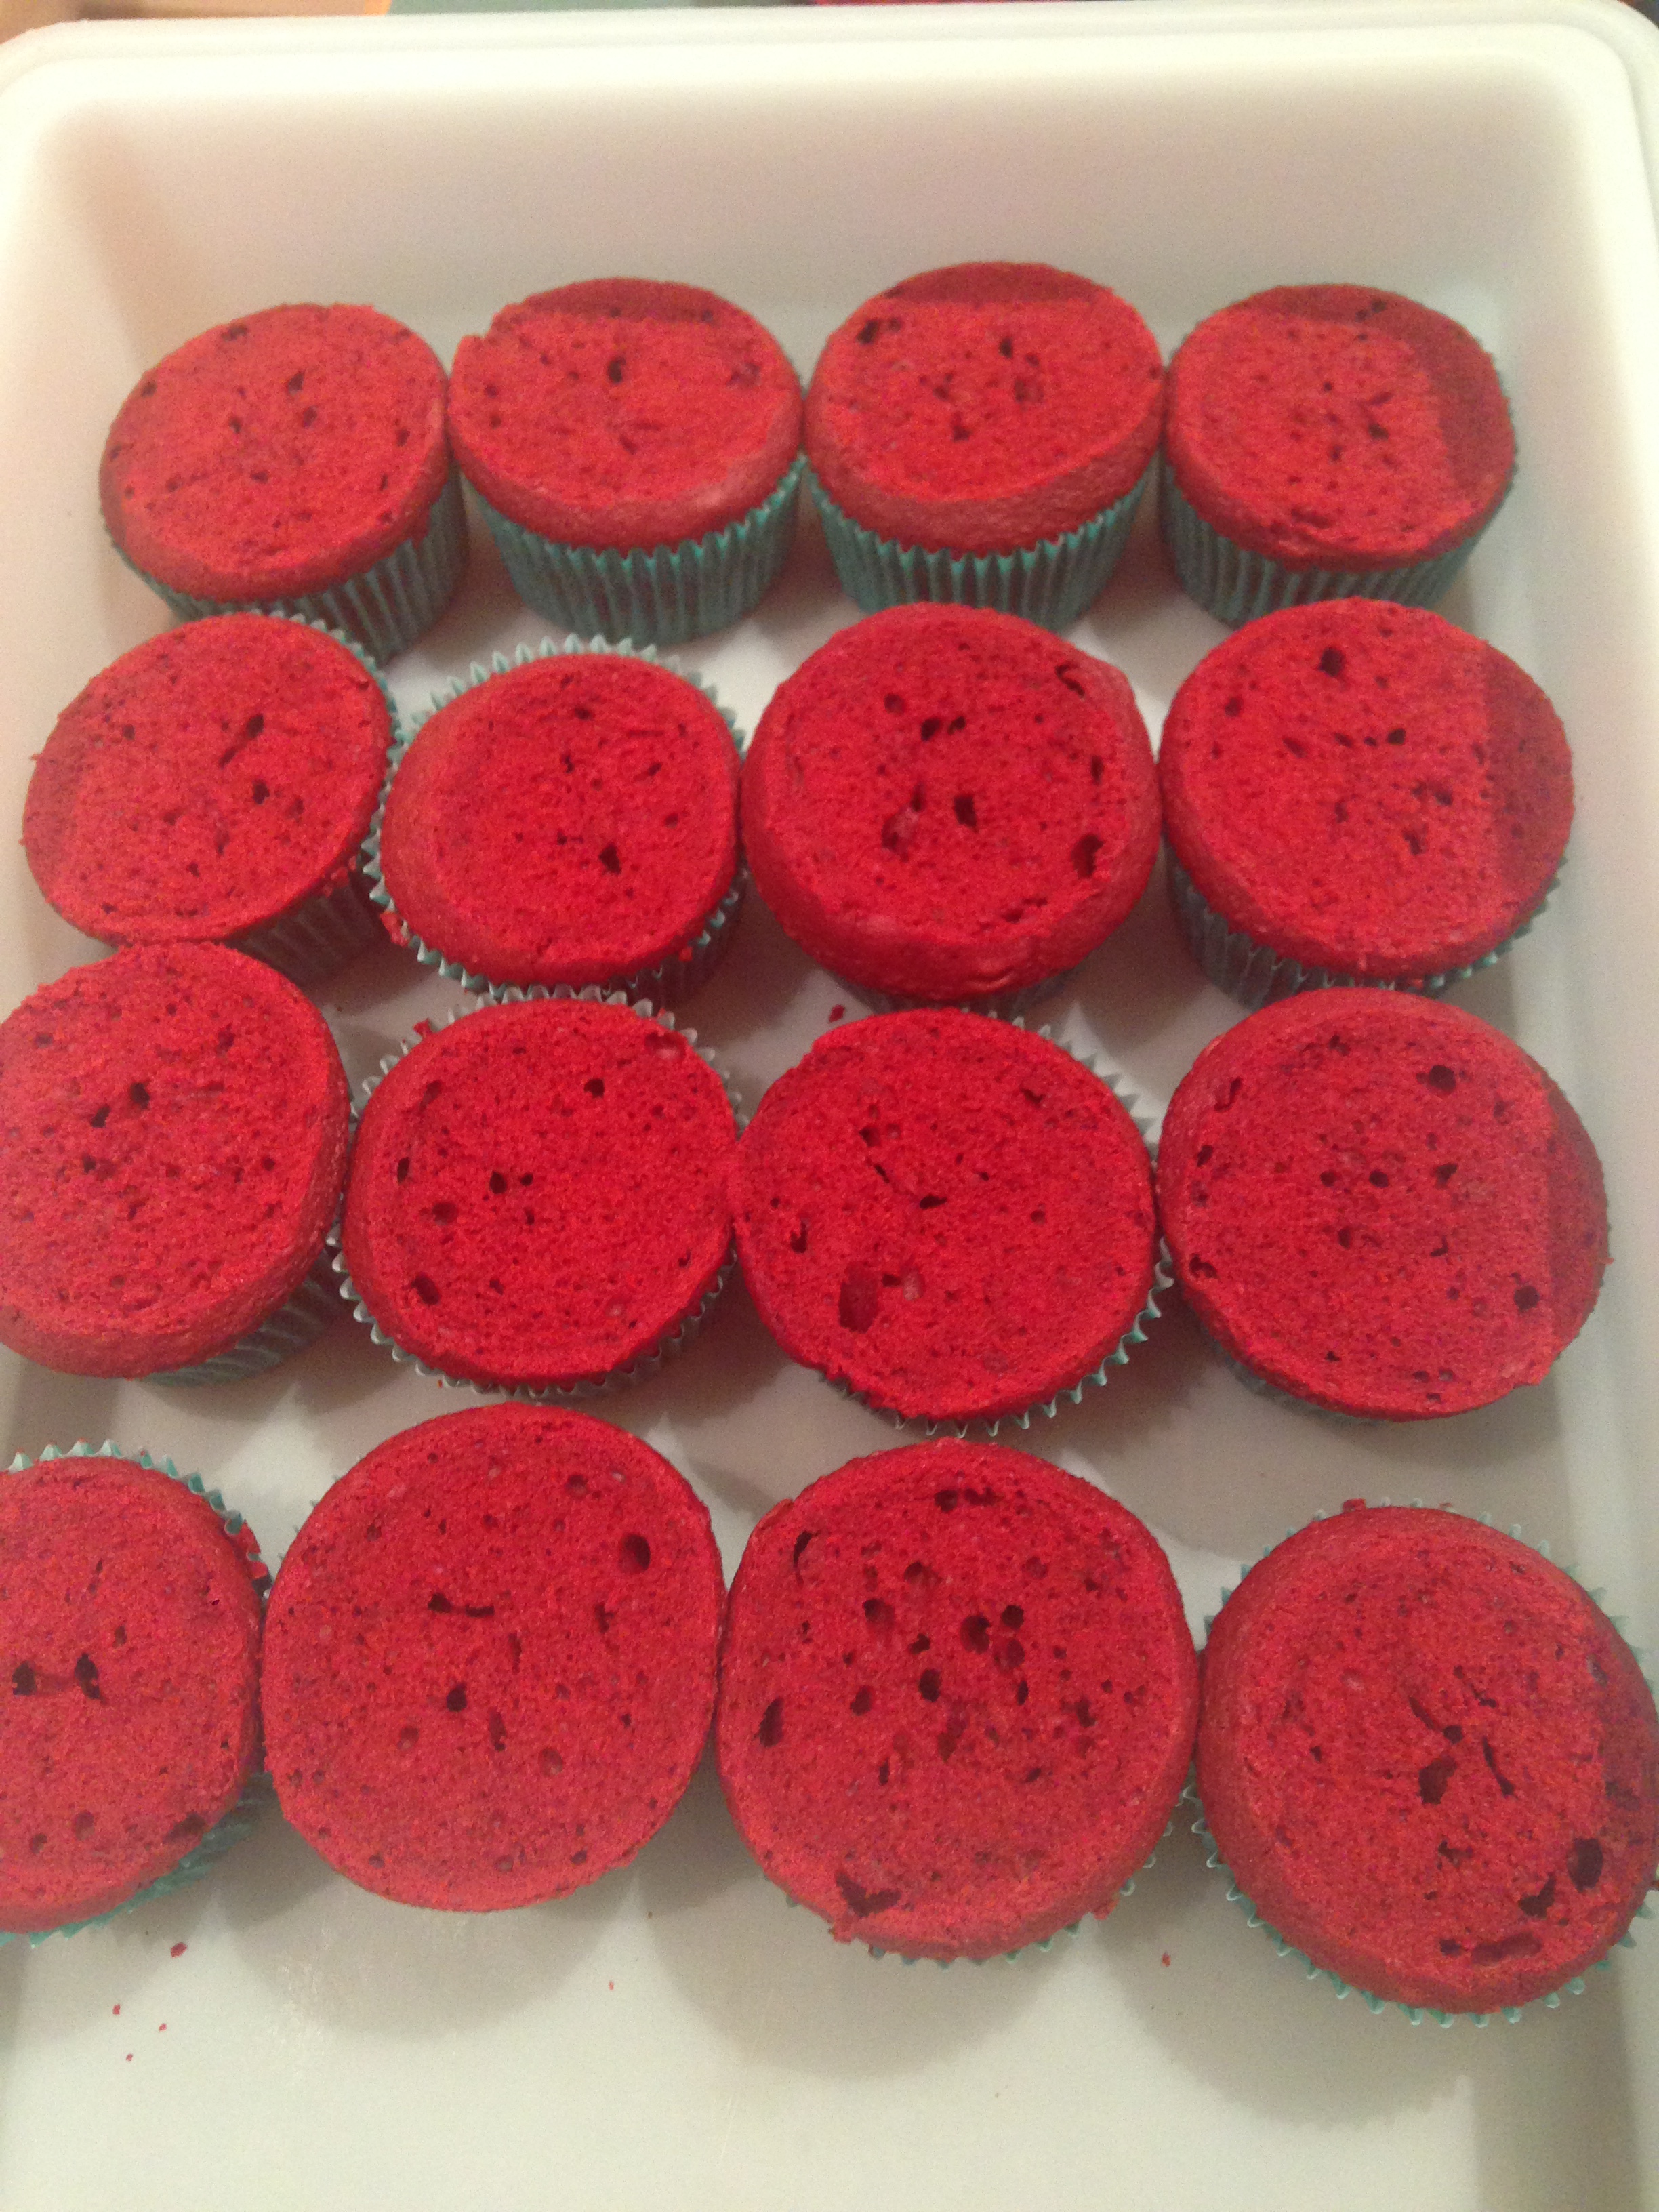
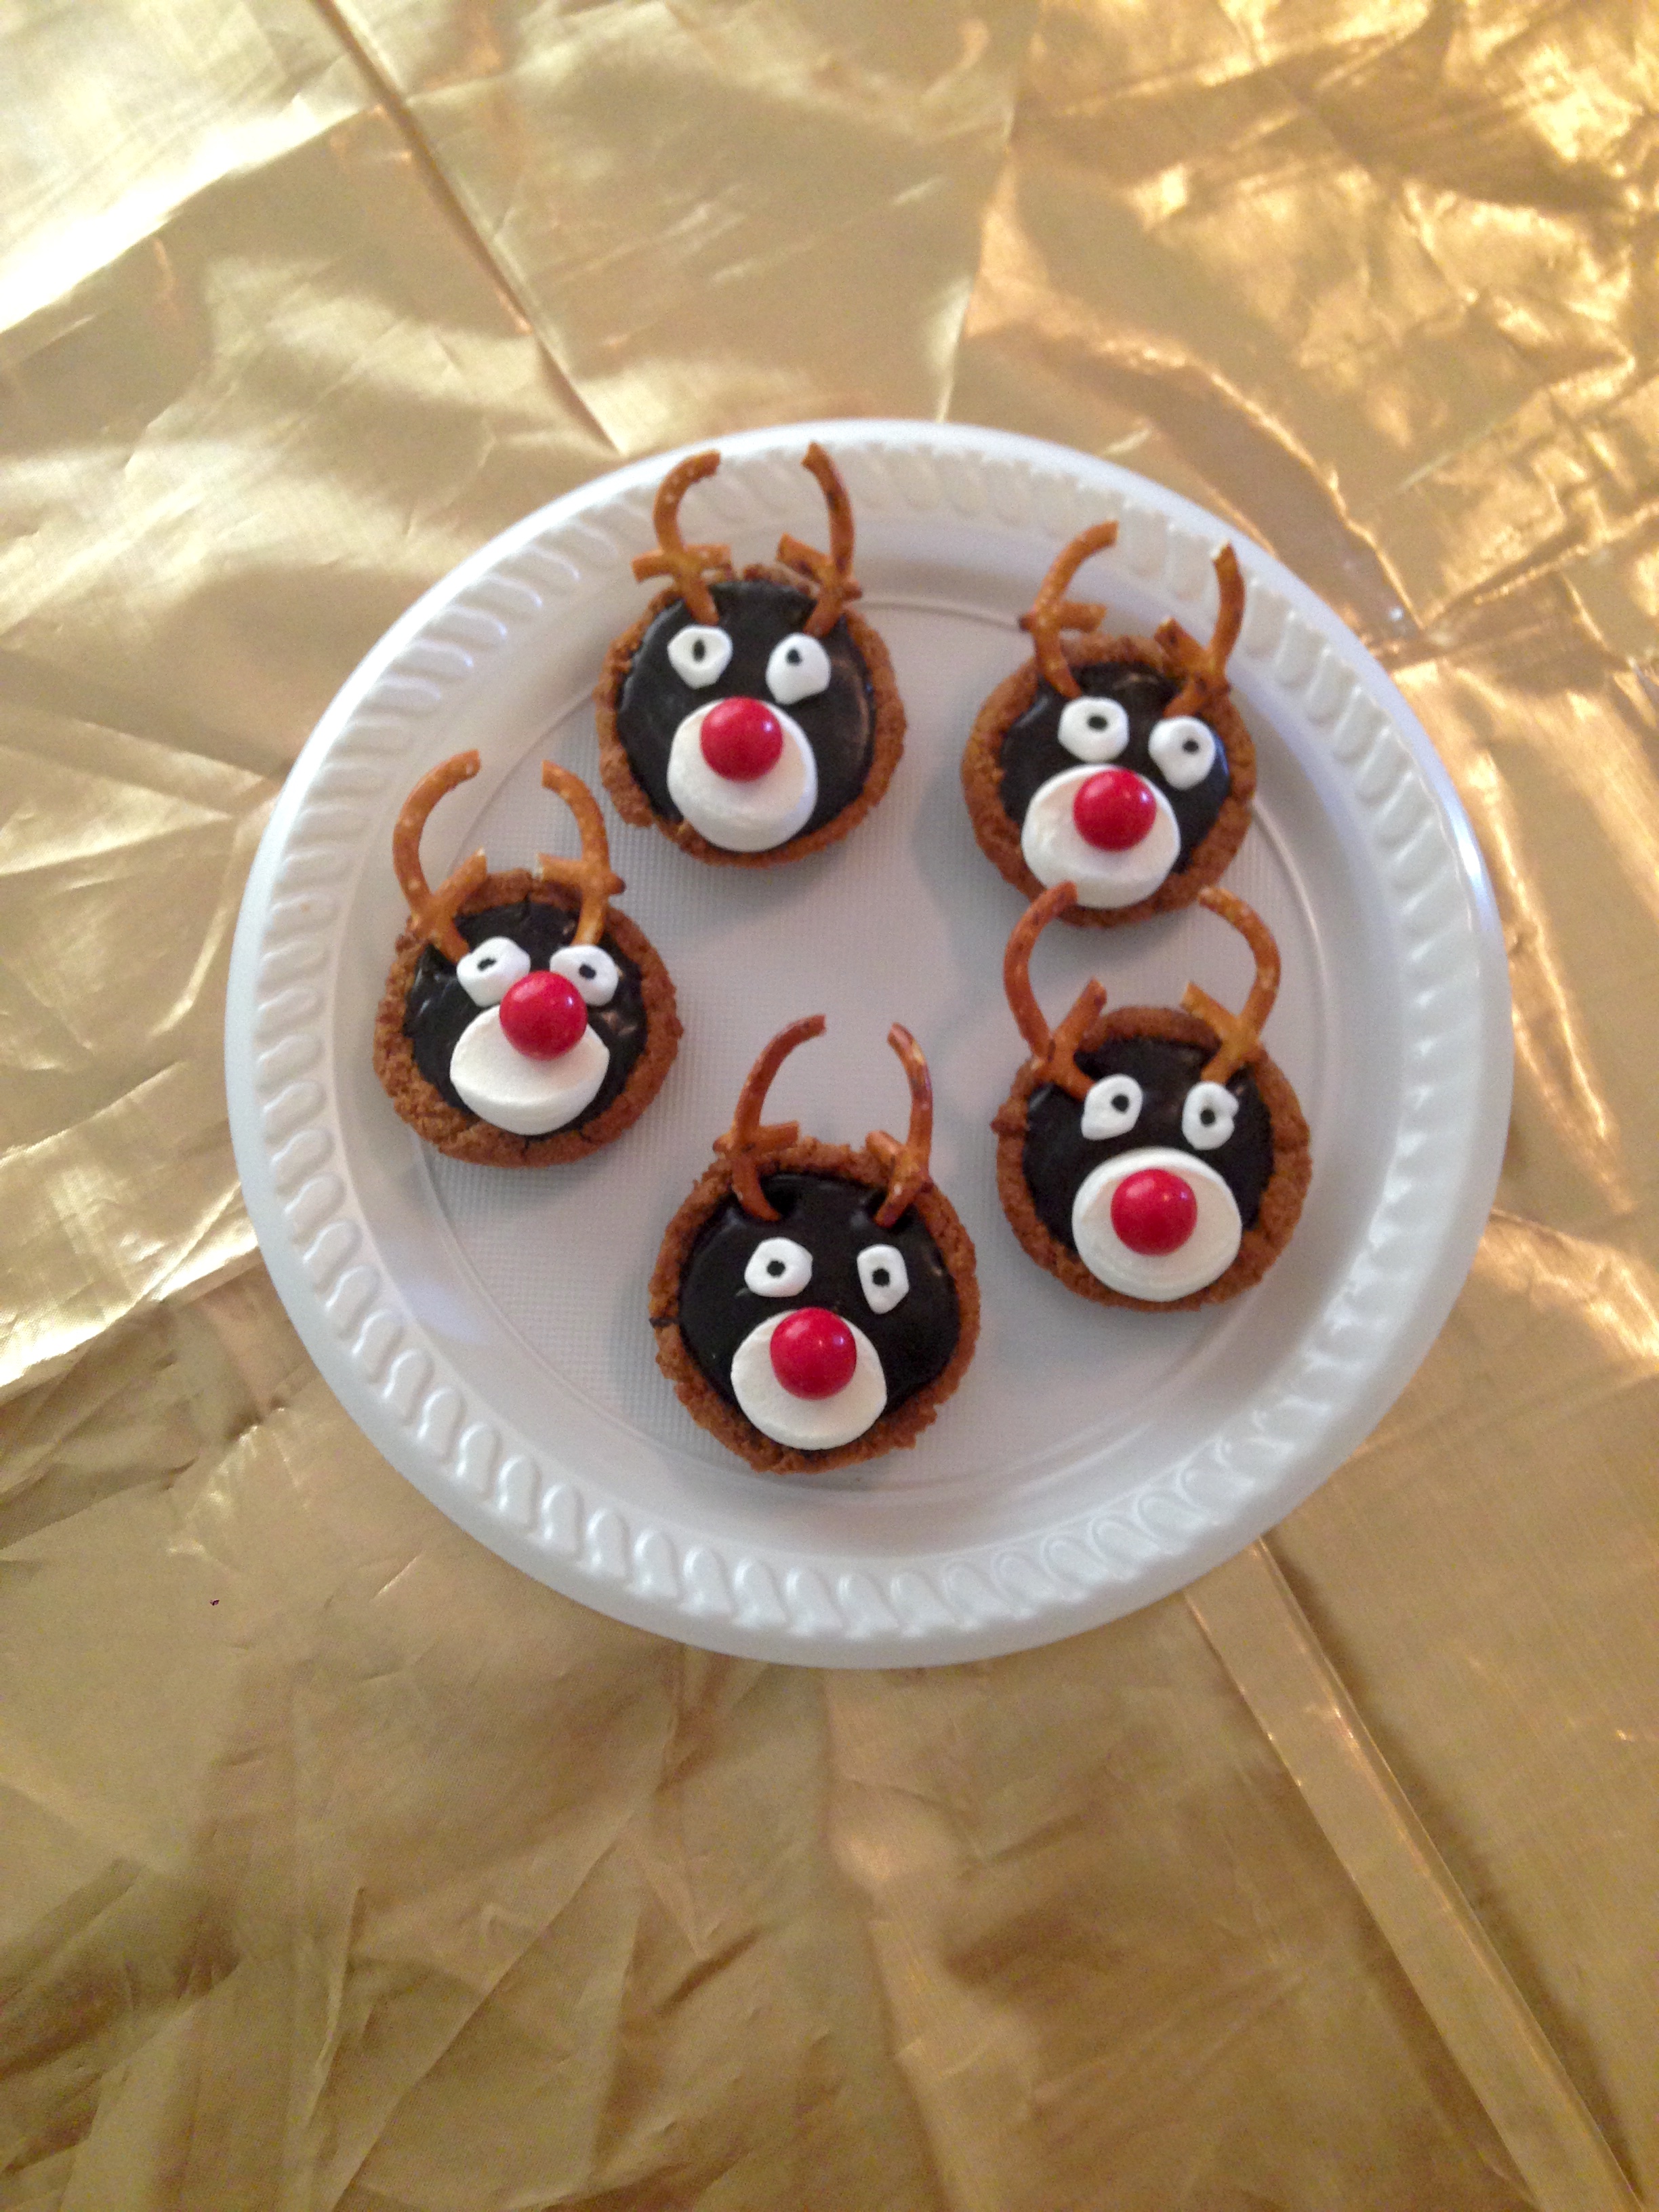
This has just been our third Easter in Adelaide and I’m pretty confident that we’ve perfected them by now – consistently getting a rich buttery biscuit outside and perfectly chewy almond-citrus filling. We tend to to make ours round (although by all means use any shape you like) and decorate them simply with pastel icing and topped with an Easter egg. Do yourself a favour and try them!

ON97+3tZRPe7d6dM2gB8eQ_thumb_2901

Ingredients (makes approx. 24)
Pastry
400g plain flour, sifted
175g caster sugar
200g butter
2 egg yolks
Grated rind of ½ a lemon

Filling
300g icing sugar, icing
300g ground almonds
2 egg whites
Grated rind of 1 lemon
2½ teaspoons orange blossom water

Icing
3 cups icing sugar
50g butter, softened
2 tablespoons milk
½ teaspoon vanilla extract
Food colouring

24 mini eggs or Easter eggs to decorate

wyHme7j4Qsye8nGn9Bo6Mw_thumb_28f8

Method
In a food processor, blitz flour, sugar & butter until it resembles fine breadcrumbs.

Add egg yolks, lemon zest & sufficient cold water to bring the dough together. Knead gently to form a smooth ball and then cover in cling film and refrigerate for 20mins.

Meanwhile, add the lemon zest, orange blossom water, egg whites & sugar to the ground almonds. Mix until combined.

Preheat oven to 180°C or 160°C fan-forced.

Roll pastry out to a 1-1½mm thickness on a lightly floured surface. Use a 7cm diameter round cutter to cut out 2 circles of pastry.

image1-3

Spread almond paste on one half and lay matching shapes on top, pressing the edges together.

image2-2

Repeat with remaining mixture. Bake on a tray lined with baking paper for approximately 20-30 mins or until golden brown.

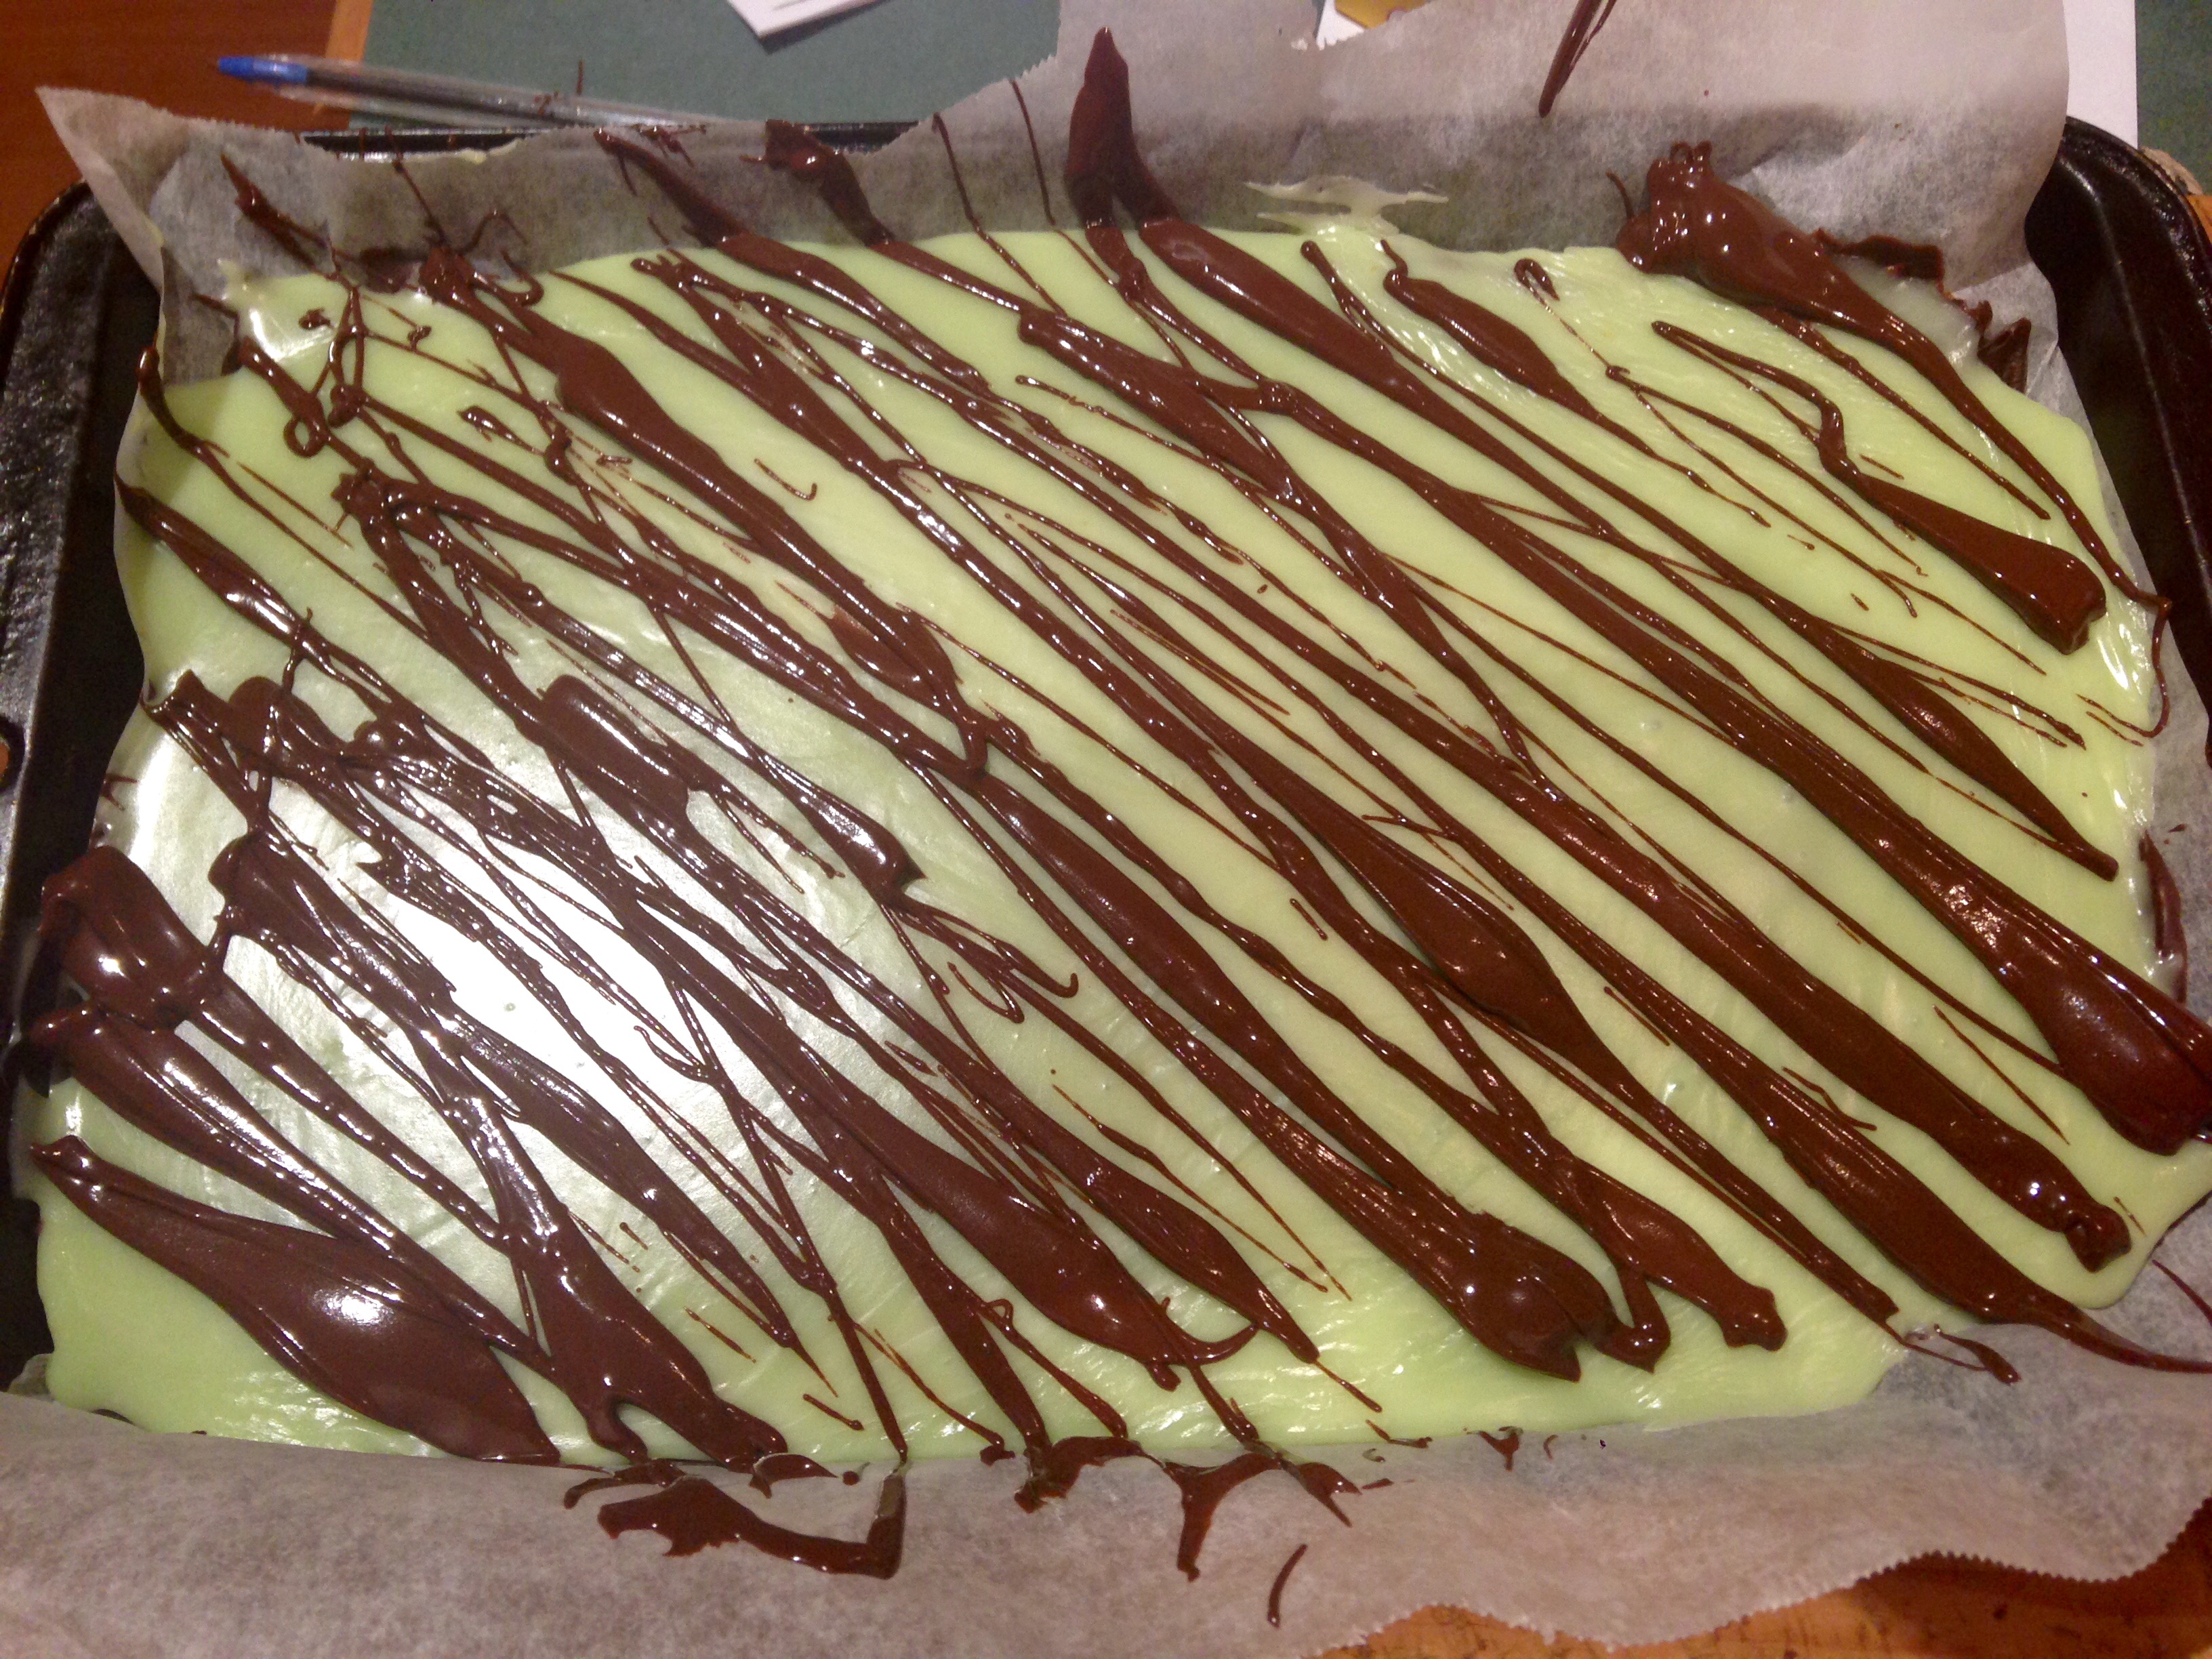
Make the icing by combining icing sugar, butter, milk and vanilla in a medium bowl with electric beaters. Add a touch of extra icing sugar or milk to reach desired consistency. Add a drop or two of food colouring. Set aside.

Allow biscuits to cool before decorating with icing & Easter eggs.

yl7ijVZiR6yuXhIukZDwWQ_thumb_28fd

Adapted from ‘The Food and Cookery of Malta’ (1999)

dfMv4W+jQtecrwPu2fE8wA_thumb_28ff

Key Lime Pie

Happy Pi Day everyone! And what an exciting one it is (3.14.15).
This pie is perfectly seasonal – being both a pie (for Pi day) and a fabulous shade of green which is appropriate for St. Patrick’s Day next week 🙂
It’s also very easy to make and a delicious way to take advantage of the abundance of limes we are lucky to have at this time of the year.

Ingredients (serves 8-10)
135g digestive biscuits, finely crushed
60g caster sugar
75g butter, softened
1x 400g can sweetened condensed milk
125ml fresh lime juice
2 teaspoons grated lime zest
2 eggs, separated
Green food colouring (optional)
300ml thickened cream

Method
Preheat oven to 170°C. In a shallow 20-23cm pie dish, press combined biscuit crumbs, sugar & butter into the base and up this sides, making a small rim.

In a medium bowl, whisk condensed milk with lime juice, zest and egg yolks until the mixture thickens. Add 1-2 drops of green food colouring.

In a small bowl with electric mixer on full power, beat egg whites to stiff peaks. Gently fold into lime mixture.

Pour lime filling into the biscuit crust and smooth the top.

Bake the pie for 15-20 mins or until lime filling is just firm.

Cool pie in this dish and then refrigerate until chilled, approximately 3 hours.

Whip cream in a small bowl until stiff peaks form. Pipe a border of cream around the edge of the pie and top with h lime wedges if desired. Enjoy!

Adapted from Mary Berry’s ‘Key lime Pie’ in Step By Step Desserts and Confections. 

Chocolate Mint Fudge

image2-3

St. Patrick’s Day is almost upon us and so I am all about the green in my baking at the moment! This fudge is super quick and easy – taking only a few minutes cooking time from start to finish. I love this fudge as it isn’t too sweet (the major issue I have with most fudge), and I’m a sucker for the mint/choc combination.

Feel free to omit the chocolate drizzle on top if you wish, and if you prefer a marbled finish you can make the 2 fudge layers at the same time, and swirl them together in the tray instead of layering them.

Ingredients
1 ½ cups dark chocolate melts
400ml can sweetened condensed milk
1 ½ cups white chocolate melts
Green food colouring
Peppermint essence
Approx. ½ cup dark chocolate melts (melted) to drizzle on top

Method
Line a rectangular baking tray with baking paper (a small tray will give you fewer pieces of thick fudge, larger will give you more pieces of thinner fudge – it’s up to you!).
In a small saucepan over a low heat, melt the dark chocolate melts with half of the condensed milk, stirring occasionally.

Spread evenly into the pan and chill in the fridge.

While the chocolate layer is chilling, melt the white chocolate and remaining condensed milk on the stovetop on a low heat.

Add peppermint extract to taste (I used 1 teaspoon) and a drop or two of green food colouring.

Spread evenly over chilled chocolate layer.

Put in the fridge to set.

After approximately 10 minutes in the fridge, melt the remaining dark chocolate melts and drizzle over the fudge.

Leave in the fridge until set and then cut into small squares. Enjoy!

image2

Note: can be stored in an airtight container in the fridge for up to a fortnight.

image1-4

Adapted from ‘Choc Mint Fudge’ on Grab Your Spork.com.

Giant Vanilla Cupcake

I haven’t made a giant cupcake for about 18 months but I’m so glad I found my giant cupcake cases again because they’re so much fun to make (and eat!) They’re also really easily adaptable as you can make them any flavour you like and decorate them in a million different ways. This time I’ve used buttercream roses but you could ice it as simply (or complexly) as you like – there’s a link to my fondant ‘soft serve’ icing instructions at the bottom of the page.image1-16

Ingredients (serves 10-12):
Cake
375g butter, softened
375g caster sugar
6 eggs
1 tablespoon vanilla extract
375g self-raising flour
3 tablespoons milk

Cupcake Case
375g white chocolate melts or Wilton candy melts

Buttercream icing
250g butter, softened
800g icing sugar
1 ½ tablespoons vanilla extract
4 tablespoons of milk
Food colouring

image1-17

Method
Spray silicone giant cupcake pan liberally with canola oil and preheat oven to 160°C fan-forced.

Cream together butter and sugar with an electric mixer until light and fluffy. Add in vanilla and then eggs, one at a time, ensuring that each egg is fully incorporated before adding the next. Add in half of the flour followed by two tablespoons of the milk, and then add remaining flour and milk. Mix until just combined.

Fill the giant cupcake pans, starting with the cupcake top. Fill until approximately 2cm shy of the top of the pan. Then fill the bottom pan with the remaining batter.

Bake in the oven for between 40-70 minutes, checking regularly. Note: the cupcake top will bake faster than the bottom so take it out before the bottom is done. The cake is ready when a skewer inserted into the middle of the cake comes out clean.

Leave cakes in their pans for at least 20 minutes before gently peeling the silicone off and allowing the cakes to cool completely on a cooling rack.

jan-proj3-041-Copy
Image credit: The Pink Whisk

While the cakes are cooling, wash and dry the bottom cupcake pan ready to make the cupcake case. Melt half the chocolate/candy melts and pour into the bottom cupcake pan. Spread evenly up the sides using a pastry brush. Refrigerate for 20 minutes and then repeat with the remaining melts. Refrigerate for 30 minutes and then gently peel off the silicone mould.

tumblr_inline_mmyiwlTG1X1qz4rgp
Image credit: She Who Bakes

tumblr_inline_mmyixnTdp41qz4rgp
Image credit: She Who Bakes

tumblr_inline_mmyj0njISG1qz4rgp
Image credit: She Who Bakes

Using a serrated bread knife, trim around bottom cake so all crunchy edges are removed. Level top (of base) and then cut base in half. Cut off bottom layer off top piece. Level base (of top).

Make buttercream by beating all ingredients but the food colouring until light and fluffy. Set half aside for the crumb coat, and then add the food colouring to the remaining buttercream.

Put a 1cm thick coating of the uncoloured buttercream between 2 bottom layers of cake and then between the base and top (ensure level – cut if necessary). Then put a thin layer of buttercream on the inside of the chocolate case and gently ease cake into it. Cover top of cake liberally with buttercream to form a protective barrier against crumbs.

image1.PNG-2

Put the coloured buttercream into a piping bag fitted with a Wilton 2D nozzle (to make roses) or equivalent, and pipe icing in a rose swirl pattern, starting from the bottom of the cake and working your way up.

Decorate with icing flowers, sprinkles, silver cachous, glitter… basically whatever you like!

image2-15

Alternatively, if you’d prefer a soft-serve, fondant look. Halve the buttercream recipe to only make the crumb coat & then follow these directions: https://bakerholicsanonymous.wordpress.com/recipes-2/cakes/giant-cupcake/

Recipe adapted from ‘Vanilla Giant Cupcake Recipe’ by The Pink Whisk

Tiramisu Ice Cream

This ice cream is easy, light and utterly delicious. It is quite sweet, more like a Vietnamese iced coffee than a traditional coffee, but works beautifully with the tartness of raspberries. I’ve chosen to serve mine in individual glasses here, but it works well as one large ice cream cut into slabs too – I’ve included the instructions for both.

Start this recipe at least 7 hours ahead of serving.

Ingredients (serves 6)
2 tablespoons instant coffee (I use decaf)
⅓ cup boiling water
2 tablespoons Tia Maria (or equivalent coffee liqueur)
400g can skim condensed milk
550ml cream
¼ cup milk
1 x 300g packet sponge finger biscuits
Raspberries & dark chocolate curls or chocolate covered coffee beans (to decorate)

Method
Combine coffee, water & Tia Maria and set aside until cool.

Combine condensed milk and cream in a large bowl and beat with an electric mixer until thickened. Beat in half of the coffee mixture.

To make 6 individual servings, prepare 6 medium sized glasses. Split the cream mixture equally into 3 bowls. Divide the first bowl’s worth of cream mixture evenly between the glasses.

Combine remaining coffee mixture with milk. Cut 6 sponge finger biscuits into halves and dip into this coffee mixture until evenly coated. Fit two half biscuits in a single layer into each glass. Cut approximately 2-3 additional biscuits into 5 small pieces and dip into the coffee mixture. Use to fill the gaps so you have a fairly full layer of biscuits.

Evenly divide the second bowl of cream mixture between the glasses. Repeat the previous sponge finger process.

Finally, top each glass with an even share of the remaining cream mixture. Freeze until set.

Serve with raspberries and chocolate curls.

To make one large ice cream, line a 20cm square cake pan with aluminium foil. Spoon half of the cream mixture into the tray.

Combine remaining coffee mixture with milk. Dip 12 sponge finger biscuits into this coffee mixture until evenly coated. Place in a single layer on top of the ice-cream mixture in the tray (you may need to cut some sponge fingers to make it fit).

Top the sponge finger biscuits with the remaining cream mixture and freeze until set.

To serve, cut into rectangular slices and serve with raspberries and chocolate covered coffee beans.

Recipe adapted from Good Taste magazine.

Bûche de Noël (Chocolate Yule Log)

Happy Christmas Eve everyone! Today I’m sharing with you an incredibly easy yet delicious cheat’s version of the classic French Christmas dessert – Bûche de Noël.

For a traditional pudding-hater like myself, Christmas dessert has never brought much joy. Sure, you can smother your piece of pudding in custard (which I do) and that helps a bit, but somehow the fruity-boozy flavour that I hate so much still overpowers it. Anyway, fortunately I’m not the only pudding-hater in my family and so last year Mum made this Bûche de Noël (chocolate yule log) in addition to the pudding for dessert. This yule log is sweet (but not overly so) and very light – perfect for a hot summer’s day. It proved so popular last year that we’ll be making it again this year 🙂

December '13 - June '14 279

Ingredients (Serves up to 12)
1x 250g packet Arnott’s chocolate ripple biscuits (or equivalent)
600ml thickened cream
1 tspn caster sugar
1 tspn vanilla essence
20g cocoa powder
Grated chocolate, to decorate
Spearmint leave lollies, to decorate
Raspberries, to decorate

Method
Using an electric mix, mix cream, sugar and vanilla together until stiff.

Fold in the cocoa until combined.

Spread a small amount of the cream along a long, rectangular serving plate to make a base. Spread 1 biscuit with 1 ½ teaspoons of cream and then top with another biscuit. Top with another 1 ½ teaspoons of cream and then place biscuits on their side onto the cream base on the serving platter.

Repeat until all biscuits have been used, to form a log.

Spread remaining cream over entire log, reserving a small amount for the branch.

Cover loosely with foil and refrigerate for at least 6 hours to set.

Just before serving, cut cake diagonally about a quarter of the way in and use that piece as a branch off the main log.

Patch it up with the remaining cream so it looks attached.

Use a fork to make some lines along the branch to look natural and then sprinkle with grated chocolate.

Decorate with some raspberries and spearmint leaves and serve. Enjoy!

December '13 - June '14 279

Adapted from Arnott’s ‘Bake and Create’ Recipe booklet.

Red Velvet Christmas Cupcakes

image2-9

Wow! Only a week and a day until Christmas 🙂 It’s warming up around here which means that having the oven on and heating the house isn’t ideal and so I’ve had a couple of organised baking spells to try and minimise the amount of oven time.

I made these cupcakes yesterday for an afternoon tea with friends and they’re easy and delicious (and still soft & moist today).

For decorations, go as crazily festive as you like. There are plenty of cute Christmas sugar icing decorations that are cheap and readily available, you could make up a range of different coloured icings and pipe a wreath on them or something along those lines (if you can be bothered), or do as I did, and cut out some holly out of ready-made fondant icing.

Of course, these cupcakes aren’t reserved just for Christmas time, they would work equally well as birthday cupcakes with piped icing and candles!

image3-2

Ingredients (Makes 24)
Cupcakes
150g softened butter
⅔ cup caster sugar
2 tspns vanilla extract
2 eggs
1 ⅓ cups self raising flour, sifted
4 tblspns cocoa, sifted
½ cup buttermilk
1 ½ tblspns of good quality red food colouring (I use Wilton’s, you may need to adjust the amount depending on the brand you use)

Cream Cheese Icing
500g cream cheese, chopped
100g butter, softened
1 tspn vanilla extract
1 ½ cups icing sugar
2 tblspns milk

To Decorate
Ready made white fondant icing
Red food colouring
Green food colouring
Holly leaf cutter (or stencil)
Sharp Knife

image2-10

Method
Preheat oven to 160°C fan-forced. Place butter, caster sugar and vanilla into a large bowl and beat with electric mixer until pale and creamy. Add the eggs, beating until well combined. Add the flour, cocoa, buttermilk and food colouring and beat on a low speed until just combined.

Divide mixture into cupcake tins lined with (green) patty pans. Bake for 15-20 minutes (depending on your oven) or until a skewer inserted into the middle of the largest cupcake comes out clean. Allow to cool completely on a wire rack.

image2-7

While the cupcakes are cooking and cooling, divide half of the fondant icing into 2 and colour one lot vibrant red, and the other a deep (holly-ish) green. Roll out the green fondant with a rolling pin and cut out 48 holly leaves. Then, using a sharp non-serated knife, mark out a leaf pattern by running the knife through the centre so that it leaves an incision but does not cut through. Then cut diagonal incisions from the centre out so that it looks like the veins of a leaf (see picture below).

image2-11

Pull small pieces of the red fondant off and roll into 48 small balls to make the holly berries.

image1-8

Once the cupcakes are almost completely cool, start making the cream cheese icing. Place the cream cheese and butter into a large bowl and beat with an electric mixer for 8-10 minutes. Add the icing sugar and vanilla and beat for a further 5 minutes or until completely smooth. Add the milk and beat until just combined.

Ice each cupcake with a generous amount of icing and top with 2 leaves and 2 berries. Enjoy!

image3

Recipe adapted from Donna Hay’s recipe ‘red velvet cupcakes with sugared cranberries’.

Chocolate Reindeer Tartlets

Only 12 days until Christmas!! I LOVE Christmas time (and I mean LOVE) and have been madly baking and decorating along to Christmas tunes ready for the big day. I have also been joined by a little puppy, Bailey, who has made baking more of a challenge but has by no means curbed my enthusiasm for it.

image2-6image1-7

These adorable reindeer tartlets are delicious and so easy to make – a perfect recipe to involve the kids in and to take to the multitude of Christmas functions where you need to ‘bring a plate’. If you don’t want all the reindeer to be Rudolphs, feel free to swap the jaffas for brown m&ms 🙂

image1-6Ingredients (makes 20)
1 packet Butternut Snap Biscuits (or equivalent)
65g butter, chopped
⅓ cup cream
200g dark chocolate melts
Approximately 10 white marshmallows, halved
20 jaffas or equivalent red lollies
20 white mini marshmallows, halved
Chocolate writing icing (or black icing pen, or additional melted chocolate applied with a toothpick)
1 packet of pretzels

Method
Preheat oven to 160°C fan-forced. Place 1 biscuit per hole in a 12-hole, round-based tartlet tin. Bake for 2-3 minutes or until soft. Remove from oven. Carefully press softened biscuits into tin to mould into a cup shape (use a spoon to make it easier if you like). Allow to cool slightly before transferring to a plate and repeating with remaining biscuits.

image1

Heat butter, cream and chocolate in a saucepan over very low heat. Stir constantly for approximately 5 minutes or until melted and smooth. Pour into a clean, dry bowl and refrigerate for 20 minutes or until cool but not set.

Fill biscuit cases with 1 heaped teaspoon of chocolate mixture. Refrigerate until set.

image1-2

While the ganache is setting, carefully cut pretzels in half and trim so it looks like a lower case ‘f’ for the antlers (I seem to break as many as I successfully cut so that’s why I recommend allowing a full packet!!)

image2-2

Gently press 1 marshmallow half, sticky side up into each tartlet.

image1-3

Attach 1 jaffa to each marshmallow.

image2-3

Attach 2 mini marshmallow halves above nose, cut-side up, to form eyes. Use an icing pen/or a spot of chocolate ganache applied with a toothpick to create the pupils.

image1-5

Place 2 pretzel pieces above eyes. Press to secure. Serve & enjoy!

image2-4image1-6

Recipe adapted from Arnott’s ‘Chocolate Butternut Snap Tartlets’ recipe.

Raspberry Jam

Wow, what a year! It feels a bit premature to be saying that as it’s only November but I have now officially finished my uni year and am two-thirds of the way through my undergraduate degree! I’ll still be working throughout my three month uni break but now that it’s heating up, the cricket is on, the jacarandas are in full bloom, and Christmas carols are being played in stores, it’s starting to feel like the year is coming to a close 🙂

Today’s recipe is very versatile. I am making it to serve as a macaron filling for some raspberry macarons I’ve made to decorate my Grandma’s 80th Birthday cake for this evening but it could also be used sandwiched between two sponge cakes for a Victoria sponge, between biscuits to make monte carlos, or on toast.

It is a vividly berry-coloured, clear looking jam (or jelly for those of you in the US), with an intense raspberry flavour and tang. I particularly like it as it’s not too sweet and it takes very little time and know-how to make.

image1

Ingredients (makes about 2 small jars worth)
175g caster sugar
300g raspberries (fresh, or defrosted frozen)
Juice of half a small lemon
30g jam setting-agent (I use jamsetta)

Method
In a medium saucepan, dissolve the sugar in 100ml of water and bring to the boil.

Once the syrup has been boiling for 2 mins, add the raspberries, lemon juice and jamsetta.

Bring back to the boil, squashing the raspberries with a spatula while stirring, and let boil for 1-2 more minutes before removing from the heat and pouring into sterilised jars.

10815806_10152789221464463_1154645438_n

Allow to cool for 15mins without the lids on the jars, then put the lids on and refrigerate for 2 hours, or until set.

Enjoy!

image1

Recipe partially based on ‘Raspberry Marmalade’ from Secrets of Macarons by José Maréchal

Caramel Slice

I love caramel slice but am constantly disappointed by the thick-bottomed, chalky and bland mass-produced stuff you buy at many cafes around the place. Instead, when I can be bothered, I make my own… and it’s amazing (if I do say so myself). The recipe originally came from my Mum’s high school cookbook and I am eternally grateful to the Annesley College Mothers’ Club for sharing it. It is very simple to make, using very few ingredients, and is perfect for occasions when you’re asked to ‘bring a plate’. The hardest part is not eating it all in one sitting (which is why I often make a double batch).

NP53UiU1TMeOxO8TwgJ6wQ_thumb_1bba

Ingredients
Base:
185g plain flour
125g butter, softened
60g sugar

Caramel layer:
125g butter, chopped
125g sugar
2 tablespoons golden syrup
½ tin condensed milk

Topping:
150g dark cooking chocolate

PZ00IqsIQYumKjleUTOAJw_thumb_1bb3

Method
To make the base, grease and line a swiss roll tin (or lamington tin – whatever you have, it will just alter the thickness of each layer) and preheat the oven to 180°C (or 160°C fan-forced). Rub butter into flour, add sugar and press evenly into the prepared tin. Bake for 20mins or until golden brown.

To make the caramel, put the butter, sugar, golden syrup and condensed milk into a heavy-based saucepan and boil for 5 minutes, stirring all the time (pay particular attention and scrape the bottom of the pan, otherwise it will burn).

Pour over the base. Leave to cool for about an hour.

Finally, to make the topping, melt the chocolate in the microwave or on the stovetop. Pour over the caramel.

Once set, cut into even squares using a knife dipped in hot water between each slice (so it cuts easily and leaves the layers intact).

Enjoy!

Vr1S1ybCQoGa7tYGZOjc6A_thumb_1bb7

Adapted from ‘Caramel Slice’ in the Annesley College Mothers’ Club Cookbook