I’ve always been fascinated by red velvet cake, probably since seeing the memorable bleeding armadillo groom’s cake in Steel Magnolias! Red velvet isn’t a very common flavour in Australia (although this is changing), and so finding a strong enough red food dye can be challenging. I used Wilton red no-taste colouring paste, but have heard Dr. Oetker works well too. These cakes are light and fluffy, and due to the buttermilk are not overly sweet. I served mine with cream cheese frosting, but a vanilla buttercream would also work well.
Ingredients (Makes 24) Cupcakes
150g softened butter
⅔ cup caster sugar
2 tspns vanilla extract
2 eggs
1 ⅓ cups self raising flour, sifted
4 tblspns cocoa, sifted
½ cup buttermilk
1 ½ tblspns of good quality red food colouring (I use Wilton’s, you may need to adjust the amount depending on the brand you use)
Method Preheat oven to 160°C. Place butter, caster sugar and vanilla into a large bowl and beat with electric mixer until pale and creamy. Add the eggs, beating until well combined. Add the flour, cocoa, buttermilk and food colouring and beat on a low speed until just combined.
Divide mixture into cupcake tins lined with patty pans. Bake for 15-20 minutes or until a skewer inserted into the middle of a cupcake comes out clean. Transfer to a wire rack to cool.
Once the cupcakes are almost completely cool, start making the cream cheese frosting. Place the cream cheese and butter into a large bowl and beat with an electric mixer for 8-10 minutes. Add the icing sugar and vanilla and beat for a further 5 minutes or until completely smooth. Add the milk and beat until just combined.
Top each cupcake with a thick layer of frosting and, if desired, break up one of the cupcakes and sprinkle its crumbs over the remaining cakes. Enjoy!
Recipe adapted from Donna Hay’s recipe ‘red velvet cupcakes with sugared cranberries’.
I made this pavlova wreath for a friend’s Christmas in July themed Birthday lunch. It’s a great, light way to finish a meal (perfect after a rich Christmas feast!) and looks festive without being kitsch. It’s great for Christmas Day as you can make and decorate it well ahead of time, giving you more time to focus on the main course and mingle with guests.
Ingredients (serves 10-12) 6 large free-range egg whites
350g caster sugar
1 teaspoon white vinegar
1 teaspoon cornflour
For the topping
600ml cream
2 teaspoons vanilla essence
½ – 1 tablespoon icing sugar (to taste)
2 punnets of strawberries
⅔ punnet of raspberries
½ punnet of blueberries
½ punnet blackberries
Mint leaves (optional)
Method Preheat oven to 160°C (140°C fan-forced). Line a large baking tray (or round pizza tray as I used) with baking paper and draw a 30cm circle in the centre.
Whisk egg whites with an electric mixer in a large, clean bowl until soft peaks form. Gradually add the sugar a little at a time, whisking on maximum speed until stiff and glossy. Once all of the sugar has been added, continue mixing for 10 minutes or until all of the sugar has been dissolved (test this by rubbing the meringue mixture between your fingertips and ensuring it is smooth). Mix the vinegar and cornflour in a cup and stir it into the egg whites.
Spoon dollops of meringue mixture onto the prepared circle on the baking paper as below:
Transfer to the oven and immediately reduce the temperature to 140°C (120°C fan-forced). Bake the pavlova for 1 hour–1 ¼ hours, until the outside is hard but still white. Turn the oven off, prop the oven door open with a matchbox and leave the pavlova inside for an hour to cool and dry.
To assemble, whip the cream, vanilla and icing sugar until thickened. Gently spread over the top of the wreath and top with fruit and mint leaves. Enjoy!
Recipe adapted from Mary Berry’s Christmas Pavlova recipe on BBC Food.
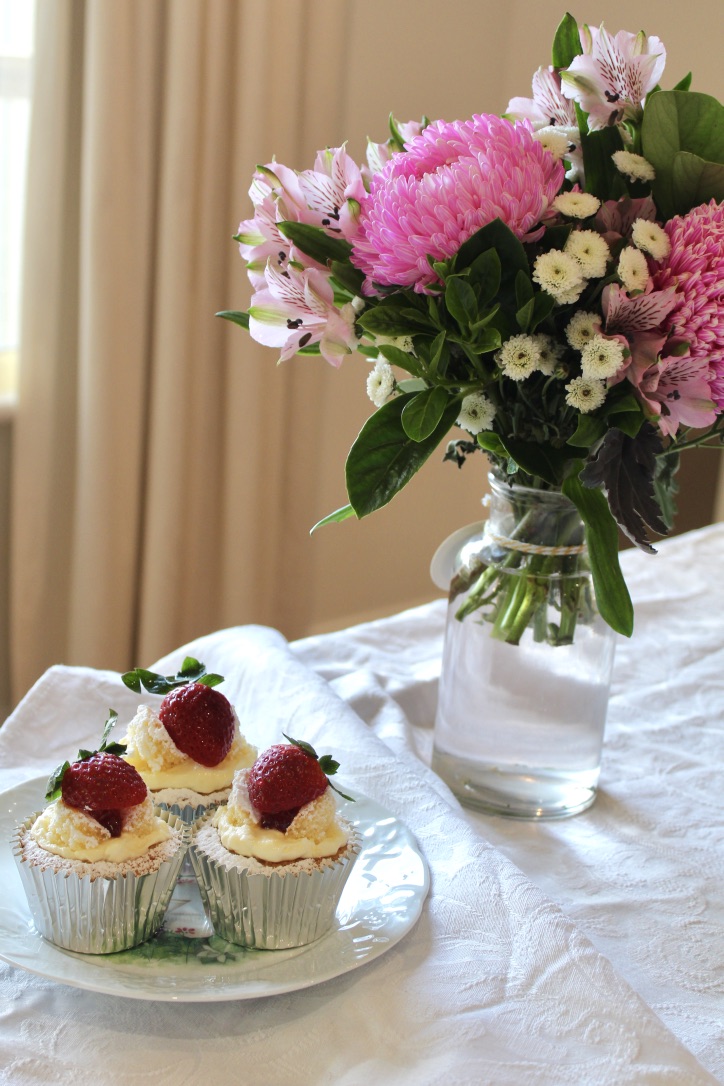
Considering it’s winter, we have been incredibly lucky to have an abundance of delicious, flavoursome strawberries and these cakes take full advantage of them.
These cupcakes are probably the quickest and easiest to make in the history of the world; you simply blitz the ingredients in a food processor, divide into patty pans and bake!
The cakes are very light with a soft, sponge-like texture, which makes them perfect for butterfly cakes. If butterfly cakes aren’t for you, they’re also delicious with a frosting of your choice (try my vanilla buttercream or marshmallow frosting).
Ingredients (makes 12) 1 cup (125g) self-raising flour
⅔ cup (125g) caster sugar
125g butter, softened
2 large eggs
1 teaspoon vanilla extract
2 tablespoons milk
Sweetened thickened cream (or whipped cream)
Good quality strawberry jam
Fresh strawberries, halved (optional)
Icing sugar
Method Preheat oven to 200ºC and line a 12-hole muffin tin with patty pans.
Put all of the ingredients except for the milk into a food processor and blitz until smooth. Pulse while adding the milk until just combined.
Divide batter evenly among the patty pans (I know it doesn’t look like much batter, but they will rise a lot).
Bake for 15-20 minutes or until a skewer inserted comes out clean. Transfer immediately onto a wire rack to cool completely.
If you will be serving the cakes immediately, make your thickened cream and cut up your strawberries while the cakes cool.
Using a sharp knife at a 45 degree angle, cut out a circle from the top of each cake and cut it in half to make the butterfly wings. Fill the holes with a teaspoon or so of strawberry jam and then top with cream, butterfly wings and another line of jam. If you like, you can serve them like this in the traditional butterfly cake style (below).
For me though, I love fresh strawberries so I top each cake with a strawberry half and then sprinkle with icing sugar. Enjoy!
NB: filled cakes are best eaten with 6 hours
Recipe adapted from Nigella Lawson’s ‘Cupcakes’ in How to Be a Domestic Goddess.
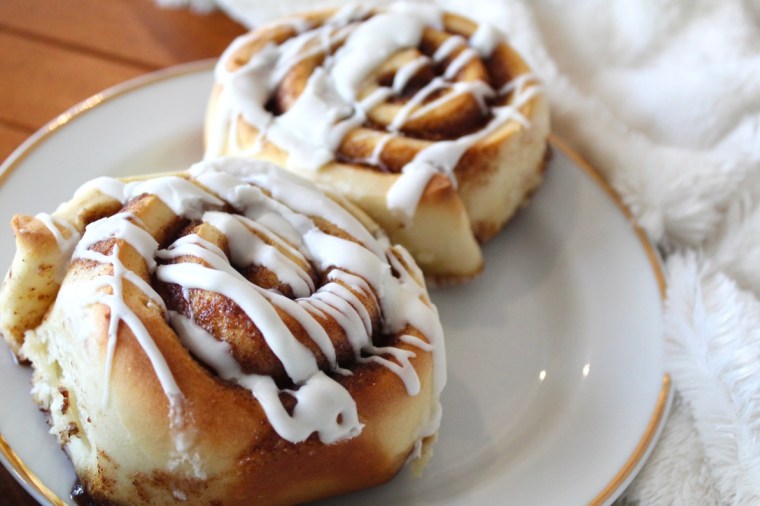
Inspired by the movie The Proposal which features some divine looking homemade cinnamon rolls, I decided to give making them from scratch a go. I did lots of research & eventually found a recipe on Pinterest which promised me a quick and easy bake using everyday ingredients. I was a little sceptical that they could possibly be considered ‘easy’, but they worked perfectly. The rolls are light, fluffy and packed full sweet cinnamon flavour. They also fill your home with the most heavenly aroma and are especially amazing eaten fresh from the oven while still warm.
Ingredients (Makes 12)
1 cup milk
55g butter, chopped
3 ¼ – 3 ½ cups flour
1x 35g package instant yeast
¼ cup white sugar
1 egg
Filling
1 cup brown sugar
1 ½ tablespoons ground cinnamon
½ cup butter, softened
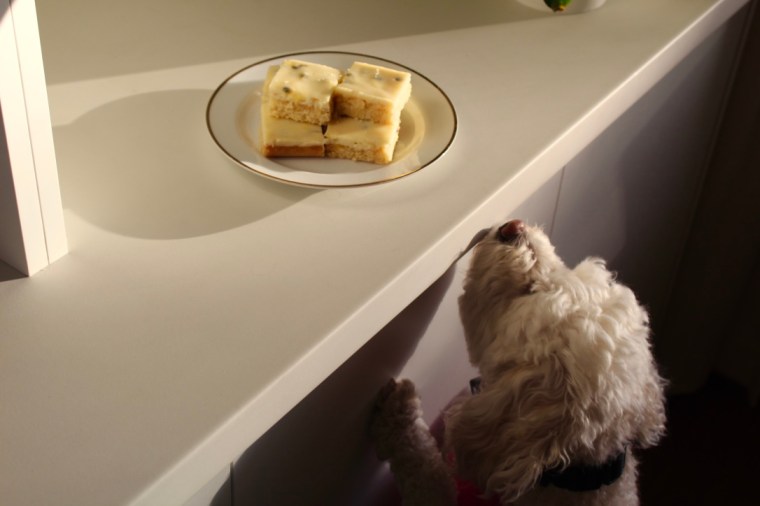
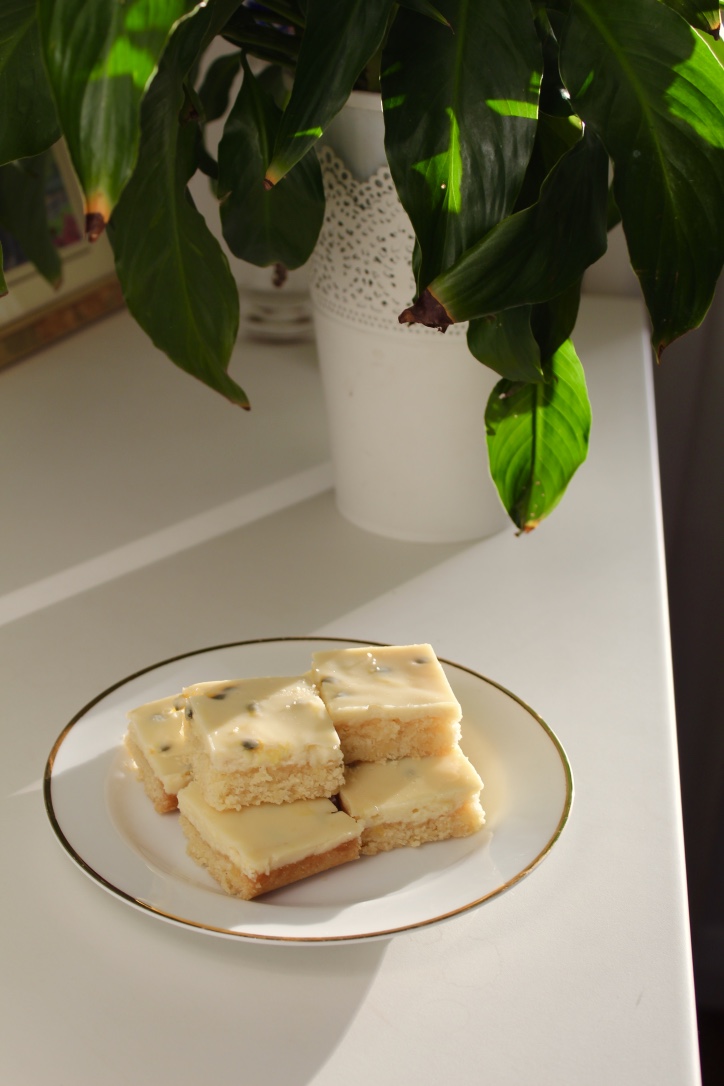
Passionfruit is one of my favourite fruits – I love its intense tangy flavour which, to me, tastes like summer. It should come as no surprise then, that I love this slice which pairs passionfruit with lemon in a creamy cheesecake-like layer on top of a chewy coconut-ty base – delicious! I also love it because it’s so quick and easy to make, perfect for whipping up quickly the night before a morning tea at work.
It smells so good that Bailey wouldn’t leave it alone!
Ingredients (makes 24 pieces)
1 cup self-raising flour
1 cup desiccated coconut
½ cup caster sugar
100g butter, melted
395g can condensed milk
½ cup fresh lemon juice
4 tablespoons passionfruit pulp
Method Preheat oven to 180°C. Line a 16 x 26cm pan with non-stick baking paper, allowing it to hang over the sides.
Combine the flour, coconut, sugar and butter in a large bowl. Use your hands to bring it together into a dough. Using a metal spoon, press dough into the base of the prepared pan.
Bake for 12 minutes or until lightly golden. Set aside to cool.
Reduce oven temperature to 150°C. Whisk together condensed milk, lemon juice and passionfruit pulp in a large bowl until well-combined. Pour onto the cooled base and spread evenly.
Bake for 15 minutes or until just firm. Set aside to cool completely before cutting into squares. Enjoy!
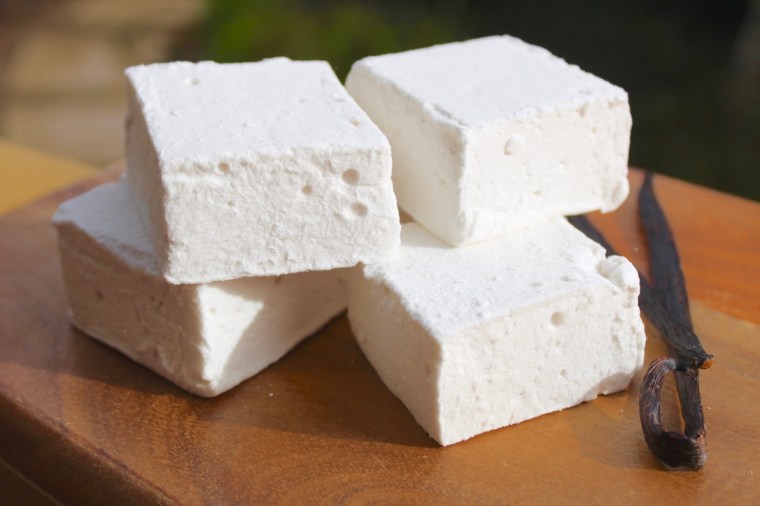
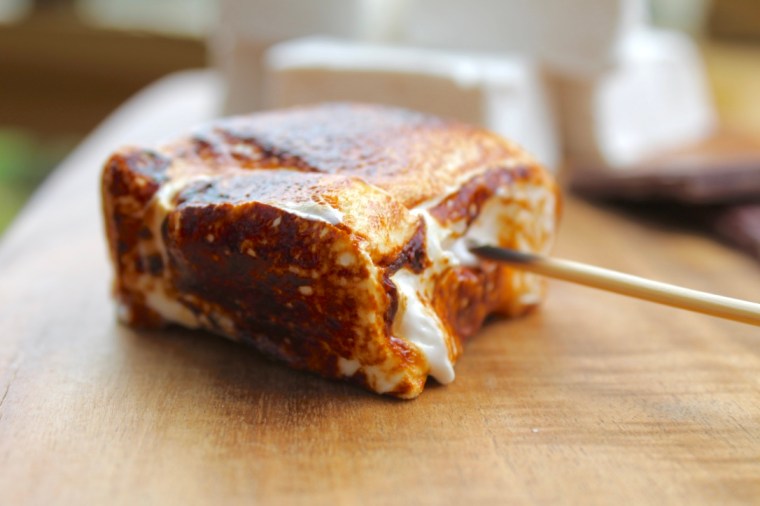
As the weather cools down, I am craving hot chocolates and crisp nights around the campfire, both of which are infinitely improved by the addition of marshmallows. Homemade marshmallows are on an entirely different level to store bought. Their texture is impossibly soft, light and dreamy with none of the powderyness that even the best quality store bought varieties have. These are perfect for eating as is, roasting over a fire, popping into a steaming mug of hot chocolate, or combining with chocolate and graham crackers (or equivalent) to make s’mores. Do yourself a favour and make some, stat! These marshmallows are so good, I am already thinking of how I can use the base recipe to make different flavours and variations (how good would Baileys marshies be?!)
Ingredients (makes ~30)
½ cup warm water
2 tablespoons flavourless, powdered gelatine
1 tablespoon vanilla essence
1 ½ cups caster sugar
⅔ cups liquid glucose
½ cup water, extra
1 cup icing sugar, sifted
Spray a 20cm x 30cm slice tin with cooking oil and line the bottom with baking paper. Place the warm water in the bowl of an electric mixer, add gelatine and vanilla and stir to combine. Set aside.
Place the caster sugar, glucose and extra water in a medium saucepan over a medium heat and cook, stirring, until the sugar is dissolved. Increase heat to high and bring to the boil. Allow to boil, without stirring, for 6–7 minutes until the temperature reaches 115°C on a sugar thermometer. With the electric mixer on high, add the hot syrup to the vanilla gelatine mixture in a thin steady stream, and beat for 5-10 minutes or until white, thick and glossy.
Pour the mixture into the prepared tin. Using a spatula sprayed with cooking oil, smooth the top of the marshmallow.
Refrigerate for 1–2 hours or until set. Gently tip the marshmallow, top-side-down onto a clean, flat surface dusted with icing sugar. Peel off the baking paper and sift icing sugar over the top. Dust a large knife with icing sugar and cut marshmallows into squares. Enjoy!
Can be stored in the fridge for ~1 week
Adapted from Donna Hay’s ‘Caramel Swirl Marshmallows’
These muffins are the perfect way to use up ‘dead’ bananas as they use 4 in one hit. They’re also my favourite kind of bake; one where you bung a whole heap of ingredients in a bowl, combine and then bake. From start to finish they take approximately 30 minutes and they fill your home with a heavenly aroma.
I’ve cut down the sugar significantly from the original recipe (which had a cup of sugar), as I found that the bananas and Nutella are sweet enough for me. Of course, feel free to add more sugar to taste.
Ingredients (makes 12 large muffins) 4 medium over-ripe bananas, mashed
½ cup packed brown sugar
1 large egg
¼ cup vegetable oil
2 tspns vanilla extract
2 cups flour
1 tspn baking soda
1 tspn baking powder
½ cup chopped walnuts (optional)
12 tspns Nutella
Preheat oven to 180°C. Spray a 12-hole muffin tin liberally with cooking oil.
In a large bowl, whisk together banana, sugars, egg, oil and vanilla. Add in your dry ingredients and mix until it is lump free. Fold through walnuts if desired.
Spoon the mixture into the muffin tin and top each muffin with approximately 1 teaspoon of Nutella. Using a toothpick, swirl the Nutella into the batter.
Bake the muffins for 15-20 minutes or until a skewer inserted into the centre comes out clean.
Leave to cool in the tray for 5 minutes before transferring onto a wire rack to cool completely. Enjoy!
Adapted from The Novice Chef’s ‘Nutella Banana Swirl Muffins’
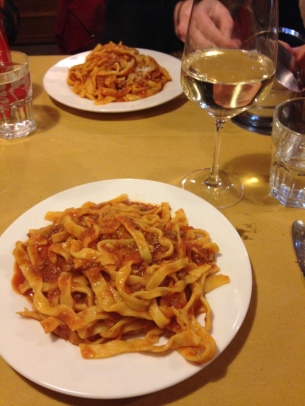
Rome, the Eternal City, rightly has a reputation as being a foodie mecca. Despite it’s growing international food scene, the heart (or stomach?!) of food in Rome still lies in its world-renowned pizzerias, trattorias and gelaterias.
Delicious pasta at a Roman Trattoria
I have been lucky enough to visit Rome twice (throwing coins over your shoulder into the Trevi Fountain must work!) and both times I have made it a personal mission to taste test as much gelato as I could get my hands on.
Legend has it that if you throw a coin with your right hand over your left shoulder into the Trevi Fountain, you will return to Rome.
Yes, despite it being winter on both occasions I ensured I had at least one gelato a day (proving that not all heroes wear capes!), and in my quest for the best gelato, sampled a large array of flavours, in both cups and cones, coloured and flavoured naturally and not-so-naturally, and made using traditional and modern techniques. Along with my sister, we researched where the gelato hotspots were throughout Rome and tried to ‘do as the Romans do’ and sample gelaterias where the locals congregated.
After all of this *rigorous* experimentation, I can say with some (questionable) authority that I have found the best gelato in Rome. So, without further ado, I present to you my top 3 gelaterias in Rome.
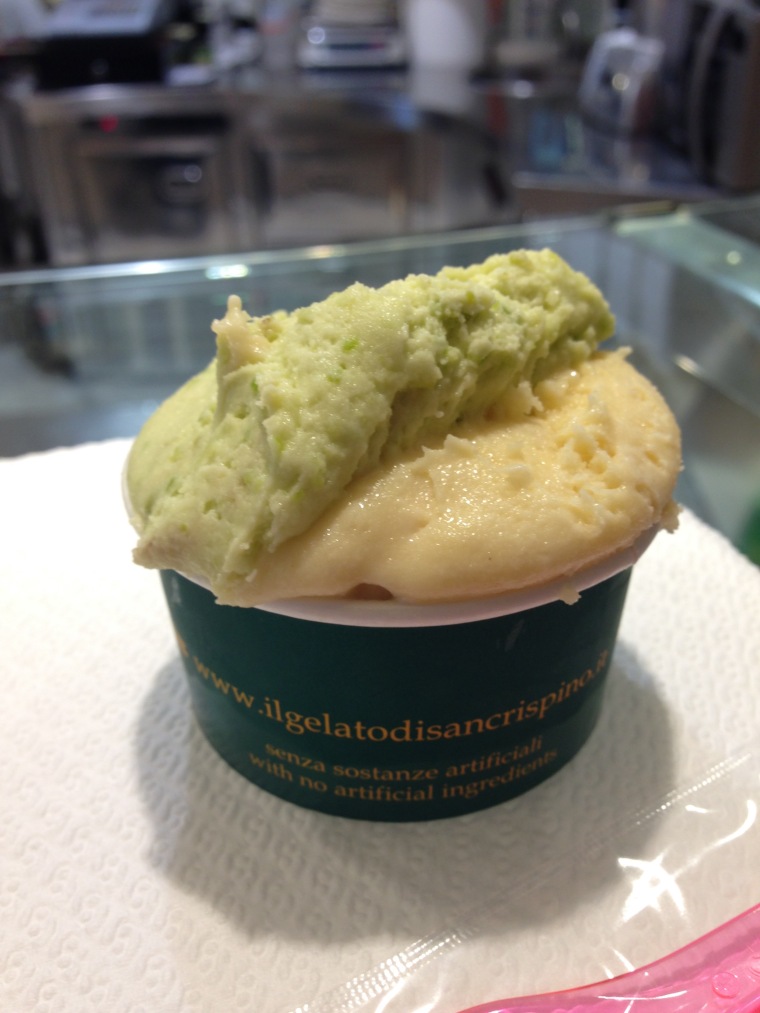
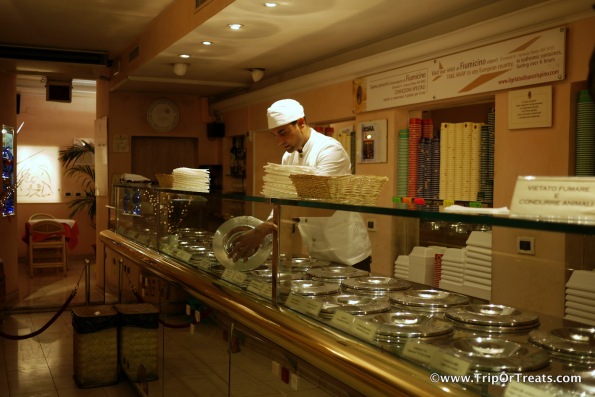
Number 3: il Gelato di San Crispino
Delicious pistachio and honey gelato
The most traditional of my top 3, San Crispino (which conveniently has 2 shops located in the historical centre of Rome), takes its gelato very seriously and prides itself on using high quality, seasonal ingredients and not using artificial colourings, preservatives or chemical emulsifiers.
San Crispino was recommended to us by our Rome walking tour guide and has many certificates of excellence (and long queues at times). After sampling the gelato, I can see why.
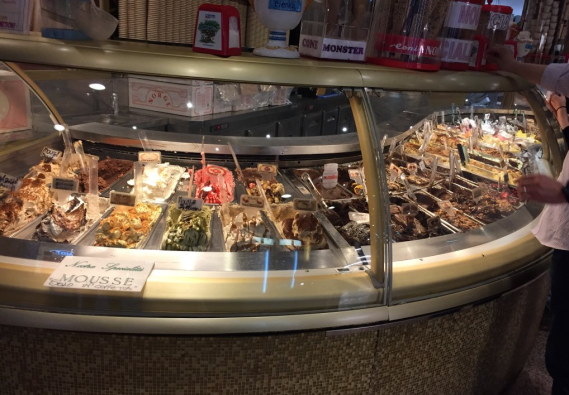
Don’t be put off by the rather uninviting decor and not being able to see any gelato upon entering; each flavour is kept in a stainless steel bin with a lid on it so that it is kept at the optimum serving temperature (between -8 and -10°C).
There are fewer flavours here than in many gelaterias as San Crispino strives for quality, not quantity. The flavours that are on offer change regularly with the seasons, but be sure to try their famous Sardinian honey gelato – it’s delicious. Dairy free sorbets and ‘meringue ice creams’ are also available.
il Gelato di San Crispino. Image: TripOrTreats
Locations: Via Acaia, 56, 00183 Roma, Italia (tel. 0670450412)
Piazza della Maddalena 3 – 00186 Roma (tel. 0697601190) Price: From €2.70 Rating: 4.5/5 cupcakes
Top tip: don’t make the mistake of ordering your gelato in a cone, as the ‘gelato craftsmen’ believe this interferes with the flavours of the gelato and only serve it in cups.
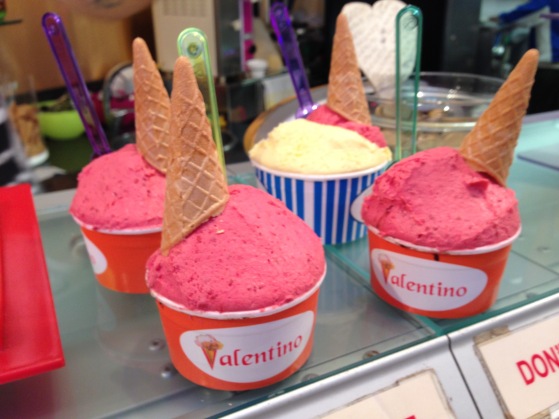
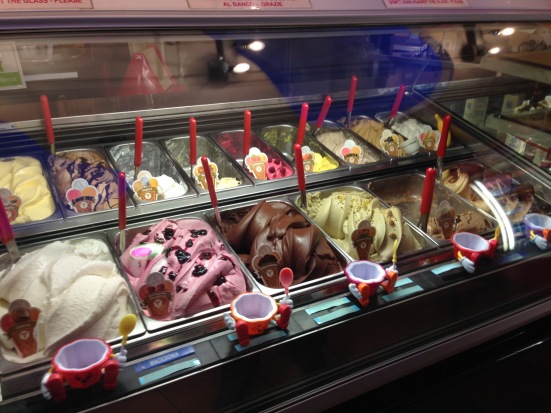
Number 2: Gelateria Valentino
In second place is Gelateria Valentino. In stark contrast to San Crispino, Gelateria Valentino is a brightly coloured feast for the eyes with its rainbow-coloured gelato proudly on display. While still boasting a wide range of natural, seasonal flavours, Valentino also offers some “less natural” varieties (think pretty green mint gelato) and certainly has no qualms about cones – you even get an adorable mini cone when you order your gelato in a cup!
As you can see, the raspberry flavour was a big hit in my family!
My sister was the mastermind who brought us to Gelateria Valentino after reading up reviews on TripAdvisor, many of which confidently declare that it has the best gelato in Rome. With its proximity to the Trevi Fountain, more than 3,600 5-star reviews on TripAdvisor (ranked as #4 for dessert locations in Rome), and huge selection of tempting flavours, it’s not hard to see why Gelateria Valentino does a roaring trade even in the middle of winter.
Our family favourite flavours were: raspberry, Baci, dark chocolate and tiramisu.
Location: Via del Lavatore 96, 00187 Rome, Italy Telephone: +39 06 678 3219 Price: From €2.50 Rating: 4.5/5 cupcakes
Top tip: Gelateria Valentino doesn’t accept credit cards so make sure you have cash on you.
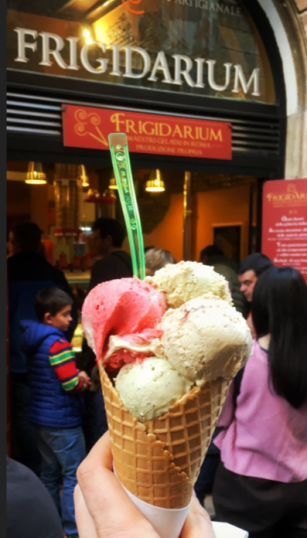
Number 1: La Gelateria Frigidarium
Image: TripAdvisor (I keep eating mine too quickly to take photos!)
In first place is La Gelateria Frigidarium, located near Piazza Navona. Like Gelateria Valentino it is a TripAdvisor award winner with over 3,100 5-star reviews, and it was always buzzing with happy customers, day or night.
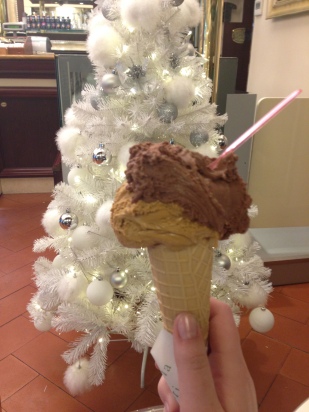
Frigidarium has an extraordinary array of mouthwatering flavours on display and you can enjoy your gelato in a cup or cone, and if you’re feeling particularly indulgent, have it coated in chocolate!
Image: TripAdvisor
For me there were several factors that set it apart from its competition. Firstly, the quality was second-to-none. Every flavour I had the pleasure of sampling was rich and creamy without any hint of graininess.
Secondly, everything is generous; the friendly staff were more than happy to let people sample flavours before deciding, the scoops were large and filled the cup or cone to the brim (regardless of what size you ordered), and every variety was packed full of flavour and contained a generous helping of ‘fun bits’ e.g. fresh fruit, cookie chunks or chocolate bar pieces, depending on your chosen flavour.
Finally, what really clinched it the top spot, is its incredible value for money. For just €2 you can enjoy a small cup filled to the brim with 2 flavours of gelato – less than half the price you will pay in most other gelaterias. The price of a large cup at Frigidarium is on par with what many places charge for a small!
Image: TripAdvisor (I keep eating mine too quickly to take photos!)
Those factors, and our desire to sample as many flavours as possible, were what had us coming back to La Gelateria Frigidarium time and time again.
Our picks? You really can’t go wrong! Every flavour we tried was exceptional.
Location: Via del Governo Vecchio 112, 00186 Rome, Italy Telephone: +39 334 995 1184 Price: From €2 Rating: 5/5 cupcakes
Top tip: Visit here first, otherwise the thought of all the Frigidarium gelato you could have been enjoying will haunt you until your dying day.
Well, there you have it folks, my top 3 gelaterias in Rome. Chasing any one of them will guarantee you an excellent gelato.
Let me know, do you agree with me? Disagree? Have you found an amazing top-secret Roman gelateria I should visit on my next trip? Please comment below, I’d love to hear about it 🙂
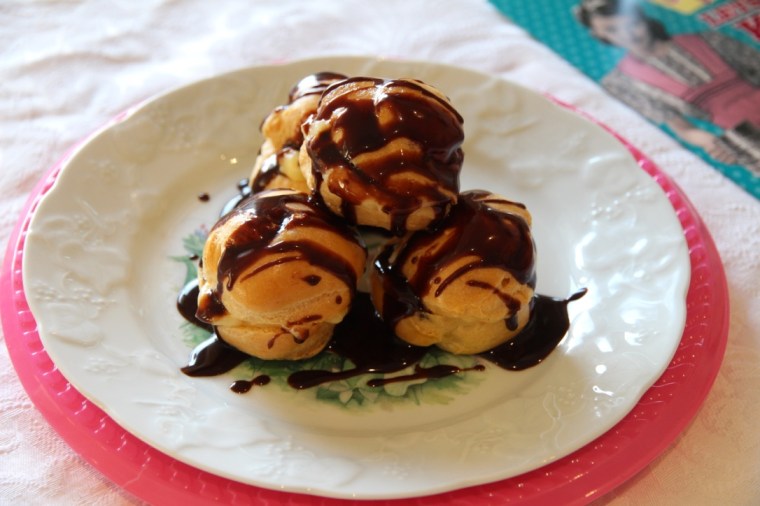
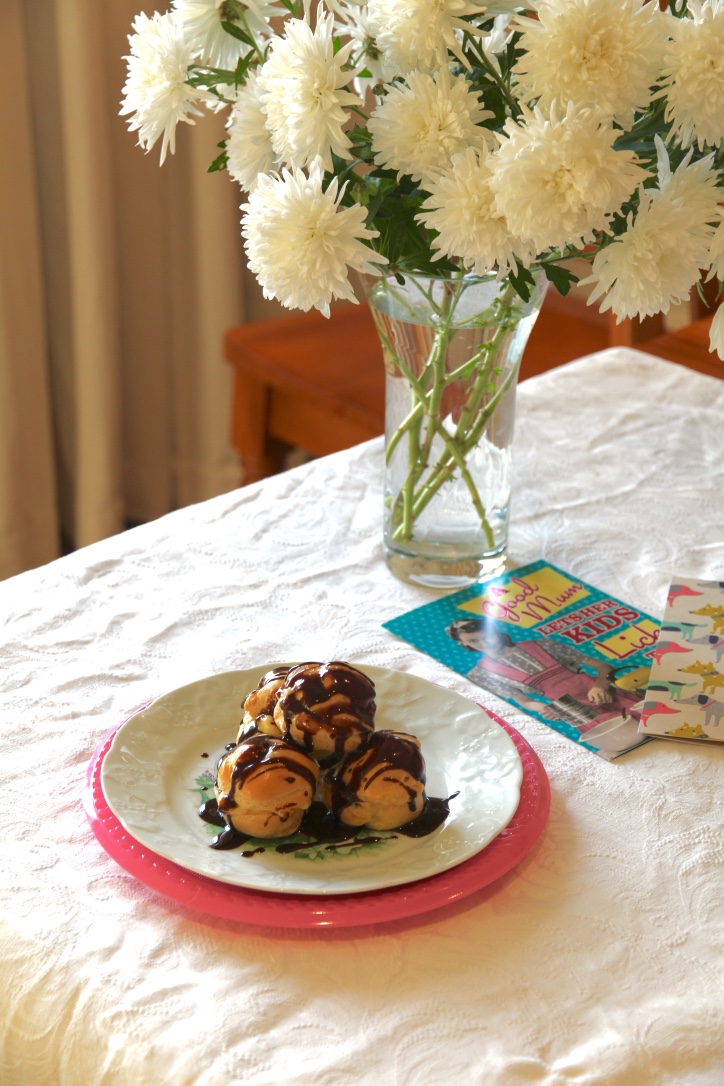
Happy Mother’s Day to all mothers out there! Today I celebrated with one side of my family for a delicious brunch and then had dinner with the other side of the family, and I served these profiteroles for dessert.
Choux pastry has a nasty reputation as being very difficult to make, but Mum has been making this recipe for over 20 years and it has never failed for her. I was surprised by how easy it was to make and using this simple base recipe you can make profiteroles, eclairs or Paris-Brest. If you’re pressed for time you could easily swap the crème pâtissière for sweetened whipped cream, or for a different flavour, you could add a liquor such as Bailey’s Irish cream or Grand Marnier to the filling (although to me, nothing beats a homemade vanilla crème pat). The chocolate sauce could also be changed to berry, lemon, or caramel, or you could dip the profiteroles in toffee à la croquembouche. Basically, the options are endless!
Choux Pastry (makes ~35 profiteroles or 20 eclairs) 1 cup water
60g butter
120g plain flour, sifted
4 eggs
1 extra egg yolk mixed with 1 tablespoon cold water
Chocolate Sauce
300g dark chocolate melts
400ml pouring cream
Line 2 large baking trays with baking paper and add a 1cm nozzle to a piping bag. Preheat oven to 205°C.
In a medium saucepan, bring water and butter to the boil. Lower the heat and add the flour all at once, stirring vigorously with a wooden spoon until the mixture forms a smooth, sticky mass. Remove from the heat and allow to cool for 3 minutes.
Stirring with a wooden spoon, add eggs one at a time, ensuring your mixture is smooth and fully combined.
Fill a piping bag with the mixture and pipe mounds of pastry about 2cm in diameter, 2cm apart. Sprinkle lightly with water (the humidity helps the pastry rise) and then bake in the preheated oven for 20 minutes. Turn down the temperature to 150°C and cook for a further 20 minutes. Turn off the oven and leave to dry in the oven for approximately an hour.
The odd misshapen profiterole is inevitable!
To make the crème pâtissière, mix together the eggs, yolks, sugar and flours. Bring the milk to the boil. Carefully pour it into the egg mixture, whisking well together. Add in the vanilla bean.
Return the mixture to the saucepan and cook over a low heat, stirring constantly with a wooden spoon. After a time, the mixture will thicken quickly – make sure you keep stirring so the mixture on the bottom of the pan doesn’t burn. Beat in the butter a little at a time.
Pour into a bowl, top with cling film and allow to cool.
Once profiteroles and crème pâtissière are fully cool, cut almost in half and fill with crème pâtissière.
Just before serving, make the chocolate sauce by combining the chocolate and cream in a medium saucepan and stirring on a low heat until melted and smooth. Add more cream or chocolate as required until desired consistency is reached.
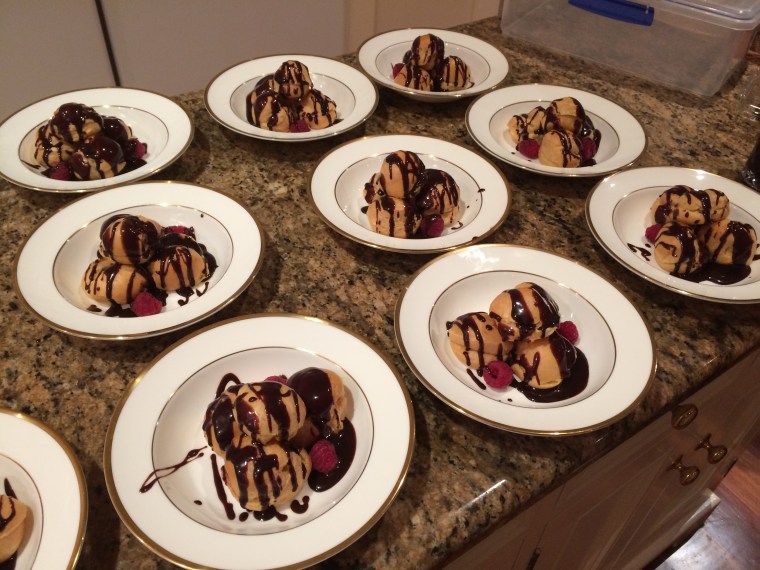
Serve profiteroles drizzled with chocolate sauce and berries. Enjoy!
Phew, 10 servings with 4 profiteroles each is quite exhausting!
Choux pastry recipe adapted from Gabriel Gaté’s ‘Sweet Treats’ (1995).
Crème pâtissière recipe adapted from Vogue’s ‘Grand Finales’ (1988).
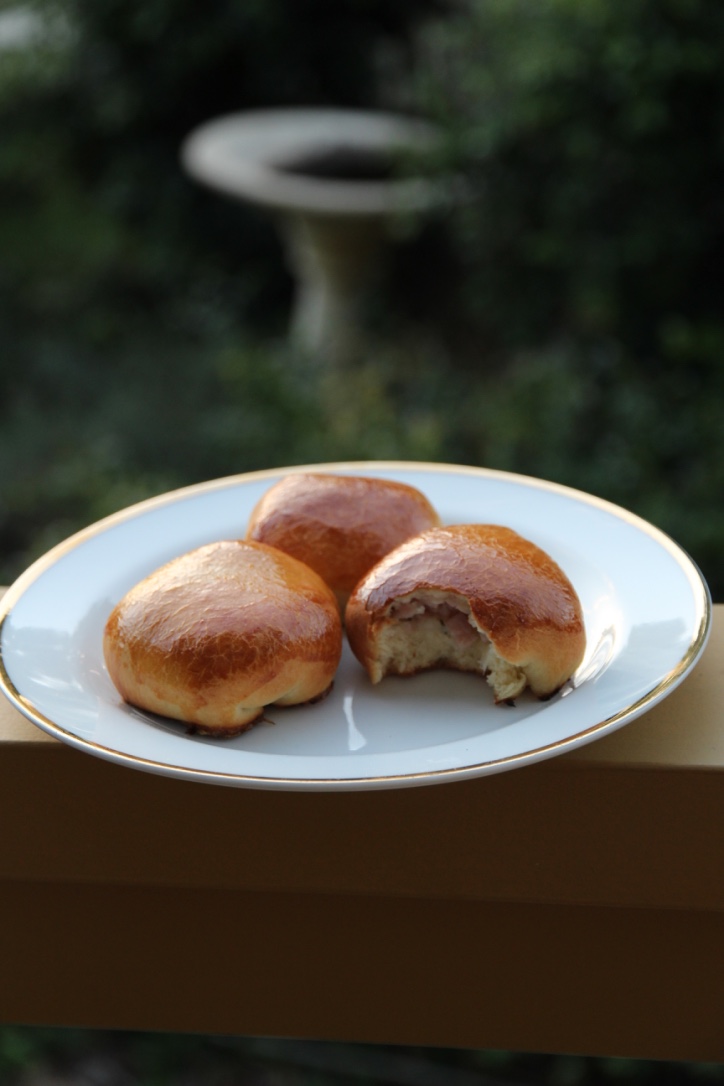
Piroshki (also known as pirozhki or pyrizhky), literally translating to ‘small pie’, are individual-sized buns with either a sweet or savoury filling. There are many variants of piroshki across Eastern Europe, but this recipe most closely resembles the Russian version. These piroshki are baked rather than fried and stuffed with the dreamy combination of bacon, caramelised onion and thyme. We usually serve these as hors d’oeuvres but they are great for lunches and picnics as they are easily transportable and don’t make a mess.
While they do take time and effort to make, they more than make up for it in terms of flavour and I find the baking process is very rewarding. There’s something so satisfying about making things from scratch and I’m always left feeling very self-righteous (plus who doesn’t love kneading dough? So fun and therapeutic). Next time you have a free afternoon, try making a batch – your tastebuds will definitely thank you for it!
Ingredients (makes 35-40) 60g fresh yeast
2 tablespoons sugar
315ml lukewarm milk
375g plain flour
Salt & pepper
125g melted butter
3 large brown onions, chopped
55g butter, extra
250g bacon
2 tablespoons fresh thyme leaves
1 egg, beaten
Method Combine the yeast and sugar; stir in the milk.
In a large bowl, mix flour and 2 teaspoons salt and make a well in the centre. Pour the yeast mixture and the melted butter into the centre. Beat well for 3 minutes until a smooth batter is formed. Cover with Gladwrap and leave in a warm place for 1 hour or until doubled in size.
Gently cook onions in extra butter until golden. Chop bacon finely and add to the onions along with a teaspoon of pepper and the thyme leaves.
Knead the risen dough lightly and then divide into 35 to 40 portions. Wrap a teaspoon of the bacon filling into each portion of the dough. Allow the buns to prove in a warm place on greased trays for 15 minutes.
Preheat oven to 230°C.
Brush each bun with egg and bake in the prepared oven for 10-15 minutes or until golden brown. Enjoy!
Recipe adapted from Hors D’Oeuvres (1988)by June Budgen.


 Ingredients (Makes 12)

 Adapted from Passionfruit Slice on Taste.com.au