Neapolitan Easter Layer Cake

thumb_IMG_1510_1024

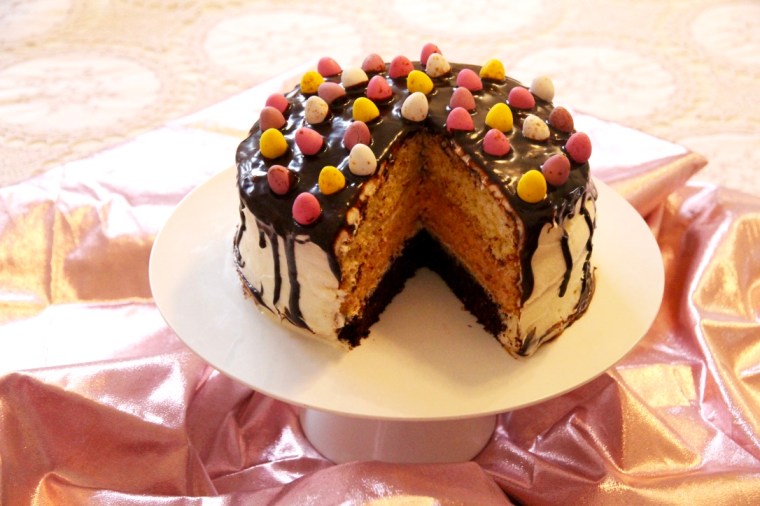
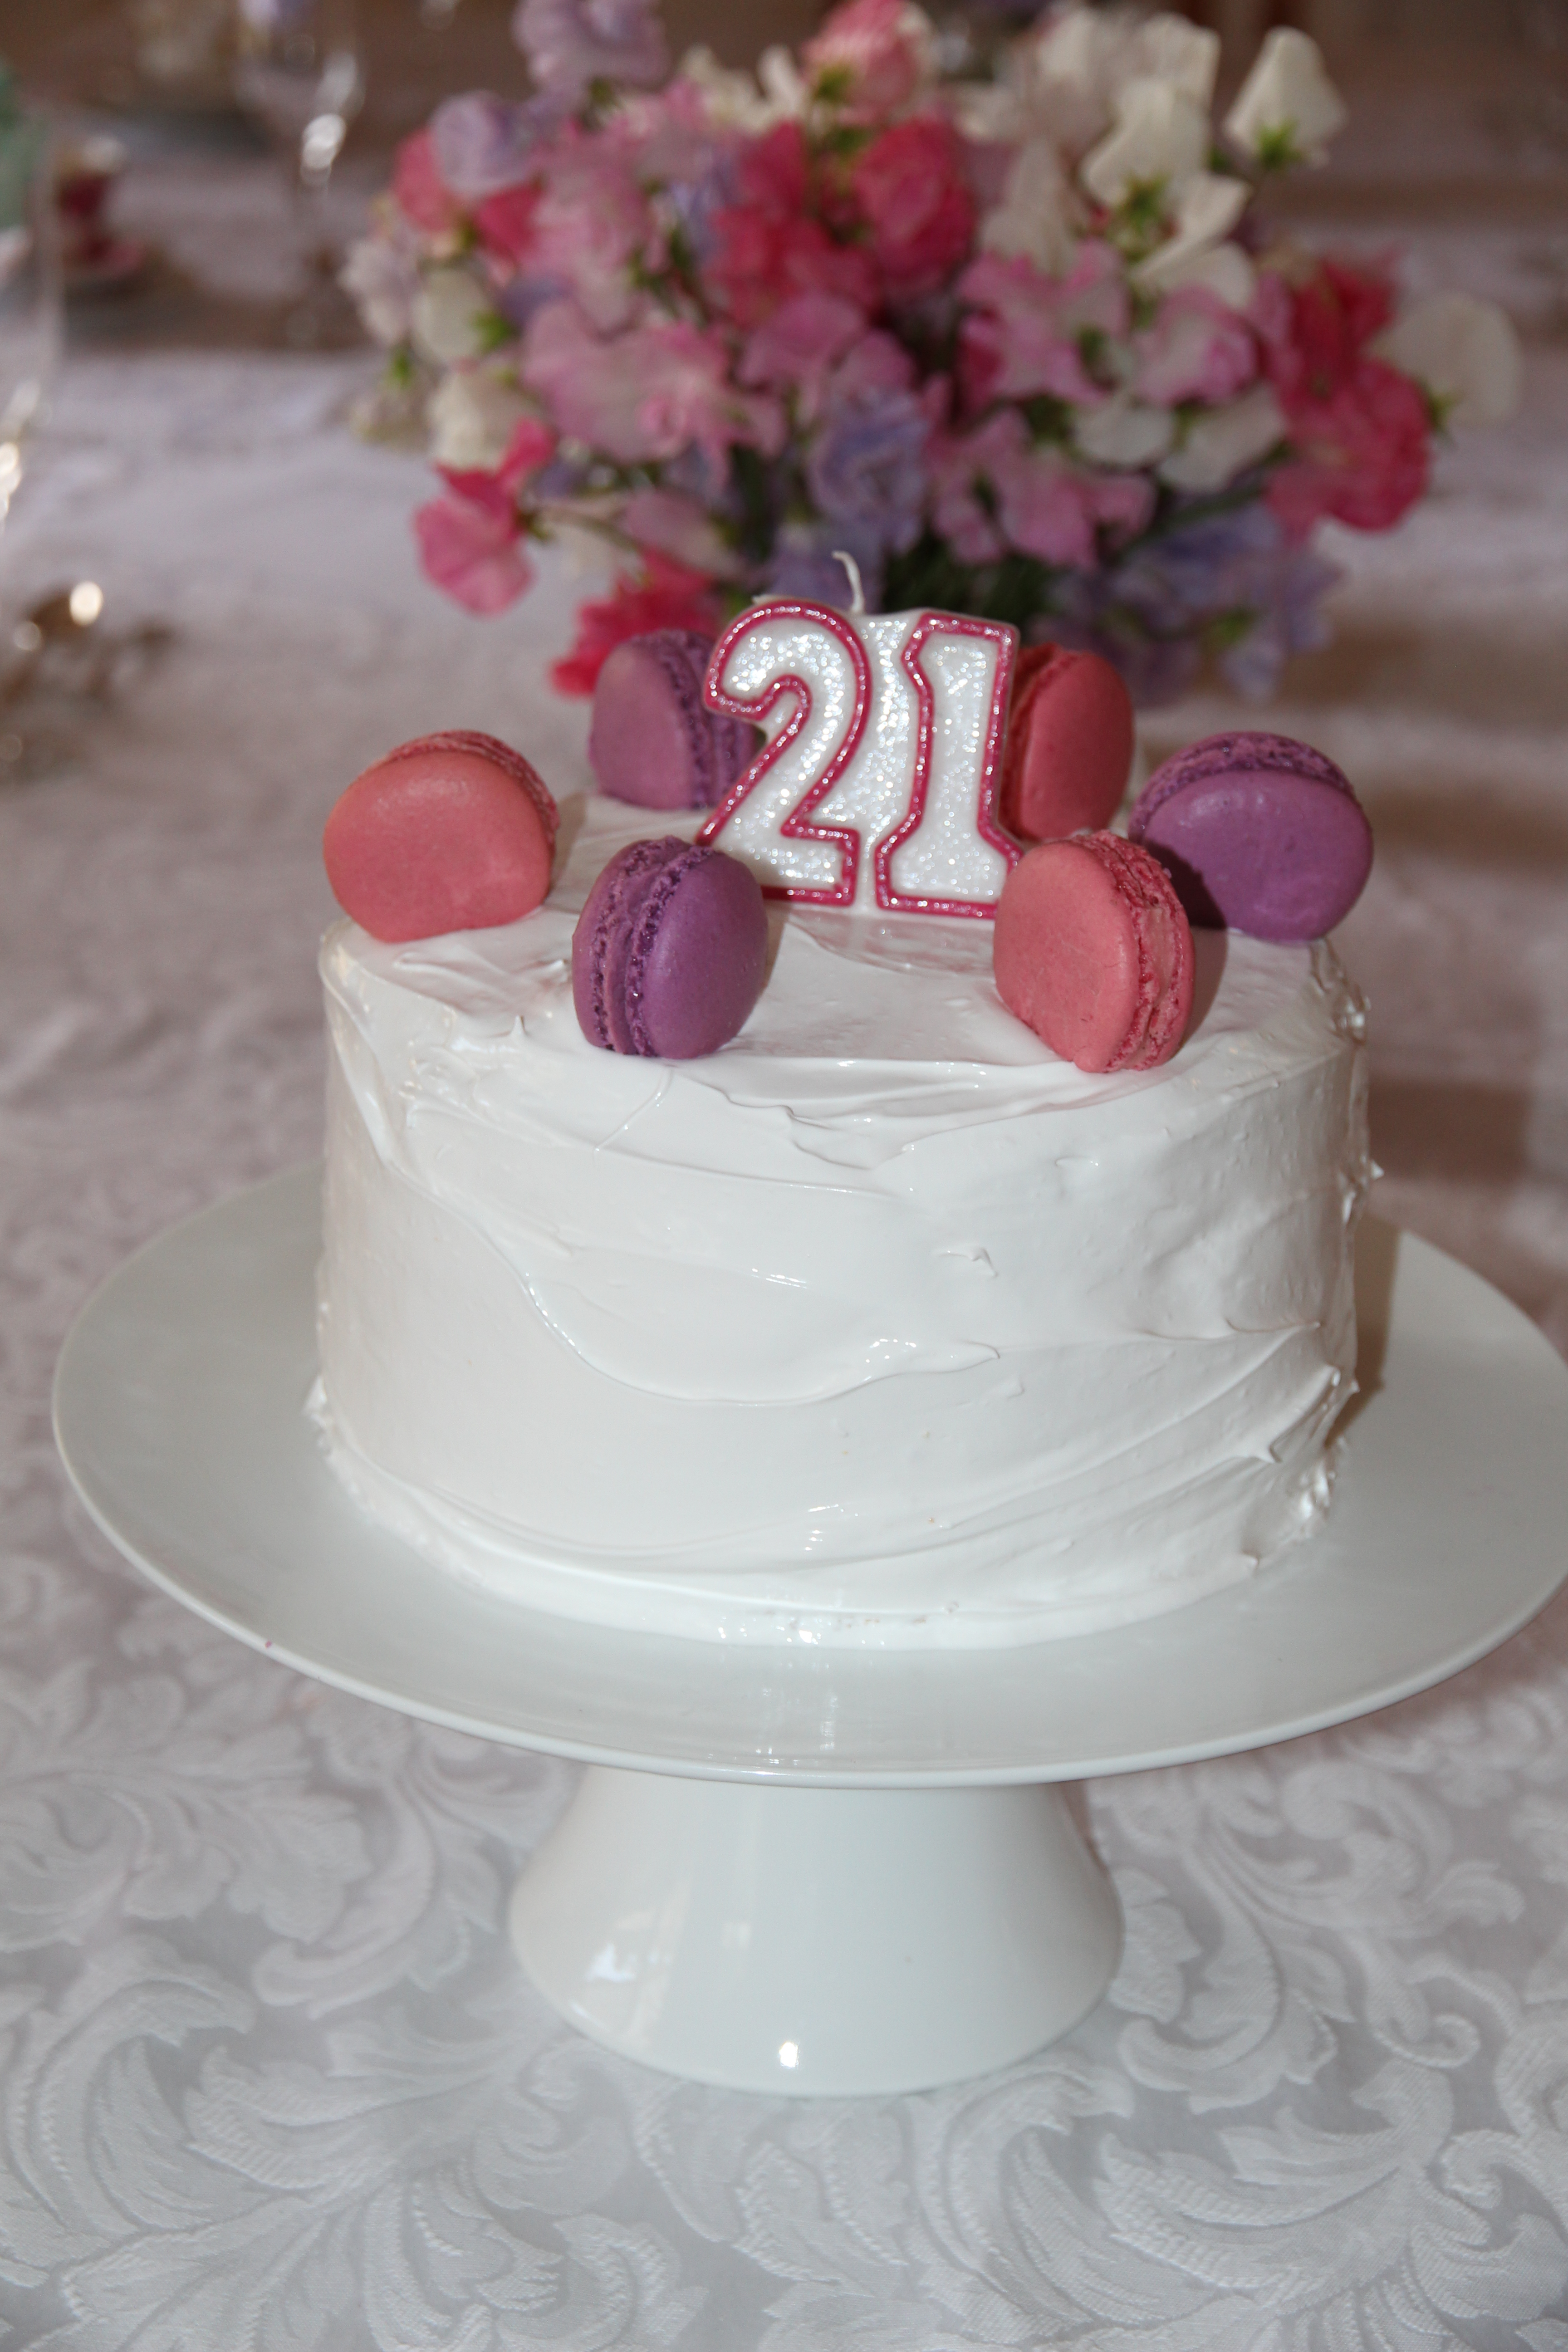
This cake is surprisingly quick & easy to whip up and makes the perfect centre piece to an Easter celebration. This cake is very rich so small pieces are recommended, especially when consumed in addition to chocolate eggs on Easter Sunday!

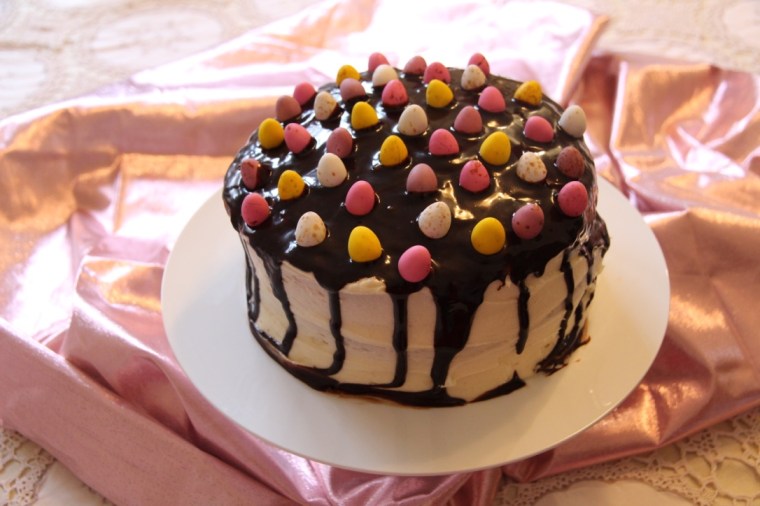
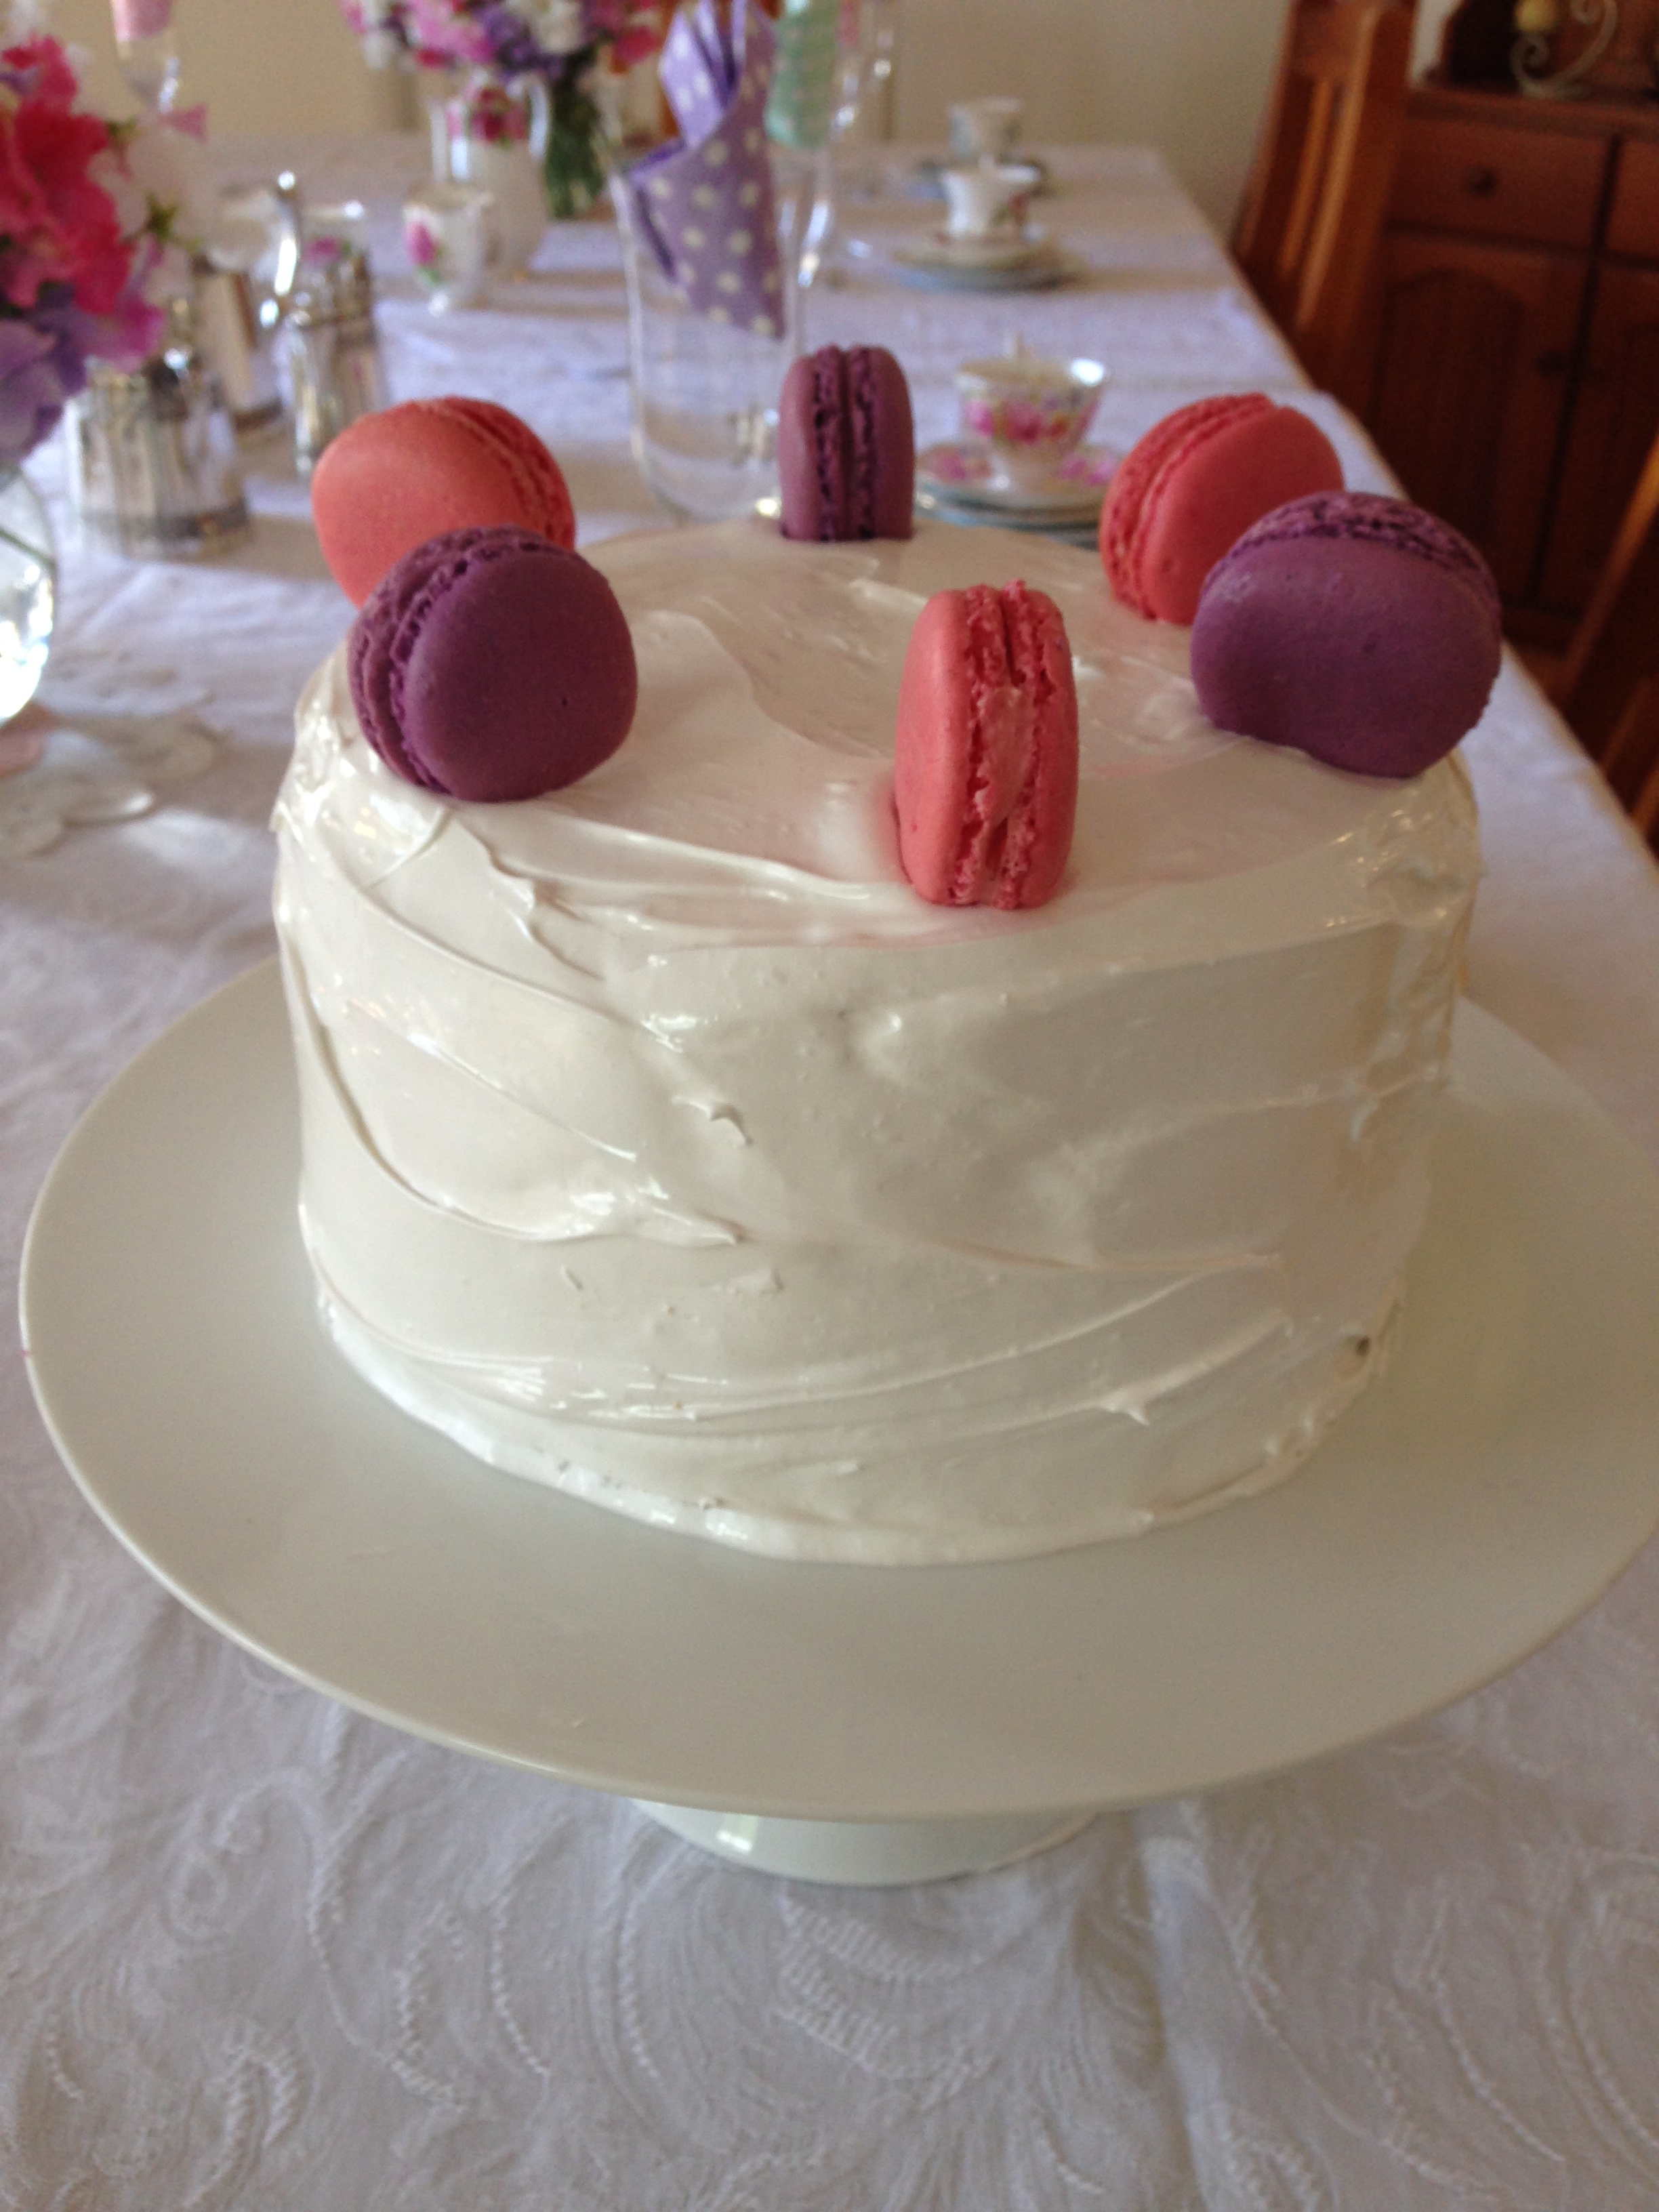
Of course, this cake doesn’t need to be Easter-themed at all, just omit the mini eggs and decorate as desired.

thumb_IMG_1483_1024

Ingredients (layer cake serves up to 20 + 6 cupcakes out of the vanilla cake mix)
For the white & pink layers
190g butter, softened
2 teaspoons vanilla extract
410g caster sugar
4 eggs
1½ cups plain flour
¾ cup self-raising flour
½ teaspoon bicarb soda
¾ cup milk
Pink food colouring

For the chocolate layer
60g butter
1 teaspoon vanilla extract
140g caster sugar
1 egg
100g self-raising flour
¼ cup cocoa
80ml water

For the vanilla buttercream
200g butter, softened
½ cup milk
1 tblspn vanilla extract
8 cups icing sugar

To decorate
150g dark chocolate
1 ½ bags Cadbury mini eggs, or easter eggs of your choice

thumb_IMG_1508_1024

Method
Grease & line three 20cm cake tins and line a 6-hole muffin tin with patty pans. Preheat oven to 180°C or 160°C fan-forced.

To make the vanilla cake layers, add the butter, vanilla, caster sugar, eggs, flours, bicarb soda and milk to a large bowl. Beat for 1-2 minutes with an electric mixer until completely combined and lighter in colour.

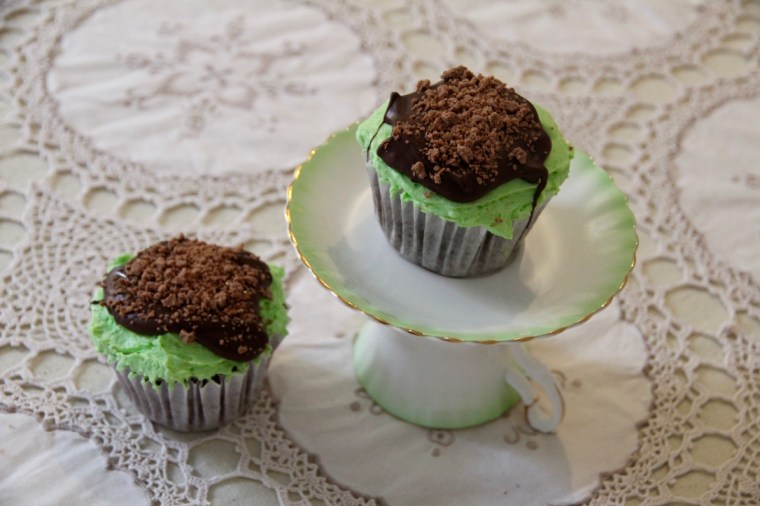
Fill the 6 patty pans approximately ¾ full with cake batter and set aside.

Divide the remaining vanilla batter into halves and colour one half pink with food colouring (this time I only used a couple of drops, but in future I will put in more for a more vibrant colour). Spread white mixture into one prepared tin and pink mixture into another, and set aside.

To make the chocolate layer, add butter, vanilla, sugar, egg, flour, cocoa and water into a large bowl. Beat for 1-2 minutes with an electric mixer until completely combined. Spread into remaining cake tin.

Place the three large cakes into the oven and bake for ~40 minutes or until a skewer inserted comes out clean. When they are half way cooked (i.e. after 20 minutes), put the cupcakes into the oven and let them cook for ~20-25 minutes or until a skewer inserted comes out clean.

Cool cakes for 5 minutes in their tins, then gently turn out onto metal cooling racks to cool completely.

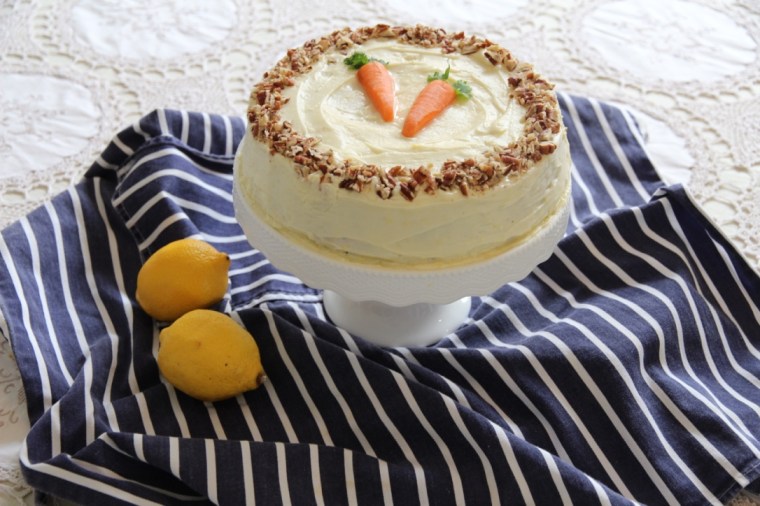
Once the cakes are cool, you can start on the frosting. Cream the butter for 1-2 mins in a large bowl using an electric mixer. Add the milk, vanilla and half of the icing sugar and beat for at least 3 mins (until the mixture is light and fluffy). Add the remaining icing sugar and beat for a further 3 mins or until of a spreadable consistency. Add extra milk if too dry or extra icing sugar if too wet.

Spread frosting over the top of each of your cupcakes and top with a mini egg if desired.

To assemble the layer cake, put a small amount of frosting in the middle of a cake stand (or plate/cake board/ whatever you want your cake to be displayed on) and gently place your chocolate layer on top. Top the cake with a generous layer of frosting and smoothe it out to the edges so you have an even layer. Gently place the pink layer directly on top, ensuring that it is flat and in-line with the chocolate layer (if the cake is wonky at all, shave some of the cake off with a knife so it sits flat, or add more frosting where it is thinner). Top the pink layer with a generous dollop of frosting and, again, smoothe it out to the edges so it’s evenly spread. Gently place the white cake on top, again making alterations if necessary so that it is flat and even.

Coat top and sides of the cake with a thin layer of frosting and don’t worry if you get crumbs in this layer (it is known as the ‘crumb coat’). Put the cake in the freezer for 10 minutes or until set. Top with another layer of frosting and smoothe with a palette knife so you have a neat, even surface. Return to the freezer for a further 10 minutes to set.

While the cake is in the freezer, melt your chocolate ready for the drizzle. Once your cake’s frosting is set, pour the melted chocolate onto the top of your cake and allow it to run down the sides. Make sure the entire top of the cake is covered in chocolate. Once the chocolate has set slightly (but not completely!!) top evenly with mini eggs. Leave it for a few further minutes until the chocolate has completely set and then serve. Enjoy!

thumb_IMG_1487_1024

Cake recipes adapted from the ‘cut and keep butter cake’ and the ‘one-bowl chocolate cake’ in the Australian Women’s Weekly Classic Cakes cookbook.

Decoration inspiration from Sainsbury’s Magazine.

Chocolate Mint Sundae Cupcakes

Chocolate and mint are a match made in heaven and these cupcakes combine them in one deliciously compact package. The cupcakes are a dark chocolate mudcake which, to me, are the perfect blend of light and rich. They are then topped with a generous layer of fluffy mint buttercream (which tastes exactly like peppermint ice-cream I might add), melted dark chocolate and a crumbled Flake bar – what’s not to love?! These are also a gorgeous shade of green – perfect for St Patrick’s Day!

thumb_IMG_1481_1024

Ingredients (makes 12)
90g softened butter
1 cup brown sugar, firmly packed
2 eggs
⅔ cup self-raising flour
2 tablespoons cocoa powder
⅓ cup almond meal
⅔ cup water
60g dark chocolate melts, melted

Peppermint Buttercream Frosting
125g butter, softened
1 ½ cups icing sugar
2 tablespoons milk
Peppermint essence
Green food colouring

To decorate
1 large Flake bar, crumbled
30g dark chocolate melts, melted

thumb_IMG_1480_1024

Method
Preheat the oven to 170°C (150°C fan-forced). Line a 12-hole muffin tin with patty pans.

Beat butter, sugar & eggs in a large bowl with electric mixer until light and fluffy. Add in sifted flour and cocoa, almond meal, water and melted chocolate.

Fill each patty pan approximately ⅔ of the way full. Bake for around 25 minutes or until a skewer inserted comes out clean. Stand cakes in tin for 5 minutes before transferring them to a wire rack to cool.

Once cakes are fully cool, you can make the frosting. Beat butter in a medium bowl with electric mixer until light and fluffy. Beat in icing sugar and milk and a drop each of peppermint essence and green food colouring  (or until desired colour and flavour reached).

Ice cupcakes with a generous layer of frosting. To decorate, dollop each cupcake with dark chocolate and spread it so that it looks as though it is dripping slightly down the cakes. Top with crumbled Flake.

Enjoy!

thumb_IMG_1477_1024

Adapted from The Australian Women’s Weekly ‘Cupcakes by Colour’ cookbook

Carrot Cake with Lemon Cream Cheese Frosting

I love this cake, it’s so quick and effortless to put together and is absolutely delicious (also, because it contains carrot it’s basically a salad, right?!). It’s great at any time of year but is particularly good as a treat around Easter for someone who doesn’t like chocolate or for people who are chocolated out!

thumb_IMG_1330_1024

Ingredients (serves 8-10)
1 ½ cups grated carrot (lightly packed)
½ cup chopped walnuts
1 cup plain flour
2 eggs
1 teaspoon bicarb soda
1 cup caster sugar
1 teaspoon mixed spice
¾ cup vegetable oil
½ teaspoon salt
½ teaspoon vanilla

Lemon Cream Cheese Frosting:
40g (1 tablespoon) softened butter
60g cream cheese (e.g. Philadelphia)
1 teaspoon lemon rind
1 ½ cups icing sugar, sifted

To decorate (if desired):
Extra chopped walnuts
The thin end of a small carrot cut into 2 halves
4 sprigs of coriander

thumb_IMG_1336_1024

Method
Preheat oven to 180°C (160°C fan-forced).

Grease an 8″ round cake pan with margarine and line the base with baking paper.

Combine eggs, sugar, oil, vanilla & sifted dry ingredients  in a large bowl & beat on low speed.

Stir in carrots & walnuts. Mix well.

Pour mixture into the prepared cake tin and bake in the oven for approx. 40 – 45mins or until a skewer inserted in the middle of the cake comes out clean.

Let the cake cool in the tin for 5-10 minutes, before placing it on a wire rack to cool completely.

thumb_IMG_1231_1024

To make the cream cheese frosting, beat butter & cream cheese until smooth and creamy. Add in the lemon rind and icing sugar and beat until smooth. Spread evenly over the top and sides of the cake.

If desired, decorate by placing the finely chopped walnuts around the edge of the cake and the carrot pieces in the centre of the cake with two coriander sprigs above each carrot. Enjoy!

thumb_IMG_1337_1024

Recipe from Aunty Cynth

Chocolate Berry Meringue Nests

These meringue nests are the perfect conclusion to a summer dinner party or BBQ. They are light, flavoursome and not too sweet when paired with fresh berries and whipped cream. I especially love that they look like you’ve gone to a lot of effort (when they’re really very simple to make) and they don’t heat up the house too much while baking!

thumb_IMG_1228_1024

Ingredients (makes 4)
3 egg whites
¾ cup (165g) caster sugar
1 ½ teaspoons vanilla essence
1 tablespoon dark dutch cocoa powder
300ml thickened cream, whipped
Fresh berries, to decorate (I used strawberries, raspberries and blueberries)

Method
Preheat oven to 120 degrees C (~100 degrees C fan-forced). Line a large oven tray with baking paper.

Beat egg whites in a medium bowl with an electric mixer or mixmaster until soft peaks form. Add caster sugar, a tablespoon at a time, beating until the sugar dissolves between each addition. Add in vanilla essence and cocoa powder.

Divide the meringue mixture into 4 roughly equal sized dollops on the baking tray, and spread into circles approximately 11cm in diameter.

Bake in the oven for approximately 45 minutes or until meringues are firm. Turn off the oven and let meringues cool for 5 minutes, before letting them cool completely with the door ajar.

Top meringues with whipped cream and berries. Enjoy!

thumb_IMG_1212_1024

thumb_IMG_1223_1024

Adapted from ‘Chocolate Berry Meringues’ in The Australian Women’s Weekly cookbook ‘Best Food’, 2005 reprint.

Xmas Reblog: Christmas Crinkle Cookies!

Gosh these are good. So good in fact that I’m reblogging them and I STRONGLY urge to make yourself a batch, stat! You can thank me later…

thumb_IMG_1366_1024

Ingredients (makes approx. 36 cookies)
100g butter
1 ½ cups brown sugar
1 tspn vanilla extract
2 eggs
100g dark chocolate, melted
1 ¼ cups flour, sifted
2 tspns baking powder, sifted
¼ cup cocoa, sifted
1 tablespoon red food colouring (depending on strength & desired colour, mine could have been a bit redder)
150g extra dark chocolate, roughly chopped
¼ cup sugar
¼ cup icing (powdered) sugar

thumb_IMG_1362_1024

Method
Place butter, brown sugar & vanilla in a large bowl and beat with an electric mixer for 3-5mins or until light and well combined. Add eggs one at a time, beating well after each addition. Add the melted chocolate and beat until combined. Slowly add the flour, baking powder, cocoa and food colouring and beat until a smooth dough forms.

Image

Fold through the chocolate chunks and refrigerate, covered, for an hour.

Preheat oven to 160°C fan-forced. Roll dessert spoons of the dough into the white sugar, shape them gently into balls and then toss in icing sugar. Place them on lined baking trays allowing plenty of room for spreading.

Image

Bake the cookies for 12-14mins or until the surface is cracked and the edges are slightly crispy. Don’t worry if the centre of the cookies looks undercooked, it will harden while cooling and be deliciously chewy. Enjoy!

thumb_IMG_1363_1024

Adapted from the Red Velvet Crackle Cookies recipe in the Donna Hay Magazine Dec/Jan 2014


Vanilla Raspberry Layer Cake

Well.. I lied. I completely intended to blog more in the last few weeks (as evidenced by my last post!) but I’ve just been too busy. I had my 21st Birthday to plan, uni assessments galore, the Psychology ball to organise, and now Laura’s 18th is coming up in a couple of weeks. Yikes, I get exhausted just thinking about it all! However, while I haven’t been blogging, I have been baking.

Here is the cake I made for my 21st Birthday afternoon tea – triple layer vanilla cake with a tangy raspberry filling & super glossy meringue frosting, topped with vanilla bean macarons. The raspberry filling was perfect as, otherwise, this cake was going to be too sweet, so I would certainly recommend leaving it (or perhaps substituting it for a tangy lemon curd if you’re not a raspberry fan) to cut the sweetness from the frosting.

Elise's 21st Birthday 039
Don’t worry, the empty plates in the background didn’t stay empty!

For my 21st birthday cake, I used 2 packets of Betty Crocker’s SuperMoist Vanilla cake mix, with some extra vanilla added so they tasted more ‘home-made’ divided into 3 20cm lined pans. I did this for 2 main reasons; it saved a lot of time (and time was precious as I had so much other cooking to do!), and because it reliably produces an even, stable, fine-crumbed cake that is easy to work with. If you don’t want to use cake mixes, just make a double batch of your favourite vanilla/butter cake and that will work as well 🙂

The raspberry filling needs to be made at least a day ahead but keeps well in the fridge so can be made up to a week ahead.

I also made the macaron shells a couple of days ahead to save me some stress on the actual party day.

The frosting should be made the day of serving as it does not keep particularly well.

Ingredients

For the raspberry filling (make at least a day ahead)
340g frozen raspberries
⅔ cups water
½ cup white, granulated sugar
1 tblspn lemon juice
2 ½ tblspns cornstarch dissolved in ¼ cup of water

For the cake
2 boxes Betty Crocker’s SuperMoist Vanilla cake mix (made following instructions, so add the eggs, milk, butter etc. as specified by the box)
½ tablespoon vanilla extract

For the meringue frosting
6 egg whites
1 ¾ cups caster sugar
2 tblspns liquid glucose (or light corn syrup)
¼ teaspoon cream of tartar
2 teaspoons vanilla extract

For the macarons
https://bakerholicsanonymous.wordpress.com/recipes-2/cookies-biscuits-macarons/vanilla-bean-macarons/

Elise's 21st Birthday 048

Method
To make the raspberry filling:
In a saucepan combine the raspberries, water, sugar, and lemon juice. Bring to boil and simmer for 15-20mins  or until the raspberries have broken down.
Remove the mixture from the heat and strain with a fine mesh sieve. Return the stained mixture to the heat. Dissolve the cornstarch in water. Whisk the cornstarch mix into the raspberry mixture.
Bring the mixture back to a boil and simmer for 5 more minutes, stirring occasionally. Remove from heat and cool completely.
Refrigerate overnight to set.

To make the cakes: Line & grease 3 20cm cake pans. Set oven to temperature specified by the cake mix boxes. Make cakes according to box instructions, add ½ teaspoon of vanilla extract to each cake mix & divide mixture among the three pans. Bake for specified time, or until a skewer inserted comes out clean.

To assemble the cake: Carefully place a cake layer on your serving platter. Top with a generous amount of raspberry filling and spread gently using a spatula to make an even layer. Top with another cake layer and repeat. Finally, top with the final cake, ready to be frosted.

Elise August 2015 111

To make the meringue frosting: Add egg whites, sugar, liquid glucose and cream of tartar, and simmer over a pot of water (not boiling), whisking constantly but gently, until temperature reaches 54°C on a thermometer (be patient, it does get there eventually!).
Beat heated mixture with electric beaters on a low speed for 2 minutes, then increase the speed to medium and beat for 2 more minutes. Increase the speed to high and beat until it is very thick and glossy, about 5 minutes.
Add vanilla and beat to combine.
Frost cake immediately by piling the frosting on top of the cake and, using a metal spatula, gently spreading from the top down. Smoothe as much as possible with your spatula.

Top with 6 macarons, 3 of each colour and a candle (if desired).

Serve each piece with a macaron & enjoy!

Elise's 21st Birthday 048

Elise August 2015 131

Elise August 2015 132

Raspberry filling recipe adapted from: Pinterest (various sources with the same basic recipe)

Meringue frosting recipe adapted from Sweetapolita’s ‘Perfectly Pink Angel Food Cake’ http://sweetapolita.com/2015/05/perfectly-pink-angel-food-cake/

Vanilla Bean Macarons

Elise August 2015 113

I made these particular macarons to sit on top of my 21st birthday cake (and because I think no afternoon tea is complete without them!) Feel free to adapt the colours or flavours as you wish.

Ingredients (makes around 40 macarons, 20 paired)
Macaron shells
225g pure icing sugar
130g almond meal
115g egg whites
60g caster sugar
1g bicarb soda
A few drops of rose pink & violet food colouring

Vanilla bean filling
100g butter, softened
¼ cup milk
½  tblspn organic vanilla bean paste
4 cups icing sugar
Rose pink & violet food colouring

Method
Preheat oven to 150°C fan forced. Grease and line two large baking trays with baking paper.

Separately sift icing sugar and almond meal into medium bowls or over sheets of baking paper. Repeat process 3 times and re-weigh ingredients (I know this seems excessive but trust me, it’s worth it). You will need to top up the ingredients as you may have lost some in the sifting process. Sift icing sugar and almond meal into a bowl and repeat, ensure there are no lumps.

Whisk egg whites until doubled in size using electric beaters or an electric stand mixer. While still whisking, gradually add caster sugar and bicarb, whisking until mixture forms very stiff peaks.

Gently fold almond meal mixture into meringue using a spatula until incorporated.

Divide mixture into 2 bowls. Add food colouring (pink to one, purple to the other) one drop at time, stirring very gently with a spatula, until desired colour reached.

Spoon into a piping bag fitted with a 9mm round nozzle (approximately). Hold nozzle close to the baking tray and pipe 3cm diameter circles onto prepared trays – don’t make a circular motion àla soft serve. Tap the underside of the tray to allow macarons to settle and air bubbles to escape. If there is still a little peak on top, dip a teaspoon in water and use the back to smooth the surface. Repeat with other colour. 217929_10151403883896183_1104201680_n

Leave to rest for at least 20-30 minutes or until the macarons form a skin and the top is no longer shiny or sticky to the touch (this is VERY important as it will give your macaron its lovely ‘foot’).

Bake for 12 minutes. Remove trays from the oven and allow macarons to cool on the tray. They will still be soft at this stage but will firm up on cooling.

Elise August 2015 087

To make the buttercream, cream the butter for 1-2 mins. Add the milk, vanilla and half of the icing sugar and beat for at least 3 mins (until the mixture is light and fluffy).

Add the remaining icing sugar and beat for a further 3 mins or until of a spreadable consistency. Add extra milk if too dry or extra icing sugar if too wet.

Halve the mixture and add a drop of rose food colouring to one half and a drop of violet colouring to the other.

Pipe a generous amount of buttercream onto half the macarons and sandwich with a second macaron.

Elise's 21st Birthday 003

Elise's 21st Birthday 004

Elise's 21st Birthday 039

Recipe adapted from Callum Hann’s ginger macarons

Salted Caramel Blondies

These delicious blondies taste like a cross between choc chip cookies and cake. Be careful not to over cook them as they’re definitely best when fudgy.

GlGdzQI2RmuJf%EzUYw+DQ_thumb_1b88

Z7qs2o8yQdeQ+yZpNoD%Yw_thumb_1b8b

Ingredients (Makes about 25 blondies)
180g unsalted butter, melted
1 ½ cups lightly packed brown sugar
2 eggs
2 teaspoons vanilla extract
1 ½ cups plain flour
Sea salt flakes
½  cup white chocolate melts
½ cup white chocolate chips
½ cup milk chocolate chips (optional)

Method
Preheat the oven to 190°C (or 170 fan-forced). Line a 20cm square baking tin with baking paper.

Mix the melted butter and brown sugar together in a large bowl. Beat in the eggs, one at a time, and then the vanilla extract.

Gently stir in the flour and a pinch of sea salt. Carefully fold in the chocolate, making sure it is evenly dispersed.

Spoon the mixture into the prepared baking tin and smooth the top with a spatula. Sprinkle a couple of pinches of salt over the top and then bake for 20-30 minutes, or until the outside is cooked and the middle has a slight wobble.

Remove from the oven, sprinkle once more with a pinch or two of salt, and allow to cool for 30 minutes in the tin. Gently remove the blondie from the tin by the baking paper and leave to cool for a further 5-10 minutes on a cooling rack.

Once cool, cut into squares. Enjoy!

wojLkPEET7SYVKkYi%3Krw_thumb_1b8c

Adapted from Callum Hann’s ‘Salted Dirty Blondies’ in I’d Eat That, 2014.


Rhubarb & Cinnamon Muffins

These are some of my favourite muffins and one of the most delicious ways to use rhubarb. The combination of the tart rhubarb and buttermilk with the crunchy sugar and cinnamon crust is a match made in heaven. Try them warm out of the oven and try and stop at one!

990305F6-4C1E-4651-A3D3-7F6EE5C00CFD_1_105_c

Ingredients (makes 16)
For the rhubarb mixture
1 bunch rhubarb, washed, ends trimmed
2 tablespoons water
2 tablespoons sugar

For the muffins
1 cup rhubarb mixture
1 ¼ cups plain flour
½ cup sugar
2 teaspoons baking powder
¾ cup buttermilk
¾ cup olive oil
1 egg

For the sugar-cinnamon crust
⅓ cup sugar
2 tablespoons ground cinnamon

CD1DA4F0-1CC6-4710-807D-CD8B6740F7CA_1_105_c

Method
Preheat the oven to 180°C fan-forced. Line muffin tins with 16 patty pans.

Chop rhubarb into small, even pieces and cook with water and sugar in a small saucepan over a medium heat until the rhubarb is tender and the sugar has dissolved. Stand for 5 minutes to cool.

Add flour, sugar and baking powder into a large bowl and make a well in the centre. Carefully pour in the buttermilk, olive oil and egg and gently stir to combine. Mix in the cooked rhubarb, being careful not to over-stir (note: the mixture is supposed to be very wet, don’t worry!)

Spoon mixture evenly into muffin cases & top with mixed sugar and cinnamon.

Bake for 25-30 minutes or until a skewer inserted comes out clean. Top with extra stewed rhubarb and cream if desired. Enjoy!

0718D069-BC73-4A0C-8BC3-DEB786181367_1_105_c

Recipe adapted from Grandma

Rich Chocolate Tart

image2-10

This was the main component of the dessert I made for Mother’s Day (in addition to the raspberry sorbet) and it was a winner with everyone. It’s not difficult to make (but looks it) and is the perfect conclusion to any meal.

image1-11

Ingredients (serves 10)
4 egg yolks
2 eggs
¼ cup caster sugar
⅓ cup thickened cream
300g dark chocolate, melted
1 teaspoon vanilla extract

1 quantity of sweet pastry

Method
Make the pastry. Reduce the oven temperature to 160°C (approx. 140-150°C  fan-forced, depending on your oven).

Beat egg yolks, eggs & caster sugar in a large bowl with an electric mixer until thick and creamy. Gently fold in cream, melted chocolate and vanilla.

Pour the chocolate mixture into the pastry case.

image1-8

Bake, uncovered, for approximately 30 minutes, or until the filling is just set.

image2-7

Cool for 10 minutes. Serve dusted with sifted cocoa and raspberry sorbet (if desired). Enjoy!

image2-11

Recipe adapted from the Australian Women’s Weekly “Best Food: Desserts” cookbook (2004)

image1-14
Image Source: The Australian Women’s Weekly