Peanut Butter, Caramel & Chocolate Drip Cake

thumb_IMG_2205_1024

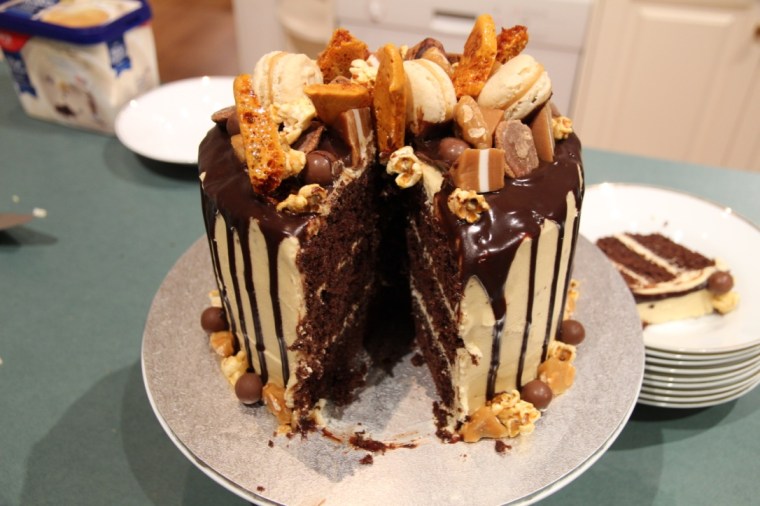
This cake is highly over-the-top, but highly delicious. 3 layers of rich dark chocolate cake slathered in salted caramel sauce and peanut butter frosting, draped in chocolate ganache and topped with all things good: honeycomb, caramel macarons, peanut brittle, maltesers, snickers pods, jersey caramels and caramel popcorn.

thumb_IMG_2210_1024

Ingredients (serves 16)
Chocolate Layer Cake
2 boxes dark chocolate cake ( I used Betty Crocker moist devil’s food cake)

Salted Caramel Filling 

Peanut Butter Frosting
1 ½ cups smooth peanut butter
375g butter, softened
6 teaspoons vanilla extract
6 cups icing sugar
3 tablespoons milk

Dark Chocolate Ganache
170g dark chocolate melts
¾ cup cream
1 ½ teaspoons corn syrup

Toppings
1 x packet Snickers pods
1 x packet caramel popcorn
1 x packet jersey caramels (halved diagonally)
1 x packet peanut brittle
1 x packet Maltesers
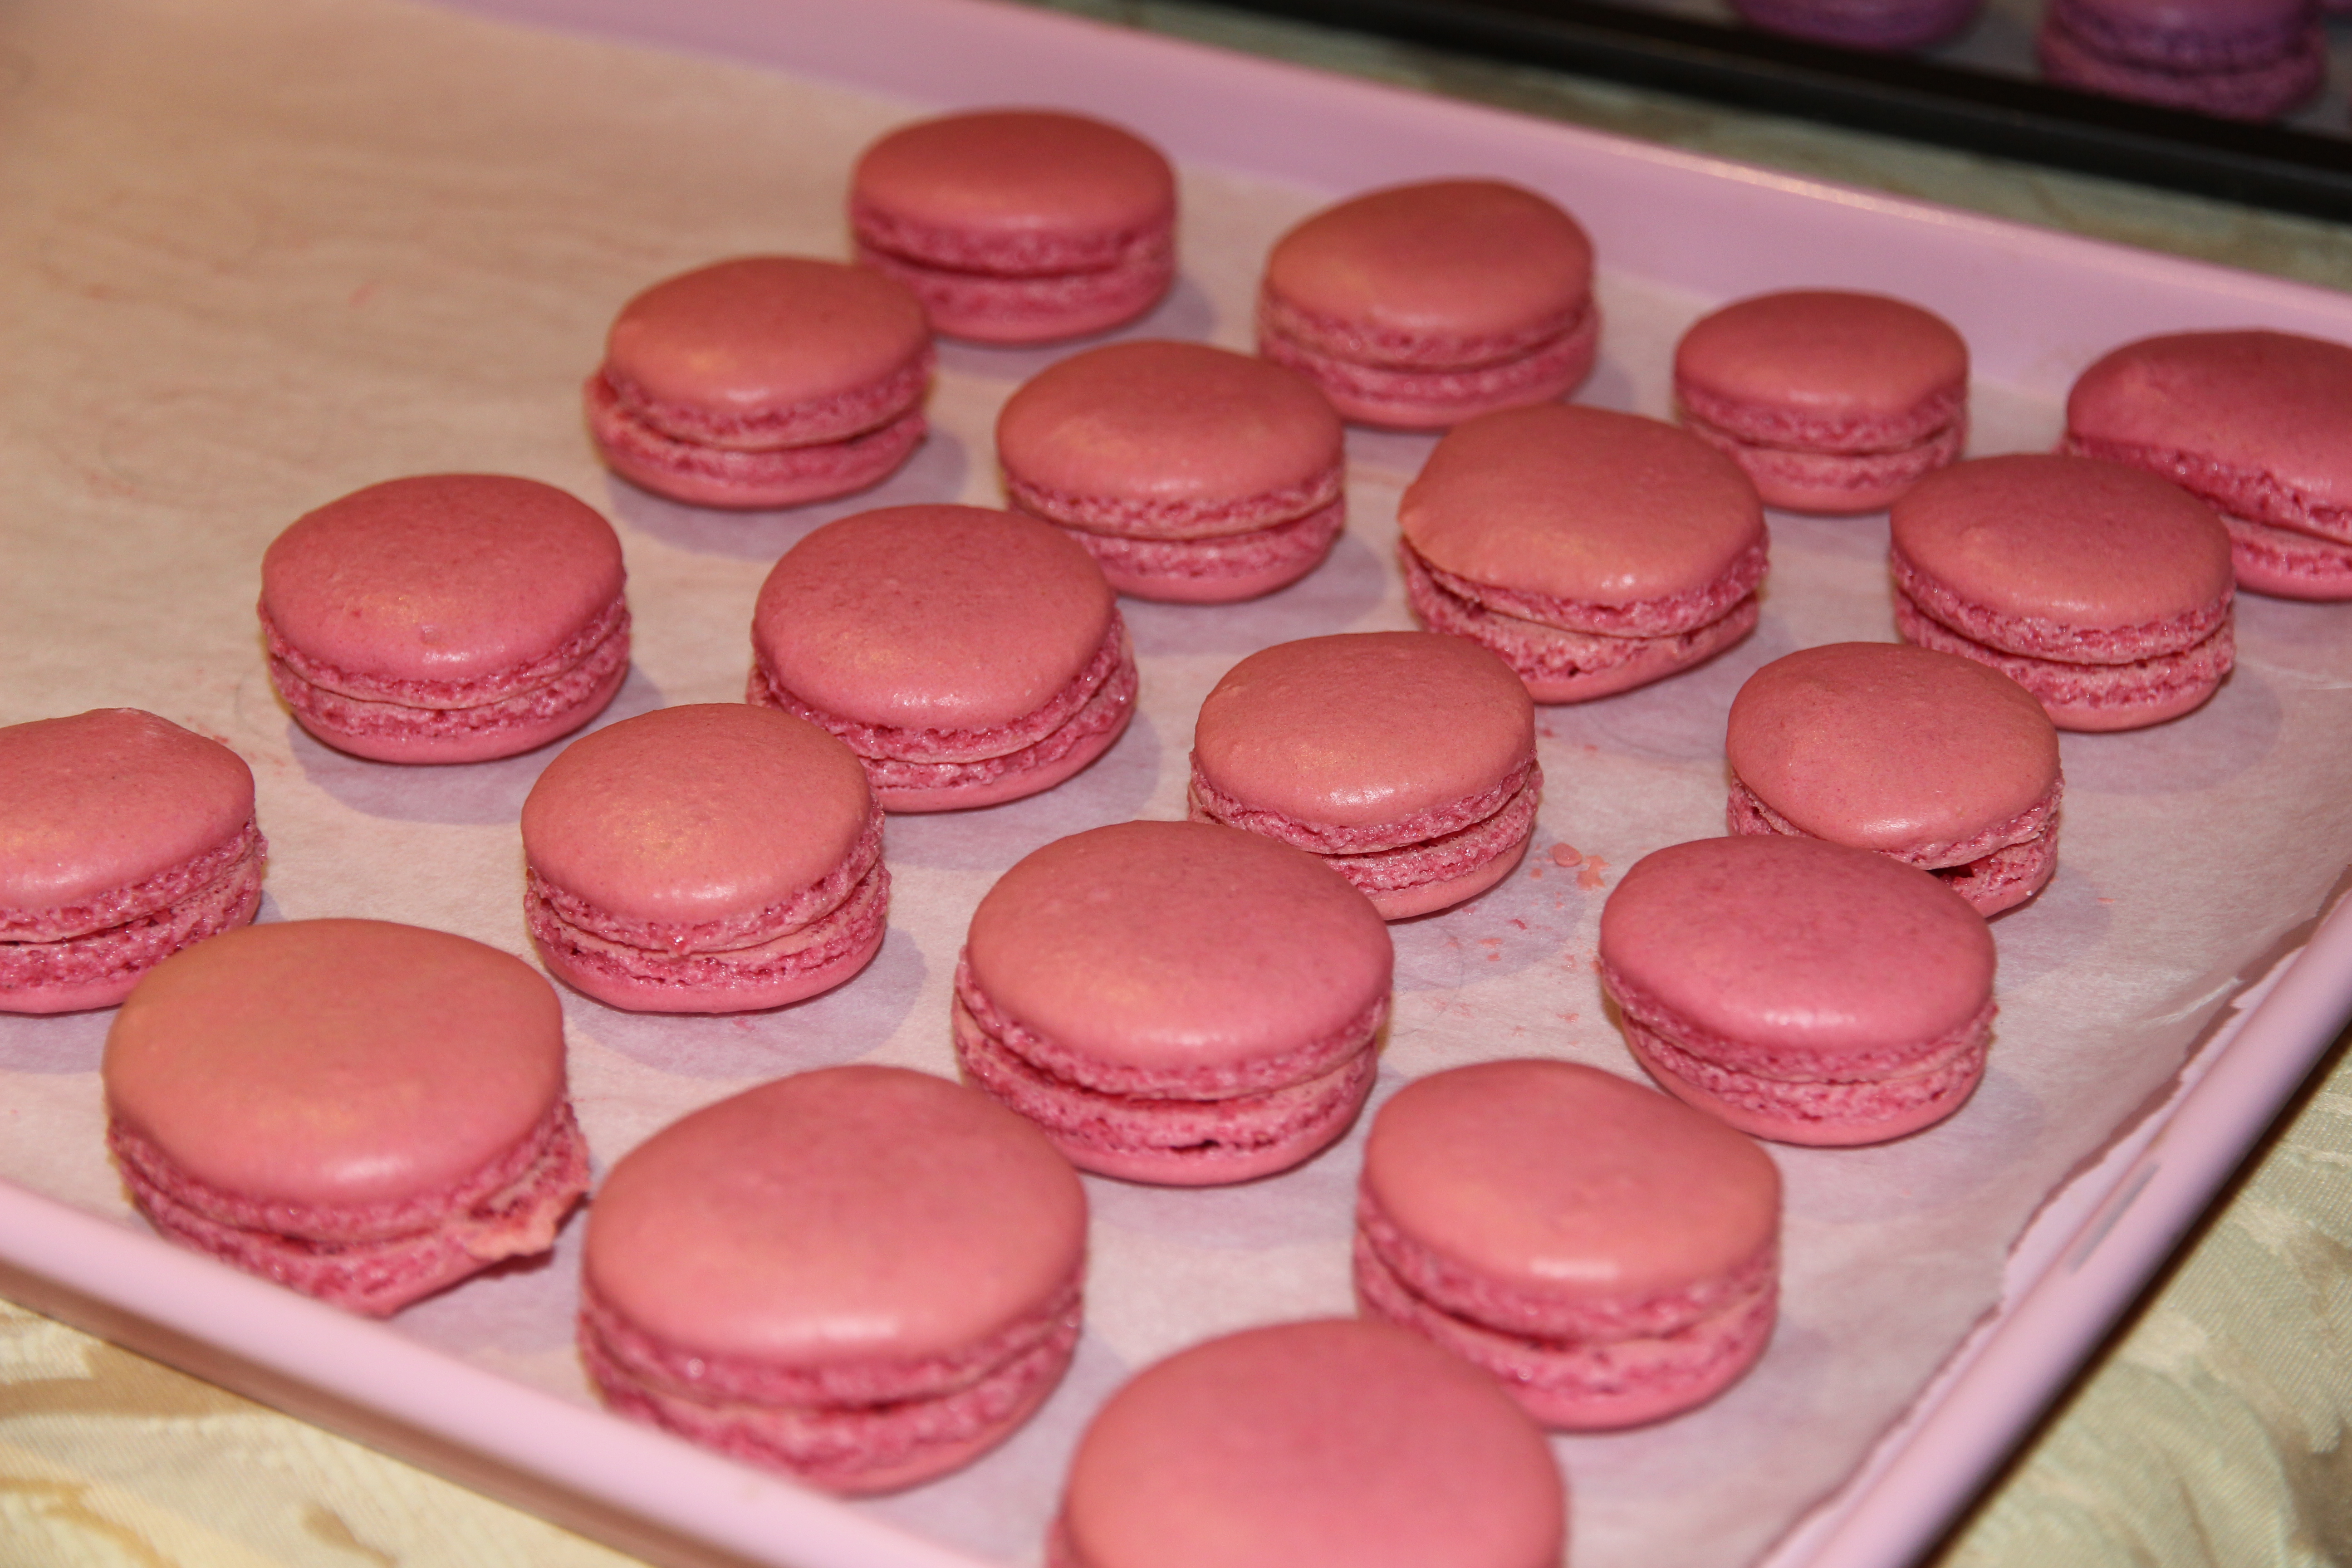
Salted caramel macarons (optional)
Honeycomb

thumb_IMG_2219_1024

Method
Make 4 cakes, according to packet instructions, by halving the batter from each cake mix. Carefully trim cooked cakes where necessary to ensure they are perfectly flat, and use the best 3 (freeze the 4th for another time, or add a 4th layer if you really want to impress).

To make the frosting, beat peanut butter and butter until smooth. Add vanilla and slowly add the icing sugar. Add the milk and beat until just combined.

Spread a generous layer of frosting onto the bottom cake layer, and then top with caramel filling. Repeat with the remaining layer/s.

image2-7.JPG

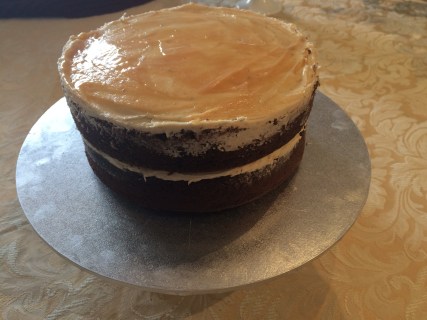
Spread frosting onto the top and sides of the cake – don’t worry if you get crumbs in it, this is called the crumb coat. Using a spatula or protractor (as I did!), scrape off excess frosting so you have a thin smooth layer.

Refrigerate cake for 30 minutes or until frosting is firm. Add a second layer of frosting onto the top and sides of cake, using the protractor again to scrape off the excess and create a smooth finish. Refrigerate for a further 30 minutes.

thumb_IMG_2187_1024

Place chocolate melts into medium bowl and set aside. Heat cream in a saucepan over medium-high heat just until it almost starts to simmer. Remove from heat and pour over chocolate. Let sit for about 5 minutes and then stir with a wooden spoon until chocolate is completely melted and smooth. Stir in corn syrup.

Use a spoon to add a few purposeful drips over the top edge of the cake. Then spoon more ganache on top of the cake, allowing it to drip at varying points around the cake.

Top cake with honeycomb, caramel popcorn, maltesers, jersey caramels, pods and macarons. Enjoy!

thumb_IMG_2238_1024

thumb_IMG_2199_1024

Honeycomb

This is an old family recipe for delicious honeycomb – perfect enjoyed by itself, dipped in chocolate to make home-made ‘crunchies’, or as decorations on cakes.

Note: best consumed on the day it is made and stored immediately in an airtight container so it doesn’t go sticky.

thumb_IMG_2210_1024

Ingredients
6 tablespoons white sugar
2 tablespoons honey
½ tablespoon water
1 teaspoon bicarb soda

Method

Place a sheet of non-stick baking paper on a tray.

Place sugar, honey and water in a medium saucepan over high heat.

Bring to the boil. Boil for 3 minutes or until deep golden in colour.

Take off the heat and lightly sprinkle over bicarb soda, stirring any lumps if required (but otherwise leaving it to froth and bubble).

Pour mixture onto prepared tray (don’t spread it too much or you will lose aeration), and allow it to set at room temperature.

thumb_IMG_2193_1024

Once set, break it into desired size pieces. Enjoy!

Recipe adapted from my Great Grandmother, Doreen James.

Chocolate Fudge Brownies

These chewy, fudgy chocolate brownies, created by the domestic goddess Nigella herself, are my reliable go-to goodies when asked to bring a plate for morning or afternoon teas. They are best eaten on the day made (which often means I get up early on the day to make them) and are ridiculously good warmed with a scoop of vanilla ice-cream.

thumb_IMG_1939_1024

Ingredients (makes 16 large brownies)
200g good-quality dark chocolate
250g salted butter
1¾ cups brown sugar
4 eggs
⅓ cup cocoa
1¼ cups plain flour
¼ teaspoon baking powder

thumb_IMG_1952_1024

Method
Preheat oven to 160°C fan-forced. Line a 20cm x 30cm rectangular tin with baking paper.

Melt chocolate and butter in the microwave (or on the stovetop) and stir until smooth. Allow to cool slightly.

Place sugar, eggs, cocoa, flour and baking powder in a large bowl. Pour in chocolate mixture and mix until combined.

Pour into prepared tin and bake for 35-45 minutes or until set on top (but should still be gooey in the middle). Leave to cool slightly in tin.

Cut into 16 evenly sizes pieces. Enjoy!

thumb_IMG_1947_1024

Recipe adapted from Nigella Lawson.

NB: Can be kept in an airtight container at room temperature for up to 3 days, but in my opinion, the fresher the better.


Neapolitan Easter Layer Cake

thumb_IMG_1510_1024

This cake is surprisingly quick & easy to whip up and makes the perfect centre piece to an Easter celebration. This cake is very rich so small pieces are recommended, especially when consumed in addition to chocolate eggs on Easter Sunday!

Of course, this cake doesn’t need to be Easter-themed at all, just omit the mini eggs and decorate as desired.

thumb_IMG_1483_1024

Ingredients (layer cake serves up to 20 + 6 cupcakes out of the vanilla cake mix)
For the white & pink layers
190g butter, softened
2 teaspoons vanilla extract
410g caster sugar
4 eggs
1½ cups plain flour
¾ cup self-raising flour
½ teaspoon bicarb soda
¾ cup milk
Pink food colouring

For the chocolate layer
60g butter
1 teaspoon vanilla extract
140g caster sugar
1 egg
100g self-raising flour
¼ cup cocoa
80ml water

For the vanilla buttercream
200g butter, softened
½ cup milk
1 tblspn vanilla extract
8 cups icing sugar

To decorate
150g dark chocolate
1 ½ bags Cadbury mini eggs, or easter eggs of your choice

thumb_IMG_1508_1024

Method
Grease & line three 20cm cake tins and line a 6-hole muffin tin with patty pans. Preheat oven to 180°C or 160°C fan-forced.

To make the vanilla cake layers, add the butter, vanilla, caster sugar, eggs, flours, bicarb soda and milk to a large bowl. Beat for 1-2 minutes with an electric mixer until completely combined and lighter in colour.

Fill the 6 patty pans approximately ¾ full with cake batter and set aside.

Divide the remaining vanilla batter into halves and colour one half pink with food colouring (this time I only used a couple of drops, but in future I will put in more for a more vibrant colour). Spread white mixture into one prepared tin and pink mixture into another, and set aside.

To make the chocolate layer, add butter, vanilla, sugar, egg, flour, cocoa and water into a large bowl. Beat for 1-2 minutes with an electric mixer until completely combined. Spread into remaining cake tin.

Place the three large cakes into the oven and bake for ~40 minutes or until a skewer inserted comes out clean. When they are half way cooked (i.e. after 20 minutes), put the cupcakes into the oven and let them cook for ~20-25 minutes or until a skewer inserted comes out clean.

Cool cakes for 5 minutes in their tins, then gently turn out onto metal cooling racks to cool completely.

Once the cakes are cool, you can start on the frosting. Cream the butter for 1-2 mins in a large bowl using an electric mixer. Add the milk, vanilla and half of the icing sugar and beat for at least 3 mins (until the mixture is light and fluffy). Add the remaining icing sugar and beat for a further 3 mins or until of a spreadable consistency. Add extra milk if too dry or extra icing sugar if too wet.

Spread frosting over the top of each of your cupcakes and top with a mini egg if desired.

To assemble the layer cake, put a small amount of frosting in the middle of a cake stand (or plate/cake board/ whatever you want your cake to be displayed on) and gently place your chocolate layer on top. Top the cake with a generous layer of frosting and smoothe it out to the edges so you have an even layer. Gently place the pink layer directly on top, ensuring that it is flat and in-line with the chocolate layer (if the cake is wonky at all, shave some of the cake off with a knife so it sits flat, or add more frosting where it is thinner). Top the pink layer with a generous dollop of frosting and, again, smoothe it out to the edges so it’s evenly spread. Gently place the white cake on top, again making alterations if necessary so that it is flat and even.

Coat top and sides of the cake with a thin layer of frosting and don’t worry if you get crumbs in this layer (it is known as the ‘crumb coat’). Put the cake in the freezer for 10 minutes or until set. Top with another layer of frosting and smoothe with a palette knife so you have a neat, even surface. Return to the freezer for a further 10 minutes to set.

While the cake is in the freezer, melt your chocolate ready for the drizzle. Once your cake’s frosting is set, pour the melted chocolate onto the top of your cake and allow it to run down the sides. Make sure the entire top of the cake is covered in chocolate. Once the chocolate has set slightly (but not completely!!) top evenly with mini eggs. Leave it for a few further minutes until the chocolate has completely set and then serve. Enjoy!

thumb_IMG_1487_1024

Cake recipes adapted from the ‘cut and keep butter cake’ and the ‘one-bowl chocolate cake’ in the Australian Women’s Weekly Classic Cakes cookbook.

Decoration inspiration from Sainsbury’s Magazine.

Chocolate Berry Meringue Nests

These meringue nests are the perfect conclusion to a summer dinner party or BBQ. They are light, flavoursome and not too sweet when paired with fresh berries and whipped cream. I especially love that they look like you’ve gone to a lot of effort (when they’re really very simple to make) and they don’t heat up the house too much while baking!

thumb_IMG_1228_1024

Ingredients (makes 4)
3 egg whites
¾ cup (165g) caster sugar
1 ½ teaspoons vanilla essence
1 tablespoon dark dutch cocoa powder
300ml thickened cream, whipped
Fresh berries, to decorate (I used strawberries, raspberries and blueberries)

Method
Preheat oven to 120 degrees C (~100 degrees C fan-forced). Line a large oven tray with baking paper.

Beat egg whites in a medium bowl with an electric mixer or mixmaster until soft peaks form. Add caster sugar, a tablespoon at a time, beating until the sugar dissolves between each addition. Add in vanilla essence and cocoa powder.

Divide the meringue mixture into 4 roughly equal sized dollops on the baking tray, and spread into circles approximately 11cm in diameter.

Bake in the oven for approximately 45 minutes or until meringues are firm. Turn off the oven and let meringues cool for 5 minutes, before letting them cool completely with the door ajar.

Top meringues with whipped cream and berries. Enjoy!

thumb_IMG_1212_1024

thumb_IMG_1223_1024

Adapted from ‘Chocolate Berry Meringues’ in The Australian Women’s Weekly cookbook ‘Best Food’, 2005 reprint.

Xmas Reblog: Easy Chocolate Yule Log

Today I’m sharing with you an incredibly easy yet delicious cheat’s version of the classic French Christmas dessert – Bûche de Noël.

For a traditional pudding-hater like myself, Christmas dessert has never brought much joy. Sure, you can smother your piece of pudding in custard (which I do) and that helps a bit, but somehow the fruity-boozy flavour that I hate so much still overpowers it. Anyway, fortunately I’m not the only pudding-hater in my family and so last year Mum made this Bûche de Noël (chocolate yule log) in addition to the pudding for dessert. This yule log is sweet (but not overly so) and very light – perfect for a hot summer’s day. It proved so popular last year that we’ll be making it again this year 🙂

December '13 - June '14 279

Ingredients (Serves up to 12)
1x 250g packet Arnott’s chocolate ripple biscuits (or equivalent)
600ml thickened cream
1 tspn caster sugar
1 tspn vanilla essence
20g cocoa powder
Grated chocolate, to decorate
Spearmint leave lollies, to decorate
Raspberries, to decorate

Method
Using an electric mix, mix cream, sugar and vanilla together until stiff.

Fold in the cocoa until combined.

Spread a small amount of the cream along a long, rectangular serving plate to make a base. Spread 1 biscuit with 1 ½ teaspoons of cream and then top with another biscuit. Top with another 1 ½ teaspoons of cream and then place biscuits on their side onto the cream base on the serving platter.

Repeat until all biscuits have been used, to form a log.

Spread remaining cream over entire log, reserving a small amount for the branch.

Cover loosely with foil and refrigerate for at least 6 hours to set.

Just before serving, cut cake diagonally about a quarter of the way in and use that piece as a branch off the main log.

Patch it up with the remaining cream so it looks attached.

Use a fork to make some lines along the branch to look natural and then sprinkle with grated chocolate.

Decorate with some raspberries and spearmint leaves and serve. Enjoy!

December '13 - June '14 279

Adapted from Arnott’s ‘Bake and Create’ Recipe booklet.

Thanksgiving Pumpkin Pie

Pic from Inspired Taste.net (mine got eaten too quickly!)
Pic from Inspired Taste (mine got eaten too quickly!)

Even though Thanksgiving isn’t really a holiday celebrated here in Australia, this year my family decided to get in on the action anyway as a number of us will be away over Christmas (and we like to party with or without good reason). So, in keeping with tradition, I made a pumpkin pie for dessert. I had no idea what to expect having never tried one before, but gave a highly rated recipe I found online a go and was really pleased with the result. If I didn’t know there was pumpkin in there (and it wasn’t orange) I wouldn’t pick it because it’s really the vanilla and spices that come to the fore, with the pumpkin providing a creamy, sweet back note. Pumpkin-y or not it was delicious and I’ll probably make it again when pumpkins are in season.

Ingredients (serves 8-10)
Pastry
1 ½ cups plain flour
3 tspns icing sugar
140g cold butter, chopped
1 egg yolk
2 tblspoons water

Filling
2 cups pumpkin puree (made by roasting pumpkins, scooping out the flesh, blitzing it into a smooth paste in a blender and then putting it in a sieve for an hour or so to remove the excess juice)
3 large eggs
½ cup sugar
⅓ cup brown sugar
¾ cup cream
1 ½ teaspoons vanilla extract
1 ½ teaspoons ground cinnamon
1 teaspoon ground nutmeg
½ teaspoon ground ginger
¼ teaspoon ground cloves
A pinch of salt
1 quick grind of pepper (i.e. a really small amount, sounds odd but it works!)

Method
To make the pastry, put the flour, icing sugar, butter, yolk & water into a food processor and process until it just comes together. Press into a ball, knead gently on a floured surface until smooth & then refrigerate, covered in clingfilm, for 30 mins.

Preheat the oven to 200°C fan-forced. Lightly grease a 23cm flan tin or pie dish.

When the pastry has chilled, roll dough on a floured surface until large enough to line the tin (I often have a bit left over). Lift pastry into tin, ease into the sides & then trim the excess.

10822204_10152813949004463_1427830649_n

Cover the pastry with a sheet of baking paper and fill with pie weights or uncooked rice. Bake in the oven for 10 minutes.

Meanwhile, whisk eggs and sugar until smooth. Add the pumpkin puree, cream, vanilla and spices and stir until all incorporated.

10819066_10152813949034463_1140907709_n

Pour mixture into pastry case (obviously remove the baking paper and pie weights first!!) and smooth over the top. I ended up having a bit of pumpkin filling left over that I might use in muffins or something (if I don’t eat it all first :P)

10754950_10152813948824463_297181058_n

Bake pie in the oven for 10 minutes before reducing the heat to 160°C fan-forced for around 30-40 minutes, or until a skewer inserted comes out clean.

10834135_10152813948784463_763620382_n

Let cool completely before transferring to a serving platter and then serve at room temperature with whipped cream or ice cream. Enjoy!

Pumpkin-Pie-Recipe-13
Pic from Inspired Taste (mine got eaten too quickly!)

Pastry recipe from the Australian Women’s Weekly Lemon Meringue Pie Recipe & Filling Recipe from Inspired Taste.net

Tangy Lemon Tart

Since moving to Adelaide, I’ve been lucky enough to have access to an abundance of homegrown lemons. In our rental house in 2013, our lemon tree provided perfect fruit almost all year round, and my Aunt & Uncle also grow outstanding citrus and always seem to have plenty to give away. This has meant lots of experimentation with lemon desserts and this one has to be one of my most popular! This tart has a strong, slightly tart lemon flavour and  gorgeously short, melt-in-your-mouth pastry. Serve dusted with icing sugar and with thickened cream or ice cream for a perfect dinner party dessert.

e3HDCt%LQaqor6f1h3H8dw_thumb_28f5

Ingredients (Serves 12)
Pastry
2 cups plain flour
½ cup icing sugar, sifted
180g cold unsalted butter, chopped
1 egg, lightly beaten

Filling
5 eggs
3 egg yolks
150g caster sugar
200ml freshly squeezed lemon juice, strained
100ml freshly squeezed orange juice, strained
250ml pouring cream

Icing sugar, to dust
Double cream or vanilla ice cream, to serve

image1-19

Method
To make the pastry, process the flour, icing sugar & butter in a food processor until the mixture resembles breadcrumbs. Add the egg and process until the mix just comes together. Form the pastry into a disc, wrap in glad wrap and refrigerate for at least 2 hours.

Preheat oven to 180°C (160°C fan-forced). Spray a 27cm tart pan with a removable base with cooking oil. Roll out pastry on a lightly floured surface until 4mm thick and use to line the prepared pan. Trim the edge, then line with baking paper and fill with pastry weights (or dried rice). Bake for 15mins then remove weights and paper and cook for a further 5mins until golden. Set aside.

Reduce oven to 150°C.

To make lemon filling, place eggs, yolks & sugar into a bowl and stir until just combined (try to avoid creating bubbles). Gently stir in lemon and orange juices. Pour cream into a small saucepan and bring almost to the boil, then stir it into egg mixture. Using a fine sieve, strain lemon filling into a jug. Place tart shell onto an oven tray and pour in the filling.

Bake for 15mins, then carefully rotate to ensure even cooking. Bake for a further 10mins or until just set. To check, gently shake the tart; it should be slightly wobbly in the centre.

Cool the tart to room temperature, then dust with icing sugar and serve with double cream or ice cream.

jMSeO5usSQOH+Bysd3Z9qA_thumb_28f7.jpg

Adapted from Matt Moran’s Lemon Tart featured in MasterChef Magazine – Issue 3, July 2010.

Vanilla Raspberry Layer Cake

Well.. I lied. I completely intended to blog more in the last few weeks (as evidenced by my last post!) but I’ve just been too busy. I had my 21st Birthday to plan, uni assessments galore, the Psychology ball to organise, and now Laura’s 18th is coming up in a couple of weeks. Yikes, I get exhausted just thinking about it all! However, while I haven’t been blogging, I have been baking.

Here is the cake I made for my 21st Birthday afternoon tea – triple layer vanilla cake with a tangy raspberry filling & super glossy meringue frosting, topped with vanilla bean macarons. The raspberry filling was perfect as, otherwise, this cake was going to be too sweet, so I would certainly recommend leaving it (or perhaps substituting it for a tangy lemon curd if you’re not a raspberry fan) to cut the sweetness from the frosting.

Elise's 21st Birthday 039
Don’t worry, the empty plates in the background didn’t stay empty!

For my 21st birthday cake, I used 2 packets of Betty Crocker’s SuperMoist Vanilla cake mix, with some extra vanilla added so they tasted more ‘home-made’ divided into 3 20cm lined pans. I did this for 2 main reasons; it saved a lot of time (and time was precious as I had so much other cooking to do!), and because it reliably produces an even, stable, fine-crumbed cake that is easy to work with. If you don’t want to use cake mixes, just make a double batch of your favourite vanilla/butter cake and that will work as well 🙂

The raspberry filling needs to be made at least a day ahead but keeps well in the fridge so can be made up to a week ahead.

I also made the macaron shells a couple of days ahead to save me some stress on the actual party day.

The frosting should be made the day of serving as it does not keep particularly well.

Ingredients

For the raspberry filling (make at least a day ahead)
340g frozen raspberries
⅔ cups water
½ cup white, granulated sugar
1 tblspn lemon juice
2 ½ tblspns cornstarch dissolved in ¼ cup of water

For the cake
2 boxes Betty Crocker’s SuperMoist Vanilla cake mix (made following instructions, so add the eggs, milk, butter etc. as specified by the box)
½ tablespoon vanilla extract

For the meringue frosting
6 egg whites
1 ¾ cups caster sugar
2 tblspns liquid glucose (or light corn syrup)
¼ teaspoon cream of tartar
2 teaspoons vanilla extract

For the macarons
https://bakerholicsanonymous.wordpress.com/recipes-2/cookies-biscuits-macarons/vanilla-bean-macarons/

Elise's 21st Birthday 048

Method
To make the raspberry filling:
In a saucepan combine the raspberries, water, sugar, and lemon juice. Bring to boil and simmer for 15-20mins  or until the raspberries have broken down.
Remove the mixture from the heat and strain with a fine mesh sieve. Return the stained mixture to the heat. Dissolve the cornstarch in water. Whisk the cornstarch mix into the raspberry mixture.
Bring the mixture back to a boil and simmer for 5 more minutes, stirring occasionally. Remove from heat and cool completely.
Refrigerate overnight to set.

To make the cakes: Line & grease 3 20cm cake pans. Set oven to temperature specified by the cake mix boxes. Make cakes according to box instructions, add ½ teaspoon of vanilla extract to each cake mix & divide mixture among the three pans. Bake for specified time, or until a skewer inserted comes out clean.

To assemble the cake: Carefully place a cake layer on your serving platter. Top with a generous amount of raspberry filling and spread gently using a spatula to make an even layer. Top with another cake layer and repeat. Finally, top with the final cake, ready to be frosted.

Elise August 2015 111

To make the meringue frosting: Add egg whites, sugar, liquid glucose and cream of tartar, and simmer over a pot of water (not boiling), whisking constantly but gently, until temperature reaches 54°C on a thermometer (be patient, it does get there eventually!).
Beat heated mixture with electric beaters on a low speed for 2 minutes, then increase the speed to medium and beat for 2 more minutes. Increase the speed to high and beat until it is very thick and glossy, about 5 minutes.
Add vanilla and beat to combine.
Frost cake immediately by piling the frosting on top of the cake and, using a metal spatula, gently spreading from the top down. Smoothe as much as possible with your spatula.

Top with 6 macarons, 3 of each colour and a candle (if desired).

Serve each piece with a macaron & enjoy!

Elise's 21st Birthday 048

Elise August 2015 131

Elise August 2015 132

Raspberry filling recipe adapted from: Pinterest (various sources with the same basic recipe)

Meringue frosting recipe adapted from Sweetapolita’s ‘Perfectly Pink Angel Food Cake’ http://sweetapolita.com/2015/05/perfectly-pink-angel-food-cake/

Vanilla Bean Macarons

Elise August 2015 113

I made these particular macarons to sit on top of my 21st birthday cake (and because I think no afternoon tea is complete without them!) Feel free to adapt the colours or flavours as you wish.

Ingredients (makes around 40 macarons, 20 paired)
Macaron shells
225g pure icing sugar
130g almond meal
115g egg whites
60g caster sugar
1g bicarb soda
A few drops of rose pink & violet food colouring

Vanilla bean filling
100g butter, softened
¼ cup milk
½  tblspn organic vanilla bean paste
4 cups icing sugar
Rose pink & violet food colouring

Method
Preheat oven to 150°C fan forced. Grease and line two large baking trays with baking paper.

Separately sift icing sugar and almond meal into medium bowls or over sheets of baking paper. Repeat process 3 times and re-weigh ingredients (I know this seems excessive but trust me, it’s worth it). You will need to top up the ingredients as you may have lost some in the sifting process. Sift icing sugar and almond meal into a bowl and repeat, ensure there are no lumps.

Whisk egg whites until doubled in size using electric beaters or an electric stand mixer. While still whisking, gradually add caster sugar and bicarb, whisking until mixture forms very stiff peaks.

Gently fold almond meal mixture into meringue using a spatula until incorporated.

Divide mixture into 2 bowls. Add food colouring (pink to one, purple to the other) one drop at time, stirring very gently with a spatula, until desired colour reached.

Spoon into a piping bag fitted with a 9mm round nozzle (approximately). Hold nozzle close to the baking tray and pipe 3cm diameter circles onto prepared trays – don’t make a circular motion àla soft serve. Tap the underside of the tray to allow macarons to settle and air bubbles to escape. If there is still a little peak on top, dip a teaspoon in water and use the back to smooth the surface. Repeat with other colour. 217929_10151403883896183_1104201680_n

Leave to rest for at least 20-30 minutes or until the macarons form a skin and the top is no longer shiny or sticky to the touch (this is VERY important as it will give your macaron its lovely ‘foot’).

Bake for 12 minutes. Remove trays from the oven and allow macarons to cool on the tray. They will still be soft at this stage but will firm up on cooling.

Elise August 2015 087

To make the buttercream, cream the butter for 1-2 mins. Add the milk, vanilla and half of the icing sugar and beat for at least 3 mins (until the mixture is light and fluffy).

Add the remaining icing sugar and beat for a further 3 mins or until of a spreadable consistency. Add extra milk if too dry or extra icing sugar if too wet.

Halve the mixture and add a drop of rose food colouring to one half and a drop of violet colouring to the other.

Pipe a generous amount of buttercream onto half the macarons and sandwich with a second macaron.

Elise's 21st Birthday 003

Elise's 21st Birthday 004

Elise's 21st Birthday 039

Recipe adapted from Callum Hann’s ginger macarons